Recitation 5- Santiago Salem

Partner: Young 

Ingredients

1 * 42STH33-0404AC stepper motor
1 * SN754410NE ic chip
1 * power jack
1 * 12 VDC power supply
1 * Arduino kit and its contents

2 * Laser-cut short arms

2 * Laser-cut long arms
1* Laser-cut motor holder
2 * 3D printed motor coupling
5 * Paper Fasteners
1 * Pen that fits the laser-cut mechanisms
Pape

Step 1, Building the circuit

Assembling this circuit was a bit more challenging than the ones before. The part that challenges me the most was able to connect all the cables accordingly to the IC chip. One of the issues I encountered was that all the cables connecting to GND had to be together in the breadboard. Apart from the ground cable issues, assembling the circuit according to the diagram was easy. On the other hand, the coding was very simple, all we had to do was open the examples in Arduino. After uploading the code, everything was smooth I was able to see the motor rotate clockwise and counterclockwise automatically due to the looping. 

Step 2, Controlling the motor with the potentiometer.

Because building the circuit for step 1 was almost identical to the second step, all I had to do was incorporate a potentiometer to control the rotation of the stepper motor. In terms of coding, I had a minor issue with the mapping function because I wasn’t able to display the correct number on my screen. But although I couldn’t see an accurate number that corresponded to the potentiometer, my stepper motor did move accordingly to the potentiometer.

Step 3, assembling the drawing machine

For the last step, all I had to do was assemble the drawing machine, this process was very easy because is just required a device that could hold my pencil. For me, this was the most meaningful step because I was able to create a piece of art with a circuit, a code, and a stepper motor.

Question 1

I would like to assemble a machine that can project 3D animals. It would be amazing to build a zoo that is made only of 3D animals. Instead of having real animals inside cages, this 3d projector can still show 3D real-time animals that can interact without humans. In this way people can still admire nature without destroying, also it can be a beautiful art show to see real-time animals. It can also increase awareness of animals that can go extinct (as a form of study).

Question 2

One of the art installation that captivated me the most was the one names Firebird: this piece of art has the purpose of triggering more human seed when a speech is made. For example: in a speech of Hitler, the Firebird will either create vibrations and heat waves that emit sounds, as a way for the audience to perceive in a more meaningful way the speech (even if in a different language). I believe this project is not only a piece of art but also an incredible way to transport a message in a more sentimental manner. The more the speech appeals to your senses the more you are going to pay attention. Paul DeMarinis did an excellent job by choosing fire to trigger sound waves because even if the speech is in a different language, the audience can still perceive the power of the words

Recitation 4- Santiago Salem ( Interactive presentation)

My definition of interaction begins when certain things or organisms establish a reciprocal interrelation where, through a connection, one organism or thing influences the other and causes it to respond in a relative (understanding) manner.

Project 1 (I don’t think is interactive)

This project through a motion sensor makes a cat (in the shape of a skeleton) move which causes children to be frightened.

For example, this project does not align with my definition of interaction since it is not possible to establish a reciprocal relationship. What I mean is that the cat only manages to scare the children. Which has the same purpose as a scarecrow in a crop field. Therefore, there is a non-reciprocal relation due to the fact that the children just react instead of establishing a relationship.

Project 2( Aligns with my definition)

This interactive project aligns with my definition of interaction because it is clear how the mirror and the person have a responsive relation. Where the reaction of one individual triggers the interaction of the other component.  The movement of the person and the reaction of the mirror have a dependant co-factor. Is not possible for one to interact and as an effect, activate a reaction of the other. This is not only an interactive project but is also an interactive piece of art. Because the mirroring effect of this wood converts into a beautiful shading effect.

(iMirror, the most interactive project I now)

iMirror is an interactive project where a customized mirror is able to talk to people and recommend them with products according to the status of their skin.

iMirror, is an excellent interactive project that perfectly aligns with my definition of interaction. Yes, I say interactive project! Because the mirror is able to establish a relation with the person through communication (and handing you the products).  Here Not only the mirror is talking, but also the people are responding in an adequate manner. The emitting signals are mutual among the two agents causing a well establish reciprocal relation. 

Week 3 recitation- Santiago Salem

Partner: Julie Huang

Sensor exploring recitation

Creating this type of circuit was not so difficult because we used what we learned in the last two lectures. On Tuesday we learned how to make a LED light fade and on Thursday we learned how we can use sensors. Then during this recitation, we mixed both lessons and we create a circuit that when an object comes close to our Infrared Distance Sensor the LED light fades. Throughout building this circuit I learned that not only the distance sensor detects when an object comes close, but it also measures the distance between the sensor and the object in cm.

In terms of the coding, although we only had to copy previous codes to build our circuit, we encounter some issues in regards to how looping works in the code. For example: Because the loop runs constantly it automatically re-starts it tricks our eyes that is continues, but actually when it re-starts it causes the LED light to flicker (for milliseconds). Therefore, due to those minor flickers on the LED light, we thought that the fading mode wasn’t actually working.

Question 1:

During recitation 3 we use the  Infrared Distance Sensor for our circuit. This type of sensor works by detecting objects that come close to the sensor. The way this sensor detects an object is through receiving infrared radiation. It can also measure the distance between the object and the sensor. In our circuit, we choose this type of sensor because we intended to build a LED light that fades as an object approaches the sensor. This type of sensor apart from being really interesting and fun, it can also have the purpose to protect peoples’ home. For example, this sensor could activate an alarm in case it detects an object approaching (the same way the LED lights turns on when an object comes close to the sensor).

Question 2:

I do believe that code can be compared to a recipe or tutorial, but I rather say code that code is the main ingredient when it comes to cooking. It is clear that the code in a way helps you to understand how the circuit run, (but I think that sometimes reading code is not very easy,), therefore I believe that for me is not like a recipe. But I do know the circuit is a key ingredient to build the circuit. For example, in our experiment, without the code, it would not have been possible to command the LED light and the sensor.

Question 3:

I believe that computers serve as a mirror of human behavior. A computer has enough information to reflect the behavior of its user. What I mean is that computers not only have the purpose of increasing productivity, but they also become a tool of the owner’s personal life. Here humans can share, understand and manipulate their own personal life, making computers confidants of our behavior. Therefore, I believe that humans can sometimes create dual identities, one in the virtual world, and one in the real one.

Week 2 recitation- Santiago Salem

Partner: Sarah Waxman

Circuit 1: Fade

The first circuit was really easy to assemble. We already had the code that fades the LED light on the Arduino app on our computer. The components for this circuit where minimum, just two cables, 1 resistor, and the LED ( and obviously a computer and the Arduino). We encounter no problems building this circuit .

Circuit 2: Tone Melody

Circuit 2 was similar to circuit one, only that this time instead of making the LED fade we had to make a sound from the buzzer. Once again the required material for this circuit where minimum. We used a buzzer a resistor and two cables (Arduino and Computer). The code was simple and it was already saved on the Arduino app on our computers, all we had to was run it. The sound this buzzer emitted had a delay like every second which later became really annoying after a couple of minutes. 

Circuit 3; Game

Oh, this circuit was nothing compared like the two previous ones. In order to assemble circuit 3 we needed to mix our knowledge of circuit one and two.  We had to construct a game were one player had to click the button more times than the other player (in order to win). Every time a player clicked  a button the buzzer emitted a sound, and at the end of the game one of the LED lights( on opposite sides)  lighted up indicating the winner. The instructions to build this circuit were very clear and concise, therefore we where able to assemble it quickly. But that was our first mistake, we made it so quick that we forgot how some of the components are polarized ( so you have ti put them in a certain location and position). The second problem was that we   had a short circuit, meaning that the usb in the computer didn’t allow the connection due to the overflow of electricity that came from the Arduino. After fixing the short circuit we finally where able to play the game. The code for the game we got it from an online source (https://www.tinkercad.com/things/6MzvN5rlZlr-race-the-led-spring19. ) that we copy and paste on our Arduino app on our computers. 

Question 1

Is almost impossible to live in todays world without having to interact with technology. Every day people and computers are coming closer to each other, meaning that computers are responding to almost every human sense they detect( known as physical computing). This type of technology is among almost every technological device we use. For example the circuits we build during this recitation (as simple as they might look)  where able to respond to our touch,  For example: circuit 3 was depending on our touch in order to run the game.  Not only this is a perfect example of physical computing, but also of how humans always pursue a closer interaction with technology. Is a codependent relation, meaning that we need technology to advance and technology needs us in order to improve (and work) .  Technology is a source that humans can alter and manipulate to their own purposes. Its a source thats is always available to help and entretain humans. 

Question 2

If I had a 100,000 led lights I would put them all under a pool made of glass. So, when the led lights detects motion they light up and follow the swimmer. This will help safeguards detect people easier and it could also be a beautiful show.

Santiago Salem- Week 1 Documentation

Ingredients

  • 1 * Breadboard: Basic device to connect all components
  • 1 * LM7805 Voltage Regulator: To regulate how much electricity is being used
  • 1 * Buzzer:Device that makes the sound
  • 1 * Push-Button Switch: Stops or activates the flow of electricity
  • 1 * Arcade Button: controller of electricity
  • 1 * 220 ohm Resistor: reduces the voltage
  • 1 * LED: The light
  • 1 * 100 nF (0.1uF) Capacitor: energy storage
  • 1 * 10K ohm Variable Resistor (Potentiometer): voltage divider
  • 1 * 12 volt power supply:Where the power comes from
  • 1 * Barrel Jack: The plug
  • 1 * Multimeter: measures the voltage
  • Several Jumper Cables (Hook-up Wires): main source of transportation for electricity (they connect to the breadboard and other components to carry the energy)

Partner: Andres Malaga

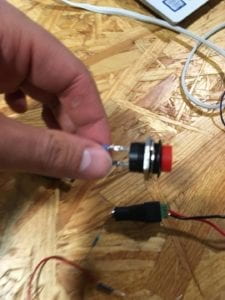
Before starting to assemble the circuits we had to attend a soldering workshop. In that workshop we learned how to melt metal for the purpose of sticking things together. For example, we had to stick some cables to a button that would then serve as a switch for circuit 2

Circuit 1) The Door Bell

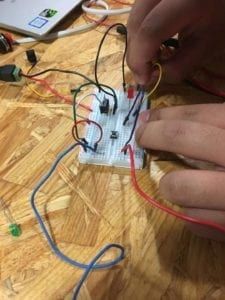
The first circuit  was the most complicated to assemble, since we had to experiment and understand all the parts that the diagram illustrated. The purpose of this circuit is to create a sound through a small bell when pushing the switch. Although the diagram and the instructions are clear, it was difficult for us to understand how the electricity flows inside the breadboard. The second problem was that I accidentally touched the LM7805 Voltage Regulator and burned my finger. What I did not know is that this regulator reduces the electricity from 12v to 5v and when doing that, it overheats a lot.


Circuit 2) The lamp

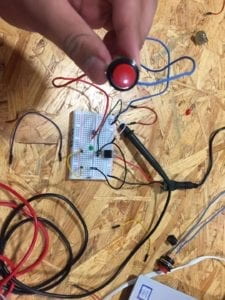
Assembling this circuit was much easier and safer. After learning how each component works we where able to assemble this circuit much faster. The only thing we found challenging was that sometimes we connected to many cables in only one line of the motherboard so we often got confused. During this circuit we used the arcade button that we assemble during the first workshop to activate the LED. 


Circuit 3) Dimmable Lamp

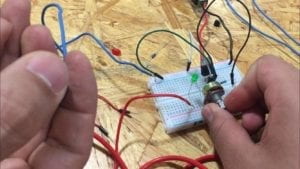
The process to assemble this circuit was similar to that of the second circuit. Although I almost forgot to put a resistor because I thought the LM7805 Voltage Regulator was gonna reduce the voltage but luckily someone helped us before the LED was gonna burn. The other thing I learned is that we still had to push the arcade bottom to turn on the LED as I thought that the potentiometer had this purpose.  

Question 1) 

First I would like to address the formal definition of interaction given by the author of  The Art of Interactive Design, Interaction: a cyclic process in which two actors alternately listen, think, and speak”. Although the authors uses this definition more as a metaphor, for this circuit the interaction we encounter among the components was a more responsive reaction to how each ingredient is dependent on the other. For instance, how pushing the switch will ultimately end up on emitting a sound through the buzzer. Although in the case of the circuit all of this is possible through and only through the use of electricity. Therefore, I believe that in order for us to conceive interaction there must be a key factor that all the components share, so in the case of all this circuit the main factor was electricity. Same with humans, there must be a key factor sending signals in order for us to speak, listen and hear. 

Question 2)

From my perspective I had never appreciated how Interaction Design and Physical Computing had the ability to create Interactive Art. Before I only saw both for the purpose of developing technology. But now that I think about it, the school last semester took us to Shenzhen for a technology convention, were I had the opportunity to admire this type of art (without knowing where and how it came from). For example: there was a box where if you came closer it showed you different type of images (this was possible through detectors that where activated though movement). I just find it extremely cool that art can also be responsive to interaction. Not only it is fun and stunning but it also connects the audience closer to art.