Come Here: Midterm Project – Sagar Risal

For my midterm my partner and I created a product meant to interact with the everyday shopper at a mall or place of commerce and lure them in to buy the product. There are obviously hundreds of different types of advertising products, but what I wanted to expand with for mine was how the advertisement would be able to interact with the user. Instead of a sign or just showing the product, I thought it would be better for their to be audios and lights to activate the closer the person got to the product. The audio is catered specifically for the product so if any person resonates with the audio or their attention is caught by the lights then the closer they will move towards the product causing the lights to shine brighter and the audio to change to something that explains the product better. This combination of audio and lights allows for more interaction with the user since they are getting two of their senses exposed, as well as a better personal advertisement to the user. 

Some of the inspiration for how to have better interaction in a certain product came from the group projects we did, and how I realized that to have better interaction between a person and an object there has to be something that draws that person into the object in the first place. It’s hard for a person to want to interact with something if there’s nothing that the person can gain or want to gain from the object. That’s why I thought that if I made an advertisement for a certain project the better it would be.   

To make this project I knew that there were three elements that had to be put together to make this work, a serial mp3, an LED strip, and a proximity sensor. I also thought a motion sensor would have been a good idea but the proximity sensor allowed for more flexibility with the audio and when certain audios would play. At first I thought it would be okay to just have a box with the proximity sensor inside with the LED strip surrounding the box but after the user testing session we got a lot of feedback that the lights were too bright and that if we made a separate box that would go underneath the one with the proximity sensors it would be less harsh on the eyes and create a nice aura around the box. This was something I thought was very important, since one of the most integral parts of our project was attracting the user to interact with it, and if it was too bright then it would deter them from doing so. These elements went very well with our project because they all worked together in luring the user with a nice presentation and allowing for interaction with the lights and audio. 

Though putting all of these elements together sounds simple enough, it was pretty difficult because of the amount of code we had to combine to make the three elements work together. The box itself was fairly easy to design, all it took was to measure the amount of space the wiring and proximity sensor would need. The only other thing we had to add to the project was the audios which were very easy to make. To use the LED strip and the serial mp3 we had to download the individual code for both items and put them together and code it so that they could both work together. This took the majority of the time since both codes had their own rules that we had to manipulate so that they could both work simultaneously. The biggest difficulty was with making all these elements come together, since in the end we weren’t able to correctly make the audios to the correct distance with the proximity sensor, the audio would play in a continuous if it sensed anything in front of it instead of playing different audios the closer you got. The other failure we had was with the quality of the audio from the speaker. Even though both the audio and speaker were good, for some reason there would always be a buzzing sound in the background every time we ran the code, even though it would sound fine if we played the audio separately. 

The goal for our project was to create a product that could be used to provide a more interactive and personal type of advertisement. The interaction of the person moving closer to the product and it changing the closer the closer the person got allowed for a more personal take on how advertising is done. I think that if we had an ever more responsive proximity sensor and nicer design than just a box, then the goal of attracting people to look at the product would be better accomplished. Though the idea of combining all these elements seemed like a pretty mundane task, it proved that sometimes it hard to combine items to make something, especially in code. What I feel that I was able to create with this project shows how advertisements can become better with more personal and interactive elements.

Recitation 5: Processing Basics – Sagar Risal

Materials:

Processing App

Processing Basics:

In this recitation we explored how to make a drawing in Processing. I thought this would be a simple enough project, but in reality it was a lot more difficult than I expected. Just the process of making a semicircle in the way you wanted to, required looking at the graph differently to be able to read the circle angles correctly. The picture I chose was of this cartoon dog. 

I thought the dog was cute and that it would be a simple enough drawing to try to make on my first time using Processing. I realized very quickly that instead of making the whole dog I could only make the head, due to my limited capabilities. This made me write out the specific shapes I was going to need to piece the dog’s head together. This method helped me look at making the dog’s head in a less complicated way and made me understand that it’s easier to make a sketch if you do it piece by piece instead of thinking how you can do it all at once. 

website of the original picture: https://www.123rf.com/photo_59697785_stock-vector-little-puppy-icon-simple-cute-cartoon-dog-vector-illustration-vet-or-pet-shop.html 

Artist: “Sudowoodo” 

Recitation 4: Drawing Machines – Sagar Risal

Materials:

For Steps 1 and 2

1 * 42STH33-0404AC stepper motor
1 * L293D ic chip
1 * power jack
1 * 12 VDC power supply
1 * Arduino kit and its contents

For Step 3

2 * Laser-cut short arms
2 * Laser-cut long arms
1* Laser-cut motor holder
2 * 3D printed motor coupling
5 * Paper Fasteners
1 * Pen that fits the laser-cut mechanisms
Paper

Drawing Machine:

 In this recitation I had to construct a circuit that could control an arm of a drawing machine. This recitation was a lot tougher than previous ones, since there were a lot of wiring and components that were more difficult to grasp than past recitations. I first had to wire the audio and the breadboard to the stepper motor to see if the motor worked by itself and I had wired it correctly. This was a bit difficult to do since there were many wires that went in to the h-bridge and following the picture was a bit tough. After wiring the breadboard I added a pentameter and modified the code with “map(value)” so that the pentameter was more responsive and in tune with the stepper motor. I then proceeded to add the arms and pen to the motor and used my partners motor as well to make a drawing machine that was controlled by the pentameter.

Question 1: 

I would love to build wearable machines that can enhance our life, are simple, and can look and feel good. I’ve always been interested on something you could maybe wear on your forearm as a sleeve of some sorts that could be extremely easy to use and control things in your daily life. 

Question 2: 

The art instillation I thought was very interesting was Yoshinobu Nakino and Team Shadow’s, “INVISIBLE – The Shadow Chaser”. It reminded me a lot of a Nintendo video game I used to play when I was younger called “Luigi’s Mansion” which had the similar premise of sucking up ghosts that you couldn’t see with a vacuum. I’m guessing the actuators were used in the vibrations of the vacuums used in the vacuums of the game. Even though the actuator is a very small part of the whole instillation, it is a very integral part since it offers the most direct connection with the user, since you feel a stronger vibration the closer you are to a “goblin”. I thought this was a great example of how to integrate small mechanics, such as an actuator, into a bigger project to make it work better. 

Recitation 3: Sensors – Sagar Risal

Materials:

  • Arduino 
  • Ultrasonic Range Finder
  • Hook up wires

Ultrasonic Range Finder: 

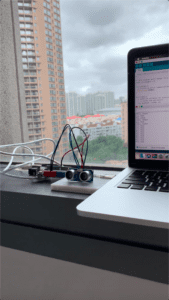
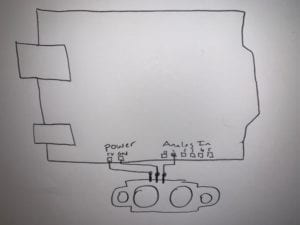
In this recitation I experimented with the ultrasonic range finder, which is a device that is able to detect how far objects are from a certain distance. On the instructions it said that the furthest range it could detect an object moving was 4 meters, so me and my partner decided to test if this was accurate. The range finder was surprisingly very good at detecting the distance between the object and itself, (in this case the object was my partner), but at around 3.2 meters the range finder would lose my partner if they kept moving further back. 


Question 1: 

In my circuit I attempted to assemble the ultrasonic range finder which would be able to tell how far the distance between an object and the sensor is from one another. This could be used in a variety of different ways, but the way I see most common is with automatic doors, since the doors could use the sensor to see if a person is the right amount of distance to trigger the doors to be open. 

Question 2: 

Code is very concrete, there isn’t much you can do to change the commands or what they do, you can only change the way you use those commands. If you use these commands in a certain way you are able to make something, which essentially is very similar to what a recipe is.  

Question 3: 

Computers take a big part away of any incentive to have any type of human interaction. With a computer you can call, email, video chat, with pretty much anyone in the world. There is very little reason to have a one and one meeting since a virtual meeting would cost much less and cause less manual labor that would go into having that meeting. With less human interaction, people will become less and less social with one another and micro-expression and social cues, which we learn from speaking in person, will become things that people will forget or not even learn due to the vast expansion of computers and technology. 

Recitation 2: Arduino Basics – Sagar Risal

Materials:

1 * Arduino Uno
1 * USB A to B cable
1 * breadboard
1 * buzzer
2 * LEDs
2 * 220 ohm resistors
2 * 10K ohm resistors
2 * pushbuttons
A handful of jumper cables                                                                                                    * arcade buttons
1 * Multimeter (optional)

Introduction:

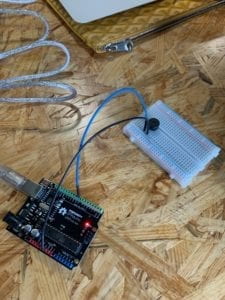
In this recitation I made three different circuits with Arduino to understand the basics function that Arduino is capable of. The first one was called “Fade” which helped me to learn how to better use the LED light with Arduino, the second one was “toneMelody” which introduced better ways to use the speaker, the third one was “SpeedGame”  which showed me an example of a simple game that could be created with the Arduino kit.

Circuit 1:  

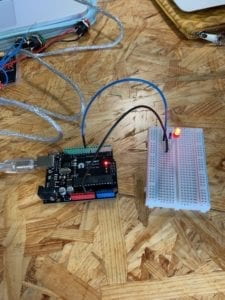
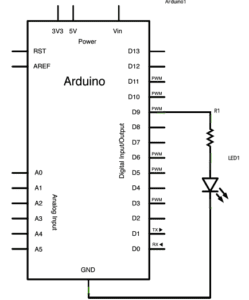
In the first circuit I had to make the light change brightness through the code on the computer. This task required me to just connect Arduino to the breadboard and connect it to the LED, a very simple circuit. 

Circuit 2:  

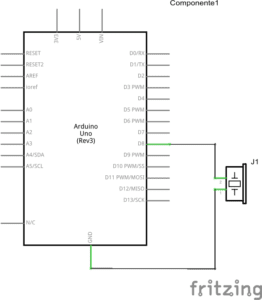
In “toneMelody” we learned how to play different tones from the speaker. I wanted to get more creative and change the melody from the sample one on Arduino. This proved to be a lot harder than I thought since I had to change a lot more than just the tones, but also code the melody and beats different. 

Circuit Game : 

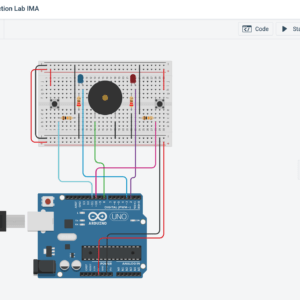
In this activity I had to create a game that tested the capabilities of Arduino and showed me how to make a simple game. Even though I didn’t understand much of the code it showed me a good example of what can be created with Arduino.

Question 1:

In our daily life we use so many circuits that one can become oblivious to the technology in our everyday life. Circuits similar to the ones we made today are light switches for one we want to have a dimmer light in the room, or jingles when you walk through the door at FamilyMart. These are all circuits that we see in our every day lives but that we become so accustomed to that we don’t notice them. 

Question 2:

The push button has a higher capacity for power than a regular LED so the resistance of the current does not have to be as low as an object such and LED so a 10K resistor is sufficient enough.

Question 3:

I would make a whole outfit that has the LEDs glued on so I could change the color of my outfit at any time.