In this lab we continued the basics of Processing and began to better understand the use of arrays and other functions.
Objectives:
Learn about how to incorporate arrays into code
Understanding the differences between loops and setup()
Materials (as listed on the IMA website):
Computer
Processing
Process:
Step 1: Create a graphic.
I was attempting to make a bear face, but I ended up with a head, ears, and half of his nose and mouth. I realized that I could create an arc but I did not understand how to flip the arc in order to create the other half of his mouth. I then realized that I was wasting too much time creating his face and not spending enough time on the code, so I left his face as it was.
Step 2: Make his face 100 times
After I finished his face, I moved on to creating his face 100 times over. This is where I learn about the difference between the setup() and draw() functions that create drastic differences in code (I will explain the differences below).
Step 3: Arrays . . . l o l
The last part was the tricky part: arrays. I especially struggled with arrays when I first started programming, and I still struggle with them. I think now I have a much firmer understanding of their capabilities. I still am not as strong at creating arrays, so I used the basis of my code from Eric’ in-class example and modified it from there. I incorporated my own design, adjusted the parameters, and renamed the variables. We used the array to create values that would allow the graphic to appear in different spots around the screen.
Step 4: Moving the Images
Step four mainly included adding three additional lines of code in a for loop that allowed for the movement of the objects dependent on where they originally started in the screen.
/* notes: Unfortunately, my screen recording would not record both the processed images and the code at the same time so I recorded them separately. */
CODE:
//x = 200
// y = 160
float x;
float y;
int numInst = 100;
float[] xpositions = new float[numInst];
float[] ypositions = new float[numInst];
void setup(){
size(500, 500);
background(255);
for( int i = 0; i < xpositions.length; i++);{
xpositions[i] = random(width);
ypositions[i] = random(height);
}
printArray(xpositions);
println();
printArray(ypositions);
This recitation was fun, as always, but also a pain. I really dislike arrays. I understand that they are really useful, but I still feel as though I am not in full command of their capabilities which I hope to get better about.
Questions:
1. In your own words, please explain the difference between having your for loop from Step 2 in setup() as opposed to in draw().
The key difference between setup() and draw() is that setup() produces just one instance of the code and then terminates, while draw() will loop the code infinitely. Unless you call a for() or some other infinite loop in setup(), then the code will only run one. When there is code in draw() the code will continue to run unless there is a case in place that would allow the code to terminate after a certain number of iterations.
2. What is the benefit of using arrays? How might you use arrays in a potential project?
Arrays are useful because they can create data without you having to manually input values that you want. For example, in the case where we wanted our graphic to appear at random places around the screen, then the use of a array allows us to utilize the computer to generate numbers for us. This is invaluable because it saves an infinite amount of time. I am planning to use arrays in my final project to store data of the user and then make my device do a certain action based on certain stored values that it calls upon.
1. Proposal 1: Training a New Master Element Bender
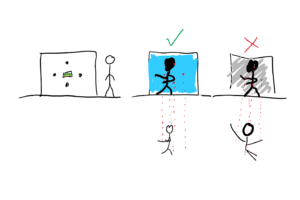
a. I, along with many others, have always had the desire to bend the elements to my will. My first proposal will consist of a project that allows me to do that. It would have 5 sensors: a color sensor in the middle to detect the color of the clothing you are wearing (this will determine what element you will be bending), and four ultrasonic sensors arranged in a diamond in front of you to understand your movements. Projected on a screen in front of you will be a silhouette that you are to mirror in order to conduct your training. The sensors will be able to detect your movements as you cross the thresholds of the sensors and thus know if you are attempting to mimic the movements. The background could be the generic color of the element. For example, blue for water, white for air, red for fire, and green for earth. If your movements are incorrect or too slow, then the background could be changed to a dark color to signal for you to get back on track.
b. Even though I have wanted to do create something like this for a while, looking at interactive displays such as the University of Dayton Interactive Wall has given me some inspiration for how it should look. With their wall, they have a massive screen of LEDs. I will not have that many LEDs at my disposal, but I am confident that I could mimic this effect with ultrasonic sensors and a projector. This project could be used for a range of ages depending on what I display on the screen. For example, if I display a recording of the figure doing the techniques for each type of bending, then this would probably be more interesting for a younger person. This idea could also be used as a program to help elderly people get active. If there was a person on the projector doing basic exercises, the person could stand up (or if they are unable then they can remain sitting and participate with their arms). Of course, a person could equally look on Youtube to try and copy the movements, but this creates an interactive version that keeps you accountable when training.
c. Sources: https://medium.com/mouth-watering-media/the-top-10-digital-interactive-display-walls-40b96066477c
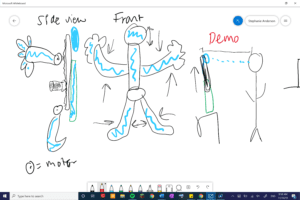
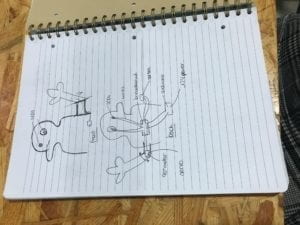
d. Rough schematic of the project design:
schematic one
2. Proposal 2: Mini-Me
a. This project will create an interactive mirror. Essentially there will be a piece of mirror that will be on an adjusting pole that will grow taller or shorter depending on your height. After that, this figure will have arms and legs that will follow the movement of your arms and legs as you are. There will be four motors. One to raise the neck taller or shorter depending on the person’s height, the second and third one will be to rotate the arms of the person, and the fourth and fifth motors will be to rotate the legs of the figure. Processing will be incorporated by having a display that let you know how close to get to effectively use the mirror. For example, if you are too far away, then the display will be red and there will be a circle that will grow in size as you move closer. When you are at the prime spot, the background will turn green and then arms and neck will adjust.
b. The purpose of the project is to create an interactive mirror that adjusts to you. For people who live alone, this device could be useful, in the way that it acts almost like another person in the room with them. My inspiration for this project was draw from looking at pictures of previous IMA student’s projects on the IMA website. There was a project that looked like a teddy bear with movable arms. There was not a video, so I am unclear as to what the function of the device is, but I liked the concept of creating a movable figure.
c. Sources (inspiration, Image 40/50): https://ima.shanghai.nyu.edu/en/gallery/spring-2017-ima-show
d. Rough schematic of the design:
schematic two
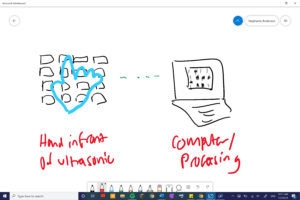
3. Proposal 3: Interactive art Display
a. For this project, I am thinking about having a 4 by 4 grid of ultra sonic sensors. The purpose of this is to create a field that would allow me to take the distances of the objects or the hand of the user and output it into Processing. The output in processing would be fluidly interactive and would instantly update at your hand or the object in front of the sensors move.
b. This project could be designed like a puzzle which could be used like a password. Let’s say this device is actually a lock on a box and in order to unlock the box you must place a figure or your hand in a specific area in order to make the sensors read values within an acceptable range. Almost like how a face scanner senses your face, this device will be used to sense objects in space. On processing, it will show the values in grayscale how how far or close each sensor is reading. If you are farther away, then it will produce a lighter grayscale; vice versa, being closer to the sensor will produce a darker gray. When the correct code of colors is reached, meaning that the box is unlocked, then the display will turn gray and the box will in tern unlock.
c. I think this project would pose a unique and fun take on a lock that could also be used a puzzle or developed into an app for people who enjoy cognitive puzzles.
d. Inspiration: https://www.youtube.com/watch?v=ikD_3Vemkf0&feature=emb_title
i. This project does not have the idea that I had about incorporating processing to make this a game/ lock and only tracks the location of the figure’s hand. It also does not use ultrasonic sensors.
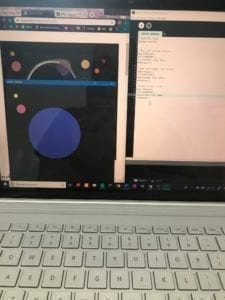
The purpose of this recitation was to learn about the basics of animating in processing. I started by creating the canvas with the basic shape.
After the shape was created, I worked on making the shape move. At first I had difficulty adjusting the speed of the shape, but after working through various methods such as adjusting the for loop and the if loops, I was able to get the circle to move at a normal, steady speed. I also experienced a problem when the circle was shrinking, it would invert on itself. When I adjusted the lowest value so that it was greater than a certain threshold (in my case val > 30), then the circle no longer inverted as it came back to its center.
The next part was a little trickier. The main struggle was trying to get the color to change at a smooth, constant speed instead of erratically changing. Once I was able to understand the colorMode() HSB capabilities, it made it a lot easier to code.
The last part I got help from the processing forum website. I used the basis of his methods in which to apply the keyboard function. From there, I built off his code and made my own object and applied the color changing stroke technique.
My favorite function that I used in this lab was keyPressed(). Something I really love about the coding community is the open-source community where everyone is sharing their work. It creates a great environment for people who are just first learning and it allows people to work upon the work of others and make the projects better. This community was super helpful for me in this case because I really did not know where to start trying to create a function like keyPressed() but I was able to build up on the work of another.
My code for creating a game that has two circles. The circles move based on what keys that you press and the goal is to get the circles to touch. The circles move with different movements based on the keys.
int rad= 20;
int rbg;
int length=300;
int value = 0;
int c = 0;
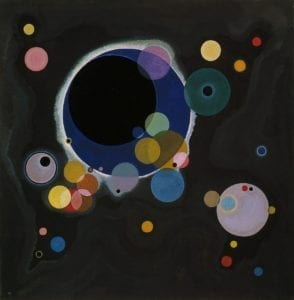
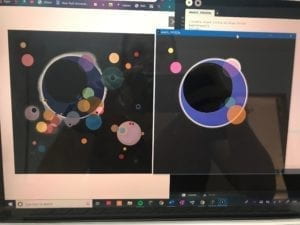
When scanning through the endless pictures, I stumbled across this one and was inspired to create it in Processing. Circles are really interesting because they have so many mathematical purposes and the hard part about them, is that it is nearly impossible for a human to draw a perfect circle. Looking at this picture made me think of space and the infinite possibilities for the make-up of objects out in space(meaning that I am sure there are a plethora of objects out there that are in-fact translucent over the standard “opaque”). I was inspired to try and recreate something I would never be able to re-create by hand, but I could do a decent job at attempting to recreate with the aid of a computer.
Work in progress
With the help of processing, I wanted to be able to learn how to place objects on the canvas and how changing the values in turn placed the characteristics of the shape. Artistically, I struggled with creating the essence of the “glow” behind the main circle. I tried a couple of different approaches. First, I tried to blur the edges of the larger circle, but the problem was that I could not find a good balance between the circle’s main color and the starkly lighter glow on the background. When I did the blurring technique, it produced more of a “spectrum” rather than a stark contrast that is shown in the painting – resembling an ellipse.
The other technique that I tried was using the same lines of code to make the large circle, I created a circle slightly bigger than the original and changed the color to the lighter scheme. This technique is displayed below and worked better than the original plan.
Refining the little details
Above is what I finished with. I think that overall, my code was clunky and that there are probably more efficient ways to write it which I will learn over time. Processing was an excellent tool for this particular piece due to its geometric nature. Having a mathematical program that allows for math functions and the ability to manipulate mathematical shapes which are then output according to your specifications is a really efficient tool to use when you are trying to do something either precisely or for the most part, mathematical. I would not enjoying trying to draw a face or a more realistic object in this program.
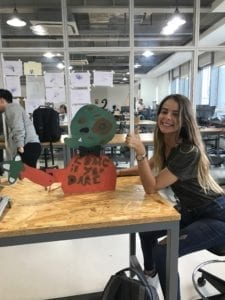
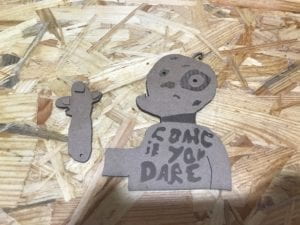
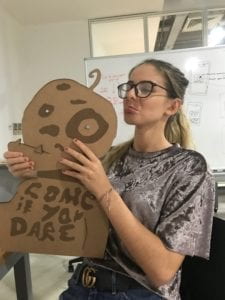
In short, Hello Hermi features a ghoulish creature who waves to users with the intended purpose of sending the message to his audience (children) they should approach the house because they are welcoming trick-or-treaters. When people are far away (greater than 300 cm) Hermi will be waving long, slow waves and have glowing green eyes to send the message of invitation to children. As they get closer, approximately 300-150 cms, his wave will get a little slower and his eyes will turn red signaling for the children to stop and ask for candy. If they happen to keep advancing and get too close to Hermi (less than 150 cm) his eyes will flaw red and green and his arm movements will be really short and curt.
Final Hermi
Introduction:
I really enjoyed our first group project. As someone with a background in robotics and working on collaborative teams, it was refreshing to be able to work on a team with a goal of creating a product useful for everyday life. After doing initial research into “what is interactivity,” I have come to the conclusion that interactivity is the process of an input creating an output different from what was input. An interaction is not simply a movement, but rather a change of variables which results in a totally different outcome from what it started as. In my group project, our concept was basically a series of algorithms which used the data taken from your day such as your body temperature, step count, and speed to create a painting that represented your day. I think that the foundation I gained in our original group project left me with some inspiration for our midterm project; I wanted to be able to create something that not only could be used in everyday life, but something that left people with a smile on their face.
brainstorming
The inspiration for our midterm project definitely came from the Halloween season. When I was originally looking at the rubric, I was intrigued when I saw the additional option of “entertainment,” Normally when my mind is focused on a project with limited boundaries such as this one, I feel inspired to create something that will save the world. In this case, however, I felt inspired to create something entertaining since this is not normally the path I would take.
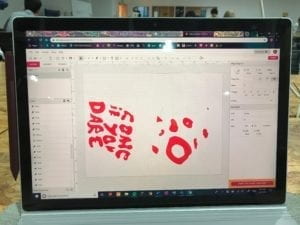
Hermi’s Design on the Computer
Concept and Design:
We began to toy with the idea of a ghost, or skeleton, or some sort of monster-like creature. Because of both my and my partner’s, limited realistic artistic ability, we decided to stay away from anything too scary due to the fact we might not be able to pull off something realistically scary. When we began doodling, I was trying to come up with something original. I did not want to look at any other doodles of cartoonized beasts and ghouls. Without copying it, but with the relative image in my mind, I fear that Hermi might look more similar to the Zombie from “Plants versus Zombies” than I would care to admit.
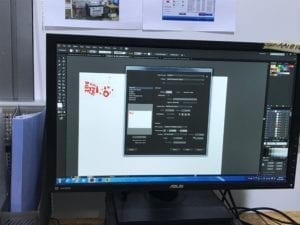
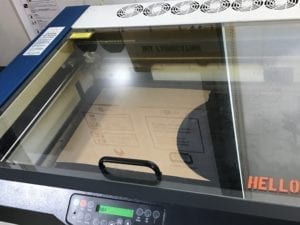
uploading Hermi to the laser cutter
Regardless, I am happy with the way that Hermi turned out.
During the design process, we came up with various things that our creature would do. It ended up turning out somewhere between a zombie, ghoul, and–as salome called it– a gargoyle. After we finalized his design, the next question came to what he would actually be doing. I think that realistically we would not be able to create something to fully walk, so that was out of the question. One idea we had is that maybe he could scream at children, or he could be one of those blow-up things at Halloween (see figure 2 below), but then how would people interact with him? In the spirit of him being a supposedly nice creature, we figured, why not have him actually welcome people to walk up to our house by waving at people? This thought presented us with a solution to his purpose and function.
Hermi on the operating table
As far as material to use, we knew that we wanted him to be able to stand on his own, but we did not really know what specific material to use. When we went to work with Tristan on the laser cutter in the fabrication lab, he suggested that we could use the wood material which would be more than sufficient to allow him to stand on its own.
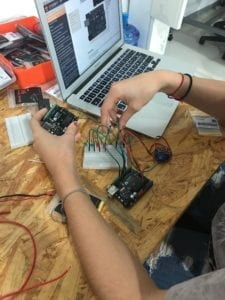
Hermi’s work-in-progress circuitry
On a side note, because Salome and I are both very organized and motivated people, we were able to create a schedule which allowed us to reach certain benchmarks for the project well ahead of any soft or hard deadlines. This organization and getting things done early helped to prevent any last-minute-caused stress and allowed us to produce an overall successful project.
Mini Hermi (test design using cardboard)
Fabrication, Production, and Assembly:
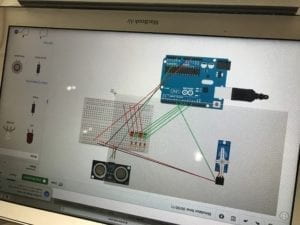
Once Hermi was born, things were able to move quickly. Salome worked on the circuits and wiring, and I created our code and put the hardware together which I think made an effective team. Before we started any of the wiring, we were able to create a simulation for our proposed circuit by using thinkercad. It was an extremely useful program and it tested our circuit for us before we created it saving us the pain of figuring out the problems through burning our figures.
designing the circuits
A problem we ran into the begining to put all the hardware together is that our large servo motor would not operate the same at the mini servo. With the help of Eric, we were able to discover that we had the wrong motor because it was, in-fact, a rotational servo meaning that it operated per rotation over the percentages we were aiming for our servo to move. Because we only discovered this the night before user-testing, we were unable to swap the large servos in time meaning that we used the mini servo for user testing. Our make-shift arm looked a bit ratchet I must say. It was rather disappointing to have to attach a pencil with a hand-drawn arm on it to our motor on user-testing day–especially when we had the code working for the large motor as well as our real arm, but that goes to show that it is never wise to work on things the night before in case something unforeseen happens.
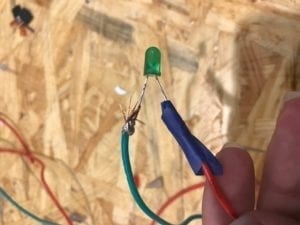
soldering the LEDs to longer wires
User-Testing:
User testing was very successful and we got many helpful suggestions. We used the ultrasonic sensor to detect how far away people are from Hermi. For user testing, we had not actually mounted the sensor anywhere yet; as a result, we taped it to the table relatively in front of Hermi. Of course, the placement of the vital component involved in the interaction of our project is crucial, so we received some excellent suggestions about where we could place the sensor. Concerning our code, we had three main thresholds for distance inputs and resulting outputs. While we had tested them ourselves, we realized that we needed to adjust the closest output to be further away from the user because too close was . . . too close. Another pertinent suggestion we received was the request to incorporate an additional element of interaction or output from Hermi. We received a suggestion regarding creating a jaw and eyebrows so that his face would move and he could have facial expressions as well as a request to incorporate sound into his actions. Yet another comment we received concerned Hermi’s overall appearance. Is he for children and supposed to be fun? Or is he supposed to be scary? Out of all of the feedback we received, these were the common themes and the critues we attempted to adjust or build upon in our final design.
Hermi’s complete circuitry for the user testing
Again, because of the orderliness of our schedule, by the time we hit user-testing, I think we were able to get a helpful feedback that helped us to really enhance our project. I feel that sometimes when you are prototyping something, people cannot look past the cheap paper or cardboard materials used and get caught up on the visuals. For someone like me who is a really visual person, I think having a majority of the visual component done for user testing was really productive because it allowed us to get more practical and constructive feedback on the actual function of our project.
user testing
Modifications:
One of the main differences between Hermi in user-testing was his coloring. We bought some acrylic and gave him some pearly whites, greenish skin with blackish spots, and an orange shirt in the spirit of Halloween! To finish it off, we made him a bowtie that hit the sensor in a fun and in-plain-sight-kind-of way! We also made modifications to the code in order to increase the threshold in terms of what happens when a person is really close to Hermi and we got rid of the delay between the transition of each threshold which was another suggestion given to use.
I think that–at least for me– the most disappointing part of this project was our attempt to incorporate a buzzer. We were able to integrate it well enough into our circuit, as well as create code which–in theory– would yield a working sensor, but our problem seemed to be one that we could not fix. When we would try to upload our code to the board, the computer would retort that it could not find the board, port, or that there was some sort of error. Normally I feel pretty comfortable debugging my code, but after working through possible options with the code, nothing seemed to be working. In combination with some of the TA’s we postulated, what if the board was fried? In turn, we completely replaced the Ardunio and still nothing, Everything from trying a different USB cable, to new Arduino board, to redownloading the software, to using different computers, to trying to upload different codes, nothing quite seemed to work which was very bizarre.
Final Product:
Final Hermi
Hermi was not afraid at all with everyone watching him and he performed wonderfully. I think an aspect of this project that I really loved was that the concept was not necessarily hard, but Hermi sold himself. He was cute, cartoon-like, and relatable, and I think that made people appreciate him because they felt more connected to him that just a hand or some arbitrary shaping moving back and forth. Our successful modifications from the user testing included: a paint job; eliminating the delay allowing him to change actions more smoothly and quickly depending on the distance of the user; mounting the sensor as a decorative piece on his neck; using the appropriately sized servo motor.
Conclusion:
This project was a great learning experience and also a lot of fun. We were able to successfully create a device designed to interact with children who are coming up to people’s houses to trick-or-treat. I think that Hermi’s defining characteristic was his face and his appearance which left the audience with smiles on their faces which was the overall intended purpose of Hermi. Moving forward, I would definitely work to incorporate the buzzer into his components in order to increase the numbers of ways that he can interact with the user. From this project, I gained skills in the design process of how to work with the digital fabrication machines and work with real users and incorporate their feedback. The overall purpose of our project was to create something to entertain the users under the theme of Halloween. Overall, I believe that we were able to create a project that left the audience with a smile on their face and a positive interaction with was the overall goal. The beauty of this project is that it can be used again for more seasons depending on his outfits, attire, or actions. Stay tuned for finals season; catch Hermi out in the IMA labs in a Santa hat and saying “ho, ho, ho.”