Recitation 10: Workshops (Rodrigo Reyes)

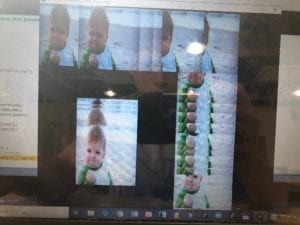
For that week’s workshop, I decided to attend the media manipulation workshop. We needed to manipulate any video we wanted like a music video or a trailer etc. I finally settled with the trailer from “Friends”. So, I went on to download a trailer I had found online. To manipulate it, I decided to pixelate the video. I thought this was going to be funny, especially since Friends is such a funny TV SHOW. To add the mapping into the equation, I had the speed of the video change as your mouse went from left to right while on top of the screen. This was done through a “float function”.

  1. I got my mp4: myMovie = new Movie(this, “friends.mp4”);

then I used a loop 

2. myMovie.play();
myMovie.loop();

To pixelate the video I used: fill( myMovie.pixels[a] );

For my project, we needed to include media manipulation because images would change the speed in which they appear as part of the “game”. Also, we were going to have music on each level of the game. It was thus important for me to attend this workshop.  

Watch Your Words- Rodrigo Reyes- Eric

Watch Your Words

CONCEPTION AND DESIGN:

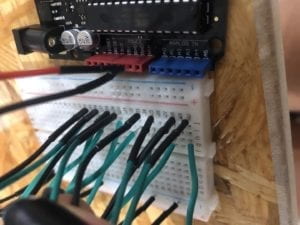
We wanted a model that would actually inform the user of what they had to as they went on through the game instead of giving the user all the information at once in the beginning. In fact, we gave very specific instructions at the beginning that were at the same time not fully complete. Once users got asked what was the last word they saw and are given four-word choices, they now know what they have to do. Another aspect of the project that we really wanted people to focus on, as the name implies, is the words themselves. Our project is meant to improve eyesight and reading skills as well as memory skills. On every level, there was an array of nine words from which the code would randomly pick four. The words were programmed to blink in a pattern were only one word out of the four would show on screen, something we got inspired by my games for dyslexia as a kid. The pattern was meant to make sure the user follows the words. Each level coherently had words that were about a specific topic. For instance, on the beach level, we had shells, sea, and sunscreen. To add to this, we had a soundtrack for each level; on the beach level we had the sound of the sea. The soundtracks were meant to allow the user to have a sensory experience that would enhance their eidetic memory.  To facilitate the already complex process of this project, Sarah and I opted in having a fairly simple design for the Arduino part.  I made an Arduino case with four buttons, that we got from the Shanghai Electonic Market (really cool LED buttons). To us and to the users who tested our project, the buttons worked because the instructions on the code pointed users to refer to the buttoned case to answer. To make it obvious I engraved the case with A, B, C, D for each button.  It was a very personal project for me because we made it wishing I would have had this project helping me deal with dyslexia as I grew up. We wanted to include something else rather than just focusing it on memory and reading in the way we had it already, thus, we wanted to play with incorporating coloring into the equation. Nevertheless,  we had a time constraint.


FABRICATION AND PRODUCTION:

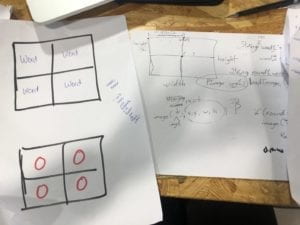
In this section, describe and assess the most significant steps in your production process, both in terms of failures and successes. What happened during the User Testing Session? How did your user testing process influence some of your following production decisions? What kind of adaptations did you make? Were they effective? In short, keeping in mind your project goals, how do you account for and justify the various production choices you made for your project? Include sketches and drawings.

On the User Testing Session, Sarah and I concretized our idea for the project. We were not so sure about how to make the “game” feel challenging for people, but still, make it enjoyable and easy to understand. People would tell Sarah and me separately to make it like a “multiple choice quiz” so people would feel pressured to answer correctly. Back in the testing session, we did not have a background track included in the code. We had planned to have a soundtrack but did not have time to include it. People really stressed to us how much it would help to have sound in the project. People in the testing session wanted us to have “cool” buttons for the visual aesthetic of the project, especially the Fellows. I finally got LED buttons from the electronic market that Eric recommend. Because the design we already had for the Arduino case was way too small, and the time constraint we had, did not allow us to incorporate the LED part of the buttons. 


CONCLUSIONS:

As I have previously stated before, interaction as a conversation,  a dialogue, a transmission and a tool that requires an input a process and an output. For it to be a more complex interaction, there must be an input a process and an output that can go back and forth. By the nature of it, you would need a relationship. To add to what I had said before I would like to stress in one key element: Understanding. In the communication that interaction facilitates there must be an understanding of how and what to communicate. For this final project, we wanted people to communicate with the computer so that people could get a different experience each time (words are randomized). We wanted this dialogue to feel unique and compelling each time. The buttons on Arduino could have easily been taken off; we could have just used the computer mouse or the keyboard on the computer. I think we could have done a better job with the interface’s design. So I learned from this that we could have planned even more and invested time into building something even specifically meant for people with Alzheimer’s like Eric suggested.  I love the idea of using technology as a means to bring art, and social thought together. An insightful element of the project experience was working on something that was constantly subjected to other’s opinions. OnThe User testing we got a lot of valuable opinions. Being open to hearing everything, even when it modified your initial idea of the project and modified your “art”, in the end, you do it for the people.   In fact, our idea of a video game to help people with dyslexia is something I would like to maybe propose to a tech company. 

Recitation 9: Media Controller (Rodrigo Reyes)

Last recitation we had to manipulate media (an image or video) on Processing by using a controller on Arduino. It was much easier to do this now since we did serial communication between these two programs the week before. 

HOW WE DID IT?

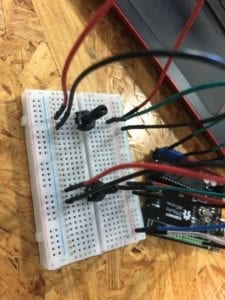
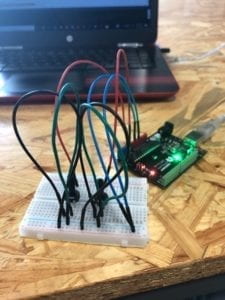
I had a potentiometer expand and contract an image on Processing. As one twisted the potentiometer to the right, the image became bigger. Likewise, when one twisted the potentiometer to the left, the image became smaller.  I added a meme picture, I mapped the values for the potentiometer, I added the prev x and y, and used the base code for serial communication that was given to us in class. 

READING

In the article “Computer Visions for Artists and Designers” by Golan Levin I found that as technology changes through time,  people’s use of it also evolves with it. Before people used to use technology to code things for businesses and create websites and new e-markets, however, today people are using coding and other technologies to create interaction through different means and designed for different actors. People now utilize technology to create art that does, in turn,  interact with other people or other things.  The reading resonates with my project because my project was designed to entertain and to facilitate social scenarios. It was meant to be a game played in large groups of people. It involved artistic vision in the design, and it involved wanting to look for ways to step out of the conventional use of technology as a means to facilitate human interaction.  

Video Bellow: 

IMG-8882

Essay: Final Project (Rodrigo Reyes)

The Better Reader 

The Better Reader is a project to help people with dyslexia or people with reading issues be able to read with more agility and accuracy. It will draw its inspiration from dyslexia reading exercises and the game of Wack-A-Mole.

The project’s foundation will be to develop interaction between the computer (using Arduino and Processing), and the human user. First of all, it will have communication between two languages in the computer world, which are Arduino and Processing. These two together will be interacting together to create animation,  audio, text, and sound depending on the human’s response to the computer. The interaction that we will design is supposed to be easy for the users to figure out. This last will be explained in the following paragraph.

The Better Reader will draw upon common exercises that are used to improve eyesight, as well as exercises for reading more quickly, and will combine this with the concept of the Wack-A-Mole game. These exercises which we draw upon have also been proven useful for people with dyslexia. A user will see on the computer (Processing will be used for the animation) three columns of three words each (nine words in total). One word is going to blink (disappear and appear) from the top left one by one and row by row until it reaches the last word and it goes back to the top to start again. This will allow the user to direct his attention to the word that is blinking, facilitating the interaction between humans and machines. The program will randomly stop at any given word and it will ask the user to identify the last word that disappeared and appeared. It will give for options (four words), and if you select the correct word, the program will accelerate the word blinking pattern to make it harder for the user to follow along. The user will have three “lives” (opportunities to lose and keep playing). To make it more engaging we will use Arduino to connect to a console that has four electronic buttons. These electronic buttons will have the word options written on them. This means that we will have to program the buttons to give different four-word options on each level, and it will obviously have to include the right choice in one of the buttons. The user will have a time limit to choose the right answer; we are thinking of limiting this time to five seconds. We want to have a hammer similar to the one in the Whack-A-Mole game so that the users can quickly hit the given answer.  Furthermore, we would like to have a scoreboard with the ranking of the people that have “played” this game in hopes of incentivizing friendly competition.

This exercise should be useful as it would allow users to develop their peripheral view, their concentration, and their short term memory.  It is not going to feel like those tedious exercises that we who have dyslexia have to do but is rather going to feel like we are just playing a game.  I think that understanding the struggle of dyslexia will push our team to focus on creating not just an exercise for reading but a game that is fun. Something that can put learning and fun together. Hopefully, there will be much to gain not just for people with dyslexia but for everyone. 

Recitation 8: Serial Communication- Rodrigo Reyes

On Excercise 1 we had to do an “Etch a Sketch” on Processing. We had to use two potentiometers in Arduino to control the drawing. One potentiometer would be the “x”, and the potentiometer would be the “y”.  We were supposed to link Processing with Arduino so that moving the potentiometer would be shown on the screen using Processing.  On Arduino, I used a code that was already given to us in class and modified. I changed the analogRead and I mapped the two sensors. I also used a code from class for  Processing. Nevertheless,  I changed the number of values,  the void setup size,  defined x and y,  added ” void draw” with line and stroke, etc. I thought it was amazing to be able to replicate an Etch a Sketch using these programs. It made me think of the endless things these programs can be used for. However, I thought interaction would have been more efficient if one used the mouse to draw, or even better, used something like an apple pen. Bellow the code I used. 

On Arduino

void setup() {
Serial.begin(9600);
}

void loop() {
int sensor1 = analogRead(A0);
int sensor2 = analogRead(A5);

sensor1= map (sensor1, 0, 1023, 0, 800);
sensor2= map (sensor2, 0, 1023, 0, 800);

// keep this format
Serial.print(sensor1);
Serial.print(“,”); // put comma between sensor values
Serial.print(sensor2);
Serial.println();

// too fast communication might cause some latency in Processing
// this delay resolves the issue.
delay(100);
}

On Processing

import processing.serial.*;

String myString = null;
Serial myPort;

int NUM_OF_VALUES = 2; /** YOU MUST CHANGE THIS ACCORDING TO YOUR PROJECT **/
int[] sensorValues; /** this array stores values from Arduino **/

int prevX;
int prevY;

void setup() {
size(800,800);
background(0);
setupSerial();
}

void draw() {
updateSerial();

printArray(sensorValues);
stroke(250,250,250);
line(prevX, prevY,sensorValues[0],sensorValues[1]);
prevY = sensorValues[1];
prevX = sensorValues[0];
}

void setupSerial() {
printArray(Serial.list());
myPort = new Serial(this, Serial.list()[ 2 ], 9600);
// WARNING!
// You will definitely get an error here.
// Change the PORT_INDEX to 0 and try running it again.
// And then, check the list of the ports,
// find the port “/dev/cu.usbmodem—-” or “/dev/tty.usbmodem—-”
// and replace PORT_INDEX above with the index number of the port.

myPort.clear();
// Throw out the first reading,
// in case we started reading in the middle of a string from the sender.
myString = myPort.readStringUntil( 10 ); // 10 = ‘\n’ Linefeed in ASCII
myString = null;

sensorValues = new int[NUM_OF_VALUES];
}

void updateSerial() {
while (myPort.available() > 0) {
myString = myPort.readStringUntil( 10 ); // 10 = ‘\n’ Linefeed in ASCII
if (myString != null) {
String[] serialInArray = split(trim(myString), “,”);
if (serialInArray.length == NUM_OF_VALUES) {
for (int i=0; i<serialInArray.length; i++) {
sensorValues[i] = int(serialInArray[i]);
}
}
}
}
}

On Excercise number 2 we had to make a musical instruement that was going to be controled with the mouse. We would incorporate the arduino by linking arduino with a buzzer to what we came up with in Processing.  Likewise, I used a based code for both Arduino and Processing from the files that were given to us in class.  I did not really change anything on Arduino for this excercise, but I did add things on Processing. I added a conditional (Bollean) so that everytime my mouse is more than 100 (or half of the screen) there was going to be sound coming out of the buzzer. Although I was not able to fully turn my mouse into an instrument every time I clicked the mouse on a different area, I created sound using the mouse, and the buzzer.  I think this excerice is very interactive. You click on the mouse and there are melodies that come after as a response are created depending on  the position of the mouse. I think this creates a dialogue between you and the computer. Bellow the code I used.  

On Arduino

char valueFromProcessing;
int ledPin = 13;

void setup() {
Serial.begin(9600);
pinMode(ledPin, OUTPUT);
}

void loop() {
// to receive a value from Processing
while (Serial.available()) {
valueFromProcessing = Serial.read();
}

if (valueFromProcessing == ‘H’) {
digitalWrite(ledPin, HIGH);
} else if (valueFromProcessing == ‘L’) {
digitalWrite(ledPin, LOW);
} else {
// something esle
}

// too fast communication might cause some latency in Processing
// this delay resolves the issue.
delay(10);
}

On Processing 

import processing.serial.*;

Serial myPort;
int valueFromArduino;

void setup() {
size(500, 500);
background(0);

printArray(Serial.list());
// this prints out the list of all available serial ports on your computer.

myPort = new Serial(this, Serial.list()[ 2 ], 9600);
// WARNING!
// You will definitely get an error here.
// Change the PORT_INDEX to 0 and try running it again.
// And then, check the list of the ports,
// find the port “/dev/cu.usbmodem—-” or “/dev/tty.usbmodem—-”
// and replace PORT_INDEX above with the index number of the port.
}

void draw() {
// to send a value to the Arduino
if (mouseX>100) {
myPort.write(‘H’);
} else {
myPort.write(‘L’);
}
}