Recitation 4: Individual Reflection by Robin Luo

For me, interaction is the occurrence of entities reacting and responding to one another. My definition is mainly influenced by Zach Lieberman’s Interactive Art article.

Two projects I looked into was Tactile Headset and this Nike installation. The Tactile Headset are two white spheres hanging from a ceiling by metal chains and vibrates in a pattern. The Nike installation is a basketball hoop in front of an LED wall which lights up in different ways when you shoot. 

I think the Nike installation aligns better with my definition of interaction because each entity communicates with each other. With the Tactile headset, it continually vibrates and it doesn’t communicate with the user. The main interaction is the user’s reaction or experience of it. With the Nike installation, the LED panels light up when the user shoots a basket and doesn’t react when the user doesn’t react with it. This isn’t the case with the Tactile headset. 

 .            

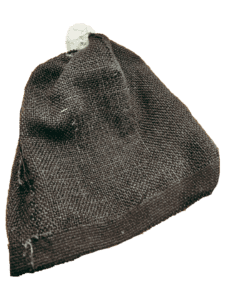
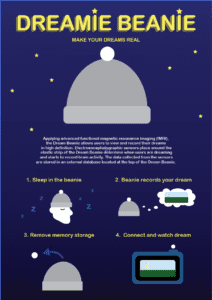
For my group, we created a beanie which records your dreams and allows you the ability to watch them. We simply thought it would be interesting for us the ability to watch our dreams because most of the time we forget them when we wake up or we only remember portions of it. It relates to my definition of interaction because it allows us the ability to react and respond to our subconscious. Although we can’t physically see our subconscious mind, our device we will be able to interact with it in a more concrete form by seeing and hearing it. Because our subconscious isn’t responding to our present actions because they are a part of ourselves that we can’t consciously control, it can’t communicate to us directly in the present moment. However, our devices bridges and lets us communicate the present moment or our conscious moments with moments that are not so we are able to “respond” to it.   


Recitation 3: Documentation by Robin Luo

Lab Date:  Mar. 1 2019
Instructor: Marcela
Lab Partner: Jackson

Aim of Today’s Lab: Build a circuit with your chosen sensor and Arduino kit

Building a Circuit with Ultrasonic Ranger

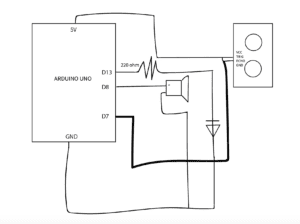
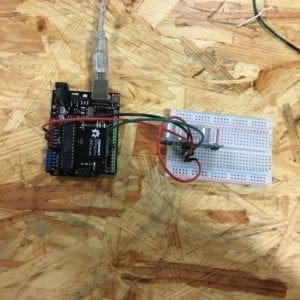
Materials used: Arduino Uno, Jumper Cables, Ultrasonic Ranger, Speaker/Buzzer, LED, USB Cable, Breadboard, 220 ohm resistor


Process:
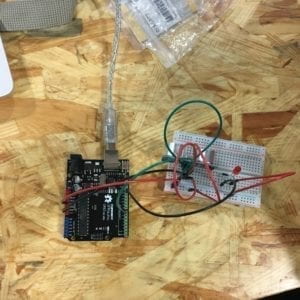
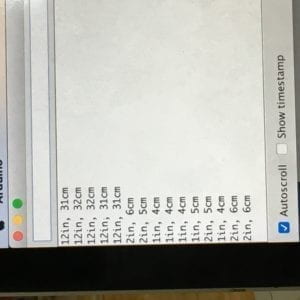
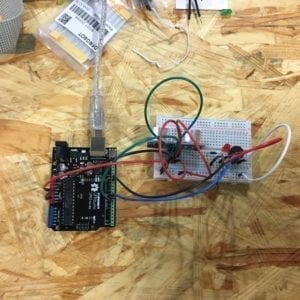
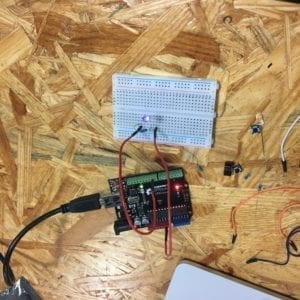
For our exercise, we decided to use the ultrasonic ranger. We had many ideas but we decided to start off small and then build from there. We first made sure our sensor worked. We ran into a small problem then by not putting the Trig and Echo to the same digital pin. Once we got that working, we decided to combine a blinking LED with our sensor. When it reached a certain proximity, it would blink faster. We ran into minor problems with the code with regards to the delay function as it would glitch out unnecessarily. It was due to how the code was being run through the computer. However, once we got the LED working, we added the toneMelody buzzer to our code. We imported the pitches.h file and didn’t run into problems. We decided, as we had a little bit of time left to change the melody, to the Mario level completed theme.  

Conclusion
I think it was pretty fun learning how to combine code to make our own circuits. I also learned how the code is read within the functions; for example, delay function will effect all the code which follows the line containing that function. 

Answers to Questions
What did you intend to assemble in the recitation exercise? If your sensor/actuator combination were to be used for pragmatic purposes, who would use it, why would they use it, and how could it be used?

In this recitation exercise, we intended to assemble an LED and sound detector which sensed when something got close to the sensor. When the object is close at a certain distance, the LED would blink even faster. At a closer distance, a sound would emit, in this case, the theme played in Mario when you completed a level.  

For pragmatic purposes, I think people in the general public would probably use it or people who want to conserve something or make something that does not need someone to manually turn on and off. For example, if they only want a light to turn on when someone is close enough to the door to conserve energy or turning on a sink when someone’s hands are close to the faucet and off when they aren’t to not spread germs. 

Code is often compared to following a recipe or tutorial.  Why do you think that is?

I think code is considered a recipe or tutorial because you’re essentially telling the computer what to do and how to do it. With a recipe or tutorial, you’re being told what to do and how to do it either by following ingredients and/or steps. With a computer, it understands what to do and how to do it through code. 

In Language of New Media, Manovich describes the influence of computers on new media. In what ways do you believe the computer influences our human behaviors?

I think the computer influences are human behaviors in many ways. One of them is the simple means of communication. We no longer need to send letters or go physically to a person to send information. Computers can help us do that without moving from place to place. It also affects the way we convey information as well or the way we do it by the devices we use. Manovich also describes how the computer and culture influence each other, and culture is manifested by the way we behave through customs and ideas. If the computer influences such cultures and also what we see in the media as Manovich also describes, then our behaviors are also influenced as we are affected by what we see around us in the media. 

Recitation 2: Documentation by Robin Luo

Lab Date: Feb. 22, 2019
Instructor: Marcela
Lab Partner: Jackson

Aim of Today’s Lab: Build 3 circuits with Arduino Uno

Circuit 1: Fade

Materials used: LED, 220 ohm Resistor, Arduino Uno, Jumper Cables, USB Cable, Breadboard     


Process:
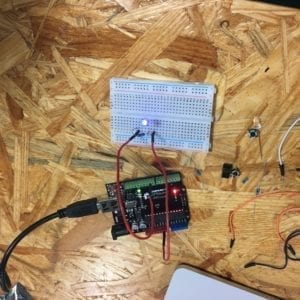
We had no problems with this circuit as it was relatively straight forward. All we needed to do was to put the jumper cables in ground and power (pin 9) and connect the resistor and the LED to that and then connected the Arduino to the computer to upload the Fading file. The LED faded in a loop as it was supposed to.

Circuit 2: toneMelody

Materials used: Speaker/buzzer, Arduino Uno, Jumper Cables, USB Cable, Breadboard

Process:
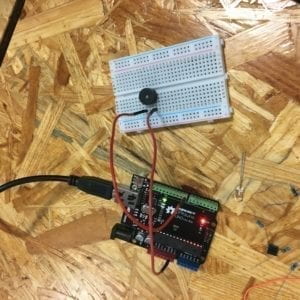
This circuit was also pretty straight forward. We removed the resistor and LED and replaced it with the speaker/buzzer. Then we moved the jumper cable connected to power from pin 9 to pin 8. We connected the Arduino and uploaded the toneMelody file and it made sound.

Circuit 3: Speed Game

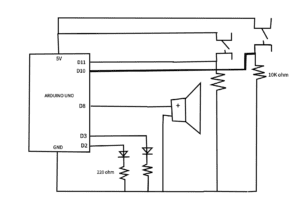
Materials used: Speaker/Buzzer, two LEDs, two 220 ohm resistors, two 10K ohm resistors, two Push Buttons, Jumper Cables, Arduino Uno, USB Cable, Breadboard

Process:
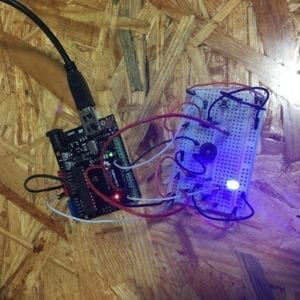
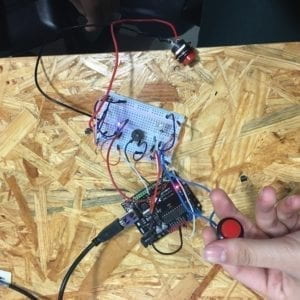
There was a lot of components to this circuit, but we managed to get it almost completely right once we plugged it in and uploaded the code from the tinkercad site. The only issue we ran into was the speaker not working because we didn’t correctly connect the jumper cables to the speaker. Once we moved those cables, the game worked! We also tried the game with the arcade button.

With Arcade Button

My Schematic

Conclusion
While we didn’t run into many issues with the circuits, I did learn a lot in regards to how the Arduino worked in conjunction to all of the components we used in last recitation.

Answers to Questions
Reflect how you use technology in your daily life and on the circuits you just built. Use the text Physical Computing and your own observations to define interaction.

Technology is heavily integrated in my daily life from my phone which I use to for a multitude of tasks like calling, messaging, or using applications; to my computer which I can use to surf the web and other programs; to the bus or metro I use to get to place to place; to even the mere objects I use such as a chair or table which has used some form of technology to have been manufactured. The circuits I just built use technology (i.e. Arduino) and is a form of technology.

I would define interaction as the ability for two or more entities that have the ability to react with and respond between one another. The article describes it interaction as input, output, and processing. For example, you can interact with the radio by turning the knob (input) which in turn changes the volume of the sound (output). By turning the knob, the volume responds and reacts to those changes.

If you have 100,000 LEDs of any brightness and color at your disposal, what would you make and where would you put it?

If I had 100,000 LEDs of any brightness and color, I would create a large panel in which you could use your body to create a R&B soundscape and beat, which would probably be in an art exhibit or public place. I would use live motion capture to follow the movements of one’s body in front of the panel and in turn the LEDs will light up and create a sound which correlates with the speed or behavior of the movement. If one touches another body, overlaps with another person, or touches or maneuvers some part of this abstract soundscape landscape on the screen, it will change the color of the LEDs and the sound.

Recitation 1: Documentation by Robin Luo

Lab Date: Feb. 15, 2019
Instructor: Marcela
Lab Partner: Ivy

Aim of Today’s Lab: Learn how to solder an arcade button and complete three circuits using a breadboard.

Soldering arcade button
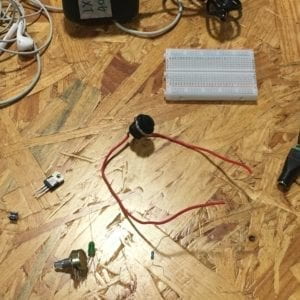
Process: 
In this exercise, we soldered an arcade button. We soldered two jumper cables to our button by melting a metal wire to our cables. We also used pilers to expose some of the copper to help us solder the metal to the cable. 

Circuit 1: Door Bell

Materials used:
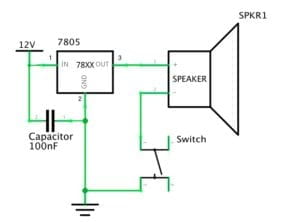
Breadboard, Speaker/Buzzer, Capacitor, Push-Button Switch,
LM7805 Voltage Regulator, 12 volt Power Supply, Barrel Jack, Jumper Cables 

Process:
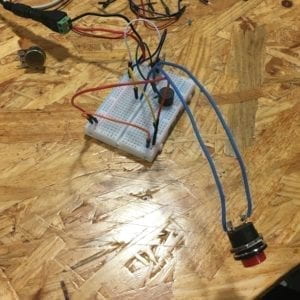
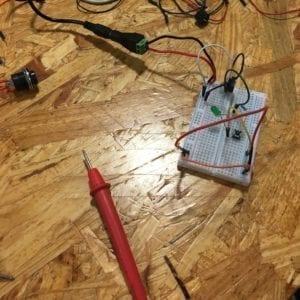
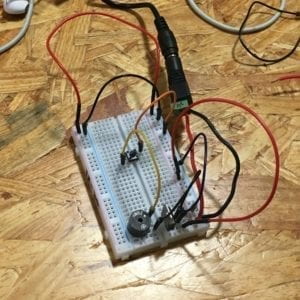
I was pretty intimidated beginning this exercise as my partner and I had no experience and didn’t know where to begin, so we began by asking fellows a lot of questions the breadboard, how to use it, and about some of the materials we acquired in the exercise. After assembling the circuit by ourselves according to the schematic, we ran into some problems. Consulting several fellows, we found out our capacitor was in the wrong place so we moved it next to our jumper cables in the power rails. We also found out that our voltage regulator was in the incorrect order so we fixed the jumper cables into the correct order. After fixing these issues, our circuit worked.

With Arcade Button

Circuit 2: Lamp

Materials used:
Breadboard, LED, 220 ohm Resistor, Capacitor, Push-Button Switch, LM7805 Voltage Regulator, 12 volt Power Supply, Barrel Jack, Jumper Cables
Process:
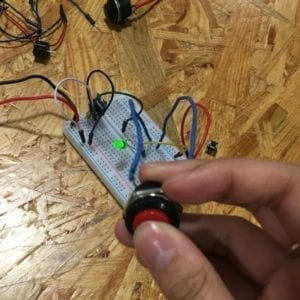
There was not much change between the door bell circuit and the lamp circuit. For this circuit, we exchanged the speaker/buzzer for the LED and 220 ohm resistor and rearranged the position of our capacitor and jumper wires. We tested both resistors by using the multimeter to determine which was the resistor we needed. There wasn’t much trouble building this circuit. However, we realized when building this circuit that we needed to exchange our push-button switch with the arcade button we had soldered from earlier. Although when we tried our arcade button, the LED failed to turn on. After consulting a fellow, we exchanged our arcade button with another one as the wires to our buttons were suspected to be burnt when we were soldering. We also learned how a push button worked and how to place it in our breadboard despite the fact our guesses on how to use it were correct. Our circuit worked again.

With Arcade Button

Circuit 3: Dimmable Lamp

Materials used:
Breadboard, LED, 220 ohm Resistor, 10K ohm Variable Resistor, Capacitor, Push-Button Switch,
LM7805 Voltage Regulator, 12 volt Power Supply, Barrel Jack, Jumper Cables
dimmable light

Process:
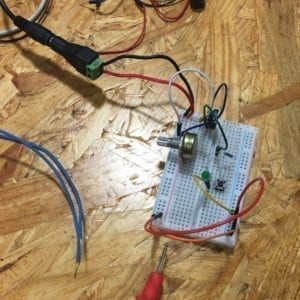
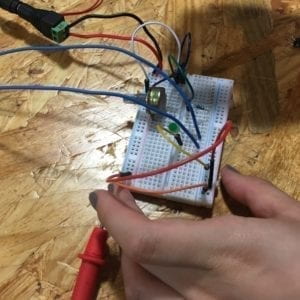
There was not much issue with this circuit. We added the 10K ohm variable resistor and rearranged the position of our jumper wires. Tested the circuit with both buttons and it worked perfectly! We returned to our door bell circuit and tried it with the arcade button as well.

With Arcade Button
Conclusion
I learned so much during this recitation: what a breadboard does, how to use it, how it works, and how to read schematic diagrams and build simple circuits like the ones we did. Without prior experience, it also confirmed by beliefs that if you don’t know something, there are always resources out there to help you and questions to ask. Some mistakes we had during this exercise was understanding how certain components worked (capacitor, voltage regulator, buttons) and how to implement it into our circuits. We also learned some other tips such as using two different colored wires for our arcade button to tell the difference between our ground and power connections. All in all, this exercise made me excited for what’s to come in this class.  

Answers to Questions
After reading The Art of Interactive Design, in what way do you think that the circuits you built today include interactivity?

The Art of Interactive Design describes interactivity as at least two purposeful actors that react to one another. After reading this article, the circuits we built in this recitation in my opinion include interactivity because we can interact with it and it will respond to our actions. With the doorbell and lamp circuit, we could press a button which emitted a sound or turned an LED light on and allow these reactions to turn off when we release the button. With the dimmable lamp, we could not only press and release a button which to turn on and off the light, but we could also change the brightness of the LED light.

How can Interaction Design and Physical Computing be used to create Interactive Art? You can reference Zack Lieberman’s video or any other artist that you know.

Interactive Design and Physical Computing can be used to create Interactive Art in all kinds of ways. One example of Interactive Art using Interactive Design and Physical Computing is Dialect for a New Era by Frederik Duerinck and Marcel Van Brakel which I experienced in the Cooper Hewitt last summer. This work of art uses Interactive Design by allowing the user to press a button on a glowing square pillar which in turn emits a scent allowing the user to smell. It uses Physical Computing through the button as well. The button is the input and in turn the piece understands to output a smell through holes above the button.