Final Project: Project Proposal ——Leah Bian

Based on our understanding of “interactive experience”, my partner and I came up with three general ideas about our final project. All of them convey a specific theme, and we expect that the user could gain an  interactive experience.

A. Tree

This project will be an art installation, which is inspired by an exhibit in WildLife Interactive Exhibition 2017. We will fill a real pot with soil and put it on a table. And we will draw a simulative image of the shadow of the pot with Processing, and then cast it on the wall with the projector to make it coincide with the real shadow of the pot. Besides, to represent the water and the light needed to make the tree grow, we will place a watering can with an Arduino button installed and a flashlight that would work with the photosensitive resistor. When the users use the watering can by pressing the button to water the empty pot in reality, an animation of the shadow of a growing sapling will appear on the Processing screen. When the users use a flashlight to simulate the sunlight shining on the empty pot, the amount of the leaves would increase. Every once in a while, the values of “moisture content” and “light amount” in the processing system would decrease, and the leaves of the tree would wither or fall off. Users need to have careful observation, adjusting water and light to make the tree thrive.

The potential challenges include how to draw a vivid image of the tree with Processing; how to connect Arduino components with the physical objects; how to transfer data between Arduino and Processing in real time…The theme of this project is “life”, and the targeted audience are those who seldom pay close attention to the subtle changes in the growth of natural life around us. We expect that through this simulated and accelerated way of conceiving life, the users can gain a sense of awe towards fragile lives and obtain an emotional impact when observing the growth of this simulative life.

B. Puppet

In this project, we will set a miniature stage with stage curtains and lighting. On the stage, we will place a marionette, which will be connected to the Arduino servos on the roof with strings. The gestures and movements of the marionette will be controlled by the Arduino part. On the wall behind the miniature stage, we will cast the Processing image with a projector. We will draw the shadow of the puppet with Processing, and the users can control the moveable joints of the puppet by the mouse to make it do different poses. Data of these gestures would be passed from Processing to Arduino. The real marionette on the stage would first quickly and randomly change a series of postures, and finally end up with the pose set by the user in Processing before. We will try to enhance the artistic appeal of the installation with music, lighting and so on.

Some of the problems we might encounter include how to accurately pass the data of the puppet’s poses from Processing to Arduino; how to connect servos with the puppet smoothly with the correct mechanism; how to let the users understand the work they need to do… The specific audience in this project are those who intentionally or compulsively cater to the social roles imposed on them by the forces in the society. In this project, the user represents the forces that decide our social images, while the puppet on the stage represents ourselves, who are constrained by our assumed roles. The “struggle” that the puppet has before it stops with its final pose represents our mental struggles when pondering whether to meet social expectations. However, we ultimately make the passive or initiative choice that satisfies the forces just as what the puppet does. We hope that through the artistic expression of this phenomenon, the users can have reflections or gain emotions in this interactive experience.

C. One Minute

In this project, the user will sit in a black box with a front opening, surrounded by a ring of lamp bulbs. We will use the projector to project the processing screen on the wall in front of the user. The image in Processing would be an animated starry night. The bulbs around the user will be connected to the Arduino, which controls whether they are on or off. The user will wear a noise-cancelling headphone, which will play soothing soft music. A series of problems will appear on the Processing screen. These questions will be relevant to the choices in busy life and they are designed to let the users reflect on themselves. The user will answer the Yes/No questions with Arduino buttons, which then directly affects the on or off of a bulb, as well as the increase or decrease of the amount of the stars in the Processing image. The logic goes like this: the more bulbs that are bright, the fewer stars there are. The experience starts with the all the bulbs on (which means there are no stars on the Processing screen), and the whole experience will last one minute. After a minute, no matter how many lights are on, all the lights would go out at the same time. Stars on the Processing screen will increase rapidly.

Our potential challenges include how to make more use of Processing functions to achieve better artistic effects; how to ensure a clear logical relationship between the user’s answers to the questions and the light and dark of the bulb; how to connect Arduino with the bulbs… The ideas about this project originate from a tagline for Earth Hour, which is “The fewer city lights, the brighter the stars will be”. In this project, the light bulbs stand for artificial lights, which represent people’s busy and impetuous life; the stars stand for the natural lights, which have the meaning of meditation and tranquility, and they represent the time for thinking that people leave for themselves. In the project, the contradictory relationship between these two is reflected in a quantitative way. We want to utilize the black box and the noise-cancelling headphone to allow the users to have a minute of quiet meditation, which help form a physical isolation from the surroundings. We hope that by asking questions to users, we can enable them to have deep reflection and active thinking. The message we want to convey is, to have a period of time alone for mediation, to think actively, to explore the true meaning of life. Our intended audience are those who are unconscious of the fact that they lack the time for being alone, thinking, and making real powerful choices.

Conclusion

As I wrote in the preparatory research and analysis, a successful interaction experience should contain the following four parts, which could be seen in our plans for the final project.

  1. The process of interaction should be clear to the users, so that they can get a basic sense of what they should do to interact with the device.  (plan A,B,C)
  2. The design of the interactive experience should provide the user with various means of interacting with the device. The “contact area” between the user and the device should be large. For example, the users can change gestures or move to other locations, instead of only pressing a small button. (plan A)
  3. Various means of expression is needed, such as visuals and audios. The user can be truly engaged when receiving information with different senses. (plan B,C)
  4. The user should gain some senses of accomplishment, pleasure, surprise or entertainment from the experience. In addition, the experience could be thought-provoking, which may reflect the facts in the real life. (plan A,B,C)
Recitation 7: Functions and Arrays——Leah Bian

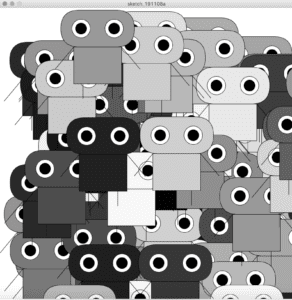
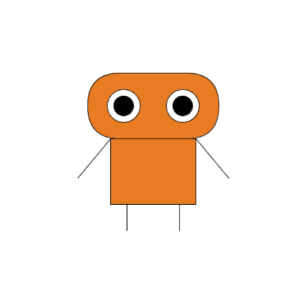
In this recitation, I created a sketch with many similar items at the same time, based on the graph that I designed in class.

Step 1:

In Step 1, we needed to make a function that takes parameters such as x position, y position, and color. 

Code:

void setup(){    //step1
  size(800,800);
}
void draw(){
  background(255);
  robot(400,400,233,124,34);
}
void robot(float x, float y, float a, float b, float c){
  fill(a,b,c);
  rect(x,y,200,100,100,100,200,400);
  quad(x+35,y+100,x+165,y+100,x+165,y+200,x+35,y+200);
  line(x+35,y+100,x-15,y+160);
  line(x+165,y+100,x+215,y+160);
  line(x+60,y+200,x+60,y+240);
  line(x+140,y+200,x+140,y+240);
  fill(255);
  ellipse(x+55,y+50,50,50);
  ellipse(x+145,y+50,50,50);
  fill(0);
  ellipse(x+55,y+50,30,30);
  ellipse(x+145,y+50,30,30);
}
0
step 1

Step 2:

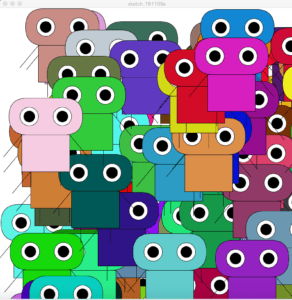
Instruction from the recitation website: Create a for loop in the setup() to display 100 instances of your graphic in a variety of positions and colors.  Make sure to use the display function you created in Step 1.  Then move your for loop to the draw() loop, and note the difference.

Code (setup()):

float x; //step2
float y;
int a;
int b;
int c;
void setup(){
  size(800,800);
   background(255);
   for(int i=0; i<100; i++){
   x =(random(width));
   y =(random(height));
   a =int(random(255));
   b =int(random(255));
   c =int(random(255));
   robot(x, y, a, b, c);
  }
}
void draw(){
} 
void robot(float x, float y, int a, int b, int c){
  fill(a,b,c);
  rect(x,y,200,100,100,100,200,400);
  quad(x+35,y+100,x+165,y+100,x+165,y+200,x+35,y+200);
  line(x+35,y+100,x-15,y+160);
  line(x+165,y+100,x+215,y+160);
  line(x+60,y+200,x+60,y+240);
  line(x+140,y+200,x+140,y+240);
  fill(255);
  ellipse(x+55,y+50,50,50);
  ellipse(x+145,y+50,50,50);
  fill(0);
  ellipse(x+55,y+50,30,30);
  ellipse(x+145,y+50,30,30);
}
00
step 2 setup()

Code (draw()):

float x; //step2
float y;
int a;
int b;
int c;
void setup(){
  size(800,800);
   background(255); 
}
void draw(){
  for(int i=0; i<100; i++){
   x =(random(width));
   y =(random(height));
   a =int(random(255));
   b =int(random(255));
   c =int(random(255));
   robot(x, y, a, b, c);
  } 
} 
void robot(float x, float y, int a, int b, int c){
  fill(a,b,c);
  rect(x,y,200,100,100,100,200,400);
  quad(x+35,y+100,x+165,y+100,x+165,y+200,x+35,y+200);
  line(x+35,y+100,x-15,y+160);
  line(x+165,y+100,x+215,y+160);
  line(x+60,y+200,x+60,y+240);
  line(x+140,y+200,x+140,y+240);
  fill(255);
  ellipse(x+55,y+50,50,50);
  ellipse(x+145,y+50,50,50);
  fill(0);
  ellipse(x+55,y+50,30,30);
  ellipse(x+145,y+50,30,30);
}

Step 3:

Instruction from the recitation website: Create three Arrays to store the x, y, and color data.  In setup(), fill the arrays with data using a for loop, then in draw() use them in another for loop to display 100 instances of your graphic (that’s two for loops total).

Code:

float[] x = new float[100];  //step 3
float[] y = new float[100];
float[] c = new float[100];
void setup(){
  size(800,800); 
   for(int i=0; i<x.length; i++){
   x[i] =random(width);
   y[i] =random(height);
   c[i] =random(255);
  }
 printArray(x);
 printArray(y);
 printArray(c); 
}
void draw(){
 background(255);
 for(int i=0; i<x.length; i++){
 robot(x[i],y[i],c[i]);
 }
} 
void robot(float x, float y, float c){
  fill(c);
  rect(x,y,200,100,100,100,200,400);
  quad(x+35,y+100,x+165,y+100,x+165,y+200,x+35,y+200);
  line(x+35,y+100,x-15,y+160);
  line(x+165,y+100,x+215,y+160);
  line(x+60,y+200,x+60,y+240);
  line(x+140,y+200,x+140,y+240);
  fill(255);
  ellipse(x+55,y+50,50,50);
  ellipse(x+145,y+50,50,50);
  fill(0);
  ellipse(x+55,y+50,30,30);
  ellipse(x+145,y+50,30,30);
} 
000
step 3

Step 4:

Instruction from the recitation website: Add individual movement to each instance of your graphic by modifying the content of the x and y arrays.  Make sure that your graphics stay on the canvas (hint: use an if statement).

Code:

float[] x = new float[100];  //step4
float[] y = new float[100];
float[] c = new float[100];
void setup(){
  size(800,800); 
   for(int i=0; i<x.length; i++){
   x[i] =random(width);
   y[i] =random(height);
   c[i] =random(255);
  }
 printArray(x);
 printArray(y);
 printArray(c); 
}
void draw(){
 background(255);
 for(int i=0; i<x.length; i++){
 robot(x[i],y[i],c[i]);
 x[i] += random(-5, 5);
 y[i] += random(-5, 5);
 }
} 
void robot(float x, float y, float c){
  fill(c);
  rect(x,y,200,100,100,100,200,400);
  quad(x+35,y+100,x+165,y+100,x+165,y+200,x+35,y+200);
  line(x+35,y+100,x-15,y+160);
  line(x+165,y+100,x+215,y+160);
  line(x+60,y+200,x+60,y+240);
  line(x+140,y+200,x+140,y+240);
  fill(255);
  ellipse(x+55,y+50,50,50);
  ellipse(x+145,y+50,50,50);
  fill(0);
  ellipse(x+55,y+50,30,30);
  ellipse(x+145,y+50,30,30);
}     

Question 1: In your own words, please explain the difference between having your for loop from Step 2 in setup( ) as opposed to in draw( ).

Answer: Having the loop in setup( ) only lets the code run once, so the outcome will be a still image.  Having the loop in draw( ), instead, lets the functions be looping. The data is refreshed continuously, so the outcome will be an animated version. 

Question 2: What is the benefit of using arrays?  How might you use arrays in a potential project?

Answer: We can store data in the arrays, instead of writing repetitive functions that wastes time. Besides, by combining arrays with loops, we can store and retrieve all sorts of information. In a potential project, I can create shapes by using both arrays and loops, so that it will enable me to set the shapes in different positions, sizes and colors with parameters at the same time. I can also store predefined data in arrays, and use them as the output of my project.

Preparatory Research and Analysis——Leah Bian

A. The Chronus Exhibition

0

0

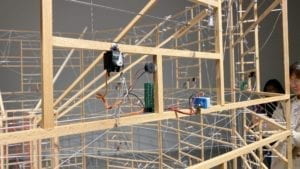
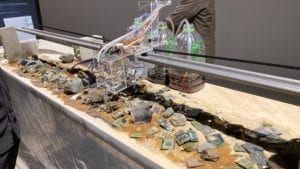
The Chronus exhibition has inspired me a lot. The art pieces are technology-based, and some of them are equipped with Arduino components. My previous learning about Arduino also helped me a lot to understand how the systems work. The most impressive exhibit for me is Beholding the Big Bang. It is a sculpture in which a motor drives a series of gears and the final gear will take 13.82 billion year to rotate once. This is one of the estimates for the age of the Universe since the big bang. The final gear will never turn, and is embedded in a block of concrete. In the description of this exhibit, there is a sentence that is inspiring for me. “The concrete is stillness—perhaps the imaginary moment before everything happened.” The concept of this art piece is so romantic, mysterious, and philosophical, which moved me deeply. It is not hard to conclude that the conception cannot be achieved if the exhibit is just a static image. While non-technology based art works can only provide the viewers with still pictures, technology based pieces can engage the viewers with movements, audios, and even opportunities of physical touch. In addition, various technologies also provide the creators with different tools to achieve the original conception. They can trigger imagination, enhance creativity, and have dynamic identities. From a viewer’s side, I found the technology-based art works more appealing. When I see a painting or a photograph, I will just stand in front of the work for several seconds, guess what it conveys, read the description, and then leave. However, when I see technology-based art works, I will be curious about how the systems work, what the implicit meanings are, and how the creators came up with these ideas. These works are more interesting, engaging, and compellingly attractive.

B.  Research

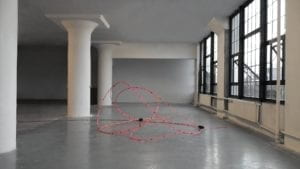
I have researched three interactive projects online. The first one that I introduce here is not quite interactive from my perspective. According to its creators Mathias Maierhofer and Valentina Soana, ‘Self-Choreographing Network’ proposes a hybrid approach: a real-time, interactive design and operation process that enables the system to be self-aware, fully utilizing and exploring its kinetic design space for adaptive purposes. However, the interaction included in this project is between the work itself and the environment. That is to say, the effect of human behaviors is not the main point of this design. In my opinion, an interactive process must include a human participant, or it could only be described as a mobile art work that is for appreciation.

0
‘Self-Choreographing Network’

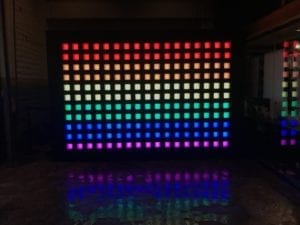
   The second project is named as ‘Click Canvas’.187 Boxes of light serve as creative tools for the audience to create some images, and the color of each box are changed each time the audiences press it. There is no doubt that it is an interactive experience for the user, since they are the real controller of the whole system. However, from my perspective, the output of the process is a bit too simple. Although it is easy for the audience to understand how the interactive process works, they may soon get bored with the interactive process itself. That is, the output of the process is just the change of the light, and what the audience are truly interested with is their behavior of creating something, instead of what the device brings them.

00
‘Click Canvas’

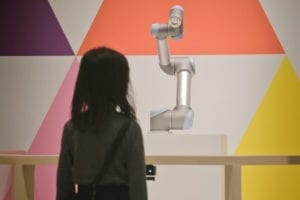
   The third project, named as ‘Design I/O’, provides the most successful interactive experience from my perspective. ‘Design I/O’ is a robot that is playful and inquisitive. It can show a range of dynamic moods and actions that are triggered in response to whatever motions or gestures it detects. The interaction here is distinct. The users can move their whole bodies to interact with the robot, instead of only pressing a small button. The interaction shows some level of communication, and it provides several means of output. The users are truly engaged with the design, and enjoy the interactive process.

00
‘Design I/O’

C. An Interactive Experience

I summarized my initial definition of interaction based on Crawford’s exact description of the interactive process. He says, “Interaction: a cyclic process in which two actors alternately listen, think, and speak” (5). I develop my ideas during the group project. In my opinion, interaction should be separated into two parts: physical interaction and emotional interaction. Emotional interaction involves emotions, humanistic feelings and aesthetic value. High-level interactivity should combine these two parts of interaction organically. My ideas about interaction also developed during the midterm project. In my individual reflection post, I wrote “a highly interactive device should allow the user to really engage in the interaction, instead of excluding them as the audience or actors”. My previous definitions of interaction thus formed into my current perception on a successful interactive experience. In my opinion, a successful interaction experience should contain the following four parts.

  1. The process of interaction should be clear to the users, so that they can get a basic sense of what they should do to interact with the device. It can be seen in both the second and the third projects that I mention above.
  2. The design of the interactive experience should provide the user with various means of interacting with the device. The “contact area” between the user and the device should be large. For example, when interacting with ‘Design I/O’, the users can change gestures or move to other locations to interact with the robot, instead of only pressing a small button.
  3. Various means of expression is needed, such as visuals and audios. The user can be truly engaged when receiving information with different senses.
  4. The user should gain some senses of accomplishment, pleasure, surprise or entertainment from the experience. In addition, the experience could be thought-provoking, which may reflect the facts in the real life.

References:

Crawford, “What Exactly is Interactivity,” The Art of Interactive Design, pp. 1-5.

Self-Choreographing Network: https://www.creativeapplications.net/processing/self-choreographing-network-cyber-physical-design-and-interactive-bending-active-systems/

Click Canvas:

https://www.creativeapplications.net/member-submissions/click-canvas/

Design I/O:  https://www.creativeapplications.net/openframeworks/design-ios-mimic-putting-emotional-machines-within-arms-reach/

Recitation 6: Processing Animation——Leah Bian

Recitation Activity:

In this week’s recitation, we integrated the coding elements to create an interactive animation in Processing. I decided to create a completely new one, and to include some level of interaction.

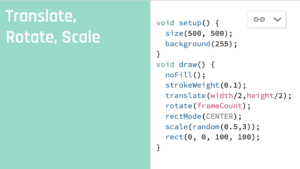
I found the transform functions quite interesting, but we did not learn them in class. Therefore, I decided to explore these functions first to develop my ideas. I copied the code from the slide, changed some numbers, trying to figure out how the codes work.

0

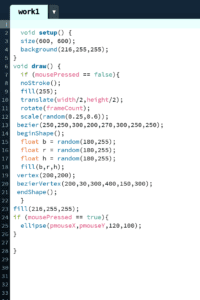
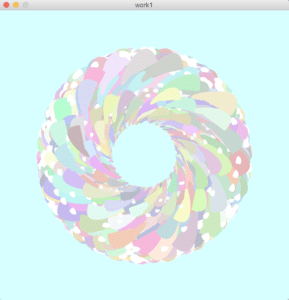
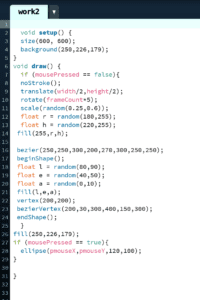
Then, I started to create some shapes by myself. I didn’t use “bezier”, “beginShape()”, “endShape()”, and “vertex” functions in recitation 5, so I decided to have a try this time. I created some abstract shapes, including some big ones and some small ones, and let them rotate around the center. To ultilize the “random()” function, I decided to create each shape in random colors. I picked the colors from a small range, so that the image would not be too messy. After I ran the code, I found the image with round shapes and colors of macaroons looked quite similar to a rainbow icing donut. So I decided to let the viewer interact with the image as “eating the donut”. I used the “pmouseX” and “pmouseY” function to control a circle that is in the same color as the background, so that it could be used as an eraser.

This is the final code that I wrote:

0
version 1 code
0
“rainbow icing donut”

This video shows how the code “make” a donut:

“Eat the donut”:

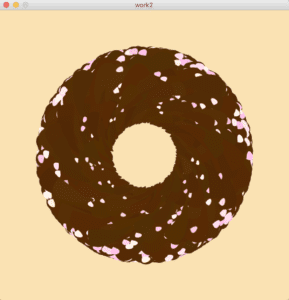
To improve my creation, I decided to change the flavor of the “donut”. I changed the background color and the colors of the shapes, and successfully made it as a “chocolate donut with sprinkles”.

0
version 2 code
0
chocolate donut with sprinkles

Additional Recitation Homework:

 As homework of this recitation, we needed to create an animated circle that is continuously changing color and its position could be controlled by the user based on the keyboard’s arrow key input. This was not an easy task, but finally I made it successfully.

Step 1:

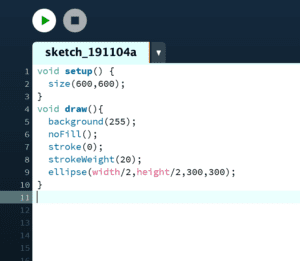
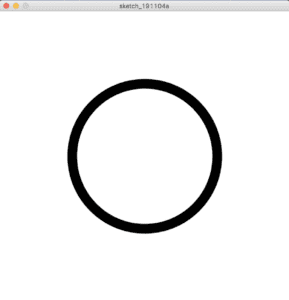
 The first step was quite simple. What I needed to do was just to set up the canvas size, the background color, and then created the circle.

0
step1 code
0
step 1

Step 2:

In Step 2, I matched the condition in “if” sentences with the “speed” that I set up, so that the circle can periodically expand and contract.

Step 3:

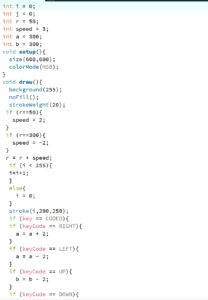
In Step 3, I needed to let the outline change color smoothly, and a hint is provided in the recitation website that we should set the colorMode() to HSB. It took me a while to understand how this function works and where to put this function. I also made some modifications to the code for the stroke’s color, so that it could look brighter.

Step 4:

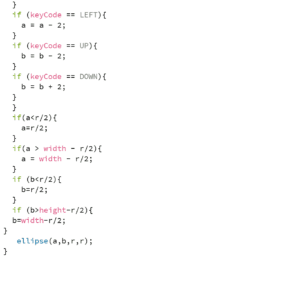
It was not hard to let the circle moves around the canvas based on the keyboard’s arrow key input. What I needed to do was just to use the “keyCode” function and the keycode environment variables, such as “UP”, “DOWN”, “LEFT”, and “RIGHT”. However, it took me long to figure out how to make the canvas’ edges a border that the circle cannot pass. I tried to set some conditionals for the “key” function, but it didn’t work. Finally, I just used several “if” sentences to complete the task.

0
final code part 1
0
final code part 2

It was my first try to create animations that the viewer can interact with. The process of creating these images was hard, but quite interesting as well. I learnt how to develop a creative idea by exploring something new, and how I could make it real by continuously having a second try when it fails. I also learnt several useful functions that are listed below.

Functions:

  • float
  • rotate()
  • scale()
  • key
  • keycode
  • pmouseX/pmouseY
  • frameCount

Recitation5: Processing Basics——Leah Bian

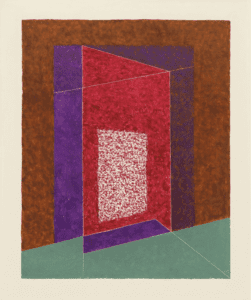
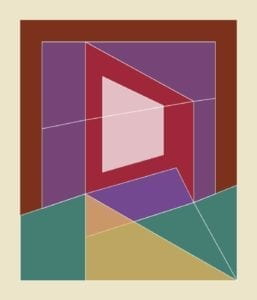
In this week’s recitation, we drew an image in Processing based on an already existing image as a motif. The image that I chose, designed by Josef Albers, is titled as “Concealing”. It can be divided into several quadrangle and triangles, which can be easily achieved in Processing. I love the contrasting colors and the exotic retro tones in this image. It is abstract, bringing people visual impact. While at the same time, the picture looks neat with the parallel lines and the intersection points. With a closer look, we can discover its implicit algorithm.

0
“Concealing”, Josef Albers

I separated the motif into several color lumps and started programming from the outside in. To achieve the visual effect of scraping the oil painting with a scraper, I used the stroke function and set the color of the border as white. Everything went well at the beginning, what I needed to do is just to make some adjustments of the colors. However, as more and more shapes were added, the coordinates of the points became confusing for me. Therefore, I decided to write down the coordinates of the points on the draft, and ensured that the extension lines of the shapes were parallel to each other based on a simple estimation. In addition, to let the shapes blend into their surroundings in color, I increased the transparency rate of some shapes, making the whole picture looks more harmonious.  After I finished the first version of my “painting”, I found that the green part at the bottom of the picture occupied too much space, making the picture looked unbalanced. So I added a yellow right triangle based on my own creative ideas, without breaking the pattern in the original picture.

This is my final sketch:

0
final sketch

My creation is similar to the motif in the overall pattern and the colors. However, since the sizes of the shapes are different from the original image, I made some modifications to enhance the sense of balance in my creation. Drawing in Processing is quite interesting, providing me with a new way to realize the creative ideas. It is precise, neat, and has great potential. I am looking forward to learning more about it.

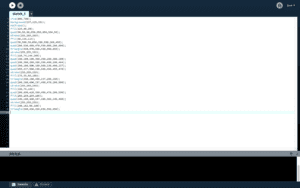
The codes are attached below:

0
code

Reference:

“Concealing” (motif): https://www.guggenheim.org/artwork/147