Recitation 4: Drawing Machines by Qianyue Fan

Introduction:

In this recitation, we made a drawing machine using an H-bridge, stepper motors and mechanical arms to control the drawing pen both mechanically and manually.

Partner: Serene

Components:

For Steps 1 and 2

1 * 42STH33-0404AC stepper motor

1 * SN754410NE ic chip

1 * power jack

1 * 12 VDC power supply

1 * Arduino kit and its contents

For Step 3

2 * Laser-cut short arms

2 * Laser-cut long arms

1* Laser-cut motor holder

2 * 3D printed motor coupling

5 * Paper Fasteners

1 * Pen that fits the laser-cut mechanisms

Paper

Step 1: Build the circuit

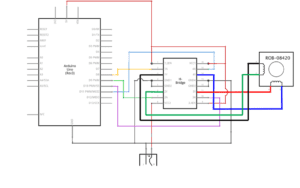
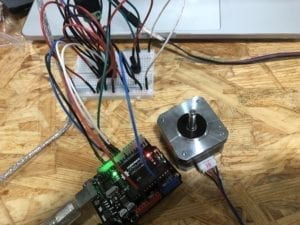
With the clear diagram, we finished the circuit easily and quickly. There were not any problem in the process. After uploading the stepper example in Arduino, the motor made one revolution as we expected.
Step 2: Control rotation with a potentiometer

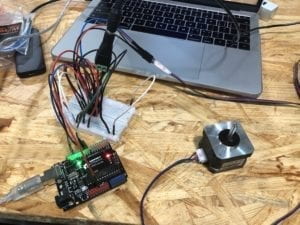
Although it was not difficult to set the potentiometer as an analog input, I had to  go back to previous Arduino codes to look at the format of map() function in order to make the circuit work correctly. It took me some time and several modifications to find the proper range of mapped value to make the stepper rotate simultaneously with the potentiometer in the same angle.
Step 3: Build a Drawing Machine

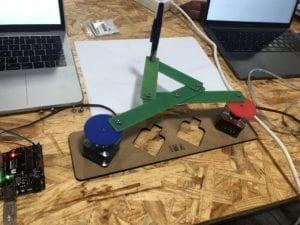
We put together the machine without much difficulty. But when connecting the circuit to the power, one of the steppers vibrated violently. It turned out that the 3D printed motor coupling did not fit the shape of the tip of the motor and therefore cannot revolute smoothly. We removed it and put them together again in the correct way and the drawing machine worked. It was hard to control the machine to draw any identifiable shape, but it was perfect for abstract art.
Question 1:

What kind of machines would you be interested in building? Add a reflection about the use of actuators, the digital manipulation of art, and the creative process to your blog post.

I am interested in building small gadgets that are tiny and handy that can help people improve their quality of life. They can be either aimed at changing their habits or simply bringing some surprise and happiness when people interact with them. In this recitation, although the actuator can only make revolutions, it has the potential for entertainment or creative art when combined with various additional parts. In art, the digital manipulation can be used for small adjustments, and at times its randomness and unpredictability can bring unexpected artistic outcomes. To be creative, it is important to observe what happens in daily life and see the needs of others. Creativity sometimes comes from design thinking by combining the required function with ingenious shape design of the device, which both solves people’s problems and brings them joy.

Question 2:

Choose an art installation mentioned in the reading ART + Science NOW, Stephen Wilson (Kinetics chapter). Post your thoughts about it and make a comparison with the work you did during this recitation. How do you think that the artist selected those specific actuators for his project?

What caught my attention was the Waves by Daniel Palacios Jiménez. In both of the works, motors are used to create changing shapes by rotating in a complex way, creating abstract art with curves and waves that have mathematical principles behind them. In Waves, the artist may be trying to remind people of the amazing physical rules of nature. In order to make the waves visible and interactive, actuators that can vibrate and make a revolution, like motors, need to be introduced in the artwork.

Recitation: Group Project Reflection by Qianyue Fan

From my point of view, interaction is an activity where two actors are involved and both of them have effects on each other by a cycle of listening, processing and responding. During the process of interaction, the action of at least one actor should be made intentionally or purposefully, and the outcome should be entertaining or utilitarian. My definition is inspired by The Art of Interactive Design written by Crawford. The reason why I define interaction in this way is that if without intention or real meaning, the process would become passive and unconscious, which is more like hidden automatic programs than interaction. By contrast, active input usually requires the attention of people participating in interaction and gets them fully engaged in it. This idea is based on the Art Machine which will be explained later.

One project that does not align with my definition of interaction is the Light Barrier by Elliot Woods and Mimi Son(https://www.creativeapplications.net/vvvv/light-barrier-millions-of-calibrated-light-beams-create-floating-phantoms-in-the-air/). In this work of art made up of thousands of calibrated beams, despite the calibration routines and the mathematical model, there are no cycles of action that exert continual influence. Although the artists did programming and calibrating, the audience only need to watch without doing anything. Therefore, although people receive some kind of visual outcome from the project, the outcome is not the result of the real-time input given by the audience.

One project that fits my definition more is the Art Vending Machine created by Matthias Dörfelt (https://www.creativeapplications.net/c/face-trade-art-vending-machine-that-trades-mugshots-for-free-portraits/), which would take a picture of the person standing in front of it, upload it to the blockchain system and generate an artistic picture of the face. In this project, in order to get a picture, people have to do a series of things as input: hit the button, face the camera and make some facial expression. Then the machine would process and print the picture as the output. People may also change their behavior or make faces to get pictures of different shapes and colors, which shows that they are also influenced by the machine.

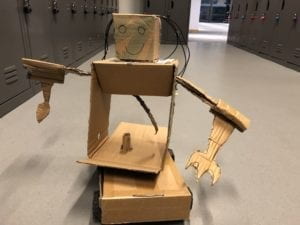
The inspiration of our design comes from a series of paintings by Jean-Marc Côté and other artists in the 1900s imagining what life would be like in 2000. Although they seem out of date, many of the imaginary machines are highly interactive. In the end we designed “Sfeeder”, a smart feeding machine that can not only feed people food by voice control but also offer health advice.

“Sfeeder”
Our poster showing the functions of Sfeeder

On the one hand, the machine receives voice messages from users as the input, process it to understand the meaning and deliver the food as the output.  On the other hand, users may change their diet and lifestyle when receiving suggestions from the machine. Therefore, the smart feeder should be seen as an interactive work that fits our definition of interaction.

Recitation 3: Sensors by Qianyue Fan

Introduction: In this recitation, we designed and built circuits that integrate sensors with Arduino on our own, and wrote the corresponding code for the required functions.

Partner: Lindsay (Yuru Chen)

Components:

1*Arduino

1*USB

1*Breadboard

1*Moisture sensor

1*Joystick Module

LEDs

jumper cables

Circuit 1: Soil Moisture Sensor

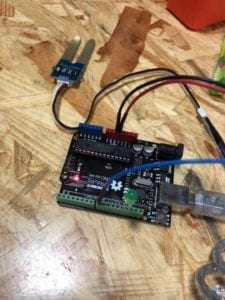
We first built a simple circuit to make a Soil Moisture Sensor. We connected it in analog mode and then tested it in digital mode. When the humidity reached a threshold value, the LED would light up. We tested the circuit by putting the sensor in pure water and by covering it with wet napkins.

Circuit 2: Joystick LED Controller

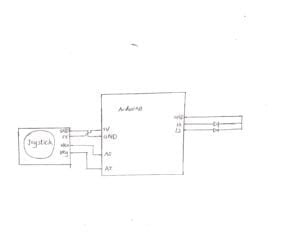
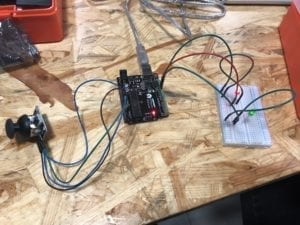
Since the joystick module can be interfaced with Arduino as two potentiometers, we connected it to a circuit with two LEDs and use the separate resistance along the x and y axis to control the two LEDs respectively. We used Boolean functions in the code and made four states of the LEDs in total.

Question 1:

What did you intend to assemble in the recitation exercise? If your sensor/actuator combination were to be used for pragmatic purposes, who would use it, why would they use it, and how could it be used?

We intended to turn the analog signals that sensors sent into digital signals that can be visualized by LEDs and find a practical use for the circuits. The moisture sensor circuit can be used to monitor the humidity of the soil of potted plants so that people can know when to water them. For the joystick circuit, it can be used for the preschool education for the children, who can learn the concept of directions by interacting with the gadget.

Question 2: 

Code is often compared to following a recipe or tutorial.  Why do you think that is?

The process of the computer executing the code is like people following the given instructions. Both code and recipe/tutorial are written in an executable format, and once it is correctly followed, it directly achieves a certain goal.

Question 3:

In Language of New Media, Manovich describes the influence of computers on new media. In what ways do you believe the computer influences our human behaviors?

 On the one hand, for people who are engaged in coding and other IT works, they may tend to think in a logical way and compare many of the daily activities with coding. By transforming problems into technological demands, it becomes easier to find a practical solution. On the other hand, for common computer users, especially the new generation, they may expect everything on the screen to be interactive and can be reached in a click or a tap on the keyboard. The development of computers has greatly simplified the way people acquire information and socialize with others, and it is possible that this trend will continue.

Recitation 2: Arduino Basics by Qianyue Fan

Introduction: In this recitation, we explored how to understand the use of codes in the Arduino and built more complicated circuits.

Partner: Malika (Weiyi Wang)

Date: 22nd February

Materials:

1 * Arduino Uno

1 * USB A to B cable

1 * breadboard

1 * buzzer

2 * LEDs

2 * 220 ohm resistors

2 * 10K ohm resistors

2 * pushbuttons

2 * arcade buttons

A handful of jumper cables

1 * Multimeter (optional)

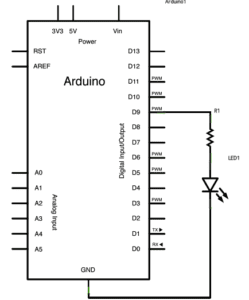
Circuit 1: Fade

Process: For the first circuit, we connected it quickly as the diagram shows and uploaded the code, and the LED flickered. It is worth noticing that we put different types resistors apart so that we would not mix them up. Also, the instructor reminded us not to connect Arduino board to power supply before completing the circuit.

Circuit 2: toneMelody

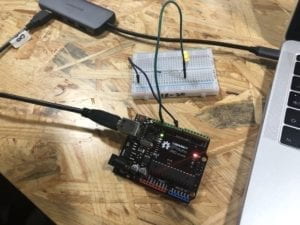
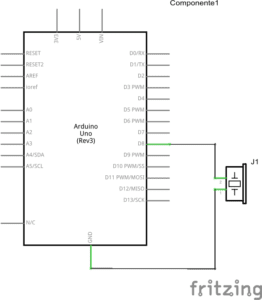
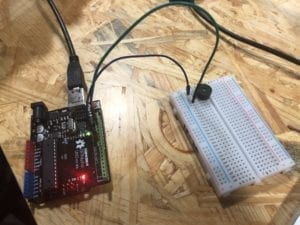
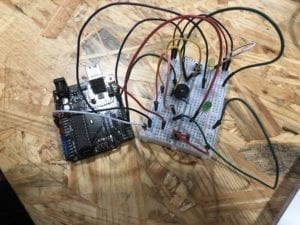
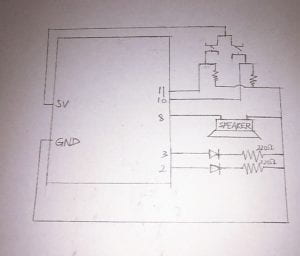
Process: Building this circuit was easier than the previous one. We connected the Arduino board, the breadboard and the speaker according to the diagram before connecting them to power supply. The speaker played a melody when we uploaded the code.

Circuit 3: Speed Game

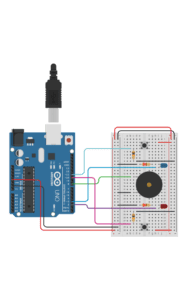
We built the circuit following the instruction here. Although it was easy to connect the components one by one, we did not understand how it worked when doing so. However, we still made some experiments and discovered that it did not entirely work as the recitation instruction said. To be specific, regardless of time, whoever clicks the button ten times first wins.

(Optional) Circuit 4: Four-player Speed Game

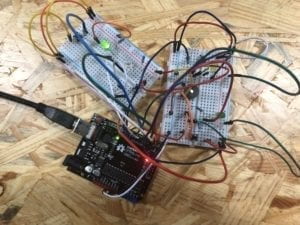
Process: We had enough time to figure out how the optional circuit works. We only need to add another two-player circuit to our own and it required few adjustments, so we started from the code. Although neither of us knew how Arduino codes work, we tried our best looking at the logic in the source code. Since we both learned some Python before, it gradually became clear how the code was organized and what each part of the code was aimed at. Step by step, we copy each part of the code to add player 3 and 4. We guessed what some symbols mean and followed suit. In the end, an instructor helped correct our code which lacked a bracket. For the circuit, we found another group and simply connected their wires for power supply to our Arduino board, and it immediately worked when we uploaded the code.

Question 1:

Reflect how you use technology in your daily life and on the circuits you just built. Use the text Physical Computing and your own observations to define interaction.

Technology may refer to any of the skills used in the production of goods and services. Therefore, every moment I am enjoying the benefits that technology brings in daily life. From the bicycle invented centuries ago to modern microchips in the cell phone, technology is widely used to facilitate travelling, learning, entertainment and almost every aspect in my life. When building the circuit, I was mainly using modern information and electronic technology that enables the miniaturization of electronic equipment, making it possible for me to make interactive gadgets without much difficulty. Interaction is an interactive process of listening thinking and speaking between two or more actors, and we can also consider it as input, processing and output when interacting with computers. This is a two-way activity, where people and computer both receive information from the other and react.

Question 2:

If you have 100,000 LEDs of any brightness and color at your disposal, what would you make and where would you put it?

I would put all the LEDs on the walls and the ceiling of a small room to make it a work of art. By changing the input signals, the LEDs can mimic the scene of time and space travelling, create moving colors according to the chosen music, or simply give people a calm and warm feeling when meditating. It would be a perfect place to stimulate imagination and creativity, or to seek mental relaxation when feeling stressed.

Week 1: Recitation Documentation – Qianyue Fan (Eric)

Partner: Gloria (Yixuan Liu)

Date: 15th February

Circuit 1: Door Bell

Components:

Breadboard: Providing a platform to connect all the components

12 volt power supply: Providing electrical power for the components

Buzzer: Buzzing when the circuit is connected correctly and the switch is pressed

Push-Button Switch: Cutting or maintaining the current flow in the circuit

100 nF (0.1uF) Capacitor: Storing and releasing electrical energy and stabilizing the current flow

LM7805 Voltage Regulator: Maintaining a constant voltage level in the circuit

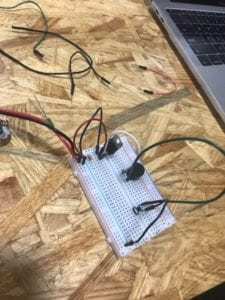
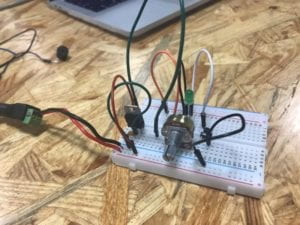
circuit 1
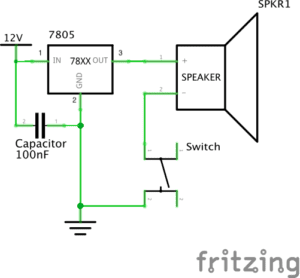
circuit 1 diagram
circuit 1 photo
circuit 1 photo

Process: 

Although it was the first time I used the breadboard, we managed to figure out how it worked using the knowledge mentioned in the lecture. However, we could not use the voltage regulator correctly and we consulted the instructor, who taught us how to identify its three feet. Also, we learned a simpler way to connect the capacitor in the circuit with fewer wires. Besides, we were not sure how the switch was connected inside itself, and the instructor showed us how to find this out using the multimeter.

After solving all these problems, the circuit worked.

Circuit 2: Lamp

Components:

Breadboard: Providing a platform to connect all the components

12 volt power supply: Providing electrical power for the components

LED: Emitting light when the circuit is connected correctly and the switch is pressed

220 Ω Resistor: Resisting and controlling the flow of electricity

Push-Button Switch: Cutting or maintaining the current flow in the circuit

100 nF (0.1uF) Capacitor: Storing and releasing electrical energy and stabilizing the current flow

LM7805 Voltage Regulator: Maintaining a constant voltage level in the circuit

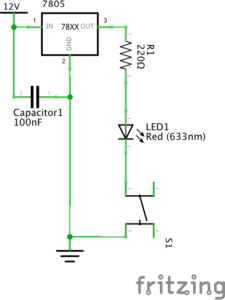
circuit 2 diagram
circuit 2 diagram
circuit 2 photo
circuit 2 photo

Process:

Applying what we learned just now, we finished this one quickly without much trouble. The only problem was that we did not realize its similarity to the previous circuit and just connected every component for the very beginning.

Circuit 3: Dimmable Lamp

Components:

Breadboard: Providing a platform to connect all the components

12 volt power supply: Providing electrical power for the components

LED: Emitting light when the circuit is connected correctly and the switch is pressed

220 Ω Resistor: Resisting and controlling the flow of electricity

10 KΩ Variable Resistor: Changing the amount of resistance of electricity in the circuit

Push-Button Switch: Cutting or maintaining the current flow in the circuit

100 nF (0.1uF) Capacitor: Storing and releasing electrical energy and stabilizing the current flow

LM7805 Voltage Regulator: Maintaining a constant voltage level in the circuit

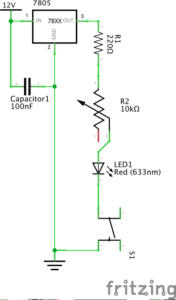
circuit 3 diagram
circuit 3 diagram
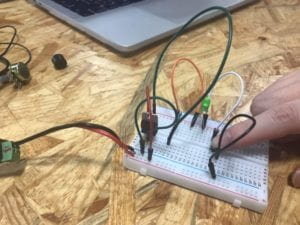
circuit 3 photo
circuit 3 photo

Process:

This time we thought it would be easier to make, for we only needed to add a variable resistor. However, just like the problem we encountered in the first circuit, we finally turned to an instructor for help to connect the three feet of the variable resistor into the circuit. This reminds us of the importance of learning about the details of components in advance. It took much longer time than we expected but we stayed after class and finally had a thorough understanding of this circuit.

Soldering: Switch the Switches

Process:

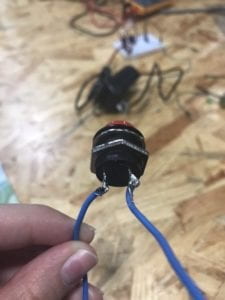
We had some difficulty using the equipment to hold the button and the wires in place and asked for help. Apart from this, everything went on smoothly. However, we were not sure what to do when going to soldering stations and were in a hurry finishing the circuits. Next time we will be more careful when reading the recitation instructions.

soldered button and wires

Question 1:

After reading The Art of Interactive Design, in what way do you think that the circuits you built today include interactivity? Please explain your answer.

According to Crawford, interaction is a cyclic process that involves two actors. From my point of view, in the recitation, the two actors are the circuit and the person who uses it. When the person presses the button, it is a kind of input and the circuit gives feedback by buzzing or emitting light. The outcome of interacting with the button then is received by the person who may take more action based on the feedback.

Question 2:

How can Interaction Design and Physical Computing be used to create Interactive Art? You can reference Zack Lieberman’s video or any other artist that you know.

What is interesting in Interactive Art is how it surprises common by using sensors and other components. When Interaction Design and Physical Computing are used in art, they should be inspiring and creative, making people aware of their potential in art when they do simple things like drawing and moving the body. These technologies can be used to discover how amazing the human body is, and our every move may bring about unexpected amazing outcome in Interactive Art.