In this recitation we created a drawing machine. We learned how to use an H-bridge to control stepper motors.
Materials:
(For Steps 1 and 2)
1 * 42STH33-0404AC stepper motor
1 * L293D ic chip
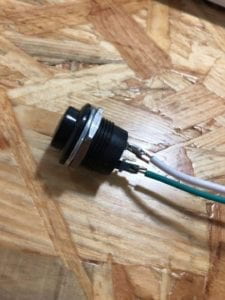
1 * power jack
1 * 12 VDC power supply
1 * Arduino kit and its contents
(For Step 3)
2 * Laser-cut short arms
2 * Laser-cut long arms
1* Laser-cut motor holder
2 * 3D printed motor coupling
5 * Paper Fasteners
1 * Pen that fits the laser-cut mechanisms
Paper
Process and Results
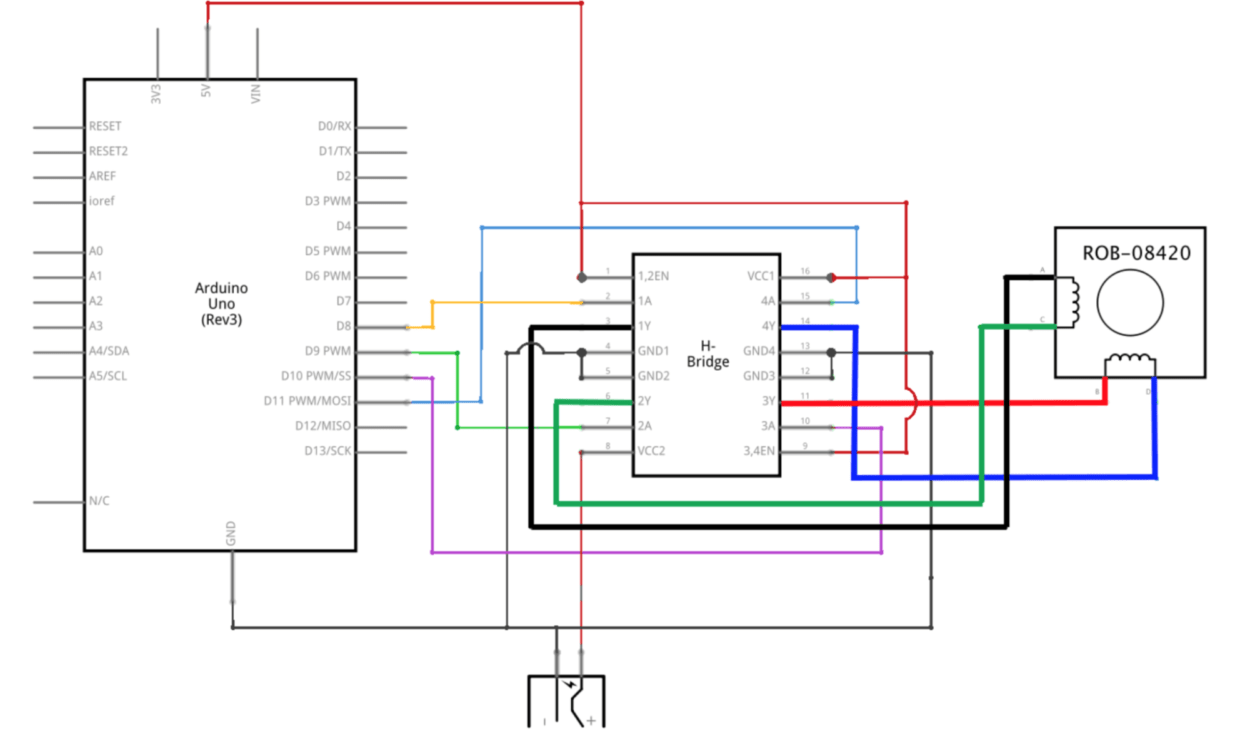
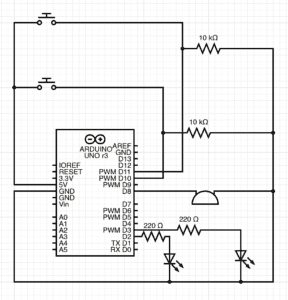
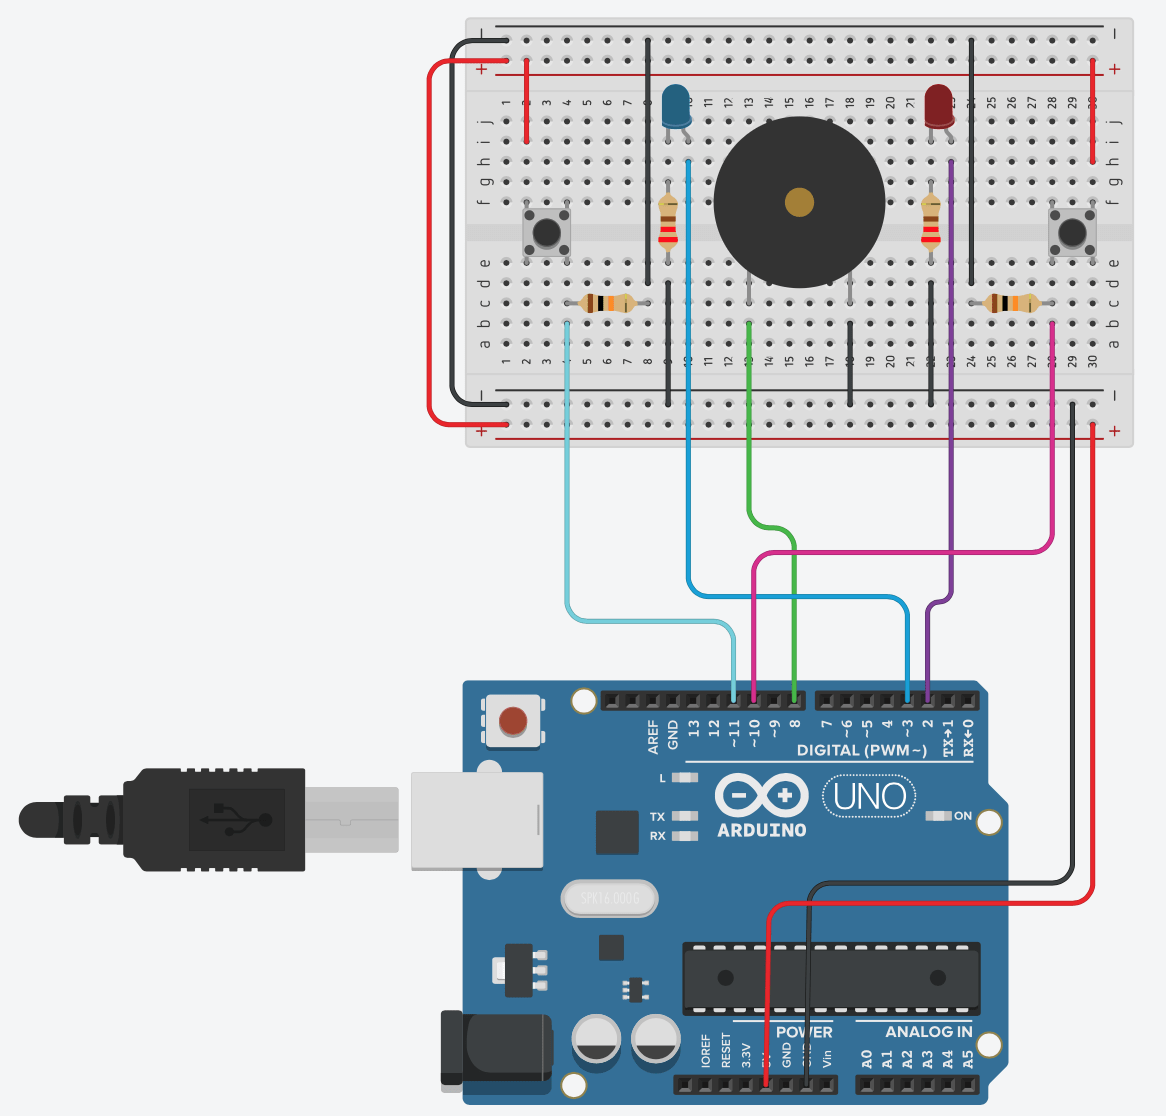
Step 1: Build the circuit
We built the following circuit:
I used the stepper_oneRevolution example code to get the motor to make one revolution.
Step 2: Control rotation with a potentiometer
I added a potentiometer to the circuit, and then, uploaded the MotorKnob example to the Arduino. I had to modify the number of steps within the code from 100 to 200, because the 42STH33-0404AC Stepper Motor is a 200 step motor (map function).
Step 3: Build a drawing machine!
Step 3 went smoothly. We just had to place the paper on top of a book so that it would meet the pen.
Question 1:
What kind of machines would you be interested in building?Add a reflection about the use of actuators, the digital manipulation of art, and the creative process to your blog post.
I would be interested in building interactive art. I want to put up an installation to make people reflect on their personal impact on the environment- how every single purchase they make has an impact. Actuators and programs that allow the digital manipulation of art are tools that let us create projects that interact with users in new ways. Instead of being a static, merely physical object, a project can seem to come alive.
Actuators
Question 2:
Choose an art installation mentioned in the reading ART + Science NOW, Stephen Wilson (Kinetics chapter). Post your thoughts about it and make a comparison with the work you did during this recitation. How do you think that the artist selected those specific actuators for his project?
Daniel Rozin’s Mechanical Mirrors: Wooden Mirror caught my attention because it took an everyday object (the mirror) and made it a novelty. Both his mirror and the simple drawing machine we made during recitation provide a new way of enjoying simple objects (pens, mirrors).
Crawford likens all interaction to conversation, saying it is “a cyclic process in which two actors alternately listen, think, and speak.” (5) Based on his explanation, and discussions I have had, I understand interaction to be an exchange of information: it is an action and a corresponding reaction.
When searching for examples of interactive designs that matched Crawford’s definition and my understanding of it, I looked through projects made by student of the Copenhagen Institute of Interaction Design. Two projects that caught my attention were Poli and Bumper. Poli is a mobile app that helps you connect with people with opposing political views. The aim of the program is to help people have access to different perspectives, and is a direct response to targeted articles and media that isolate us and confirm our existing biases. Bumper is a devise that means to connect people with similar interests to promote conversation. When people enter a location with Bumper, they input their interests and the device leads them towards someone else that might share an interest. Through conversation, both individuals are meant to find out what their common interest is. After a few minutes, they device signals that it is time to find someone else to talk to. The goal of this project is to force individuals to connect with their environment and meet people they would have otherwise not approached.
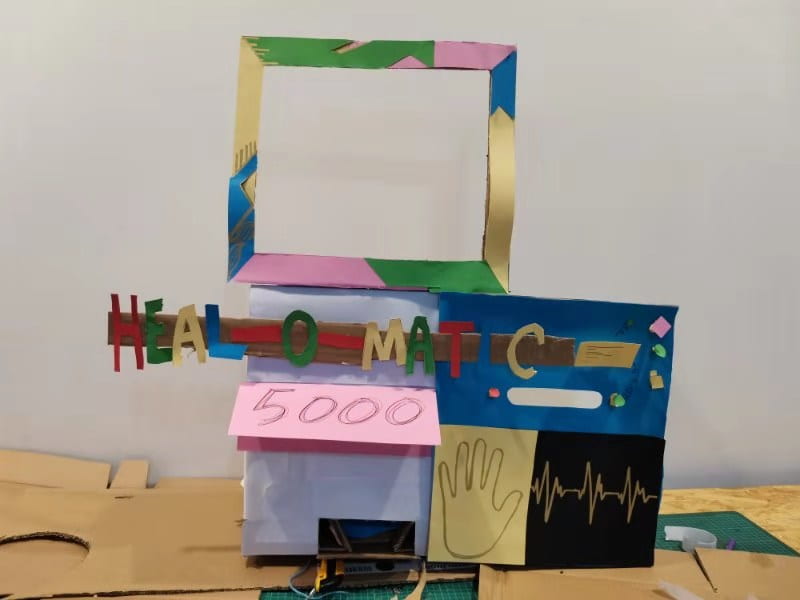
What I liked about these two projects was their purpose: to better the life of the user. For our project, we wanted to brainstorm a device people could interact with, which would better their life quality. Eventually, we thought of the Heal-O-Matic 5000. It is a dispenser meant to make medicines for common/minor (yet inconvenient) ailments more readily available. This way users wouldn’t have to go out of their way for a simple diagnosis. It would be efficient and near them. People with more serious health concerns could then be treated more immediately by actual doctors.
The Heal-O-Matic 5000 assesses the patients state and provides optional treatments the patient can choose from. Once the patient chooses a suitable (safe) medication, the machine dispenses the appropriate amount. The machine interacts with the user to provide an efficient solution to the user’s problem.
This activity served as an introduction to sensors. My partner and I decided to include an Ultrasonic sensor in our circuit. We made an instrument (really, “noise-maker” is a more accurate descriptor) that would play notes of different pitches depending on the musician’s distance from the sensor. If the musician got closer, the pitch of the note got higher. In the end, we also included a Force-sensing resistor so that the musician could control when the instrument made noise- ultimately allowing him/her to allow what notes to play.
Process and Results
Question 1:
What did you intend to assemble in the recitation exercise? If your sensor/actuator combination were to be used for pragmatic purposes, who would use it, why would they use it, and how could it be used?
We wanted to create an instrument that would react to movement. A more sophisticated version of our circuit could be used for performance art, or as a way to help people who are unable to use/ have lost their hands get involved in the creation of music.
Question 2:
Code is often compared to following a recipe or tutorial. Why do you think that is?
I think it is because code, like a recipe or a tutorial, is an algorithm: a series of step by step instructions that specify how a process should be carried out. Just like a recipe tells a chef what he is supposed to add to the dish he is preparing, code tells the computer what a programmer intends.
Question 3:
In Language of New Media, Manovich describes the influence of computers on new media. In what ways do you believe the computer influences our human behaviors?
Computers have reformed and automated many man-made processes, changing how we see ourselves, how we interact with each other, what we do with our days and how we do it. I believe we now expect everything to happen instantly. If we want to go on dates, we no longer have to work up the courage to ask someone for a phone number- we can just use apps like tinder to swipe right. Or “slide into their DMs”. If we need to do some research we no longer have to go through endless encyclopedias- we just Google it (or Bing! it, but if you are doing this, you’ve made some questionable choices). I believe that although the computer and all the technology that has resulted since its creation have advanced our society enormously, they may be hindering our concentration and patience.
This activity served as an introduction to working with Arduino. It consisted in building 4 circuits, the fourth being optional. My partner and I were able to complete all of them.
1 * Arduino Uno
1 * USB A to B cable
1 * breadboard
1 * buzzer
2 * LEDs
2 * 220 ohm resistors
2 * 10K ohm resistors
2 * pushbuttons
A handful of jumper cables
Process and Results
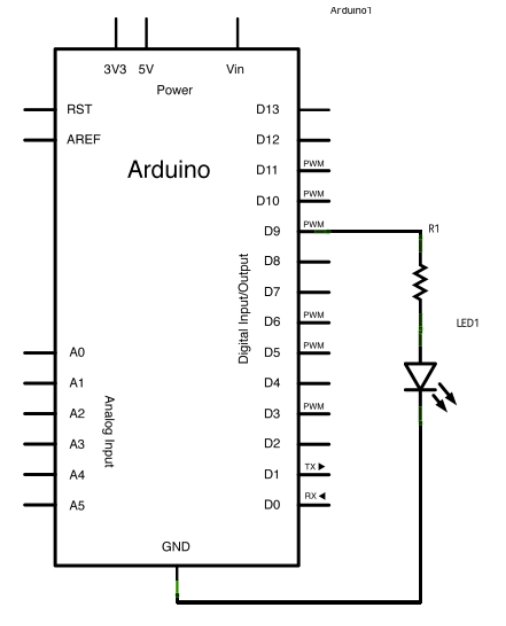
Circuit 1: Fade
Instructions for this circuit and its code: https://www.arduino.cc/en/Tutorial/Fade
Circuit 2: Fade
Instructions for this circuit and its code: https://www.arduino.cc/en/Tutorial/Fade
Circuit 3: Speed game
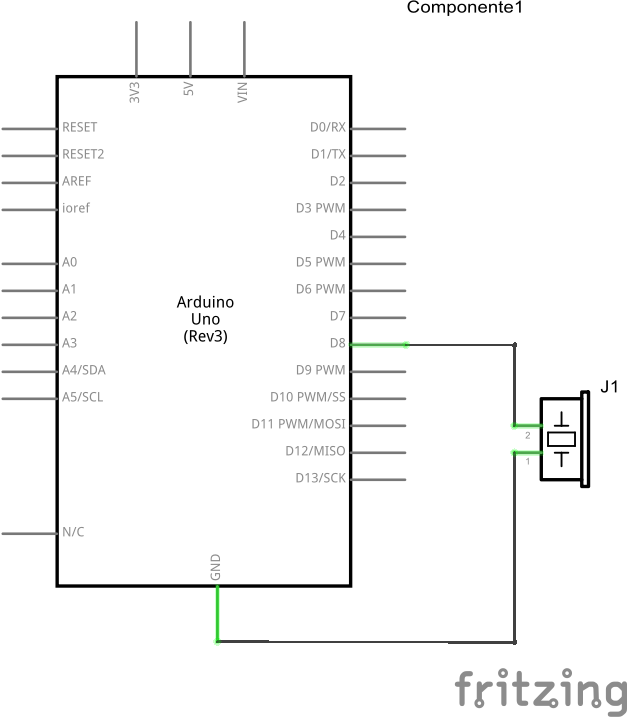
Instructions for this circuit and its code: https://www.tinkercad.com/things/6MzvN5rlZlr-race-the-led-spring19.
This is the first circuit diagram I’ve made.
Circuit 4: Four-player speed game
We adapted the code from circuit three to include two more players by creating variables for player 3 and player 4. We used another group’s third circuit and connected it to ours via the positive and negative terminals (so that electricity would also flow through it). We also added pins 5 and 6 for buttons 3 and 4, and pins 4 and 7 for LEDs 3 and 4.
Code:
int buzzerPin = 8; int button1 = 11; int button2 = 10; int button3 = 5; int button4 = 6;
int led1 = 3; int led2 = 2; int led3 = 4; int led4 = 7;
int goal = 10;
//button //player 1 int buttonState1 = LOW; int previousState1 = LOW;
//player 2 int buttonState2 = LOW; int previousState2 = LOW;
//player 3 int buttonState3 = LOW; int previousState3 = LOW;
//player 4 int buttonState4 = LOW; int previousState4 = LOW;
int counter1 = 0; int counter2 = 0; int counter3 = 0; int counter4 = 0;
// the follow variables are long’s because the time, measured in miliseconds, // will quickly become a bigger number than can be stored in an int. long time = 0; // the last time the output pin was toggled long debounce = 100; // the debounce time, increase if the output flickers
void setup() { // put your setup code here, to run once: Serial.begin(9600); pinMode(buzzerPin, OUTPUT); pinMode(button1, INPUT); pinMode(button2, INPUT); pinMode(led1, OUTPUT); pinMode(led2, OUTPUT); Serial.println(“******************* RACE THE LED *******************”); delay(1000); Serial.println(“READY”); delay(1000); Serial.println(“SET”); delay(1500); Serial.println(“GO!!!!!!!!!!!!!!!!”);
}
void loop() { // put your main code here, to run repeatedly: buttonState1 = digitalRead(button1); buttonState2 = digitalRead(button2); buttonState3 = digitalRead(button3); buttonState4 = digitalRead(button4);
//Serial.println(buttonState1);
//this checks the times player 01 has pressed the button if (counter1 < goal && winner2 == false && winner3 == false && winner4 == false) { if (buttonState1 != previousState1 && millis() – time > debounce) { if (buttonState1 == HIGH) { counter1++; Serial.print(“player 01: “); Serial.println(counter1); time = millis(); } } previousState1 = buttonState1; if (counter1 == goal && winner2 == false && winner3 == false && winner4 == false) { winner1 = true; digitalWrite(led1, HIGH); Serial.println(“PLAYER 01 WINS”); playMelody(); } }
//this checks the times player 02 has pressed the button
void playFreq(double freqHz, int durationMs) { //Calculate the period in microseconds int periodMicro = int((1 / freqHz) * 1000000); int halfPeriod = periodMicro / 2;
//store start time int startTime = millis();
//(millis() – startTime) is elapsed play time while ((millis() – startTime) < durationMs) { digitalWrite(buzzerPin, HIGH); delayMicroseconds(halfPeriod); digitalWrite(buzzerPin, LOW); delayMicroseconds(halfPeriod); } }
Reflect how you use technology in your daily life and on the circuits you just built. Use the text Physical Computing and your own observations to define interaction.
When I use technology, it reacts to me. It is an interactive experience- I push a button or tap a screen and I am given new information to work with. My environment might change (as it does when I press the buttons on an AC remote or a massage chair) or I may get more options to explore and choose from (like I do when I use apps and browsers).
This class felt like a first step in demystifying this interactive process. I got to experience first-hand how it all comes down to the flow of electricity. Although I still don’t fully understand how the technology I use in my daily life works, I no longer see it as a undecryptable blackbox. I am curious to learn more about it.
Question 2:
Why did we use the 10K resistor with the push button?
We used a 10K resistor with the push button because it didn’t need 5V. Had we not put the resistor, the component could have over-heated and malfunctioned. A 10K resistor allows us to provide the ideal voltage for it to work.
Question 3:
If you have 100,000 LEDs of any brightness and color at your disposal, what would you make and where would you put it?
A really bright Christmas tree was my first thought. But no one really wants that/needs that. I would make an art installation that reacts to sound. Basically just a portable light show that would make any musical performance into a concert.
This activity served as an introduction to soldering and basic circuits.
I’ve copied the objectives and the materials from the original assignment below for quick reference.
Objectives:
Learn how to read a circuit diagram
Complete the circuits
Learn to Solder
Create a button comprised of button and soldered wires
Materials:
1 * Breadboard
1 * LM7805 Voltage Regulator
1 * Buzzer
1 * Push-Button Switch
1 * Arcade Button
1 * 220 ohm Resistor
1 * 10K ohm Resistor
1 * 10K ohm Variable Resistor (Potentiometer)
1 * LED
1 * 100 nF (0.1uF) Capacitor
1 * 12 volt power supply
1 * Barrel Jack
1 * Multimeter
Several Jumper Cables (Hook-up Wires)
Process
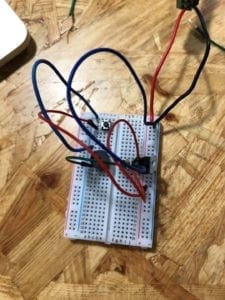
Task 1
We completed the first circuit. At first, we were unsure of how to include the capacitor. Once successfully closed the circuit and created the intended doorbell, we spent some time eliminating the extra wires to make it more effective and less messy.
Task 2
We learned how to solder, by soldering wires to an arcade button. However we never connected our button to the circuit.
Question 1:
After reading The Art of Interactive Design, in what way do you think that the circuits you built today include interactivity? Please explain your answer.
The circuit we built is interactive because it reacts to an action: when the user clicks the button, the speaker makes a sound. It is a very simple interaction, but one none-the-less.
Question 2:
How can Interaction Design and Physical Computing be used to create Interactive Art? You can reference Zack Lieberman’s video or any other artist that you know .
Interaction Design and Physical Computing can help maximize how we interact with the world, providing more tools by which we can explore and create. Before, humans reacted to art. With sensors, now our art can react to us too.
Reflection
We didn’t fully complete the tasks. Since circuitry and soldering are new to us, it took longer than we expected to complete each subtask. However, we considered this experience very fruitful, as it increased our confidence in the matter and made us hungry to explore it further.