Conception and Design
When first presented with the final assignment, we decided to go down the game route. We also wanted to create something that was portable and easy to use, something bust students could easily use when they needed a gaming break. The idea a small version Dance Dance Revolution came from my partner, we both thought it would be a fun game to draw inspiration and we both liked the game’s concept as well. Thus the idea for a small and portable version of the ‘stage’ that was a signature piece of DDR. We knew we wanted to make the stage the only thing a player would need to control the game, so we included the buttons in our design for the board. We also wanted to create a visually stimulating experience not just on the screen, but also on the board itself. So we wanted to have a bright color palette and use lights to make it give it a little extra pizazz. We also looked at online videos of others who had created dance boards with similar ideas to ours, we found that capacitive sensors were the most popular option for the type of controller we wanted to . build. For what would appear on the screen, we wanted something that would be enticing to players and be easy to navigate. To do that, we wanted to have some sort of start and end menu that would provide a pause for players when they weren’t playing. This would also have a leader board where users could see and compare scores, a staple of many arcade games. We could’ve just opted for a game that doesn’t even need the stage, in actuality the game totally could work without a stage. But we thought that would loose the nostalgic feeling we were trying to capture by having the stage in the first place. The stage carries more meaning than just a controller and we really wanted to enhance that.
Fabrication and Production
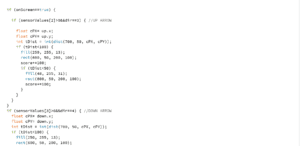
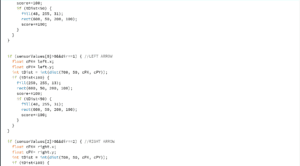
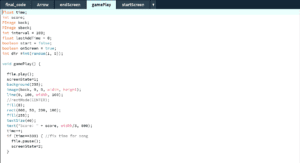
Before I started coding right away, we outlined what we wanted the display of the game to do. We distilled it down to three main components that were the essentials for the game: looping the arrows movement, scoring, and timing. These were what had to be done before we worried about add ons like a leaderboard and smaller sound effects when points were received. During user testing, we got a lot of feedback pertaining to the aesthetics of the game. These were implemented in the neon-y theme we decided on as well as the speed of the arrow itself. Many people said it was too slow. The scoring and timing elements weren’t too difficult to figure out. Scoring was based on tracking a point on the arrow and using the dist() to check how close it was to another point at the top of the screen. The timing was also a lot easier than i had anticipated, i just modified the rate at which the y values used to draw the arrow were until it matched the music. But getting the arrow to do this:
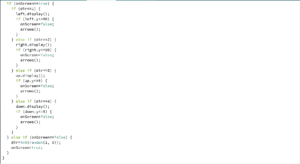
was a long process of trial and error that proved to be the most difficult part of the code. Either the arrows would randomly change directions every frame, not loop, or not move at all. After asking several fellows and trying different approaches, I found that this set of code worked just how i wanted it to. The biggest thing I think was the problem in figuring out how to do this part was having an ‘original’ arrow for each direction that was the start for an iteration of the loop if that direction was chosen. After getting this piece to work, most of the other coding related tasks were able to be finished. We were able to modify the final code accordingly so that the timing and scoring aspects worked with the arrows. Unfortunately due to the amount of time this ‘simple’ part took to figure out, we were unable to fully finish the leaderboard aspect of the game. We also were unable to add multiple songs or levels because just one song proved to be much harder than we had anticipated.
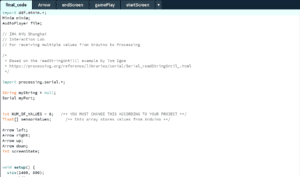
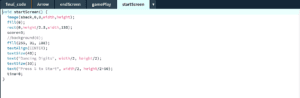
Final Code Processing:
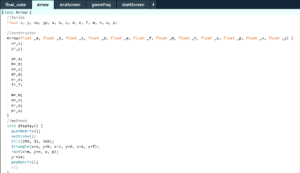
![]()
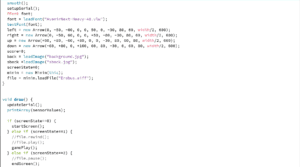
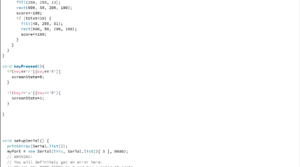
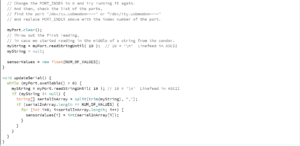
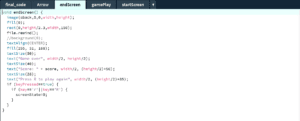
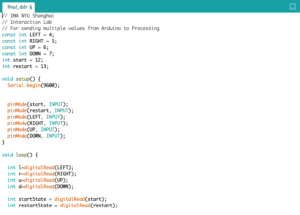
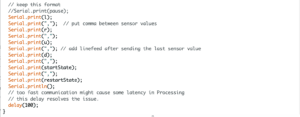
Arduino Code:
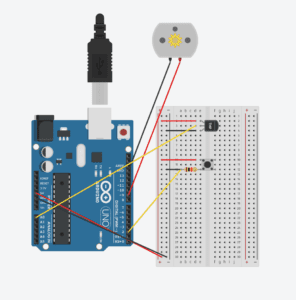
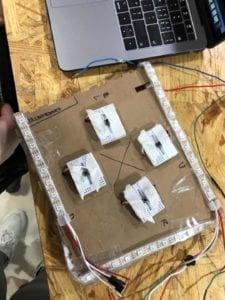
For the stage, we had some problems getting the laser cutting just right for the top piece. We ended up having to cut three times , and even then it still wasn’t perfect but we had to move due to time constraints. For the buttons, we first had tried using capacitive sensors. But with how we had designed the top piece, the sensors weren’t able to pick up a hit very accurately. So we changed the sensors to small buttons that worked better at communicating to processing that an arrow was being pressed. Our plans for the lights were unfortunately never fully finished because we ran into a difficult decision close to presentations. Our two buttons on the board had begun switching on and off at random intervals, so we had to decide to focus on fixing those or the lights. We chose the button route, but even after trying to fix them they refused to work for final presentations. But in the end, the key element of the board, the arrows, worked well and were able to provide the players with the experience we were shooting for.
Conclusions
Overall, I was very satisfied with what my partner and I created. Even though the final result of out project wasn’t completely perfect, I think we were able to accomplish the goals we wanted to accomplish with this project. It is portable, easy-ish to play, and from what users said, fun to play. Apart from the small set backs we faced near the end of the project, I think we were able to create a smaller scale version of DDR that captures the elements of the original game we set out to imitate in Dancing Digits. I think being able to take a game on the go is an ever increasing need for gamers, hence the popularity of the Nintendo switch. I think Dancing Digits is able to apply portability of the switch to a game that is pretty unmovable quite well, even if it looses some of the qualities attributed to DDR. However, our goal was not create a tiny DDR rather something that draws inspiration from it. Dancing Digits partially aligns to my definition of interaction, the user input and the reaction in the game is the element that aligns. I think if we were to add an option for another player or making the game harder if the user is doing really well would better align with my own definition. If I were to make this project again, I would definitely add some element that would make the game harder depending on how well the user is playing. I think that would give the user incentive to continue playing as well as challenge those already mastering the basic level. This version of Dancing Digits I believe was able to accomplish the basic goals we set out to accomplish, even if some of the elements we wanted to include failed. I think the portability element of this project is the most important aspect of the project. Being able to connect to anywhere with anyone is what makes games more fun and versatile.