Recitation 5 Documentation

Documentation:

Original drawing

Tilted forms with color ink washes superimposed.

December 1987

Color ink wash

Courtesy of the Estate of Sol LeWitt

First Installation
Royal Scottish Academy, Edinburgh

First Drawn By
David Higginbotham, Linda Taylor, Jo Watanabe

MASS MoCA Building 7
Second Floor

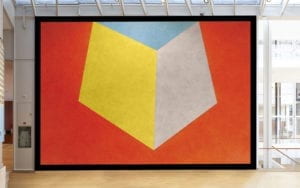
I chose this image of Sol Lewitt’s Wall Drawing 552D because the sheer size of his drawing seemed very impressive when viewing the painting as a whole. The colors of the drawing complement each other very well, and provide stark contrast against the background of the wall drawing. Sol Lewitt describes these wall drawings as not quite a cube, yet still inspired by the geometric formations of one. They also adhere to the idea of flatness not seen in a 3D figure like a cube, which provides an interesting interpretation of what a cube could look like. 

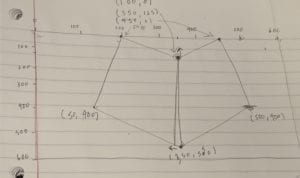
I wanted to draw in Processing an image that would emulate the drawing, mirroring the different shapes and colors that compose Lewitt’s wall drawing. I first sketched out the drawing on paper, first creating a grid for the drawing, then marking down the coordinates of each figure. Using both triangles and quadrilaterals, I ensured that each point was aligned with each other, so as to not disturb the linear integrity of the piece. After creating the figures in Processing, I fine-tuned the points in order to better match the overall picture. My final creation is linked to the motif in that its colors and shapes are quite similar, though there are subtle nuances in the overall structure of the drawing, such as the size of the shapes relative to the background. I believe Processing was a good means of realizing my design, as the shapes were linear and not too abstract, making it easier to draw in Processing. 

Sketch of the Drawing
Final Rendering of the Drawing
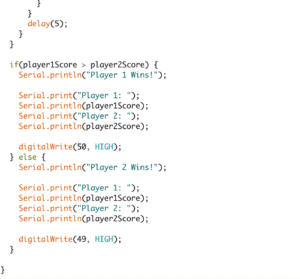
Code of the Drawing

Whack-A-Mole – Lydia Zhao – Eric Parren

CONCEPTION AND DESIGN

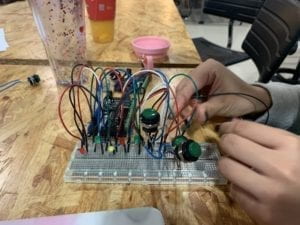
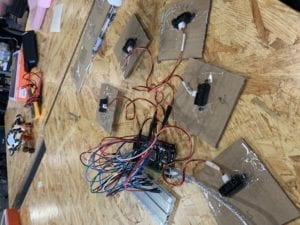
The way our users interact with our project informed the design decisions by making it a two-player game instead of a one-player game, meaning there would be double of the hardware for the project. We also needed to make sure the users could easily play the game, so instead of using sensors to play the game, we switched to buttons and mallets to provide a more intuitive way of participating in our game. We used the laser cutter to create the main form of the box, as opposed to the 3D printing device that initially gave us some troubles with the actual formation of the box. We used the biggest gaming buttons eventually, but before we prototyped with both infrared sensors and smaller gaming buttons. We found the smaller buttons hard to press for the users, and the sensors too sensitive towards any movement caused by the player. The biggest gaming buttons proved most useful for our project, as users could both easily hit it with their hands to play the game, or use the provided mallets to hit the buttons. 

The initial prototype with smaller game buttons

FABRICATION AND PRODUCTION

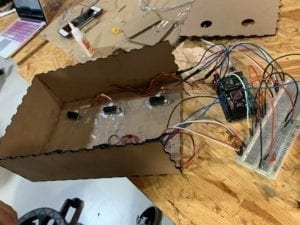
During the User Testing Session, we received many effective ideas in improving the overall design of our project. In terms of failures, our infrared sensors, used to detect the user’s input and change to the next light, were sensitive to even the slightest movement of the hand. By doing so, this made it easy for players to easily manipulate the game by waving their hand over the sensors, so that they would therefore “win” the game. In terms of successes, the players could easily play the game as each light corresponded to the correct sensor, making it a competitive update of the traditional Whack-A-Mole. The user testing process caused us to make significant changes in our prototype, taking it from mostly composed of cardboard to produce a more sophisticated box for our game. We also made it into a two-player game with buttons on both sides of the interface, allowing for players to participate in each game simultaneously. We added a “stop” time for the game, as compared to before when the game could theoretically continue infinitely. They were effective in that it made the game less likely for players to manipulate the game and “activate” all sensors every time. Instead, they had to physically smash the buttons in correspondence to their LED lights. We justified the various production choices we made for the project by seeing how they fared in comparison to before, or how the users were interacting with them. If they showed improvement in efficacy, we decided it would be more efficient to implement them in our game design. 

The initial cardboard prototype
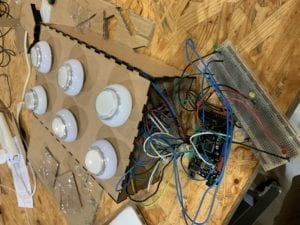
Laser cut prototype of the game
Integrated button design of the game
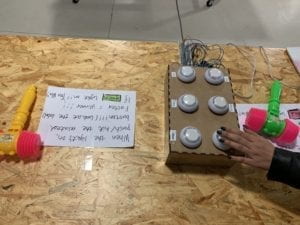
Final design with instructions

CONCLUSIONS

The goal of our project was to create a fun, interactive game that allowed users to whack a button similar to the traditional arcade game, Whack-A-Mole. Our project results closely align with my definition of interaction, as it requires both an input from the user and an output from the game in order to fully function. The audience interacted with our project more competitive than expected, as both players typically had a desire to win, and therefore wanted to whack the buttons powerfully. If we were to improve the project in the future, we would start by hiding the wires of the physical project to improve the physical interface. We would also place the LEDs of the corresponding button directly in front of the button, as to avoid the user from looking between the LED light and the button itself. We took away that by learning from our failures, we can create an even better of our project design than if the project was “perfect” from the start. Failures are key to any project, as it locates any mishaps and gives the creator a chance to fix these mistakes, and improve further upon the development of the project. 

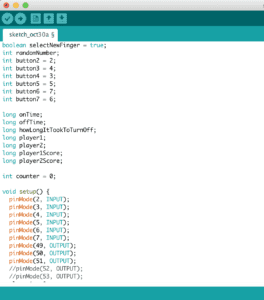
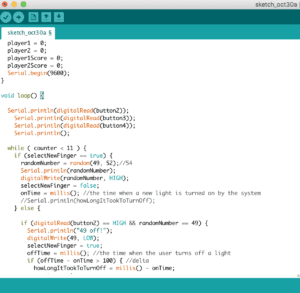
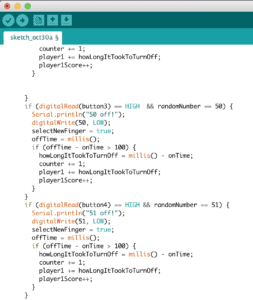
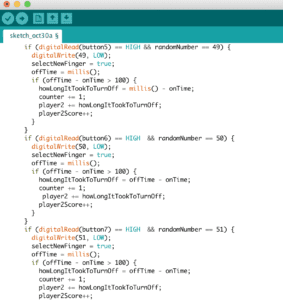
The code was written in a way to ensure a randomization of the lights, and therefore the buttons. It could also control the amount of times the lights would go off before determining the winner. There were 3 buttons on each side of the board, making it 6 buttons in total for our game. 

      This image requires alt text, but the alt text is currently blank. Either add alt text or mark the image as decorative.

Recitation 4: Drawing Machines

Materials:

For Steps 1 and 2

1 * 42STH33-0404AC stepper motor
1 * L293D ic chip
1 * power jack
1 * 12 VDC power supply
1 * Arduino kit and its contents

For Step 3

2 * Laser-cut short arms
2 * Laser-cut long arms
1* Laser-cut motor holder
2 * 3D printed motor coupling
5 * Paper Fasteners
1 * Pen that fits the laser-cut mechanisms
Paper

Step 1: Build the circuit
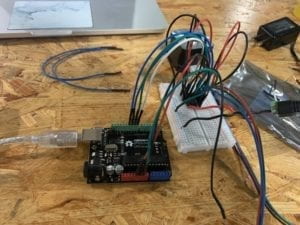
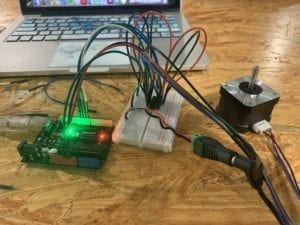
Building the general circuit was fairly simple, but sorting the wires by ground and power was a more difficult task to complete. At first, I was mixing up the different colors of the wires which made going in and fixing the incorrect wires harder to fix. I also made sure to connect all the wires going into ground into the ground on the breadboard first, then into the Arduino itself. Additionally, I did the same for the power on 5V, to simplify the flow of the circuit more.

Step 2: Control rotation with a potentiometer
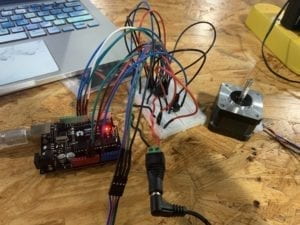
Adding the potentiometer was a bit more difficult, as we had to ensure that the 3 parts of the potentiometer were going to the correct part on the circuit or breadboard. I had problems with the wires going into the stepper motor being too loose, which would result in the motor sometimes barely moving and rotating at all. 

Step 3: Build a Drawing Machine!
IMG_7197.TRIM

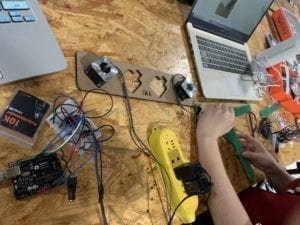
To build the drawing machine, we first had to construct the parts that held each respective motor and attach them to form a mechanical arm that would become the drawing machine. One problem we encountered was that after we finished building the machines, my motor was drawing even without me controlling it, similar to  Douglas Irving Repetto’s Giant Painting Machine that had erratic changes in its drawing patterns. Our finished drawing was very random, with constant changes in the thickness of the stroke or speed of the motor. 

Question 1: What kind of machines would you be interested in building? Add a reflection about the use of actuators, the digital manipulation of art, and the creative process to your blog post.

I would be interested in building some sort of machine to deal with crushing soda cans or bottles. When throwing out the trash, crushing cans or bottles would make room for more space in the trash can. Servo motors could be used in a similar fashion to metal forming machines, in which servo motors use their precise motion control to press or bend metal fabrication. The digital manipulation of art could be used to express the amount of space saved by crushing bottles or cans. By using a precise control to press down the metal, it would achieve a greater place in the process of recycling and throwing out the trash.

Question 2: Choose an art installation mentioned in the reading ART + Science NOW, Stephen Wilson (Kinetics chapter). Post your thoughts about it and make a comparison with the work you did during this recitation. How do you think that the artist selected those specific actuators for his project?

One art installation mentioned in the reading is Douglas Irving Repetto’s Giant Painting Machine, in which electromechanical devices built of scrap created wall-sized paintings on transparent Mylar. I like the fact that they incorporated the wobbly suspension and erratic changes of the motor into the drawing, making it incredibly unique and different with other calculated paintings. In comparison to the work we did during our recitation, our drawing motors were not too erratic in motion, instead we were able to calculate how they drew through the use of a potentiometer. I believe the artist selected those specific actuators in order to create a more randomized drawing, with electronics that  constantly change the speed and direction of the device.
FitBox – Lydia Zhao – Eric Parren

“Interaction” to me means how two participants work and influence each other, or how one participant responds to another participant’s input. The Art of Interactive Design most clearly defines interaction as “a cyclic process in which two actors alternately listen, think, and speak,” through comparing the act of interaction similar to a conversation (5). More precisely, however, interaction is typically composed of three steps: input, output, and processing, as outlined in Introduction to Physical Computing (Igoe & O’Sullivan, 20). 

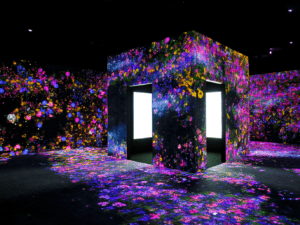
One example of an interactive project is the teamLab’s Infinity of Flowers, where viewers can touch the artwork and see the flowers dance. When one participant is doing an action, the artwork is responding to the participant’s input. One example of a non-interactive project would be the ARC poster board, where fellows pin their names to their respective rooms. One participant is working to change the board, but the board is not actively responding and interacting with their actions. TeamLab Borderless’ exhibition more closely aligns with the definition of interaction as both participants are interacting with each other, instead of it being a one-sided interchange. 

TeamLab Borderless

The most important component of defining interactivity is how there are two people involved, who collectively react with each other. The visitors interacting with the exhibition portrays “a cyclic process in which there are two actors that alternately” interact with one another, as defined by Chris Crawford in The Art of Interactive Design (5).

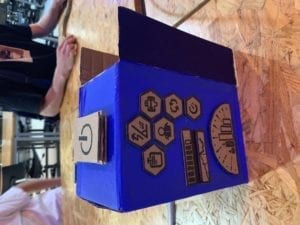
My group proposed to design FitBox, an interactive fitness partner device that is capable of correcting improper form or posture when working out through the use of a modern hologram of a fitness trainer. FitBox is additionally capable of being the emotional support for you to continue the workout, as a way of encouraging you to finish your exercise routine. FitBox is targeted towards people that do not have the means for an actual physical trainer, nor the time to go to the gym to workout. They are instead able to workout from the comfort of their home, or whatever environment they feel most comfortable working in. FitBox interacts with the person working out to improve and maximize upon their exercise experience; if they were to continue working out incorrectly, it would undeniably injure their body in the long run. Users tap the button to power the machine, then interact with FitBox using voice commands to select the function they would like to utilize. Then, during the routine, the device interacts with the person working out, scanning and analyzing points of interest along the body to determine if they are working out correctly. For the moral support feature of FitBox, the device interacts with the person to boost their morale during their performance. The two participants, FitBox and the one performing the physical exercise, are working together and influencing each other, to enhance the exercise performance. The FitBox responds to the user’s input by scanning their movements, and the user responds to FitBox’s input by correcting their form and matching themselves to the hologram.

FitBox Design                   

Recitation 3 Documentation

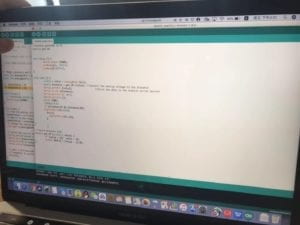
For the third recitation, we were tasked with building a circuit that integrated a infrared distance sensor. The sensor didn’t work at first, so we spent quite some time maneuvering around the wires to get the circuit to work. But finally after rewriting the code a couple times, we got the circuit to run smoothly.

9

Question 1:


We intended to assemble the infrared distance sensor in the recitation exercise. If we were to use the infrared distance sensor for pragmatic purposes, we would probably use it in a setting where the distance between two objects is very crucial to know in some instance, for example a car that uses a backup camera. It could use the infrared distance sensor to know when the car is approaching something behind it. Anyone that needs help in parking or backing out could use the device in order to ensure they are within a safe distance of object when backing up or parking. It could be used in conjunction with the camera itself so it can detect when objects are at a close distance from the rear of the car.

Question 2:

A recipe consists of set of instructions in order to prepare a particular dish, including a specific set of ingredients, and code also requires specific instructions in order to successfully work. 

Question 3: 

The computer has influenced our daily human behaviors almost entirely, from how we commute to how we interact with one another. We can call a car using our phones, and the car will use a GPS to take us to our location. We interact with others across the globes instantly from our phones, or order food directly to our doorstep using our phones. The computer has tremendously made our lives more convenient, making research and information accessible to our fingertips at any moment.