Recitation 5: Processing Basics – Lillie Yao

For this project, I chose “A II (Construction A II) by LászlĂł Moholy-Nagy” I found his artwork in one of the links provided on our recitation cite. I chose this artwork because I liked how the shapes overlapped each other and the transparency changed within in each shape. I also wanted to challenge myself into re-creating this in Processing because I have never done something like this. 

Here is the original piece:

László Moholy-Nagy, A II (Construction A II), 1924. Oil and graphite on canvas, 45 5/8 x 53 5/8 inches (115.9 x 136.2 cm)

Here is my creation on Processing:

I found that the hardest part for me to grasp was where exactly to graph each point and where the right place to put a certain shape was. I also found it very tedious to move a shape up, down, left, or right.

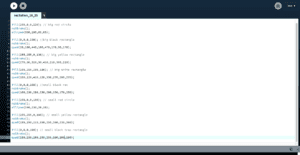
Here is my code:

Overall, I found drawing and coding in Processing really fun and I was able to realize a lot of little details in my code and drawing. It was also really cool to me that I could recreate a piece of artwork! 

Recitation 4: Drawing Machines – Lillie Yao

Introduction:

During this recitation, I used the Arduino, breadboard, and motor to connect and make a drawing device. This machine connected to two motors which were controlled by the user, to move the pen and make a drawing. During this project, I encountered many obstacles with the motor and h-bridge and which cables to connect to which part of the breadboard. In the end, I figured it out and got the machine to finally work and draw!

Materials:

For Steps 1 and 2

1 * 42STH33-0404AC stepper motor
1 * L293D ic chip
1 * power jack
1 * 12 VDC power supply
1 * Arduino kit and its contents

For Step 3

2 * Laser-cut short arms
2 * Laser-cut long arms
1* Laser-cut motor holder
2 * 3D printed motor coupling
5 * Paper Fasteners
1 * Pen that fits the laser-cut mechanisms
Paper

Step 1: Build the Circuit

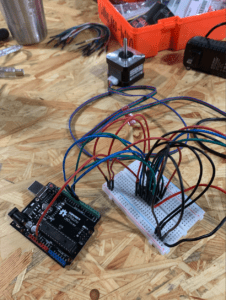
This step was the most challenging for me because it was really confusing as to which cable to connect to which hole in the Arduino and breadboard. I learned that if you make just one Ground and one Positive, it will be a lot more organized when you look at the cables and a lot less confusing.
Step 2: Control Rotation with a Potentiometer

During this step, we had to connect a potentiometer to our already existing motor, which doesn’t sound like a hard thing to do. But for some reason, mine would not work with the potentiometer. I mapped and coded everything in Arduino correctly but it still wouldn’t work. In the end, a fellow came and solved it with just plugging it in…

Step 3: Build a Drawing Machine!

For this step, we just had to put two motors together and connect it to the machine that was put together with push pins. This was definitely the easiest step.

Question 1:

I would be interested in building some type of automatic device created in the lab but have it more geared towards being controlled by an electronic device; kind of like a 3D printer.

Question 2:

A project that I thought was very interesting was “The Table” by Raffaello D’Andrea,  Max Dean and Matt Donavan. I thought this project was cool because the table is trying to form a relationship with a human in the room and moving towards it. But as soon as the person leaves, the table stops moving. I think its really interesting to have a table try and form a relationship with a human being. This project didn’t really have a lot to do with our recitation project because in our project, we were in control of the motor with a potentiometer, but this project was self controlled by the actions of the people in the room.


Group Project: Katy Perry – Lillie Yao

To me, interaction is a continuous conversation between two or more corresponding elements that takes energy to and communication.

Within the two projects that my group and I researched, what triggered my understanding of interaction the most was the project by Aaron Sherwood called “Firewall.” Within this project, Sherwood created an “interactive” design where an individual must touch the backdrop in order for it to interact with them. The project would then start playing its own music according to the motions and movements it felt. This project was the perfect definition of interaction because it showed a continuous corresponding action of input and output when an individual communicates with technology. At the same time, the project itself would still run on its own, not in need of another individual to interact with it.

The other project we researched was just an Arduino based program called “Click Canvas.” This was basically just a variety of lights that would turn on once someone clicked or tapped it. This did not suit my definition of interaction because this project would just be sitting there doing nothing unless someone decided to play with it. Whereas “Firewall” would still run by itself, not in need of a person, if it wanted to.

My group and I created the Body Sensor which would sense a person’s body temperature and adjust the AC/Heat in the house. This fit with our definition because it would just be an ongoing circle of events whenever a person’s body temperature is changing, so would the house AC/Heat. The body sensor would be able to fully operate on its own as well, not needing the person to control what it is doing. This fits with our definition of interaction because whether or not the person is giving an input, the sensor will provide an output.

Recitation 3: Sensors – Lillie Yao

Materials:

  • Ultrasonic Ranger
  • Breadboard
  • Jumper Wires
  • USB Cable

Introduction:

In this recitation, my partner and I had to choose a sensor to code and link up to Arduino with. We chose the Ultrasonic Ranger (Ultrasonic Sensor OR  HC-SR04) This sensor is supposed to detect motion from 2cm to about 3m in length.  During this activity, we linked the Ultrasonic Ranger to Arduino through the breadboard. In this video, you can see that we got the sensor to work and I was walking back and forth to test out the distance/motion

Question 1:

In this activity, my partner and I intended to assemble a motion sensor. If this were to be used for pragmatic purposes, it could be used for security purposes. For example, if there is a precious piece of artwork, the government could use motion sensors to secure that if anyone tried to steal it, motion sensors could detect any movement around it and sound an alarm.

Question 2:

I think that code is often referred to as a recipe or tutorial because it breaks down what one should to and/or how to do it. Code is easily understood when you are trying to figure something out and is the basic foundation, just like a recipe or tutorial, to help guide someone to do something.

Question 3:

I think computers influences us in many different ways. It can influence us to easily communicate with one another in a fast and efficient way. At the same time, it can cause us to become more lazy since we have technology to do things for us in a manner of time.

Recitation 2: Arduino Basics – Lillie Yao

Introduction:

For this week’s recitation, I built 3 different types of circuits. The 3 circuits that I built were called Fade, toneMelody, and the Speed game. All three circuits operated differently.  By doing this recitation, I learned how to program a button game, turn on a LED light, and play music with an Arduino.

Materials:

1 * Arduino Uno
1 * USB A to B cable
1 * breadboard
1 * buzzer
2 * LEDs
2 * 220 ohm resistors
2 * 10K ohm resistors
2 * pushbuttons
A handful of jumper cables

2 * arcade buttons
1 * Multimeter (optional)

Circuit 1: Fade

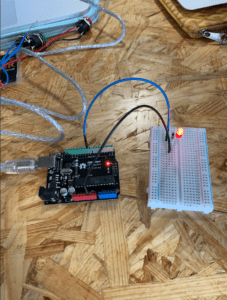
In this activity, I connected the Arduino to the breadboard to power the LED light on the breadboard. This activity was very simple to complete and code. Although I did have some problems coding with Arduino, they were easily resolved after reading through the code.

Circuit 2: toneMelody

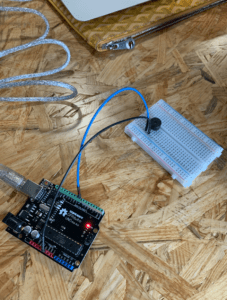
For this activity, we learned how to use Arduino and a speaker to play a certain series of sounds/tunes. This activity took me quite a while because I was confused as to which jumper cable should be connected to which sides and also connecting it to Arduino as well. Coding it was difficult because at first, it didn’t work and then we tried to incorporate the “pitches.h” file and we were also having trouble figuring that out, but we got it to work in the end!

Circuit 3: Speed Game

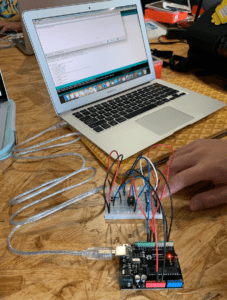
In this activity, I had to connect 2 LED lights that corresponded with the two buttons. The game was whichever player pressed the button 10 times, they would win and whoever won would have their light start blinking and the speaker would also go off and make a sound. Some difficulties I ran into was that the LED lights wouldn’t flash if one player won. Also, one of our buttons wouldn’t work, so the same one player would win each game. In the end, we just switched some wires and it worked.

Question 1:

The technology I use in my daily life does reflect the circuits that I made during this recitation. The first activity reminded me of the lights in my bedroom that I turn on and off. The second activity reminded me of a lullaby box that makes music when you play it. The third activity reminds me of just a normal two-player arcade game.

Question 2:

I’m not sure why we need to use a 10k resistor but I’ve always used it.

Question 3:

If I had 100,000 LEDs of any color, I would decorate my room with a bunch of lights that would have the ability to change colors and flicker whenever I want it to. I would just line up a bunch of lights alongside the wall or make a photo out of the lights on my wall into some sort of design.