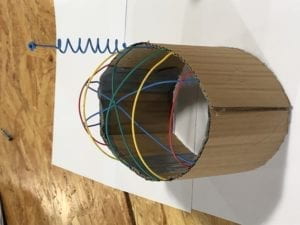
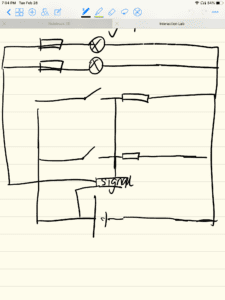
Recitation 4: Drawing Machine by Sheldon Chen

During the recitation last week, we got to explore the stepper motor, with a circuitry that couldn’t be more complex. The ultimate goal of the recitation was to get two of these stepper motors working collaboratively to produce the art of the machine.

Without doubt, in step 1, the most complicated part of was assembling the circuitry. It took me almost ten minutes to connect all the wires to the circuitry, and double check whether I’ve made the right connection. Luckily, everything worked perfectly, and nothing burned after powering up the circuitry.

Step 2 involves controlling the angle of the stepper motor with a potentiometer. To make the stepper motor work properly, I have to change the number in the code, from 100 to 200. A map function is also needed to convert the number between the analog read and write. Thanks to t

he learning assistant, I was able to correct my code and prevent the Arduino from short-circuiting and burning. 

Step 3 was the most interesting part of all. My partner and I have to use two stepper motors to control one marker, while remain the individuality of each stepper motor. What we encountered during the drawing process was the pen not being steadily locked on the external plastic and went on scratch on the paper.

In conclusion, my biggest take-away from last week’s recitation was how we should double check our code. Instead of checking the code on one’s own, it would be much better and more efficient if one could have his or her partner to cross-check the code. Otherwise one could hardly find the bugs or syntax errors in the code.

Question 1:

The machine I would be thrilled to make would be switch controller allowing me to turn on and off the light remotely. It is inspired from my personal experience of having to get off the bed to turn off the light after using phone before going to sleep. Things are especially tricky when living on the second floor. The actuators involve several servos, probably an infrared module to remotely receive the signal from a controller. The digital implementation of art would be using the servo and a plastic piece to create a rockerarm. It could turn on and off the light by having the arm on it pressing the button.

Question 2:

The art installation I looked into was the Fish, Plant, Rack. I was most attracted by its concept of using the fish’s neural activity to control the living condition of the plant. In this way, the fish’s neural activity could be visualized upon the living condition of another creature. Maybe this device is predicting the future of us human, where we could just use our thoughts to control everything. The biggest difference between this project and what we did during the recitation is the way the output is presented. In the recitation, the output is simply drawn on a piece of paper. In the fish project, however, the output can only be reflected through the livelihood of the other creature. The actuators might involve several electrical pulse receivers, several switches used for controlling throwing in of the nutrients.

Recitation 4: Group Project

Definition of Interaction

My definition of interaction is pretty strict. Firstly, just as the What Exactly is Interactivity has pointed out, interaction must consist of input, processing and output, where the input and the output should be visible, hearable, or touchable (, 5). And the output should change in accordance with the input. Such a process should also leave an impression on the person with whom it interacted with mentally, such as delight, sorrow, surprise, or even a simple “wow”.

Projects

The first project I’ve looked at is the Unsmart E-Pet, which I think is a very good interactive project. By putting together several light sensors as well as the distance sensors, the motors inside the e-pet would make sure the pet’s head is facing you when your head is moving. The pet would also turn its head when you are trying to pet it. My understanding was shaped because despite the e-pet can only respond you in two ways, you can see specific input and output when you are interacting with the robot, and its action is always so vivid, alive and cute that it would make me laugh. That’s what makes me feel it’s interacting with me.

The second project I saw was this Interactive LED Strip. In this project, the LED would light up when the user places the hand on top of the strip. I don’t think it’s an interactive design. Though the input and output are pretty clear, the process doesn’t make me feel anything special or different. It resembles the example in the reading of What Exactly is Interactivity, where the bulb would light up when you open the door of the fridge, which would turn off when you close the door.

The group project

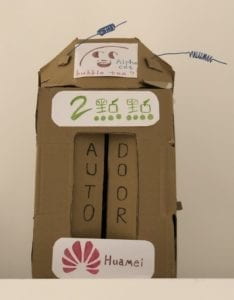
The group project I’ve been working on is an automated bubble tea machine. The helmet first read the brainwave from the user’s head, and send the brainwave into the AI, which would interpret one’s desire in the specific bubble tea. When the AI has sensed the user is feeling confused, it would automatically recommend the most popular one to you. After the user has confirmed what he wants, the bubble tea order would be sent directly to the bubble tea shop. And when the person has arrived at the tea shop, the AI would assist him in taking the bubble tea by sending neural recognition, through which the tea-door would automatically open, waiting for the user to take away.

The poster
The poster
The bubble tea machine and its AI Alpha Cat
The hat
The hat

The project we designed was derived from my understanding of interaction, where I think the interaction is valid if it could stir up one’s mind, either it would be sorrow or happy. In our project, when ordering bubble tea, the user would be so surprised and happy at how well the machine knows him or her mind.

What’s more, it also related to my strict idea of input and output. We shouldn’t be expecting a fully automatic civilization in the future, where there’s merely any input from human and the AI is deciding everything for us, all we have to do is to sit back and become fatter. In our project, we are still having the input from human, but it is understood by the machine through a more next-generation style, the brainwave. The output is also very clear in this project, which is presented by sending out the bubble tea order and finally receive the bubble tea.

Recitation 3: Sensors by Sheldon Chen

The recitation last commenced after the major event, the distribution of our individual Arduino kit. This time, we tried several new sensors, the moisture sensor, the infrared distance sensor, the vibration sensor, the ultrasonic sensor, as well as the joystick module. And we, of course, were expected to get these electronic components working.

The process of assembling these components was almost the same, which involves finding the electrical description of component online, assembling the circuit, copy paste the code from online resources. It could simply work after this. The videos of these circuits working are as follows.

However, there still were several small problems I had or mistakes I’ve made, either in coding or in the hardware. First of all, when reading the analog data from the joystick, what the serial monitor shows were nothing but a bunch of messy code. There was nothing wrong with the circuit or the code. It was later found by Eric that we forgot to switch to the correct baud rate in the serial monitor. What’s more, when using the code online to drive the ultrasonic sensor, it was using two pins to receive and send the ultrasonic signal, which was different what the documentation has said. And it turned out the theory is to take sending out ultrasonic signal as on, and receiving the signal as off, while using the built-in timer to calculate the time gap between sending out and receiving. And by multiplying the duration and the speed of sound divided by two, the result is the distance between the sensor and the barrier. Last but not least, when I was assembling the circuit where one can use the potentiometer to adjust the brightness of the LED, the brightness of the LED wasn’t able to change linearly while the potentiometer was turned. Thanks to Eric, he discovered that I forgot to convert the value of analog read, which ranges from 0 to 1023, to analog write, which ranges 0 to 255.

Apart from the potentiometer and LED combination mentioned above, I also attempted to assemble a circuit using the ambient light sensor and the LED, where the LED would light up if there isn’t too much light in the environment. I think there would be several conditions using the circuit. One circumstance would be installing a number of them on the way from the bedroom to the restroom and use them as the pilot lamp. Those LEDs would be turned on when there isn’t much light in the environment. When one needs to use the restroom at night, these LEDs would be showing this person the way while not turning on the light and wake others up. It would be especially useful for those living with others in the same room. The other circumstance would be installing the light at the end of the pen for kids. And the LED would light up once the environment is too dark for kids to read and write. It would reduce the chances of kids having myopia.

According to Eric Parren, computers are very dumb (Eric). Indeed, computers are only machines executing the instruction you send, not being able to freestyle at all. Thus, it would be appropriate to compare code as a tutorial or recipe. The computer would be following the tutorial provided by programmers and executing it step by step, in order to attain a certain goal or demonstrate something.

Living in the 21st century, it is not hard to spot the influence computers have on our behavior. In a word, with their assistance in dealing with repetitive work, we are becoming lazier and lazier. One great example would be the emergence of smart home gadgets, such as floor mopping machine. By implementing these machines, we would be freed from carrying out domestic work. But on the flip side, by having computers everywhere in our life handling the repetitive work would enable us to focus more on work that requires creativity. In the past, when using the film cameras to take photos, you must adjust all the parameters, such as aperture, shutter speed, focus, etc. And the procedures would be so annoying that one can hardly focus on composition. By implementing computers in cameras, all the repetitive work above would no longer be troubling us. The only thing photographers need to worry about is the composition.

Reference

  1. https://www.dfrobot.com/wiki/index.php/SHARP_GP2Y0A41SK0F_IR_ranger_sensor_(4-30cm)_SKU:SEN0143
  2. http://wiki.seeedstudio.com/Grove-Moisture_Sensor/
  3. https://www.arduino.cc/en/Tutorial/Knock
  4. https://cdn.sparkfun.com/datasheets/Sensors/Proximity/HCSR04.pdf
  5. https://www.brainy-bits.com/arduino-joystick-tutorial/
  6. https://randomnerdtutorials.com/complete-guide-for-ultrasonic-sensor-hc-sr04/
  7. https://www.brainy-bits.com/arduino-joystick-tutorial/

Recitation 2: Arduino Basic by Sheldon Chen

The recitation this week focuses on building fading lights, buzzers that sing awfully, and finally the button pressing game that has crazy wires. Specifically, I guess the goal of which is helping us learn the usage of different pins on the Arduino, building complicated circuitry, as well as building our confidence by letting us modify code in an unknown language.

The first circuit was about building a lighting up and fading loop for the LED. In this circuit, we use the PWM to simulate the change in voltage. And it didn’t take us too long before the circuit was built.

However, problems start to arise when we were dealing with the second circuit. In our several trials at the beginning, we weren’t able to have the buzzer singing. At first, we thought the buzzer was broken, but as soon as we switch the wires to the 3.3V, the buzzer was able to make noise again. Eventually, we found that we didn’t move the wire from pin 9 to pin 8, which is responsible for outputting in this circuit. And finally, the buzzer could sing awfully.

The third circuit was a speed game, where we are expected to use the circuit to see which player can hit the button for 10 times quicker. The faster player would have a LED lit up indicating his winning. And this is a very complicated circuit, with different components connected to different pins on the Arduino, different slots on the bread board, things were pretty messy. We could merely do nothing but to follow the schematic. It took us some time before having the circuit working, as we made several mistakes, such as the orientation of the button and the LED. Though we eventually made the circuit working, when the player one wins the match, the corresponding LED couldn’t light up. It wasn’t until the recitation ended that we discovered we used the wrong resistor on the route of the LED.

Schematic
Schematic drawn by myself

The final, giant four-player speed game was another mess. After the code was modified and the circuit being rebuilt, we could only dictate the player one and two’s activity, while the clicks of player three and four keep showing 0, and the code was alright after double-checking. Before we turn totally desperate, someone from other groups reached out to us. It turns out we have misconnected some of the pins while assembling the circuit. It started to work after we reassemble the whole circuit.

Answer to question 1:

In my daily life, the technology that I’m having most interaction with is my iPhone, iPad and mac. And in most cases, I interact with them using fingers and eyes. Sometimes, I could use my voice to command Siri on these devices. What’s more, the iPhone has a step counter. In other words, I’m not merely a monster with eyes and fingers only in the eye of my iPhone. A great example of interaction I can think of, is the Kinect by Microsoft. Instead of using a controller, you can use your body to interact with the console, which is much better than iPhone does. In the speed game, we could only have basic interaction happening, which is using our finger to press the button and our eyes to view the result. The interaction being discussed in the text is about having more parts of our body involving in inputting message to the computer, as well as more parts of our body capable of receiving the output from the computer. In such a way, the interaction between users and computers could be more diverse, and let users really focus on what to interact, instead of how to interact.

Answer to question 2:

If I can own 100,000 LEDs, I would like to put them in different arrays, and the arrays are so dense that the resolution is very high. In this way, I can use the LED array as a giant secondary monitor for my laptop. 

Documentation on soldering and electronics


The recitation last week mainly focuses on a number of basic electronic operations, soldering and configuring some circuits.

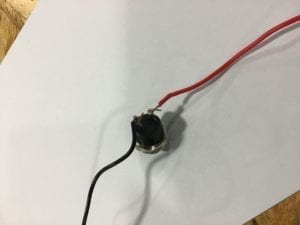
The process of soldering is pretty simple. After heating up the soldering iron, put the solder at the tip of the iron to let it melt, before putting the iron on the joint. After the spot is also heated up, apply solder onto somewhere near the joint and wait for it to melt. When the work is done, clean the tip. Though I have played around with it before, it seems my procedures were totally wrong. When I was soldering, I have been skipping the step on tinning the tip. What’s more, I have also been applying the solder right onto the joint or even the soldering tip. But finally, my partner and I have got the wires soldered securely soldered to the button. We even soldered to jump wires together.

The button soldered to wires
Two wires soldered together

Building the circuit was not complicated. Though when building the first circuit, we have encountered difficulties in reading the diagram, as the capacitator was a bit annoying. Therefore, we were confused about which socket should the wires and switches be connecting to. Another problem was the direction of the switches. We weren’t able to control the on and off of light using the switch, because we weren’t clear of the direction of the switch. After checking the information about the direction in the button, we made it work. But afterwards, we were able to get the first and second circuits working pretty quickly. The third circuit, however, involves more electrical components, so we were a little hesitated in wiring up. And my partner was not very familiar with the breadboard so that he almost connected two pins of an electronic component to the same row of the breadboard. After correcting his tiny mistake, we got our last circuit working as well. During the rest of the time, we used the potentiometer to make the tone of the speaker change while turning the potentiometer.

The brief description for the electronic components involved are down below:

BreakBoard: the board that has built-in wires, through which different electronic components can be connected more easily 

Voltage Regulator: adjust the voltage flowing into the circuit

Speaker: a buzzer that can make noisy sounds

Push-Button switch: used to turn the circuit on and off

Arcade Button: works the same as the Push-Button switch, but there are less pins to connect

Capacitor: store electricity inside, which would feed back to the circuit

Resistor: to reduce the current in the circuit and prevent the components from burning out

LED: light up when connected in a circuit

Variable Resistor: a resistor that can change its ohms

12 volts power supply: the power for all components in the circuit

In general, technically speaking, the recitation last week wasn’t very complicated. The difficulties we encountered mostly resulted from our lacking dexterity.

Based on The Art of Interactivity, our circuits have very limited interactivity. The only possible interaction was pushing the switch and have the light lights up or the speaker makes a sound. It is almost in the same circumstances as opening the door of the fridge when the light in the fridge lights up, or a person avoids the branches falling from a tree.

When it comes to the relationship between physical computing and interactive design, physical computing acts as the empowerment of the interactive design idea in the artists’ mind. And in the process, the physical computing itself is only a tool and should be made accessible, in order to have the artist focus on creating completely.