Final Project Essay – Kevin Nader

A: Project Title

The title of this project is See Your Feelings.

B: Project Statement of Purpose

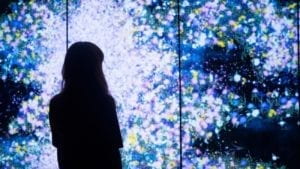
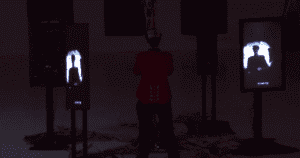
I intend to create a project with deep meaning. My previous project titled Smash That Like Button was a simple game; after conducting independent research as well as visiting the Chronus exhibition, I discovered how to attribute that deeper meaning to my project. See Your Feelings aims to provide a user with a physical representation of their emotions. Thanks to my research, I intend to make this experience as dynamic as possible. I would like to preserve the image associated with a user’s emotion on some form of canvas, that way the more the project is used, the more intricate of an image is formed. This image would reflect how complex an individual’s emotions are as well as the ways their emotions interact with other users’. Emotions are extremely abstract, so attempting to visualize them in some capacity is a task I strongly wish to undertake. I intend on using a sound sensor to take in the user’s story as well as buttons programmed with predetermined color pallets associated with different levels of emotion. Once the user gives the project all appropriate inputs, they will have their image displayed on the canvas.

C: Project Plan

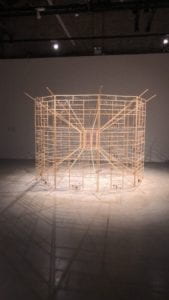
In order to create this project, I intend on splitting the work with respects to Arduino and Processing. I work far better with hardware, while my partner has told me they have a deeper understand of processing. This will help us to work side by side in creating this project as efficiently as possible. Before any casing for the project is created, we intend on having a functional project to display for user testing. As of right now, the idea of what the casing will look like is unclear, so we hope to get guidance from the users’ feedback. Ideally the first prototype should be completed and operational before user testing. This way after user testing, any hardware or software adjustments can be taken into account, and fabrication can begin on creating appropriate casing. It would be best to complete the project at least two days before presenting in order to iron out any kinks in the software. Furthermore, some additional user testing or advice from faculty could help smooth the edges of the final product. Since this project relies on defining emotion, and emotion does not really have a set definition, we intend to listen very carefully to what the users have to say in order to create the most encompassing experience we possibly can.

D: Context and Significance

            My research caused me to delve deeper into the concept of projects with deeper meaning. For a long time, I’ve understood the idea of having a project listen to its user, however getting a user to listen back to the project is something I’ve struggled to wrap my head around. Thanks to my research I’ve learned ways in which I can accomplish this and add to the interactivity of my project. I tried to implement this concept into all of my project proposals, however the one I believe that See Your Feelings reflects it the best. Furthermore, my research has shown me that dynamic experiences are better. If the user is able to use a project multiple times and have a different experience each time, it greatly contributes to how interactive a project is. In the case of See Your Feelings, the project will give them a different outcome depending on (1) how they are feeling as well as (2) when they use the project. Should the user be among the first ones to use the project, they will clearly see their image associated with their emotion. If the user were to use this project once the entire canvas is covered up, their contribution would add to the chaos of everyone’s emotions colliding. This project does not really have an intended audience, the more diverse the people who use it, the better and more encompassing the generated picture will become. In a project designed to help celebrate the diversity in people’s emotions, having users from different age groups and background seeks to improve the overall product. Moreover, the user can ponder their own emotion or even others based on seeing it in a physical form. So far this project will influence the user’s emotion image based on how long a user talks into a sound sensor. It would be amazing to improve the project by implementing more from a user’s voice; for example, duration of speaking, pitch of voice, etc. to create a more unique and personalized addition to the canvas. This can help the user create more of a connection and have a more in depth conversation with the project.

Final Project – Preparatory Research and Analysis – Kevin Nader

A:

Prior to taking Interaction Lab, I had never seen anything like the Chronus exhibition. The aspect of the exhibition that stuck out to me the most was the simplicity behind some of the art pieces. To be honest, I have always felt that we were limited by the small selection of hardware in our Arduino kits, however seeing the Chronus exhibition changed my mind. There was one piece in particular that ran consisted of an Arduino controlling an array of servo motors. The piece of art utilized these servo motors to pull yarn in such a fashion that it generated a complex and “animated” geometric shape. Seeing such a beautiful display consisting of components all found in my Arduino kit really altered my perspective on our limitations; I now believe that our only limitation is our imagination. While the Chronus exhibition was certainly different from other non-technology art exhibits I’ve visited in the past, there were some key similarities. The strongest example of a similarity between the two is symbolism. While the art, both tech and non-tech based, is entertaining to look at because, there is always hidden meaning. How the artist chooses to convey that is their choice, but this is a practice among both tech and non-tech based art exhibitions. Seeing these really inspired me to emulate this kind of hidden meaning mentality in my project. The main difference between tech and non-tech art exhibitions are the mediums used.  The Chronus exhibition made me realize that tech-based art exhibitions have far more potential in the variety they can produce. Couple that with the subtle whirring of these projects in action, and you create an environment that a non-tech based art exhibit could never create.

B:

Flowers and People – Dark

Flowers and People – Dark is a project that I find to be a particularly interactive. Flowers and People – Dark created vibrant floral images for the user that stand before them. The image itself is influenced by a variety of factors that are not disclosed which creates a sense of exploration for the user in the sense that they can learn how to control the images they create. The project is influences solely by the users and will never replicate the same visual state twice. I respect this aspect of the project because the user will have a different experience each time they go through it. Moreover, once the user backs away from the installation the flowers will simultaneously wither and die. This is to convey the installations hidden representation of the cycle of life. This project creates a unique relationship with every user and does uses this relationship to ponder the complexities of life and death. A nice touch is that it does this in an utterly beautiful LED display. It is for these reasons that I find the project to be a strong example of an interactive experience.

Emergence

Emergence is a very interesting concept and puts on a beautiful show, however it is not as interactive as the aforementioned project. Emergence takes the users biorhythms and transforms them into a sound and light show. While this is extremely entertaining to look at, one must take into account how much the user really does in this instance. All the user does is simply attach themselves to a couple of sensors and experiences the show. In reality the only interaction that occurs is attaching some wires to yourself. While every user will most likely have a unique experience, they do not really have control in how that experience plays out. While the show is beautiful and the technology is awesome, this installation is not as up to par on an interactive level.

C:

This research has helped me to build upon what I find interaction to be. I strongly resonated with Chris Crawford’s definition of interactivity in which he says interaction is: “a cyclic process in which two actors alternately listen, think, and speak”. This definition applies greatly to Interaction Lab projects because they primarily generate an experience of which the user applies inputs and the project will provide a special output. What I love about this definition is this concept of fluidity. This definition appears to frame interaction as a type of conversation. Conversations never go the same way, this is why the more influence a user has over the outputs a project can produce, the more interactive it is. moreover, the idea of a project listening to its user is very straight forward, however how does a user listen to the project? This comes in the form of the hidden meaning preciously discussed. If the project can get the user to reflect on some underlying message, then that is how the user listens to the project. Ultimately, the user should be able to leave the experience having influenced a project to influence them in some sort of way; this is the key to good interaction.

Works Cited:

https://www.teamlab.art/w/flowersandpeople-dark

https://www.trendhunter.com/trends/sean-montgomery-emergence

What Exactly is Interactivity? – Chris Crawford


Recitation 10 – Workshops – Kevin Nader

Introduction:

For this recitation I chose to work on my serial communication with Young. I chose this because I felt that my understanding of it was not up to par. This was particularly important considering how I intended to use serial communication for my final project. Young explained serial communication to those attending the workshop by walking us through the creation of two devices.

The Devices:

Coming up for a name for the first device is relatively difficult because it does not really have an intended purpose. It was created simply to teach us serial communication. Here is a clip of the device in action. 

The device utilized a potentiometer to move the ellipse along the x axis of the background, mouse placement was used to determine the ellipse position with respects to the y axis. If the button was pressed, it would cause the ellipse to grow.

These are two clips of the hardware in action:

This clip is showing that the button in charge of making the ellipse grow functions properly 

This clips shows the potentiometer responsible for moving the ellipse along the x axis is working

Arduino Code:

// IMA NYU Shanghai
// Interaction Lab
// For sending multiple values from Arduino to Processing


void setup() {
  Serial.begin(115200);
  pinMode(9, INPUT);
}

void loop() {
  int sensor1 = analogRead(A0);
  int sensor2 = digitalRead(8);

  // keep this format
  Serial.print(sensor1);
  Serial.print(",");  // put comma between sensor values
  Serial.print(sensor2);
  Serial.println(); // add linefeed after sending the last sensor value

  // too fast communication might cause some latency in Processing
  // this delay resolves the issue.
  delay(100);
}

Processing Code:

// IMA NYU Shanghai
// Interaction Lab
// For receiving multiple values from Arduino to Processing

/*
 * Based on the readStringUntil() example by Tom Igoe
 * https://processing.org/reference/libraries/serial/Serial_readStringUntil_.html
 */

import processing.serial.*;

String myString = null;
Serial myPort;


int NUM_OF_VALUES = 2;   /** YOU MUST CHANGE THIS ACCORDING TO YOUR PROJECT **/
int[] sensorValues;      /** this array stores values from Arduino **/


void setup() {
  size(500, 500);
  background(0);
  setupSerial();
}


void draw() {
  updateSerial();
  printArray(sensorValues);

  background (0);

  // use the values like this!
  // sensorValues[0] 

  // add your code
  float posX = map(sensorValues[0], 0, 1023, 0, 500);
  int size;
  if (sensorValues[1] == 0) {
    size = 50;
  } else {
    size = 200;
  }

      ellipse(posX, mouseY, size, size);
  }


  void setupSerial() {
    printArray(Serial.list());
    myPort = new Serial(this, Serial.list()[21], 9600);
    // WARNING!
    // You will definitely get an error here.
    // Change the PORT_INDEX to 0 and try running it again.
    // And then, check the list of the ports,
    // find the port "/dev/cu.usbmodem----" or "/dev/tty.usbmodem----" 
    // and replace PORT_INDEX above with the index number of the port.

    myPort.clear();
    // Throw out the first reading,
    // in case we started reading in the middle of a string from the sender.
    myString = myPort.readStringUntil( 10 );  // 10 = '\n'  Linefeed in ASCII
    myString = null;

    sensorValues = new int[NUM_OF_VALUES];
  }


  void updateSerial() {
    while (myPort.available() > 0) {
      myString = myPort.readStringUntil( 10 ); // 10 = '\n'  Linefeed in ASCII
      if (myString != null) {
        String[] serialInArray = split(trim(myString), ",");
        if (serialInArray.length == NUM_OF_VALUES) {
          for (int i=0; i<serialInArray.length; i++) {
            sensorValues[i] = int(serialInArray[i]);
          }
        }
      }
    }
  }

Similar to the first device, the second device was relatively simple as well. This device was a processing sketch where, if clicked, would trigger a servo motor to move. Here is a clip of that device.

As you can see, the device works as intended.

Arduino Code:

// IMA NYU Shanghai
// Interaction Lab
// This code receives one value from Processing to Arduino

#include <Servo.h>
Servo myservo;
int val;

char valueFromProcessing;


void setup() {
  Serial.begin(9600);
  myservo.attach(9);
}


void loop() {
  // to receive a value from Processing
  while (Serial.available()) {
    valueFromProcessing = Serial.read();
  }

  val = valueFromProcessing;
  val = map(val, 0, 500, 0, 180);
  myservo.write(val);
  delay (15);

  //  if (valueFromProcessing == 'H') {
  //    digitalWrite(ledPin, HIGH);
  //  } else if (valueFromProcessing == 'L') {
  //    digitalWrite(ledPin, LOW);
  //  } else {
  //    // something esle
  //  }


  // too fast communication might cause some latency in Processing
  // this delay resolves the issue.
  delay(10);
}

Processing Code: 

Unfortunately, due to issues with my computer’s storage, the processing code was lost.

Reflection:

Overall, this workshop was very beneficial to me. I’m glad I was given the opportunity to brush up on my serial communication skills. Hopefully I can take these skills with me into my final. 

Recitation 9 – Media Controller – Kevin Nader

Introduction:

In this recitation, I created a device that distorts your camera if it detects a sound loud enough. I did this through the usage of a sound sensor and relatively simple serial communication. Here is a short clip of the project in action. Unfortunately, though present in the background of the video, the code for this project has been lost due to issues with my computer. 

Reflection (Based on Computer Vision for Artists and Designers: Pedagogic Tools and Techniques for Novice Programmers):

As previously mentioned, this device distorts the user’s image when it detects a sound that is loud enough. This implementation of serial communication is intended to teach the user the importance of sound and how too much of it can distort one’s message. The extent of this interaction is nothing more than a sound sensor doing its job. Should the sound sensor read an input above the coded threshold, it will blur the image of the user. I am trying to convey my belief to the user that conveying a message through aggression (loudness) will often times distort both the user’s message and intentions. This projects usage of multimedia, though relatively primitive, does its job very well. Further improvements to these skills is extremely beneficial and seems like the future of interactive art.

Recitation 7 – Arrays – Kevin Nader

Introduction: 

For this recitation, we were tasked with creating an array. Similar to animation, I also find arrays a bit confusing so this recitation was very helpful.

My Array:

This is a video containing my array. I was unable to make it to step four as there was no time left in the recitation, however this is what I ended up with.

Spooky

Code:

void setup () {
  size(600, 600);
  background(0);
  //drawNightmare(360, 240, color(120, 60, 0));
  //drawNightmare(240, 420, color(140, 50, 32));
  //drawNightmare(510, 140, color(240, 34, 88));
  //for (int i=0; i<100; i++) {
  //drawNightmare(random(0, width), random(0, height), color(random (0, 255), random(0, 255), random(0, 255)));
  //}
}

void drawNightmare(float x, float y, color c) {
  fill(c);
  ellipse(x, y, 150, 150);

  fill(255);
  ellipse(x-25, y-15, 30, 20);
  ellipse(x+25, y-15, 30, 20);
}

void draw () {
  for (int i=0; i<100; i++) {
    drawNightmare(random(0, width), random(0, height), color(random (0, 255), random(0, 255), random(0, 255)));
  }
}

Homework Questions:

Q1: In your own words, please explain the difference between having your for loop from Step 2 in setup() as opposed to in draw().

Answer: While setup runs the code once, void draw runs it over and over again.

What is the benefit of using arrays?  How might you use arrays in a potential project?

Arrays make it easy to deal animations containing a large number of different entities. This functions could be used to create complex patterns for future projects.