Group Recitation Project: Dreamie Beanie – Jessica Xing

My definition of interaction: 

To me, interaction requires a back and forth between the user and the machine — more notably I feel it has to respond to function with its own unique reaction, separate from simply the commands fed into it. In “The Art of Interactive Design” by Chris Crawford, Crawford defines interactivity as: “a cyclic process in which two actors alternately listen, think, and speak.” The key word is cyclic, because in order for the process to loop back the machine has to be capable of thinking for itself, not just respond simply to the user’s requests. 

Interactivity and Projects: 

So by following my definition of interaction, I looked at two projects: Open Highway and Alias the “teachable” parasite

Open Highway illustrates my problem with defining “interactivity” simply as command and response — I find “Physical Computing” by Dan O’ Sullivan and Tom Igoe’s definition, as “input, processing, and output” too vague in that it allows for simulations such as Open Highway to be defined as interaction when there is no “cyclical” interaction. While technically Open Highway is an active simulation that is able to respond and change when highway factors change, it is still a simulation because the user is not able to respond back to it once the machine reacts. It is a demonstration that follows simply what the user tells it to do, not a cyclical process. 

On the other hand,  Alias the “teachable” parasite aligns more with my definition of interactivity because of how much room it allows for customization. The article states: ” the user can train Alias to react on a custom wake-word/sound, and once trained, Alias can take control over your home assistant by activating it for you.” This opens up a dialogue between the user and the machine, and not only that but it allows for a cyclical process of endless interaction. The alias itself is even set up to respond and act like a living thing, as it is based on how a fungus is able to control and manipulate insects. It acts as the middle man between an Alexa-like smart device and responds to sound and stimuli — if the response is not to the user’s liking, Alias immediately reacts and is able to control it without needing the user to directly feed the command into it. 

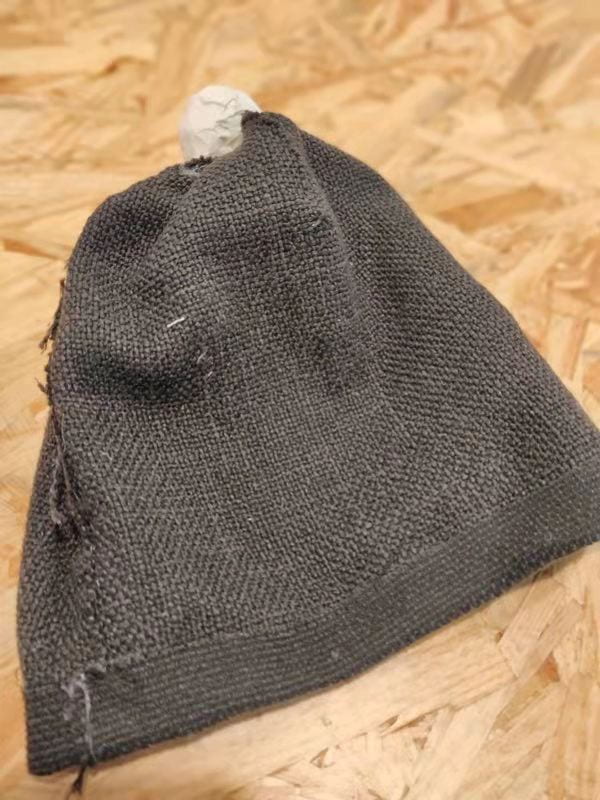
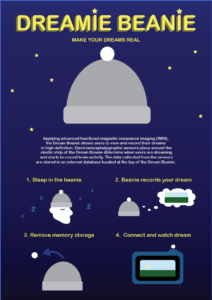
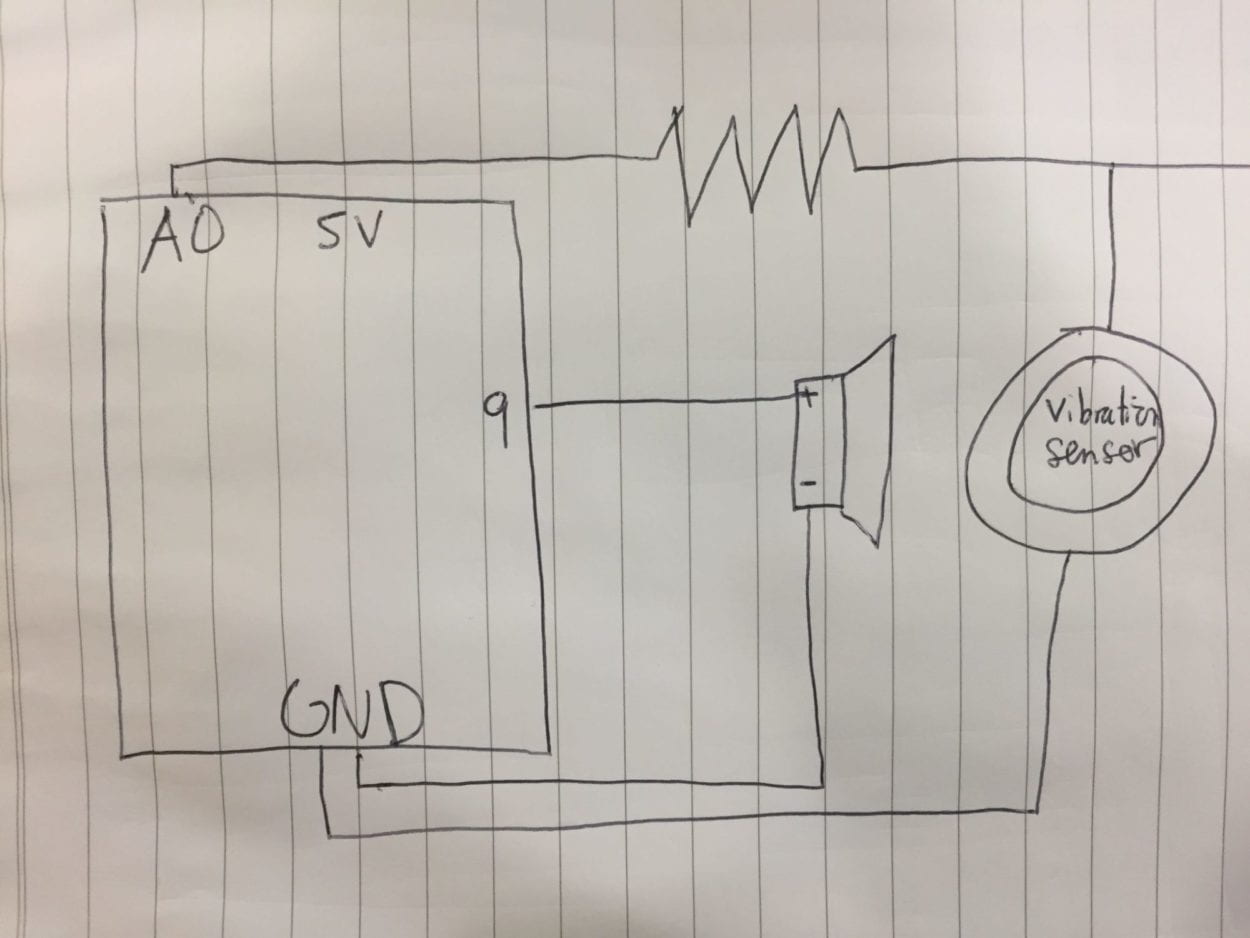
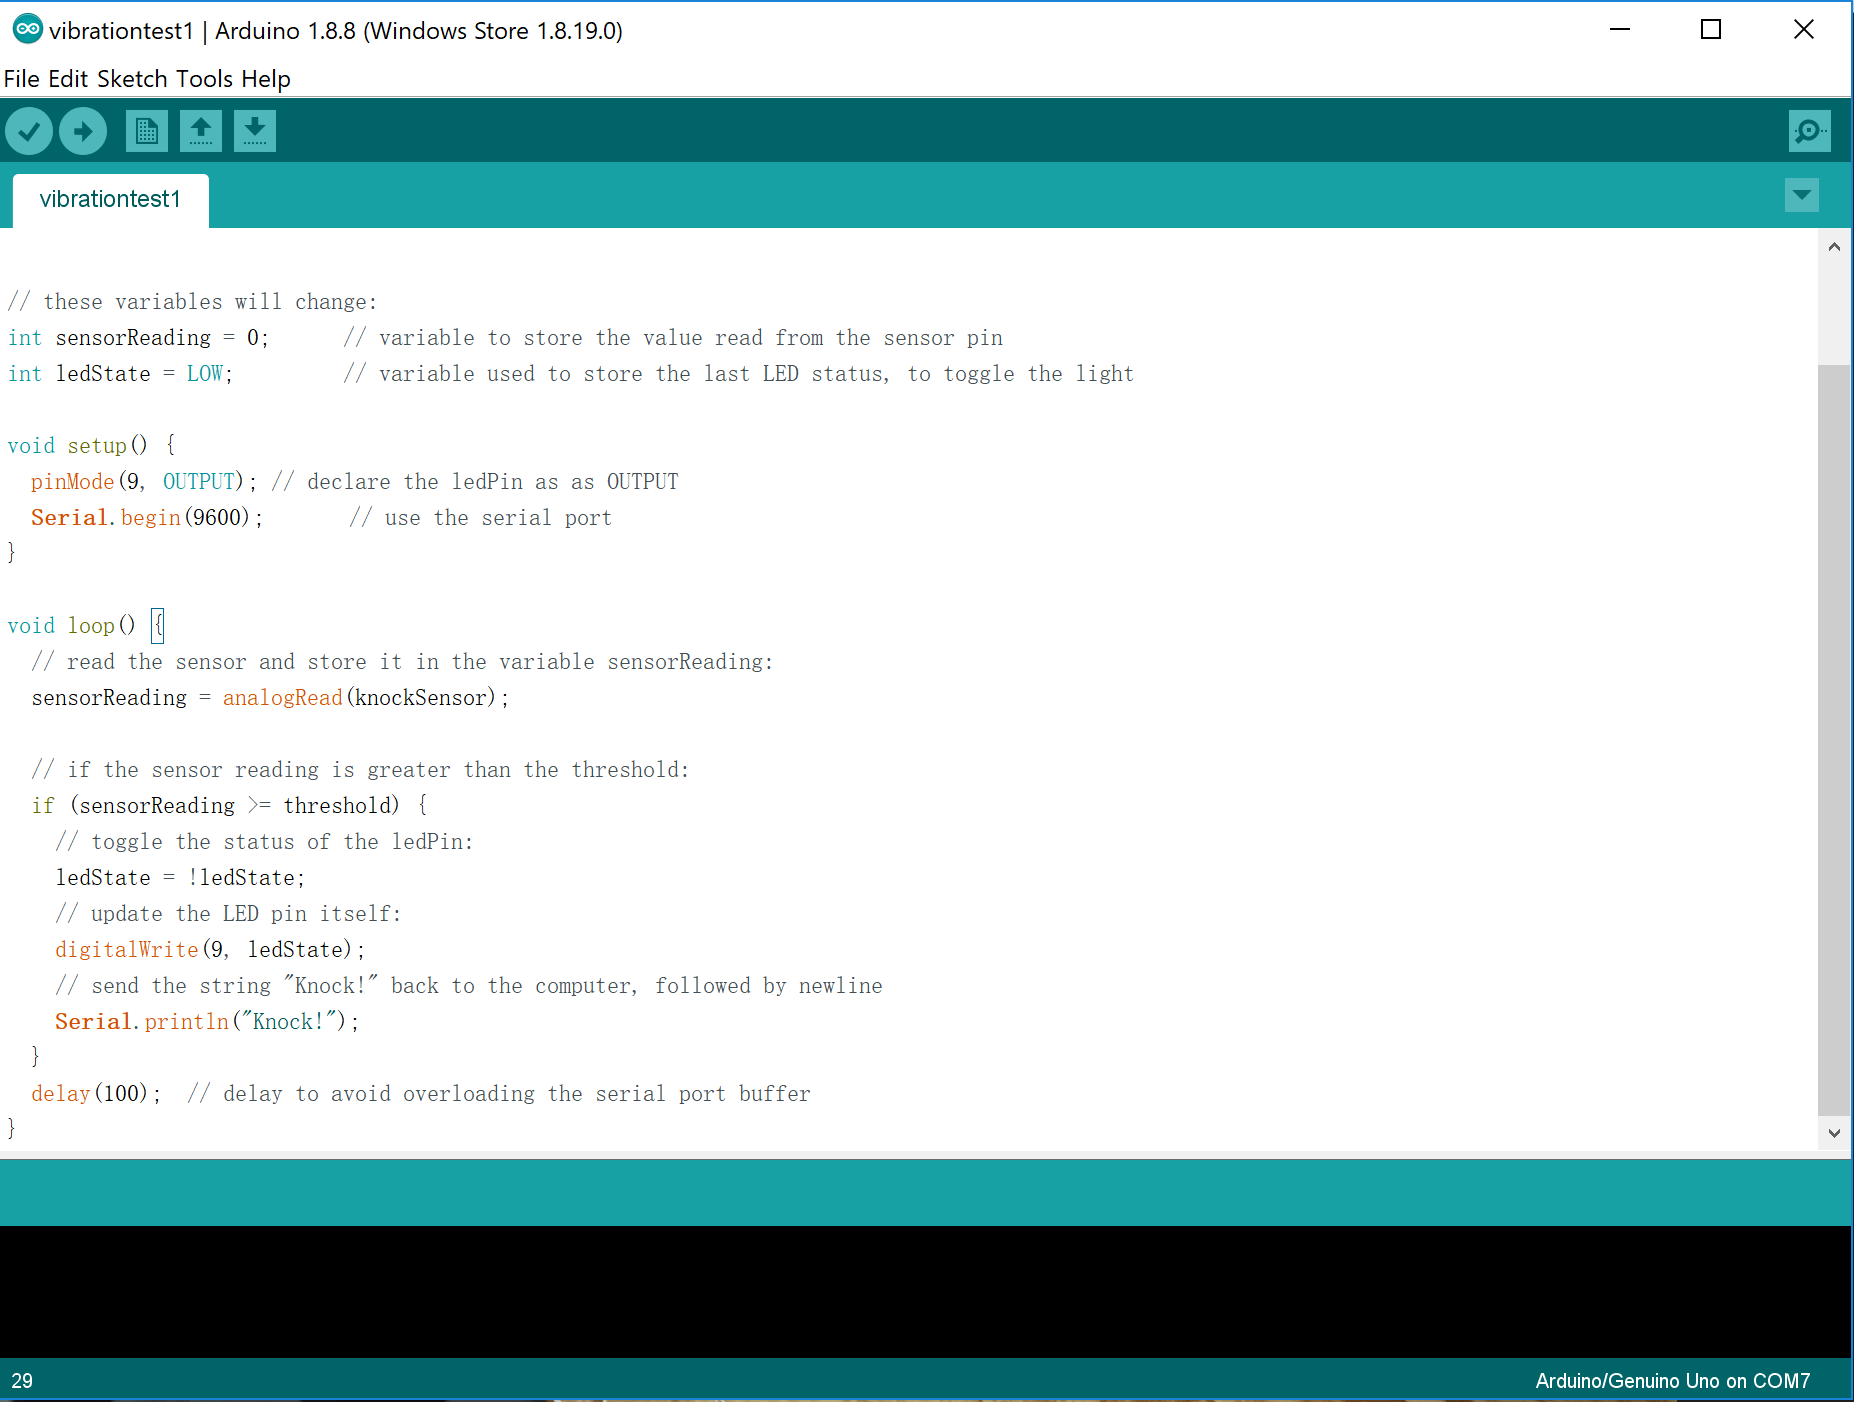
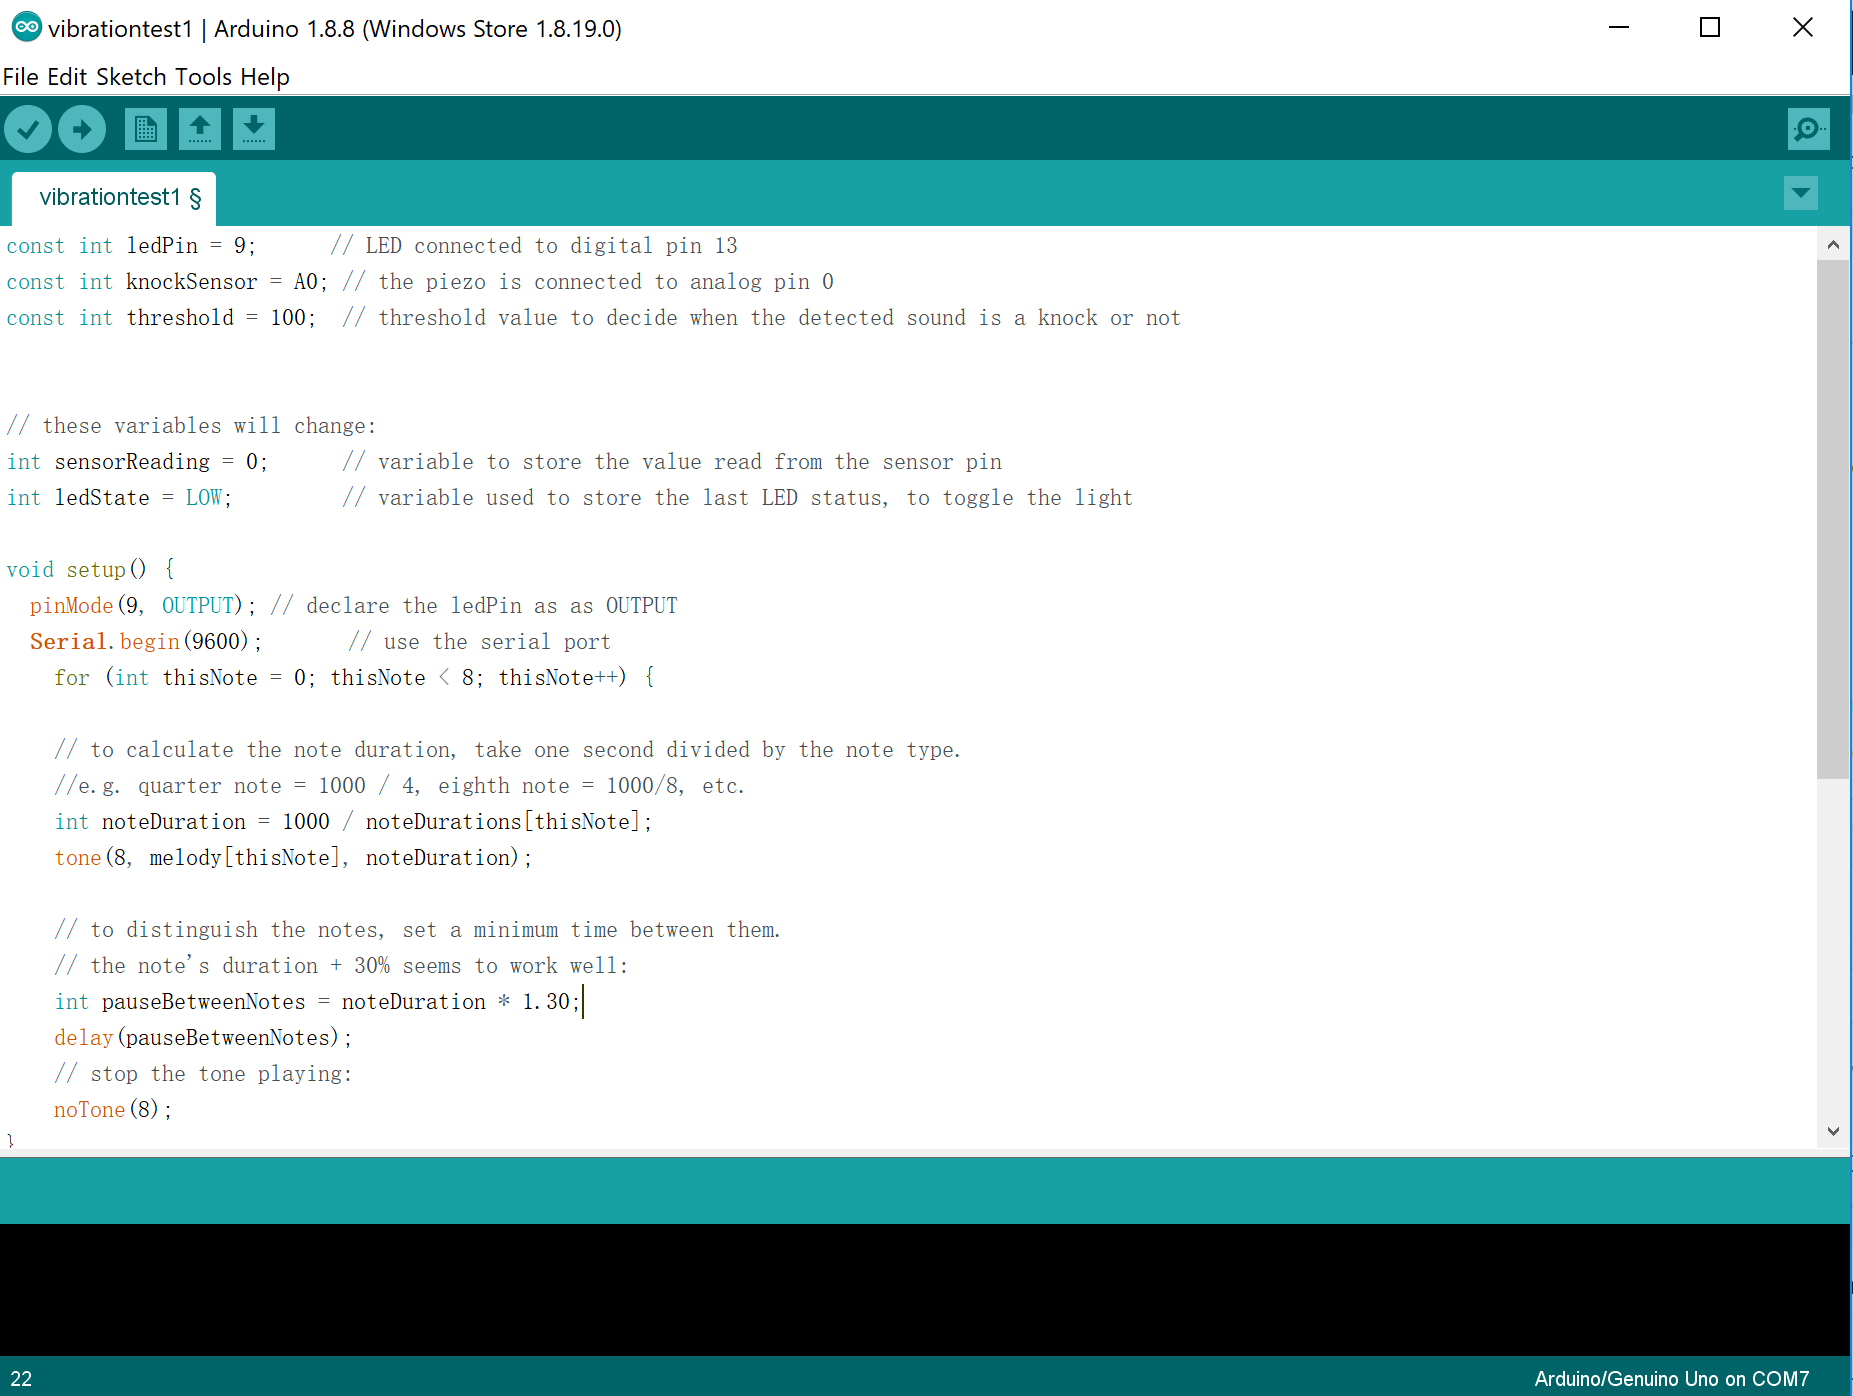
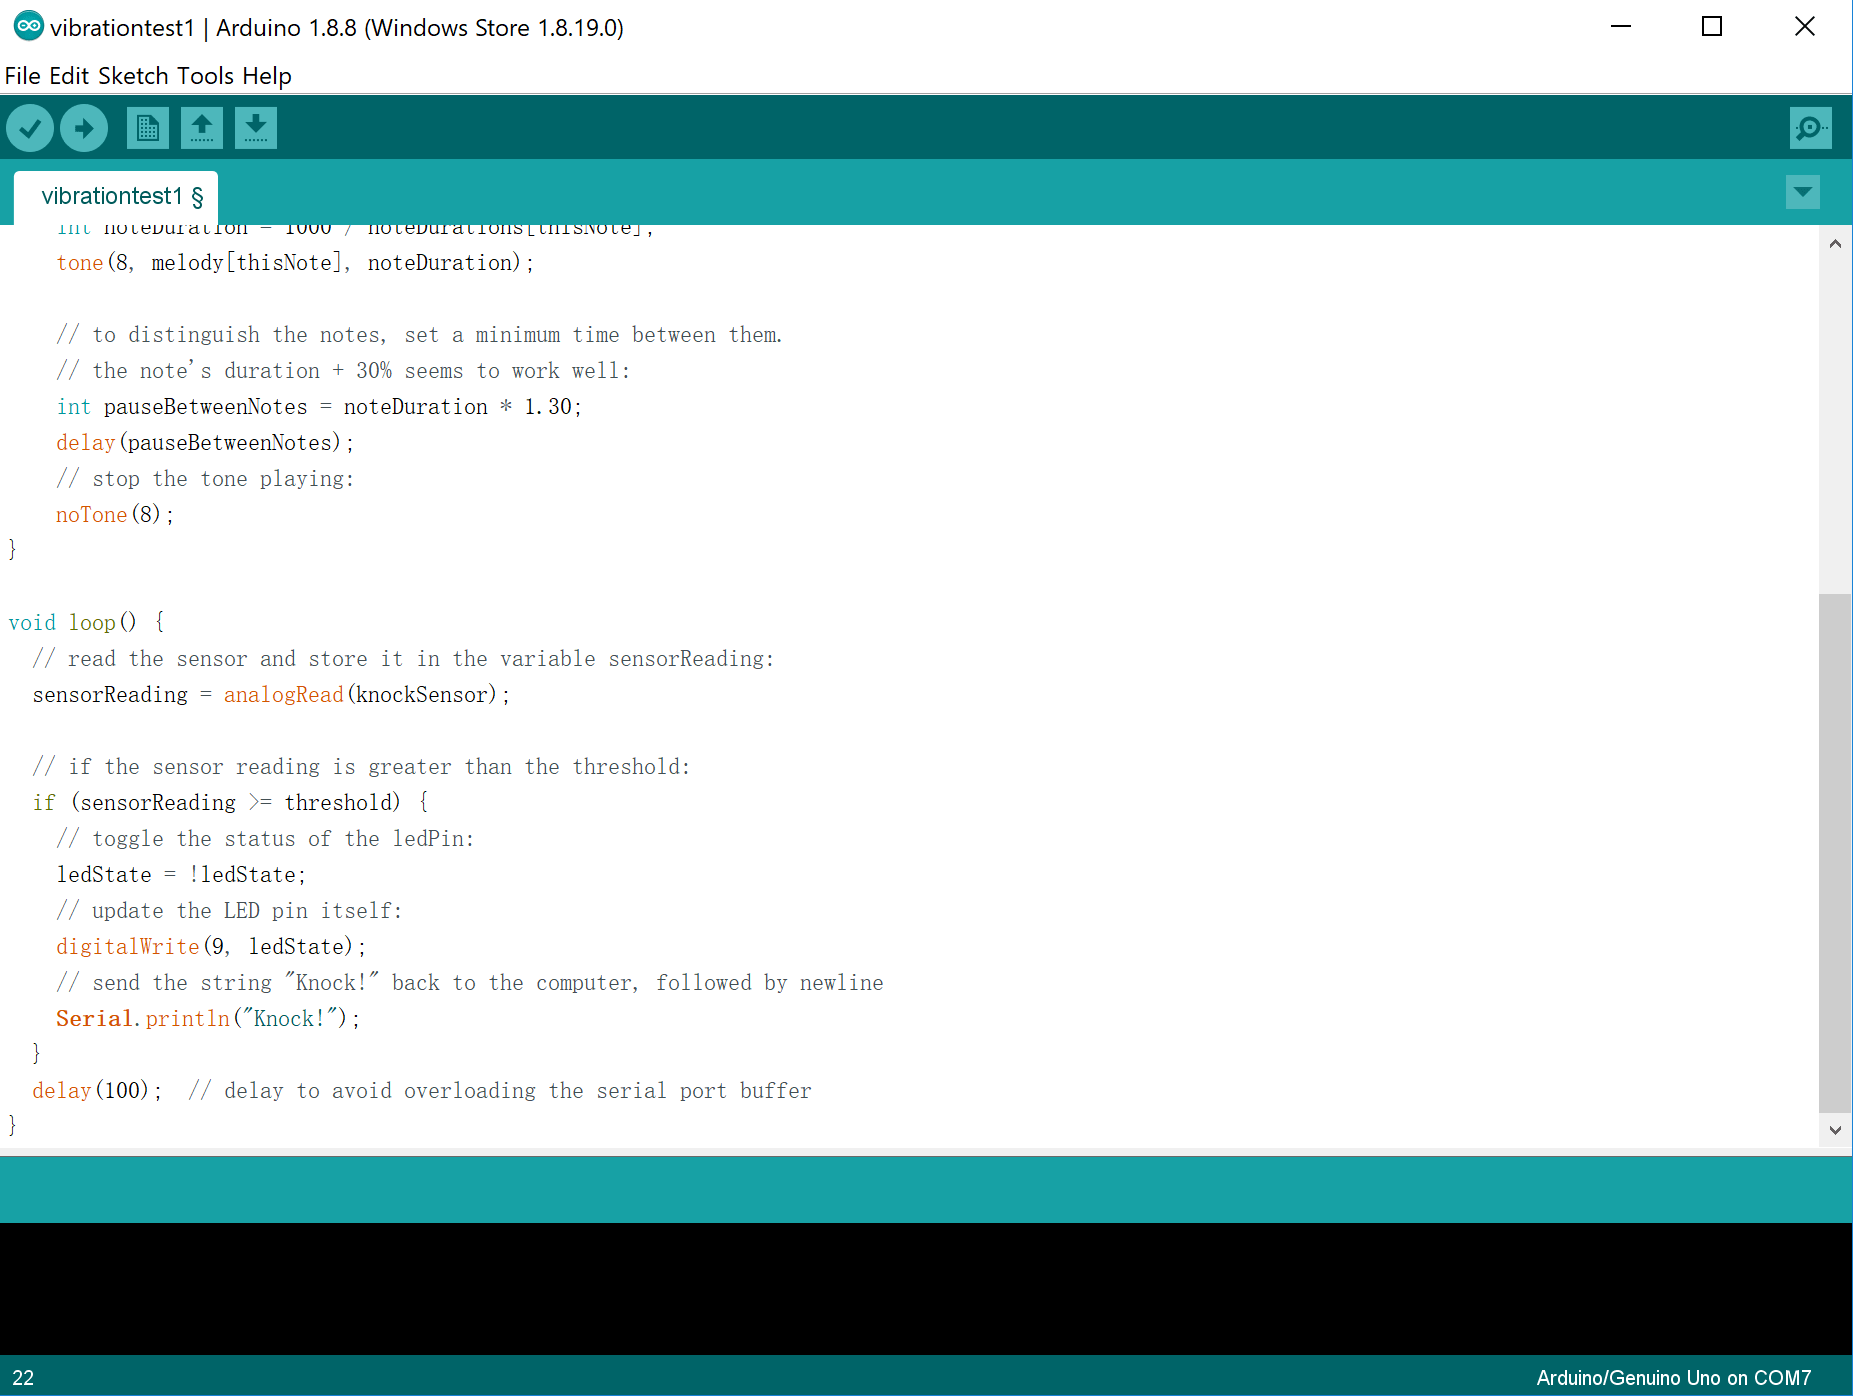
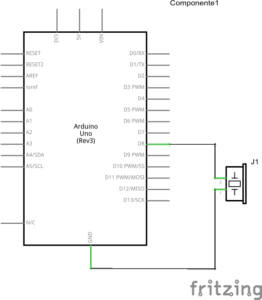
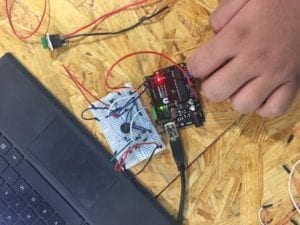
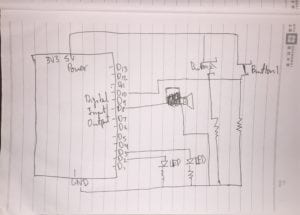
Dreamie Beanie: Our Group Project 

Our group project is called the “Dreamie Beanie” in which we use a beanie, something comfortable and non threatening, to record your dreams. This idea came up because we thought it would be interesting to be able to watch some our dreams back and make sense of them. The Dreamie Beanie aligns with my definition of interaction because it is a cyclical process of sensation, interaction, and response — by sensing which stage of the sleep cycle you are in, the Dreamie Beanie is able to respond and record, bridging the interactive gap between you and your subconscious. In allowing a continuous conversation with you, the device, and your brain, the Dreamie Beanie forwards communication between the user and the machine. 

Here is a photo of the product and the poster below: 

Recitation 3 – Jessica Xing

In today’s recitation, we continued to experiment with Arduino’s functions with this weeks concepts of values and if else statements using servo sensors. My partner and I used the Vibration sensor to play sound from a buzzer, linking the servo motor with an external output. 

The circuits were relatively easy to figure out, as to simply connect the motor we followed the Arduino diagram provided in Recitation. 

To add the external output, the buzzer, we simply attached the speaker to the breadboard — Here is a photo and a diagram of the final circuit below: 

And here is the drawn diagram: 

Where we ran into the most trouble was getting the code to work. We thought the circuit wasn’t correct which is why the speaker wouldn’t make any noise despite us knocking the sensor, but it turns out we needed to use ToneMelody in order for the speaker to play the sound. Our first code looked like this:

As you can see, ToneMelody is completely absent from the current code, so we took ToneMelody’s code from Recitation 2 and tried to combine it together like so: 

But with this code we saw not only was the ToneMelody code not repeating (so of course the sensor wouldn’t work when pressed) but also we did not input a sensor value for the knock so once over the value would trigger the sound. We saw that the code for Knock, which we got from the Arduino Website, set the sensor value as cont int threshold = 100. So using an if else statement, we set the SensorValue to be >100 so the Knock Sound could be registered. Here is the final code: 

Once we had the SensorValue and the If Else Value set up, the Knock Sensor finally worked. Here is a video of the final product: 

Documentation Questions: 

  1. We tried to build a Vibration sensor that would trigger a noise whenever it is able to detect movement. This is similar to motion detectors I see at homes: when the alarm is set and once the motion gets close enough to the door an alarm is triggered to sound. I believe people would use this for security: it can be for home protection, or it can be for pets and babies — a sound can play when the pet. or the baby has gone too far or has started to move when they and the house should be asleep. 
  2. The code tells the hardware computer what to do: in order for the Arduino to trigger the analog, physical functions it has to understand what to tell the different parts. That is why despite the fact we got the circuit all correct, none of it could work unless the code was set up in a specific, routine way: code does not allow for deviations which is similar to how a recipe needs to be simple and to the point in order for the product to work. 
  3. I think computers influence almost every aspect, but more specifically I think it has profoundly influence language. This can be seen through text messaging, in which there is a standardized code of abbreviations that people immediately can understand without clarification. I think with computers in terms of interactions we expect a much quicker response — we expect communication not only with our conversational partner but also the computer itself to be instantaneous. Our behavior has become conditioned to reward instantaneous and rapid communication through short hand and social media.  

Recitation 2 – Arduino Basics by Jessica Xing

In this recitation, we used three Arduino templates to understand the basics of Arduino’s functions. We built three circuits, starting with the “fade” function we tried in last Wednesday’s lecture. The second was “toneMelody” followed by a “speed game,” both of which required connecting analog devices to the Arduino hardware to test the program’s interactivity. 

Circuit 1: Fade

Components: 

  1. Arduino Board
  2. Breadboard
  3. a 220 ohm resistor
  4. a LED 

We had gone over how to use “Fade” in class, so using the program was fairly simple. We ran into a little trouble with the circuits, because the line connecting to the power was too long and had to be trimmed in order for the circuit to work. Here is a video the finished product: 

And here is a diagram of how the circuit was connected: 

Circuit 2: ToneMelody

Components:

  1. Arduino Board
  2. Breadboard
  3. Speaker

ToneMelody was a relatively easy circuit to build, we just followed the directions given to us at the start of recitation. Here is a video detailing the finished product: 

Here is a diagram of ToneMelody’s Circuit: 

Circuit 3: Speed Game

  1. Arduino Board
  2. Breadboard
  3. 2 220 ohm resistor
  4. 2 10 ohm resistor
  5. 2 Pushbuttons

The Speed Game was a little harder — our first problem was that once we built all the circuits, only player 1’s button would connect to Arduino, so of course player 1 would win every time. 

Turns out the problem was that the arcade buttons were too big for the board and had to be switched out the smaller ones for the board. Once we rechecked the circuitry both buttons were able to connect. Here is a video of the finished product: 

Here is the drawn diagram attached below: 

Documentation Questions: 

  1. “Physical Computing” taught me to consider any interaction with machines as potentially technological. It made me look at my daily interactions with technology as a manual effort, as it made me look at each interaction with my phone, my computer, and the elevator as a matter of “input, processing, output.” If we look at it, swiping on a phone is fundamentally similar to the circuits we had to build in order for a game to work on Arduino computer software. Each requires a specific input, and if the connection isn’t there between each part then the output fails — it made me look at my interactions with technology as a manual, complicated kind of communication. This is different from how I usually think of technology because technology has become so integrated into our daily lives that interaction becomes almost mindless — it is hard to imagine the level of processing required in order for technology to respond to us. 
  2. For my 100,000 LED lights, I would put them in all the classrooms in the AB and use them to write super high voltage jokes that will be programmed to be different each day. This has no higher purpose, it is just when I am bored in my lectures I wish I had the power to do.