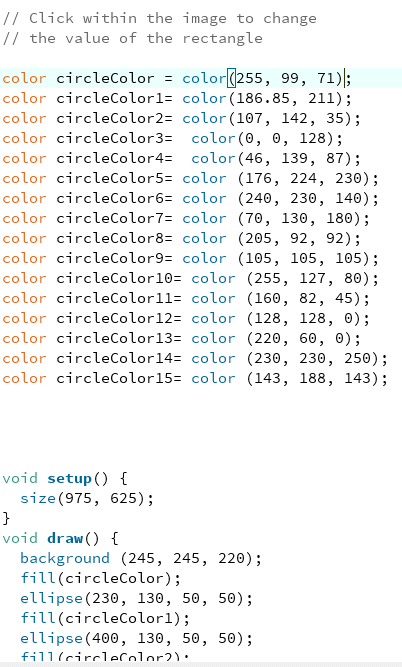
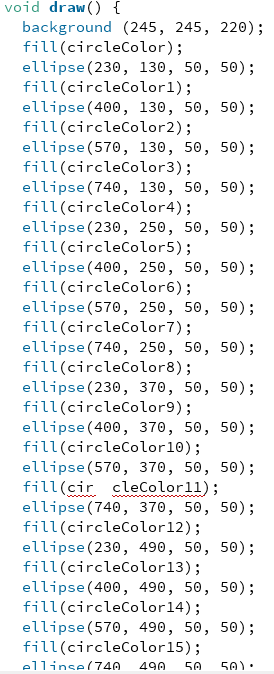
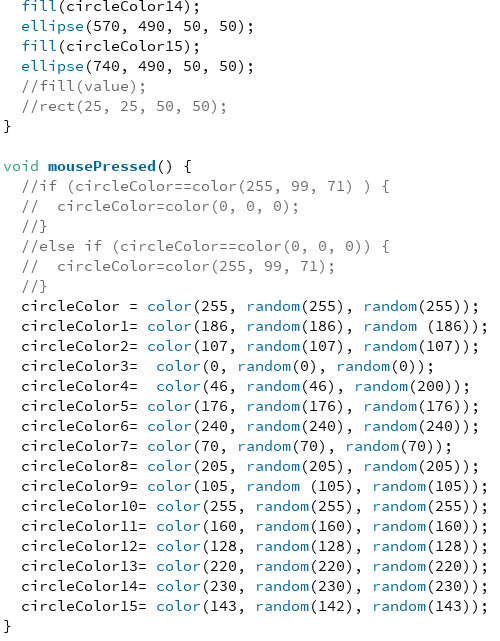
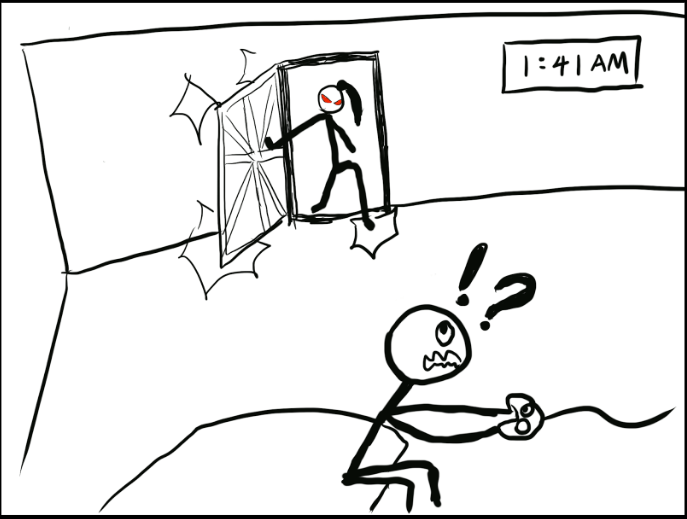
Exercise 1:
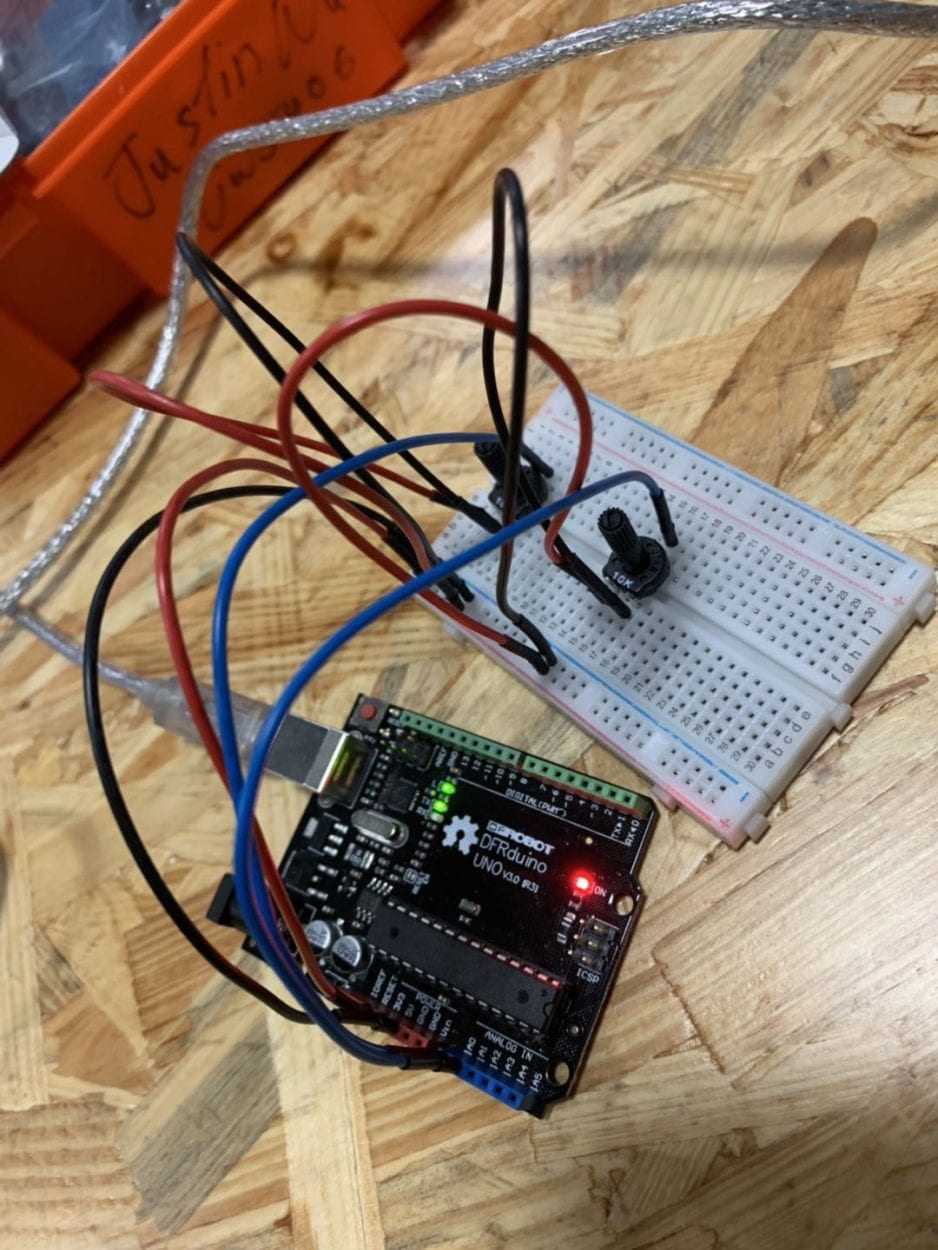
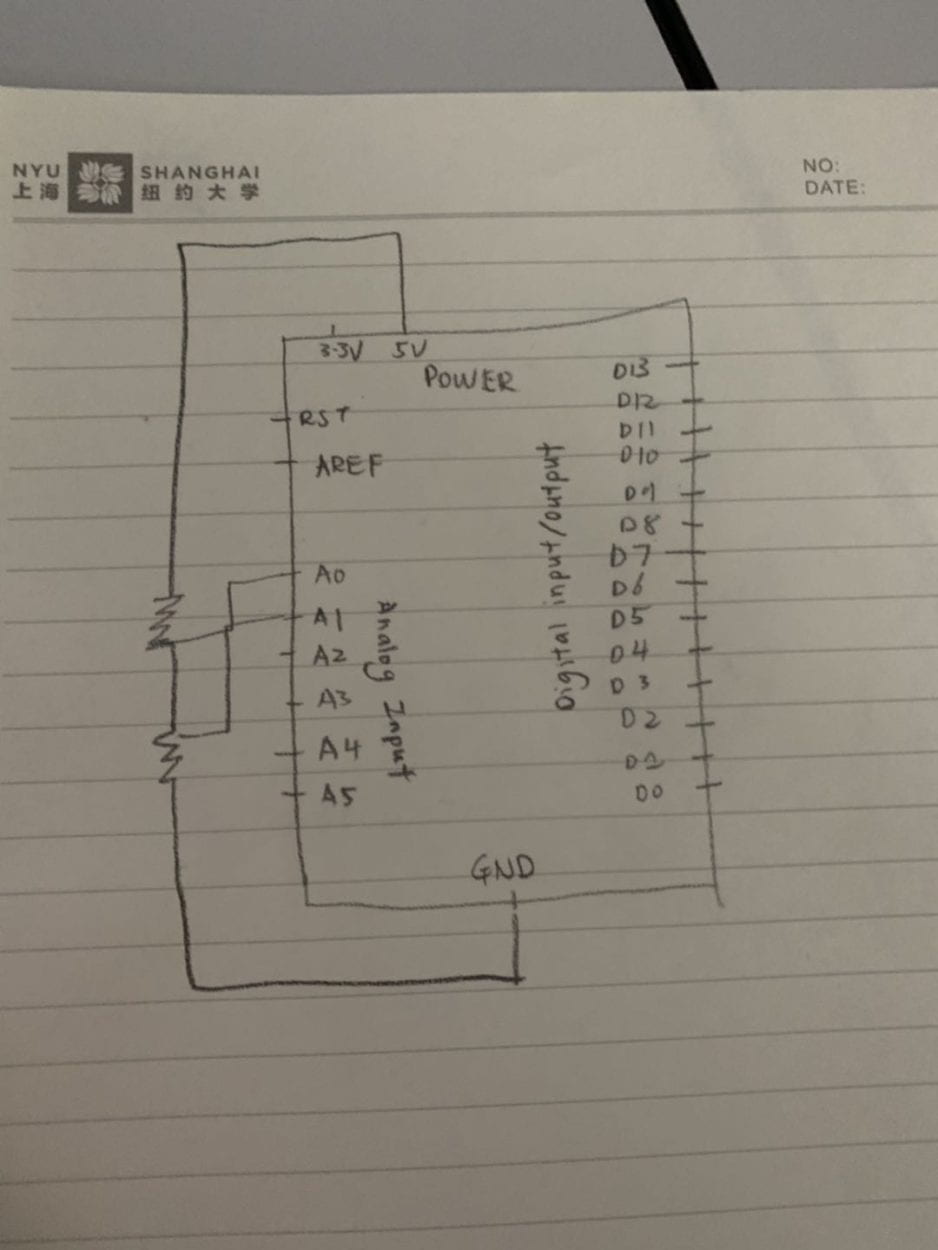
In this exercise, we used the notes from this week’s lectures. By using Arduino and Processing together through serial communication, I was able to build a circuit with two potentiometers included. The two potentiometers served a different purpose. The potentiometer located in the middle controlled the y-axis movement of the ellipse while the other potentiometer controlled the x-axis movement of the ellipse. Although it is not as complex as the Etch A Sketch example, the idea behind this circuit is identical and employs the same mechanism. Exercise One utilize the most simple interaction, depending on how each user wanted to create their image, they can twist the potentiometer according to their liking and create an unique piece.
Pictures and Videos:
Code:
/ IMA NYU Shanghai
// Interaction Lab
// For sending multiple values from Arduino to Processingvoid setup() {
Serial.begin(9600);}
void loop() {
int sensor1 = analogRead(A0);
int sensor2 = analogRead(A1);
// keep this format
Serial.print(sensor1);
Serial.print(“,”); // put comma between sensor values
Serial.println(sensor2);
// too fast communication might cause some latency in Processing
// this delay resolves the issue.
delay(100);
}
Processing:
// IMA NYU Shanghai
// Interaction Lab
// For receiving multiple values from Arduino to Processing
/*
* Based on the readStringUntil() example by Tom Igoe
* https://processing.org/reference/libraries/serial/Serial_readStringUntil_.html
*/
import processing.serial.*;
String myString = null;
Serial myPort;
int NUM_OF_VALUES = 2; /** YOU MUST CHANGE THIS ACCORDING TO YOUR PROJECT **/
int[] sensorValues; /** this array stores values from Arduino **/
void setup() {
size(500, 500);
background(0); //if background in draw not called, circles drawn on top of all
setupSerial();
}
void draw() {
updateSerial();
printArray(sensorValues);
fill(255);
ellipse(map(sensorValues[0],0,1023,0,width), map(sensorValues[1],0,1023,0,height),50,50);
//
}
void setupSerial() {
printArray(Serial.list());
myPort = new Serial(this, Serial.list()[ 5 ], 9600);
// WARNING!
// You will definitely get an error here.
// Change the PORT_INDEX to 0 and try running it again.
// And then, check the list of the ports,
// find the port “/dev/cu.usbmodem—-” or “/dev/tty.usbmodem—-”
// and replace PORT_INDEX above with the index number of the port.
myPort.clear();
// Throw out the first reading,
// in case we started reading in the middle of a string from the sender.
myString = myPort.readStringUntil( 10 ); // 10 = ‘\n’ Linefeed in ASCII
myString = null;
sensorValues = new int[NUM_OF_VALUES];
}
void updateSerial() {
while (myPort.available() > 0) {
myString = myPort.readStringUntil( 10 ); // 10 = ‘\n’ Linefeed in ASCII
if (myString != null) {
String[] serialInArray = split(trim(myString), “,”);
if (serialInArray.length == NUM_OF_VALUES) {
for (int i=0; i<serialInArray.length; i++) {
sensorValues[i] = int(serialInArray[i]);
}
}
}
}
}
Exercise 2:
For Exercise 2 I decided to use the mousePressed function to randomly play a note. Intially I tried to incorporate the tone function into this exercise but after consulting Leon, I realized there was no use for the tone function. Instead I focused on using the if else and value statement to help create an array of notes. Although I did get everything to work, there was one issue. The notes were not playing long enough for each note to be differentiated from one another. Therefore we had to adjust the duration of each note. Following the adjustment, everything went smoothly. Exercise 2 consists of a more unpredictable interaction, depending on how long each user press the mousepad, they would generate a different note and a different duration of the note as well.
Pictures and Videos: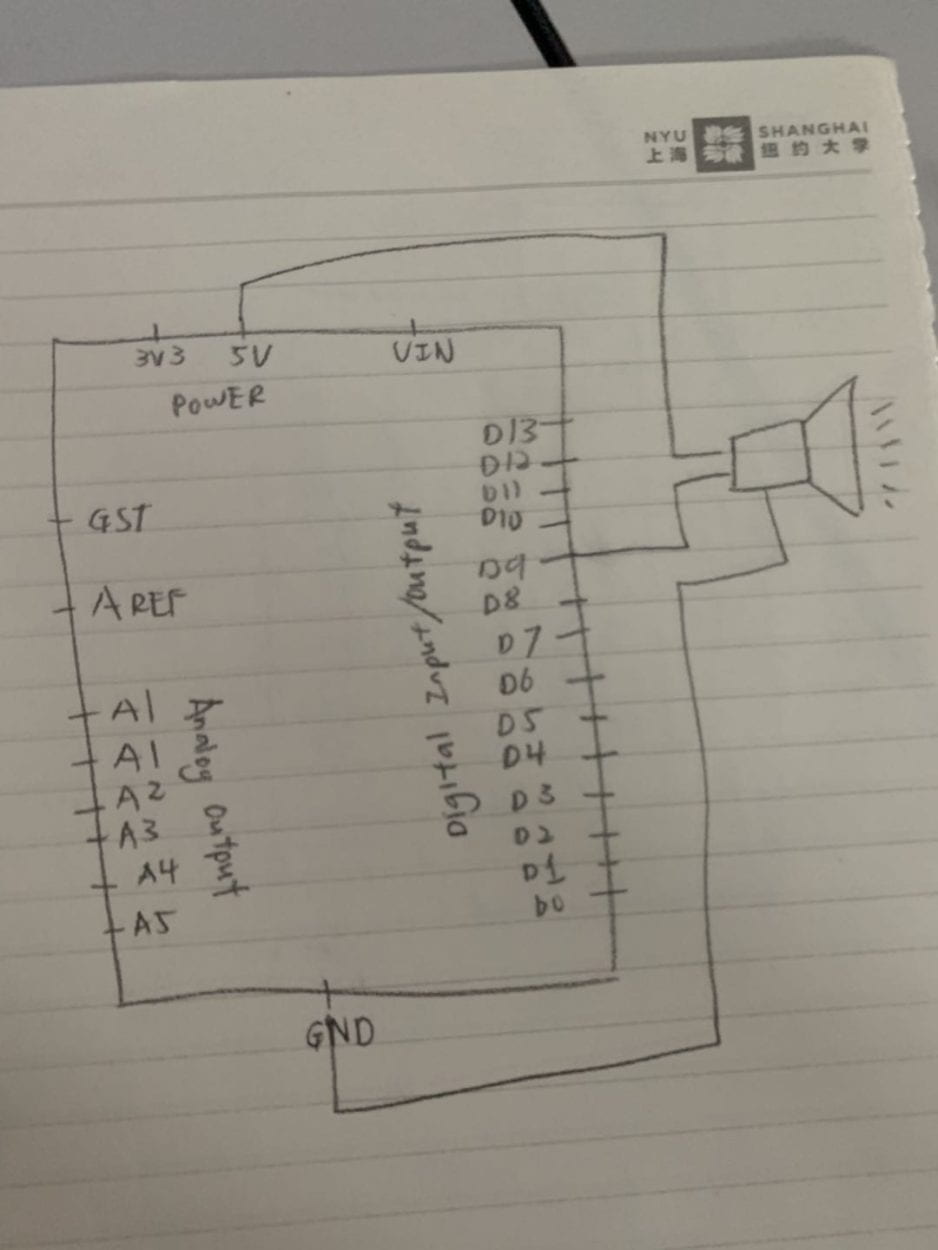
Code:
Arduino:
// IMA NYU Shanghai
// Interaction Lab
/**
This example is to send multiple values from Processing to Arduino.
You can find the Processing example file in the same folder which works with this Arduino file.
Please note that the echo case (when char c is ‘e’ in the getSerialData function below)
checks if Arduino is receiving the correct bytes from the Processing sketch
by sending the values array back to the Processing sketch.
**/
#define NUM_OF_VALUES 2 /** YOU MUST CHANGE THIS ACCORDING TO YOUR PROJECT **/
/** DO NOT REMOVE THESE **/
int tempValue = 0;
int valueIndex = 0;
/* This is the array of values storing the data from Processing. */
int values[NUM_OF_VALUES];
int melody[] = {
31, 1100, 123, 578, 882, 311, 4978
};
// note durations: 4 = quarter note, 8 = eighth note, etc.:
int noteDurations[] = {
4, 8, 8, 4, 4, 4, 4, 4
};
boolean state = false;
void setup() {
Serial.begin(9600);
pinMode(13, OUTPUT);
pinMode(9, OUTPUT);
Serial.begin(9600);
}
void loop() {
getSerialData();
// add your code here
// use elements in the values array
// values[0]
// values[1]
if (values[0] == 1) {
digitalWrite(13, HIGH);
} else {
digitalWrite(13, LOW);
}
//Serial.println(randomNumber);
if (values[0] == 1 && state == false) {
tone(9, melody[values[1]],5000);
state = true;
} else {
noTone(9);
//state = false;
}
// tone (8, melody[random(0, 7)], noteDuration);
// if (values[0] == 1) {
// tone (8, melody[random(0, 7)], noteDuration);
// } else {
// tone (8, melody[random(0, 7)], noteDuration);
// }
}
//recieve serial data from Processing
void getSerialData() {
if (Serial.available()) {
char c = Serial.read();
//switch – case checks the value of the variable in the switch function
//in this case, the char c, then runs one of the cases that fit the value of the variable
//for more information, visit the reference page: https://www.arduino.cc/en/Reference/SwitchCase
switch (c) {
//if the char c from Processing is a number between 0 and 9
case ‘0’…’9′:
//save the value of char c to tempValue
//but simultaneously rearrange the existing values saved in tempValue
//for the digits received through char c to remain coherent
//if this does not make sense and would like to know more, send an email to me!
tempValue = tempValue * 10 + c – ‘0’;
break;
//if the char c from Processing is a comma
//indicating that the following values of char c is for the next element in the values array
case ‘,’:
values[valueIndex] = tempValue;
//reset tempValue value
tempValue = 0;
//increment valuesIndex by 1
valueIndex++;
break;
//if the char c from Processing is character ‘n’
//which signals that it is the end of data
case ‘n’:
//save the tempValue
//this will b the last element in the values array
values[valueIndex] = tempValue;
//reset tempValue and valueIndex values
//to clear out the values array for the next round of readings from Processing
tempValue = 0;
valueIndex = 0;
break;
//if the char c from Processing is character ‘e’
//it is signalling for the Arduino to send Processing the elements saved in the values array
//this case is triggered and processed by the echoSerialData function in the Processing sketch
case ‘e’: // to echo
for (int i = 0; i < NUM_OF_VALUES; i++) {
Serial.print(values[i]);
if (i < NUM_OF_VALUES – 1) {
Serial.print(‘,’);
}
else {
Serial.println();
}
}
break;
}
}
}
Processing:
/*
Melody
Plays a melody
circuit:
– 8 ohm speaker on digital pin 8
created 21 Jan 2010
modified 30 Aug 2011
by Tom Igoe
This example code is in the public domain.
http://www.arduino.cc/en/Tutorial/Tone
*/
#include “pitches.h”
// notes in the melody:
int melody[] = {
NOTE_C4, NOTE_G3, NOTE_G3, NOTE_A3, NOTE_G3, 0, NOTE_B3, NOTE_C4
};
// note durations: 4 = quarter note, 8 = eighth note, etc.:
int noteDurations[] = {
4, 8, 8, 4, 4, 4, 4, 4
};
void setup() {
// iterate over the notes of the melody:
for (int thisNote = 0; thisNote < 8; thisNote++) {
// to calculate the note duration, take one second divided by the note type.
//e.g. quarter note = 1000 / 4, eighth note = 1000/8, etc.
int noteDuration = 1000 / noteDurations[thisNote];
tone(8, melody[thisNote], noteDuration);
// to distinguish the notes, set a minimum time between them.
// the note’s duration + 30% seems to work well:
int pauseBetweenNotes = noteDuration * 1.30;
delay(pauseBetweenNotes);
// stop the tone playing:
noTone(8);
}
}
void loop() {
// no need to repeat the melody.
}