Kinetic Light: Final Project Documentation – Ivy Shi

Title
“The Wheels of Fate” 轮回

Project Description

My project “The Wheels of Fate” is a kinetic installation of two overlaying wheels showcased in combination with DMX light composition for achieving synergy of light and motion. 

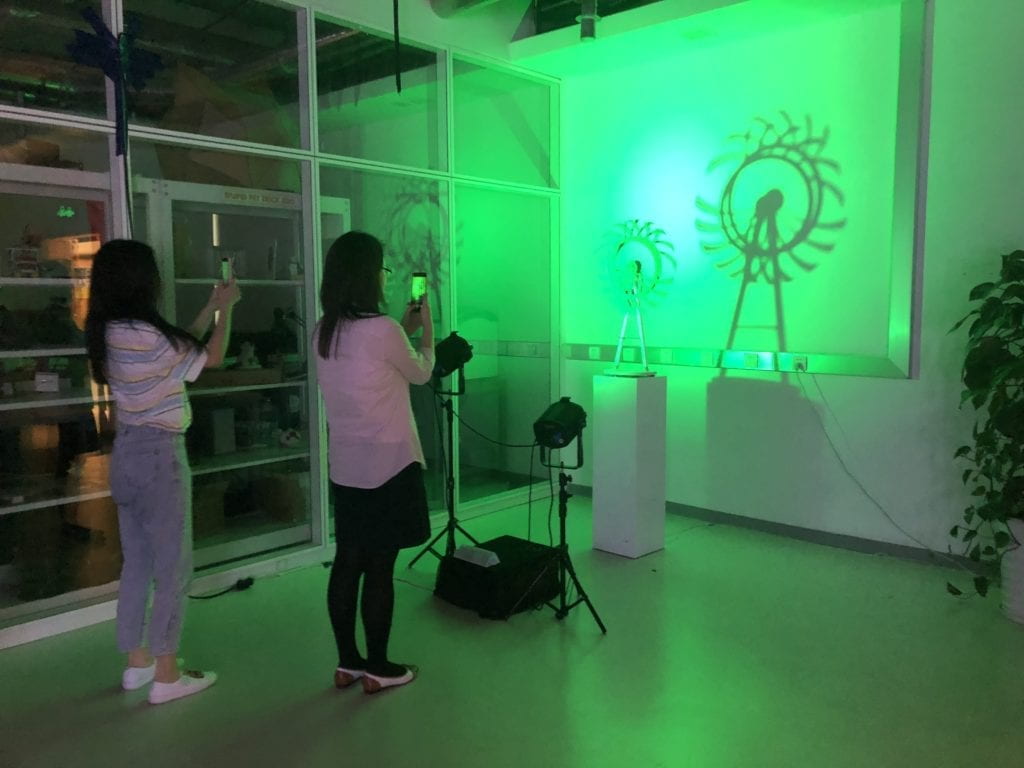
I took major inspiration from David Roy, specifically his piece “Duality” for constructing the main body of my piece. For the final setup, the two wheels, each moved by motors to create patterns, are assembled together on a base which is then put on a pedestal. Two DMX lights face towards the kinetic structure at an angle, creating “ever-changing” shadows on the back wall

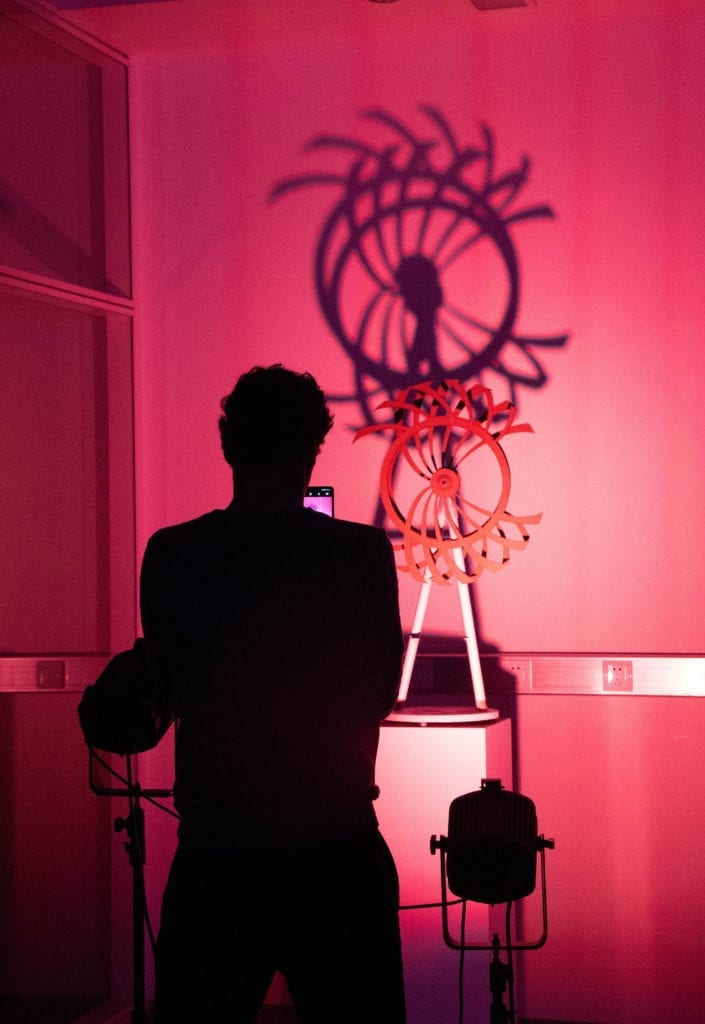
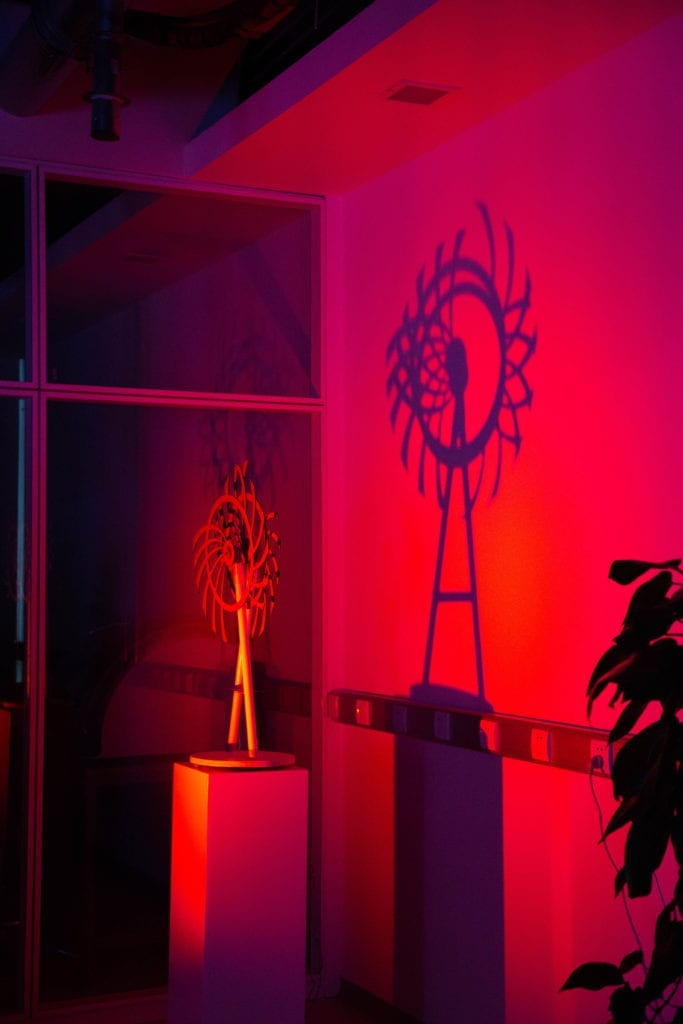
While David Roy created his work on the principles of three balances – visual, simple and patterning, I had a different take. I see the mesmerizing patterns generated by the interactions of two wheels as the central focus of the project that needs to be emphasized, repeated and highlighted. Thus light compositions are used to amplify such movements on the backdrop, and even contribute to part of the change in movements. The patterns resemble the cross-over of human experiences – how people come into play, interact with and then ultimately leave from each other’s life. The unavoidable cycle of appearance and departure captures the characteristics of fate. 

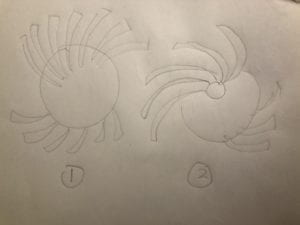
With this project, I want to create a captivating experience for audiece with visual complexity created by overlaying simple repeating shapes. The two panels of the piece have the exact same design but because of the way they are positioned, the speed they rotate, and the time at which they overlap, distinctive patterns are created. This is a metaphor for even though we are all humans alike but due to the differences in our experiences and the time and space in which we meet, our interactions generate diverse. During this generative composition, audience might see one, three and/or five wheels depending on when they see and how long they stay. In part, they become components of the piece to feel and experience fate. 

Perspective and Context

I tried to render what we learned about color theory into the DMX light composition of the project. Specifically, there are different selections and grouping of colors that aims to stimulate people’s senses and perception. Some of the choices include using complementary colors to create high contrast, playing with colors and black-out time to generate afterimages. 

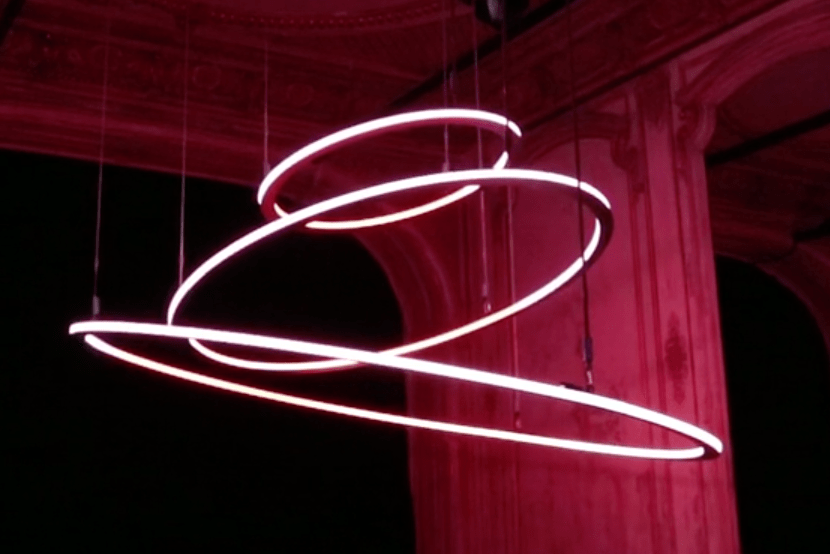
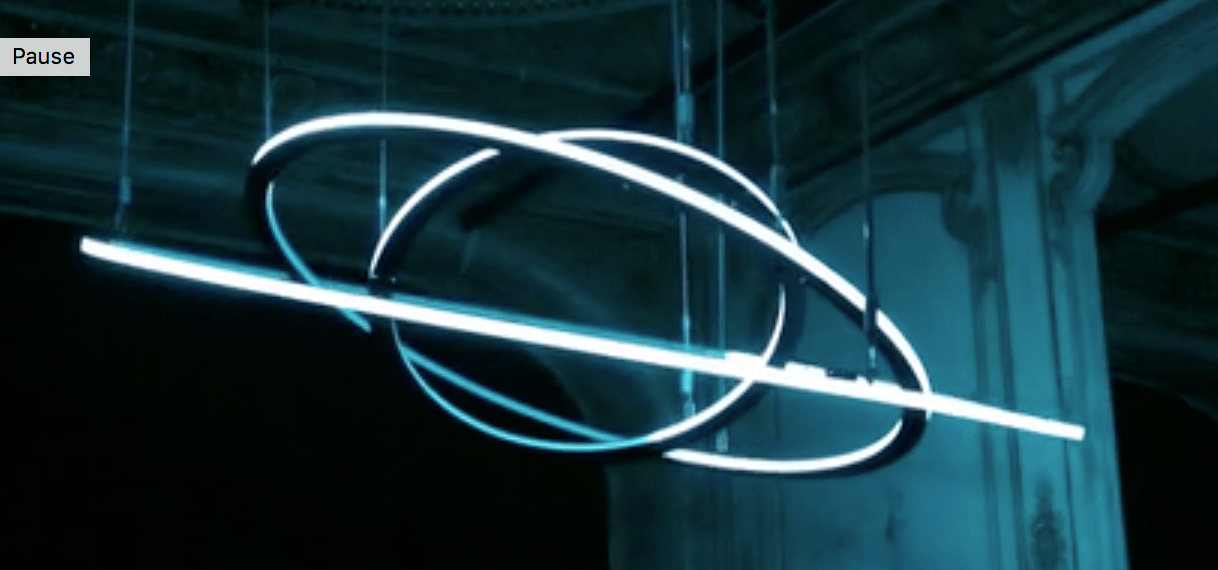
In terms of how this fits into the context of kinetic and/or light art, artists nowadays try to present the best of light and motion by blending them in the most balanced way visually. Christopher Bauder’s piece â€śCircular”  composed of three moveable lighting rings suspended from the ceiling is a great example. But what is more important is that Bauder once said in an interview “It[one of his piece GRID] amazes mind as well as emotions”. Especially that light and movement are such interesting medium to work with, we sometimes tend to focus on the technical, digital aspects too much and forget about the feelings and experience such art form evokes. Therefore for my piece, I want audience to not only inspired by what they are seeing, but also experience what they are feeling.  

Development & Technical Implementation

The fabrication process was quite smooth with much help from Andy and some fellows, however I faced some difficulties when combining light and motion, and had to switch my idea from using EL wires to DMX lights at the end. 

Motion:

I started out with creating the two wheels using laser cutting with MDF 3mm. When they are manually attached to the motors, the motion created is quite nice.

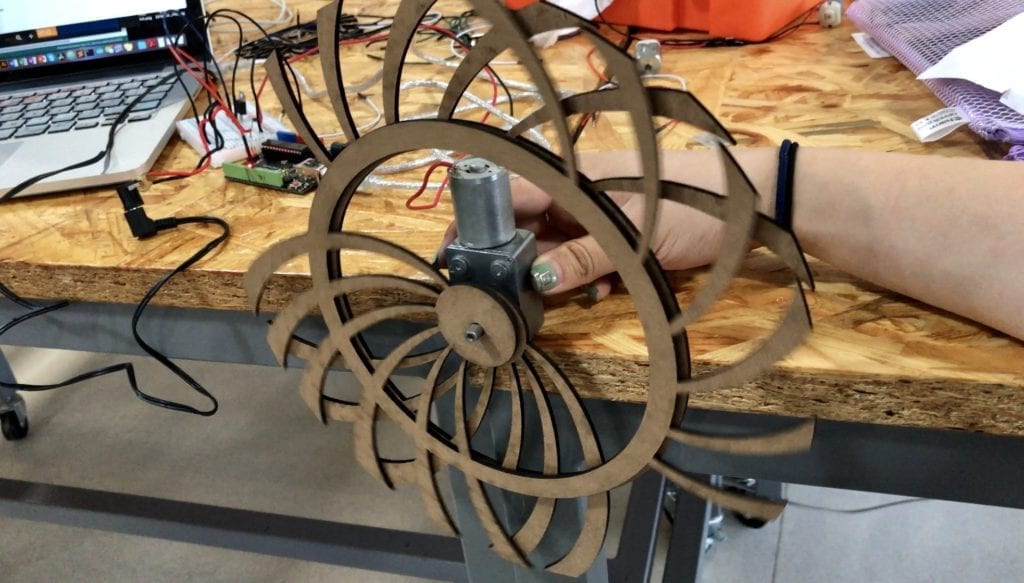
Then I went on to laser cut the wheels in large scale. I attempted to use MDF 5mm to get more texture and depth to the objects, but laser cutting 5 mm was a major failure. For some reason, the laser just cannot cut through. 

I could not directly put them together because the two wheels are supposed to move at different directions and speeds powered by separate motors. The next step is to attach the two wheels to their own motors and create a structure base to hold them. This is achieved by these steps: 

1) attach the motor with the wheel

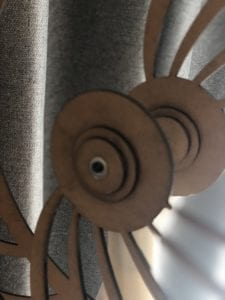
2) attach the motor to a tube. In the process, because the motors do not fit into the inner diameter of the tubes I bought, I had to 3D print a hollow cylinder shape to slip on top and connect them together. 

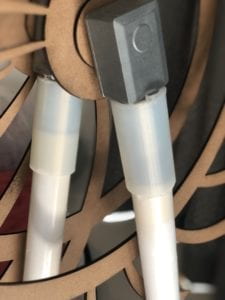
3) attach the tube to a wooden base

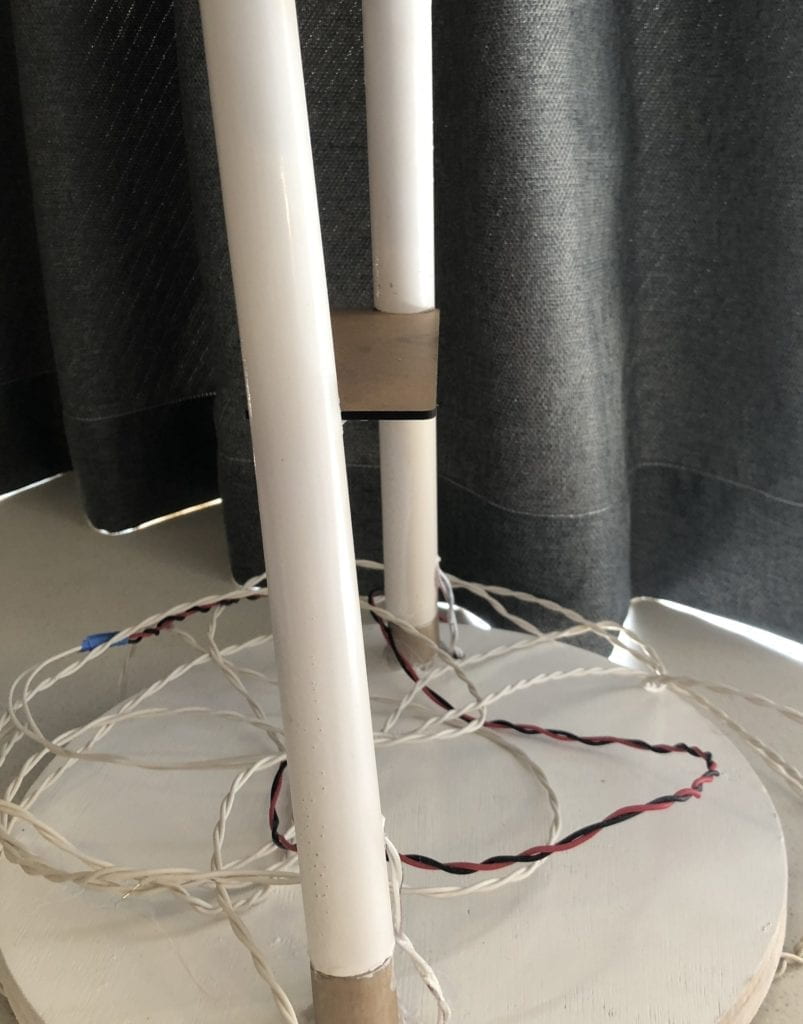
The main structure looks like this. 

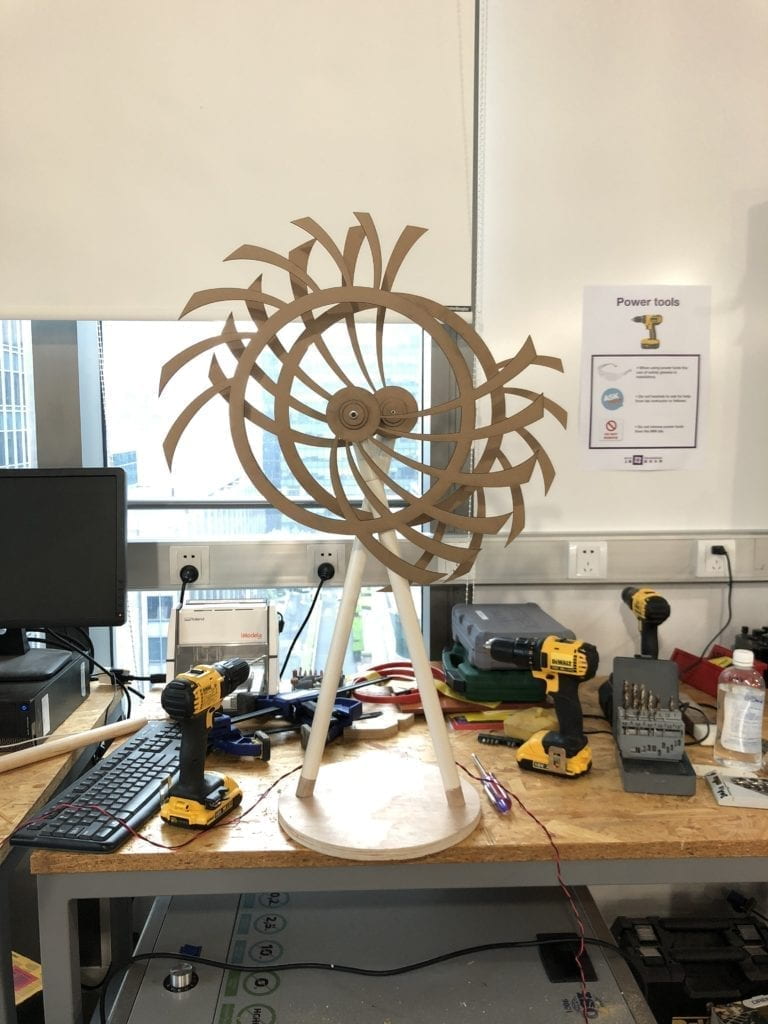
Wires of the motors come out from the bottom to connect to the Arduino that control the speed and direction of the movements. The code for the wheel movement is attached here: https://gist.github.com/ivyshi98/d8f21f249cb1513fad1323bf4e5682d8

Light: 

In terms of the light aspect of the project, I originally wanted to use EL wires to circle around the whole wheel. Each wing of the wheel will be controlled separately so they don’t just turn on and off at the same time. I imagined patterns like turning on in sequence, blink two by two and so on to create more variations and dynamism. However, because the wheel is also spinning, I need to use a slip ring to connect the wires of the EL wires and the motor, otherwise they will get tangled in the motion. However, there are twelve wings on each wheel and getting a slip ring that connects to 12 components at a relatively reasonable price is quite impossible. As a result, I had to change my plan. After some discussions with Eric, he suggested me to use DMX lights to shine lights directly towards the main structure to create shadows on the wall. I was initially unsure about this idea but after some experimentation with DMX lights, I was convinced by the effects created. 

The light composition was quite time-consuming. My concept is to start out simple with only one light at a time. The next part is light interacting with each other from different directions. The speed also varies spanning from smooth, slow motion to fast blinking. In terms of colors, I chose complementary colors to leave an afterimage effect in some cases. 

Light Testing: 

When composing lights, I encountered a problem with using milis( ) in Arduino. In my loop() function, it specifies the actions of the lights depending on the time starting from 0. However since millis() is a timer that starts from the beginning and never goes back to 0, the loop only runs once and never repeats itself. In order to solve this problem, I had to add a simple line: 

The code for DMX light composition is included here: https://gist.github.com/ivyshi98/eb52524739c03db415ca31e9add47229

Presentation

I first presented my project in class. In general, people enjoyed it and liked the interactions of light and motion. Since I did not explicitly state my concept behind the main structure, people had different interpretations of it. Some of the guesses include fan, ferris wheel, devil’s eye and etc. 

Some areas for improvement I got was: 1) The two wheels did not align properly in the center which makes the shadow in the middle a little bit off.  2) The light composition could be enhanced especially the strobing part. The effects were not too obvious as too many lights are flashing at the same time. Having more black-out time in between would hugely improve the viewing experience. 

After getting some useful feedback, I made some adjustment for the IMA show. I fixed the center alignment issue by putting in another screw at the base to secure the positions of the fans. In terms of the light composition, I flashed one light at a time and alternate between lights for each strobe. Additionally, I increased the delay time a little bit so the effects are more noticeable. The end results turned out to be really good. On top of that, based on the suggestion from Professor Eric, I tried to hide the wires of the DMX lights and connections to the Arduino boards in the best way possible. I also moved the lights close to the wheel structure to enlarge the shadows on the wall. 

Overall, I am really happy with the end results shown at the IMA show. Huge thank you to Professor Eric, Andy, Nick and all of my fellow classmates for all the help, support, advice along the way. Here is a video of audience enjoying the project: 

Here is the final presentation: 

Conclusion

This is my very first time putting together an Art project starting from the very initial conception to the fabrication phase and eventually to the showcase. The process was filled with learning and some challenges. I want to first recognize myself for having a much better production schedule than the midterm and being smart about down-sizing of my prototypes to save materials. I took lessons from the midterm in mind and improved in the fabrication process. Additionally, I was more diverse in terms of the fabrication methods I utilized including laser cutting, 3D-printing and wood sawing (with the help of Andy). This time, I also took more considerations into how I want to present my project including having a base structure to put on a pedestal and hiding the wires coming out from the motors. However, there were still areas I missed as pointed out during the class presentation. 

Another aspect I was not super successful at was the light composition (before modification for the IMA show). I spend too much time on getting the structure and motion looking nice that I neglected the light part until the very end. There were not enough thoughts and experimentations went into the light compositions itself. Although the modifications made for the show improved the effects, I could still enhance it even further. This gives an important takeaway that composition is as important as fabrication. We should be smart about distributing time properly to every aspect of the production process, thus why having a well-planned schedule is vital. If I were to have a chance to work on another project next time, this is definitely something I will keep in mind. 

Future Improvement

Lastly, in terms of potential future improvement, I received a suggestion from Young to add human interactions to the project. I think there are two ways to go about making it interactive: 

1) Create an interface that allows audience to generate their own light compositions. In my code, I would need to adjust some of the functions to take in parameters as the color and time duration inputs. 

2) Allow audience to interact with and be part of the shadows. This would take some rethinking about the backdrop and the spatial relationship between the wall, the structure and the lights. 

iML Week 14: Final Project – Ivy Shi

Concept 

Tattoo Generation 

My final project is a continuation of the midterm project to work on tattoo image generation using GAN. I was inspired by the project named this person does not exist which is a website that displays random generative human faces based on real face images dataset it was trained on. My goal is to train a DCGAN model and creates a front-end interface that allows user to generate random tattoos. 

Process

Data Collection: I started out by data collection since there are no existing dataset for tattoo images. The approach is to use the python script called “Google Images Download”  with chromedriver which scrapes Google Images based on search keywords/key-phrases on Google Images to my computer. For this project, I specifically searched for  “tattoo stock images” as they have clean background that will create less distractions for the model. There is a limitation to the tool so I could only download around 400 images at a time. After running it 10 times and manually filtered out photos, I obtained 2560 images for my tattoo dataset. 

Training: I used a DCGAN model on GitHub for training. Since images are different size, I had to pre-process them by center-cropping. I started out with 64×64 pixels images as they are faster to train and I can inference the results rather quickly. 

One problem I encountered during training was the dataset. The program would crash during random interactions within the first epoch. I decreased the batch size to check for the error. After some experiments, I found out that there was one corrupted image in my original dataset. After deleting it, everything started training smoothly. 


Result

Then I used the python script to inference on the checkpoints generated. Here are some of the results I got: 

After getting satisfiable results, I wanted improve the output image quality. So I repeated the same process with 256×256 pixel images. The training took a lot longer than the first time, therefore I was only able to around 8500 iterations. The results are still worth noting here: 

Inference with TensorFlowJS: With good results from the python script, I  also want to experiment with inferencing in TensorFlow. Using the freeze flag, I obtained a frozen graph from the most recent checkpoint from the Intel Dev Cloud. Following Aven’s tutorial on converting CycleGAN model from week12, I modified the file by inputting the generator’s name which is generator_1/Tanh. Aven also showed this APP called

With good results from the python script, I  also want to experiment with inferencing in TensorFlow. Using the freeze flag, I obtained a frozen graph from the most recent checkpoint from the Intel Dev Cloud. Following Aven’s tutorial on converting CycleGAN model from week12, I modified the file by inputting the generator’s name which is generator_1/Tanh. Aven also showed this APP called Netron – a visualizer for neural network and machine learning models. It details how inputs are being converted in the model and what types of activation functions are used. In the case of DCGAN, it starts with input dimension Z. Since it is a very long graph, I included a snippet of the visual. 

Converting the model was quite difficult to do. Basically I followed the python script and tried to find exact same ways to do so in TensorflowJS. With much help, I eventually employed the right distribution function and obtained the right dimension for my tensor which then I can output on the HTML page in my front-end implementation. Right now, the front-end is quite minimal with an option for users to click and generate new tattoo images. Here is a demo and some example output: 

Something worth mentioning is for some reason, the tensorflowJS model produces much worse output images than the python script. I am not sure the exact reason and would like to look more into it.

Future Improvement 

Here are some areas I can improve on for the future. 

1) Upsize the dataset to improve model output 

2) Improve output image quality for better visuals 

3) Enhance front end functionalities with more user interactions

4)Experiment with other GAN or machine learnings models to allow tattoo generation based on user input sketches rather than random generation. 

iML Week12: CycleGAN Training – Ivy Shi

Introduction: 

For this week’s assignment, I trained the summer2winter yosemite dataset with CycleGAN on Intel DevCloud. Domain A contains images of Yosemite Park in the summer and Domain B in the winter. There are no big differences in style between the two domains as most of the landscapes remain the same except for the addition of snow in the winter. 

Process:

Due to some error when saving the training script, I wasted some time initially retraining the monet2photo dataset again. Therefore there was not as much time for the summer2winter dataset training which contains around 1000 images. Right now I am at 58 epochs after 24 hours. It will be trained up to 200 epochs which should take a little less than three more days. 

Results:

Here are the results achieved after inferencing with 58 epochs

Conclusion: 

The results are actually worse than I expected. If we look closely, we can see the skies in the inferenced images get gloomier and trees appear to be in a darker shade of green. However, there is no trace of snow to signify winter which is rather disappointing. 

In general, there are no big differences between the left and right images which suppose to correspond to summer and winter respectively. I suspect this is due to the small number of epochs trained. Another possible reason might be images from Domain A and B are quite similar in style. 

The results right now are not great. I will continue to train and inference with a better model once it is completed. 

iML Week 11: Final Project Proposal – Ivy Shi

Idea: 

My final project is a continuation of the midterm project to work on tattoo image generation using GAN. After exploring this topic/model and having trained a model on face generation, I am interested in utilizing it to fulfill my interest in creating tattoos. So far I have not found any project similar to this on the internet so I am excited to making something new. The idea is to create an interface that allows users to generate tattoo images, ideally incorporating personalized features like user input and style selection. 

Continue reading “iML Week 11: Final Project Proposal – Ivy Shi”

Kinetic Light: Final Project Proposal – Ivy Shi

We have been focusing on light and light art for the first half of the semester. Therefore, for this final project, I looked more into kinetic artists and attempted to draw inspirations from them. Eventually I want to see how I incorporate the element of light into motion making truly kinetic light art. 

Perspective and Context

David C. Roy is a computer programmer turned kinetic art sculptor. He creates wooden kinetic sculpture that moves on its own without external motor, battery or power source. I thought Roy’s approach to kinetic art is quite unconventional and thought-provoking. He utilizes knowledge from when he was a physics student to make his pieces move by manually winding gear wheels. 

Another interesting fact is that Roy does not only concern with the movements of his sculptures but also the sound that they create. The idea of stimulating different senses is important when it comes to making people perceiving art. 

The second artist I found very inspiring is Christopher Bauder. I was especially attracted to his piece “Circular”  composed of three moveable lighting rings suspended from the ceiling. While Bauder gives meaning to the rings by associating them to eternity, I was simply just amazed by the installation itself. 

Even though there is only one shape of three different sizes, the varieties of movements they create are stunning. The moves are slow but hypnotizing. There are no flashy changes that force viewers to pay close attention but the paced and controlled movements make people hooked. The effects are strengthened by the appropriate choice of light and music. I think this is an exemplar of kinetic installation supported by usage of light. 

Project Description

I got my initial idea from David C. Roy’s piece called “Duality”

He detailed the three balances he tried to achieve: visual, simple and patterning which are definitely things for me to consider in my final work. He did not explain the meaning behind the name but I interpret it in two ways. First, just looking at the shape, there are two panels and their corresponding patterns interacting with each other. When they are apart, they are just on their own. But the interaction creates duality. Second, the patterns changes with time as the speed at which each panel moves is different. Depending on the timing, we see different effects. This is like anything in life, depending on how we look at it, it can be negative and/or positive. 

For the final project, I want to take the general shape as an inspiration, added with my own understanding of duality and combine it with lights to put on an additional layer of visual complexity. For the motion part, I will be using motors instead of Roy’s secret method of winding. 

For the motion part, I will be using motors instead of Roy’s secret method of winding. This is because first I do not have his knowledge, second by using motors I can create a generative composition. Since the panels have to move at different speeds to create changing patterns, at least two motors are required. For the light part, I will use either analog or digital LED strips. The specific way of using the lights such as where to put them and what patterns to pick is not determined. I would like to test things out once the prototype structure is done before making a final decision. At this point, I consider the motion part as the primary characteristic and the light part a supplementary aspect of the project. 

Production Schedule

April 25: Buy materials 

April 27: Start designing prototype of the final structure 

April 29 & 30: Use 3D printing and/or Laser cutting with different materials to see the effects. 

May 1 &2&3: Experiment with motor(s), see how the two panels interact and the patterns create with the motors on

May 4&5: Add LED lights on, develop code for lights

May 7&8: More testing with colors, patterns and speeds;

Finalize size of the structure

May 9&10:  Find the best way to display the project 

May 11—May 14: More testing and adjustments