Group Project Presentations – Julie (Marcela)

Group Project Presentations – iMirror

Instructor: Marcela

Partners: Santiago Salem, Daniel Zamiri, Justin Wu, Bing Chen

My Definition of Interaction: Interaction is described by a continuous relationship between two actors that is composed of communication through verbal, physical, and/or mental feedback. I chose to include mental feedback because if something or someone makes you feel something inside, then there is a relationship there, even if it isn’t a visible relationship.

Aligning Interactive Project – Sharing Faces

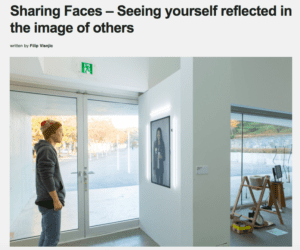
Through my research process, I stumbled upon a number of incredible interactive projects. One of my favorites is this project by Kyle McDonald called Sharing Faces. The project is composed of 3 crucial elements: a camera positioned at eye-level, a wall that displays images, and a human. When the person stands in front of the wall, the image projected on the wall are new images pulled from a database of all the people that have stood in front of the wall. These new images match the position of your reflection in the mirror to create an image of yourself using the images of others.

After reading about this project, I was able to solidify my definition of interaction. When you place yourself into this project, you are fully immersed into the experience. Not only are you interacting with a physical thing, but you are also interacting with other humans (digitally)! I thought this was really awesome because when you interact or be social with other humans, you also feel something inside of you, like a connection of some sort. So, to be able to see so many other humans that were also standing right where you were standing, taking part of this project, generates a sweet connective feeling from within you. This project aligns with my definition because it embodies a purposeful feedback reaction. When the person moves, the image changes and creates a reactive feeling. And this reactive feeling urges the person to continue moving and to be curious about other possible images in different positions.
https://www.creativeapplications.net/openframeworks/sharing-faces-seeing-yourself-reflected-in-the-image-of-others/ 

Misaligning Project – Björk – Biophilia – Virus 

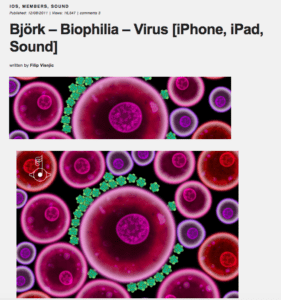
On the other hand, I discovered a project that was not within the framework of my definition for interaction. Björk – Biophilia – Virus is an IOS app that is essentially an interactive musical experience. The app combines unique musical pieces and interactive artwork to create a specific musical and visual experience. While this app embodies a really cool idea that may satisfy other’s definition of interaction, it wasn’t enough for me. The creator of the app was pretty awesome to give us his steps to achieving the programming of music to visuals. But, the app is mainly just a cool video with compatible musical sounds that explain some process of a virus etc. I wasn’t able to connect with it as much as I did with the project I explained above. This lack of connection helped me develop the mental feedback aspect of my definition of interaction. I feel that something is truly interactive if it makes you feel something inside. Interaction is not only just the physical actions between 2 things but has to have the added factor of purposeful feedback.

https://www.creativeapplications.net/sound/bjork-biophilia-virus-iphone-ipad-sound/
This also ties back to Crawford’s piece, The Art of Interactive Design, where he describes interactivity as a cycle where “two actors alternately listen, think and speak”. My approach to defining interaction was initially based off his definition. I ended up branching off a bit to include this mental feedback aspect. After learning about a number of projects, I realized what made a project interactive for me, was if it included a reactive feeling that made me more curious to explore a little more about the project.

Our Interactive Device

This leads into the idea for the interactive device my group had. Our product is called the iMirror. It is essentially a mirror that uses AI to analyze the condition of your skin based on previous interactions/uses and the weather conditions outside. The mirror has an internal speaker that can hold a conversation with you. Then, based on the analyzed condition of your skin, it offers products that are algorithmically determined to be effective for your skin. It has a database of how your skin reacts to the products and can recommend a customized routine that is suitable to your skin type and environmental circumstances. Because it first offers product samples, you can then determine if you like the product or not. If you like the product, you can then receive the product in full-size. This product is based on that assumption that 100 years in the future there would be advanced enough technology that has a database that holds all these products within the mirror or includes lightning fast delivery.

This product derives from our problems revolving skin care. We all agree that having clear and healthy skin is a crucial part to one’s self-esteem and confidence. It is always so frustrating to use products and experiment with products but see no improvement with your skin quality. Thus, we began to think about how we can provide a solution that is convenient yet effective and incorporate it into something that we use every day. Most of us wake up in the morning and go into a bathroom with a mirror. We wanted to transform the average, traditional mirror into something purposeful and effective. Through this, we began to brainstorm that ideas that would soon be features in our high-tech smart mirror.

We wanted to create something purposeful. By having a mirror that can hold a conversation with you and provide you with solutions/improvements to an important part of yourself, I felt that this truly reinforces the core aspects of my definition of interaction. Not only does this product embody verbal and physical feedback loops, but it also includes a mental feedback loop. The mirror can speak to you, push products through the slots, and when you see results, it makes you feel better about yourself. If you don’t like the product, the mirror would take this feedback into account and revise/adjust based on your reaction. If you do like the product, you would give the iMirror positive feedback and it would have more knowledge about you and improve in future interactions. This reactive feeling generates a connection between you and the mirror, furthering the interactivity between both.
Recitation 3: Sensors – Julie (Marcela)

Recitation 3: Arduino Basics

Instructor: Marcela

Partner: Santiago Salem

Circuit: Infrared Distance Sensor

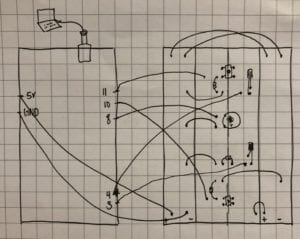
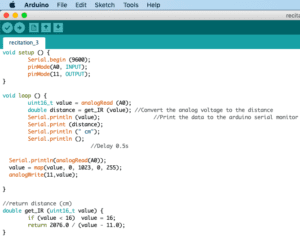
Using this sensor, my partner and I sought out to connect the distance your hand was from the sensor to the brightness level of an LED light. We had both received our own Arduino boxes that day and were very excited to begin using brand new material! We followed the sample code and diagram from this link to set up our circuit and connect it to Arduino. We used the jumper cables to connect the sensor to the corresponding ground, 5v power, and analog plug (AO) in Arduino Uno. To test if the distance sensor was working, we opened Serial Monitor to see the if it was able to numerically detect the distance and infrared values. The further away we were, the distance number and infrared decreased, and vice versa when we put our fingers right on top of the sensor. 

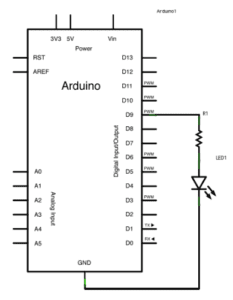
After we confirmed our sensor was working, we then continued to the second half of our circuit: using the sensor to determine LED brightness. We connected the breadboard to Arduino Uno through ground and pin. On the breadboard, we attached the LED light and correspondingly, the resistor. To begin, we based our additional code off our knowledge from fade and blink code. We changed digital read to analog read to accommodate. We than ran the Arduino code but the LED was not lighting up. After consulting with a fellow, we realized we had plugged the jumper cable into an input without a squiggly line on the side. Jingyi explained to us how the LED was lighting up, and that we couldn’t have a continuous plug connected with a digital plug. Since our code was in a loop function, it was constantly circling the information from the Arduino code, which is why the LED light sometimes flickered. The plugs with the squiggly line could receive analog results with digital means.  In addition to this complication, Jingyi also helped us understand the why we also needed to include a map function code. We referred to lecture class notes with Arduino codes to help us write the map values. Only after we solved both these issues, the circuit was able to function smoothly. 

Question 1:

In this recitation exercise, we intended to assemble a infrared distance sensor test. Distance would be sensed by if there was something in the atmosphere that was solid and from there would relay information to the corresponding brightness of the LED. In the real world, there already exists many of these infrared distance detectors. For example, at airports, there are many long range infrared camera detectors to ensure safety both inside the airport and out on the runway. When it’s dark at night and there are large clouds of fog, it is hard for an airport coordinator to see all incoming and departing flights. With their infrared distance sensor, these people are able to maintain control over flights and ensure safety. 

Question 2:

Code is similar to a recipe because it produces a result of something, however, not everyone’s final product will be exactly the same because of the working process of how one produces the end result. Like in cooking, there are many ways of reaching a final product and each final product tastes a little bit different. When we code, everyone has a different processing strategy, and while everyone’s code may be different (or exactly the same), more or less, the same outcome is reached. Each code is individualized and has the process of failure and success. If something in the recipe process is done incorrectly, you will receive feedback by eating a dry cake or too spicy curry. From there, the next time you create that food again, you’ll try again until you are satisfied with the final product. Like in cooking, when you write code, you also receive feedback and can revise the code to create an end product you are satisfied with. In both code and recipes, you are given a guideline of what works, but you can personalize it by either adding an extra ingredient or by choosing how long the delay of a LED light should be. 

Question 3:

Computers have a strong influence over human behavior. Manovich states that old media “involved a human creator who manually assembled textual, visual, and/or audio elements,” however new media is “characterized by variability” (12). Old media stunted creativity and innovation. Humans would stay within the box of ideas. However, through the rise of the digital age, aspects no one had ever imagined emerged. This gave rise to the essence of variability and that is what influences humans and their interactions with the rest of the world. Through new media, we are given the opportunity to “create versions of the same object that differ from each other in more substantial ways” (15). Because of the ease of access to variability, we are given more ways to express ourselves, be who we want to be, and do what we want to do. In this era of new media, more and more projects and creations are catered toward self-fulfillment, rather than for the purpose of creating profit. We are moving on a path of constant improvement and life enhancement. The latest health technology is constantly undergoing R&D to improve and lengthen human lives. While there are many aspects of technological improvements that motivate humans to strive for the best, it also grants the opportunity to be lazy and let others do the improving and variations. Computer, in specific, allow humans to interact in unorthodox ways in comparison to old media. Computers give us access to learn and grow from each other, giving rise to variability and advancements. However, computers also have a negative influence and can suck humans into a completely addictive digital life, which typically leads to a disconnect from reality. As with most things, there are positive and negative influences that come from improvements and new eras with computers and the digital new media era being just one of them.

Recitation 2: Arduino Basics – Julie (Marcela)

Recitation 2: Arduino Basics

Instructor: Marcela

Partner: Justin Wu

Circuit 1: Fade

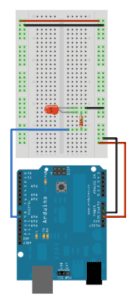
Initially, while we were assembling this circuit, we were pretty confident. However, our first attempt ended up being a failure. We had forgotten to connect an additional ground cable to the ground leg connected to the LED light. Therefore, while we had most of the circuit complete, the missing grounding cable led to an incomplete circuit. I think this shows that you can never be too careful and diligent when building these circuits. 

Circuit 2: toneMelody

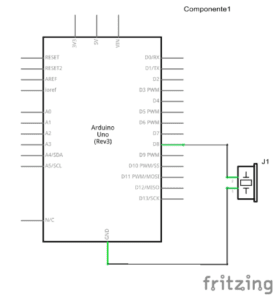
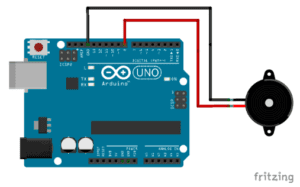
The assembly of this circuit was fairly simple. We focused mostly on creating a clean and organized breadboard. We color coordinated the cables, red for power, black for ground, white and yellow for connecting to the buzzer. 

Circuit 3: Speed Game

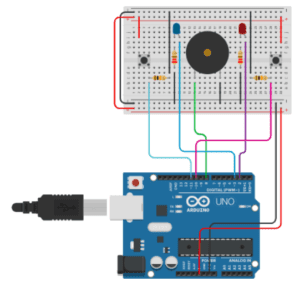
When assembling this circuit, my partner and I were a bit overwhelmed with the complexity of the diagram.  We started from the top of the diagram and moved downward. Thinking we had gotten everything correctly plugged in, we realized that we had forgotten to connect power and ground from our breadboard to the Arduino Uno. In an effort to keep our breadboard organized, we also went to cut more black jumper cables for ground. After talking to the fellows, we realized we made an amateur mistake of not being diligent enough. To see who won, we referred to the Serial Monitor on Arduino.

We didn’t have enough time to create Circuit 4: Four-player Speed Game, however, if we were to assemble it, I would imagine we just add additional buttons and connect those to the Arduino Uno and add the players on the code.

Question 1:

Technology has grown to be an increasingly relevant concept in almost everyone’s daily lives. From the moment we wake up to the moment we fall asleep, we are in at least one way digitally connected to some sort of physical computation, electrical circuits, etc. We turn on lights, brush our teeth, check our phones, use computers, swipe in and out of the AB… I can go on and on, but I think you get the point. Even when we don’t think we are plugged in, we almost always are. Building these circuits have really helped me better understand the basic physical computations of some every day things I come in contact with. The three stages of interaction are composed of “listening, thinking, and speaking — or, in computer terms: input, processing, and output”. These stages connect physical things with physical things, physical things with technological things, and technological things with technological things. Interactivity is not only just human and technological connections, but it also grounds itself as a foundational aspect of a relationship. When two actors connect, whether it be digitally or physically, they are exchanging information, ideas, and feedback. And only after this relationship is established, then you can begin to expand and grow through interaction. 

Question 2:

If I had 100,000 LEDs of any brightness and color at my disposal, I would create an light experience. Imagine a completely blacked out room, you walk in and sit down in a chair. Immediately, the room senses your presence and guides you through a story like journey resembling something like those sand art stories. The lights would light up in different colors and brightness levels to tell a story through images and designs.This kind of experience could be in an art exhibit or some random popup store. 

Recitation 1: Electronics and Soldering – Julie (Marcela)

Recitation 1: Electronics and Soldering

Instructor: Marcela

Partner: Justin Wu

Materials Used in Circuits:

  • Breadboard – a flat device used for short term electronic prototyping, that allows for easy and organized connections between jumper cables, etc. without the addition of soldering.
  • LM7805 Voltage Regulator – this maintains the voltage output and is used support the current. For example, this device allows the 12V DC to be executed at 5V DC so the LED would not fry.
  • Buzzer – this device acts as the output once it is pressed, resembling a  feedback system which allowed us to see if our circuit was working or not.
  • Push-Button Switch – this device allows electrical currents to flow throughout the circuit; can act as an input and/or output. 
  • Arcade Button – like the push button switch, this device is another input element that controls electrical flow through the circuit.
  • 220 ohm Resistor – this device limits the voltage that flows to the LED to protect it. 
  • LED – emits light once electricity flows to it; acts as a output.
  • 100 nF (0.1uF) Capacitor – has the same function as the resister; used to protect the LED or buzzer.
  • 10K ohm Variable Resistor (Potentiometer) – this device can adjust the voltage that flows to the LED, controlling the brightness of the LED.
  • 12 volt power supply – we converted the 220V AC to 12V DC, a voltage level that was safer to experiment with.
  • Barrel Jack – connects the breadboard with the 12V DC power supply. 
  • Multimeter – ahas many different functions, but in this class, we used it to determine the correct resister level.
  • Several Jumper Cables (Hook-up Wires) – flexible wires used in the breadboard to connect circuits.

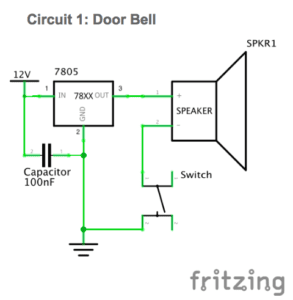
Circuit 1: Doorbell

Components used:  Breadboard, LM7805 Voltage Regulator, Buzzer, Push Button Switch/Arcade Button, 100 nF (0.1uF) Capacitor, 12 volt power supply, Barrel Jack

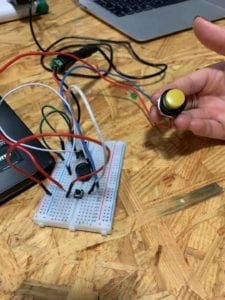
While this model seemed fairly simple, it really helped me understand how the breadboard flow works and the concept of power and ground. Our first few trials were all failures. Being new at this, we weren’t really sure how to go about the circuit. We weren’t sure how to connect everything and what was connected to what. But once the functionality of the breadboard was explained to us, we were able to rearrange our jumper cables to connect the correct cables to power, ground, and legs of the components. We were also learned that the best way to format the button was to have the jumper cables in a cross formation, and that it would cancel out if the cables were in the same row. 

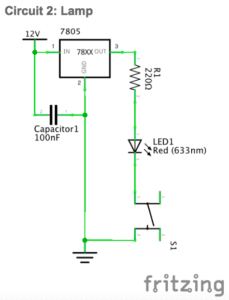
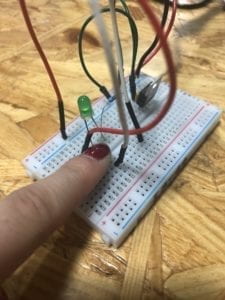
Circuit 2: Lamp

*finger on the button

Components used: Breadboard, LM7805 Voltage Regulator, Buzzer, Push-Button Switch/Arcade Button, 100 nF (0.1uF) Capacitor, 12 volt power supply, Barrel Jack, 220 ohm Resistor, LED

After assembling the first circuit, we had a much easier time with this circuit, We just replaced the buzzer aspect with the LED light. However, we had to be careful of the legs of the LED light and remember that the long leg is positive to power. Only if the legs are positioned correctly, then the LED would light up. 

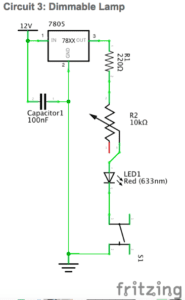
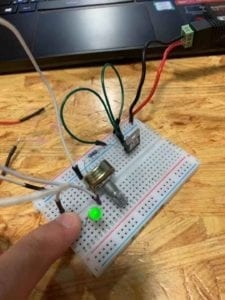
Circuit 3: Dimmable Lamp

Components used: Breadboard, LM7805 Voltage Regulator, Buzzer, Push-Button Switch/Arcade Button, 100 nF (0.1uF) Capacitor, 12 volt power supply, Barrel Jack, 10K ohm Variable Resistor (Potentiometer), LED 

In this experience particularly, I think we realized the importance of breadboard organization. When we first began, we had a lot of jumper cables hanging out and plugged in with no purpose. It was difficult to see what line the potentiometer legs were plugged into. We replaced the resistor with the potentiometer, but were initially confused where to plug what because it had 3 legs. However, after further instruction, we were told to plug the cables into the left and middle legs. From there, we were able to light up and adjust the LED brightness.

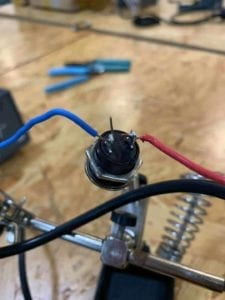
Soldering!

While we only used this button in the first circuit, this was my favorite part of recitation. We were able to solder the wires onto the connecting metal circles to facilitate electrical flow by melting a little portion of the metal jumper cable.

Reflection Question 1:

After reading The Art of Interactive Design, I believe our circuits include interactivity through the cycle of human interaction and feedback. The author describes interactivity as a cycle where “two actors alternately listen, think, and speak.” In this case, both my partner and I were one actor and the breadboard circuit was the other actor. We would listen to the instructions given, think about how to format the elements, and speak to the breadboard by trying the circuit out. The circuit would then have to listen to our ideas, think if the ideas were suitable, and speak back to us, giving us feedback if the circuit was functioning or if something was wrong (ie. no buzzing or light). If something was wrong, we would then have to listen to what the circuit was doing (usually nothing), and if nothing was happening, we would then have to think about how to make it work, and ultimately speak again and execute what we thought would work. This cycle is a continuous loop of listening and feedback until both actors are satisfied with the outcome. 

Reflection Question 2:

Interaction Design and Physical Computing can be used to create interactivity in numerous fashions. Both interaction design and physical computing have been around for ages, but in our most recent era, we have had the breakthrough of being able to combine both aspects to create interactive ideas with humans, other objects, etc. For example, interactive design can enhance existing ideas. In class, we watched this particularly eyeopening video “The Eyewriter”. This particular film really stood out to me because not only was this using physical computing to help someone, but that computing led to interactive design that changed his life. Being physically disabled left him constrained to his bed, but with this idea, he was essentially able to be transported outside and have his graffiti shown on buildings miles away from him, allowing him to interact with many other humans. However, I think interactive design and physical computing can also be for silly things like the head button game where 2 players wear helmets and try to slap each others head and have their picture taken when the button is pressed. Both ideas are great and create interactivity with each other and with physical things. The range of ideas to create interactivity is immense and can be for all different purposes.