Week 12 – Training CycleGAN – Jenny

Process

I decide to train CycleGAN with monet2photo dataset for this week’s assignment. I follow all the steps and it took me three days to get the trained model. But when I started to download the model, I faced with a lot of difficulties. Maybe because the checkpoint files are too large, my download stopped every time. I tried about 10 times and it still failed to download the whole checkpoints. Then I decided to switch back to our in-class example and see how it is going to be like if I choose different input images. 

xdv cdv

Result

I imported some images from a photographer called David Ablehams and the results as follows are satisfactory. 

vfrt gt fgt

Week 14 – Final Project – Virtual Dressing Room – Jenny

Introduction 

This final project is a continuation of previous midterm project and it simplify the fashionGAN model into more practical bodyPix and styleTransfer model. BodyPix is responsible for making body segmentation and styleTransfer is responsible for adding different patterns or transforming different colors on the input clothing images. Since in real cases, the same clothes would have different colors and texture patterns as well. So it is really useful if I could use styleTransfer to generate different styles of the same clothes.

Goal

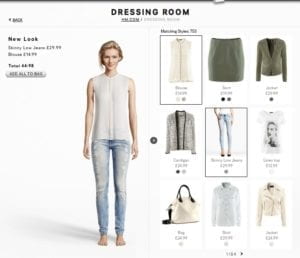
Continuing on my midterm project, I think I do not really need to stick with DeepFashion since the image synthesis part does not quite compile with my project idea. What I really want to create is like some e-commerce website already have. They have their own virtual online dressing room with 3D models generated by computer. When the user select different clothes, the model will automatically fit in different clothes. The conceptual webpage could be like this.

1

Demo

Here is a quite demo about the webpage I created. When pressing different keys on my computer, different clothes will be matched onto the upper body part of the model and different text description will display on the left hand side of the image. 

demo

My Web Layout

ferv

Workflow & Difficulties

Here the techniques I used are basically these two models and here styleTransfer is based on ml5.js and bodyPix is based on p5. (Moon helped me to create the p5 version of bodyPix and I used this one instead of the original p5 based on Tensorflow.)

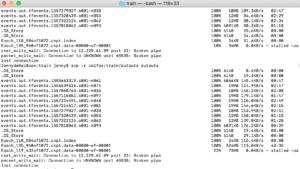
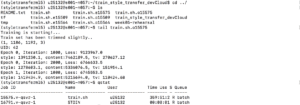
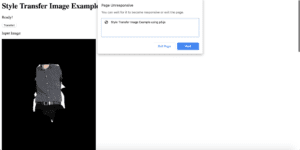
First of all, I worked on these two work stream separately and combined them into two linked webpage. But then wired things happen that every time I input the segmentation I got from bodyPix into styleTransfer, my webpage crashed for some unknown reason. I am not quite sure about the exact reason but both my newly trained styleTransfer model and existing styleTransfer model failed. But all of these models worked perfectly fine with other input images.

h

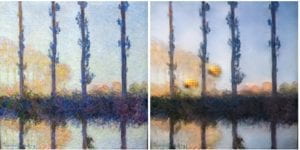
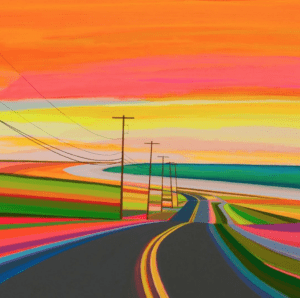
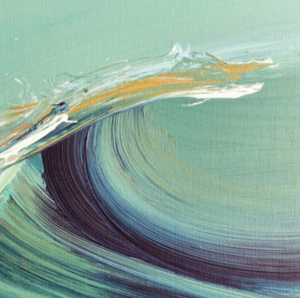
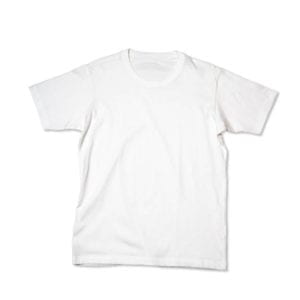
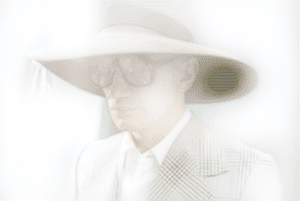
one of the newly trained model — a white T-shirt (input & output images)

c

derfcfv

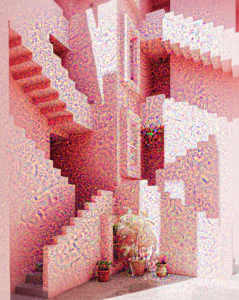
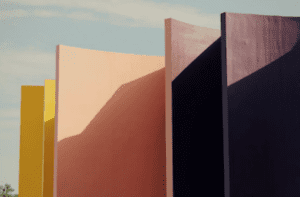
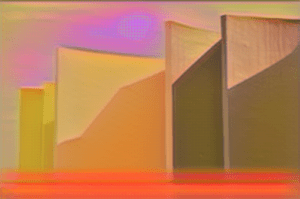
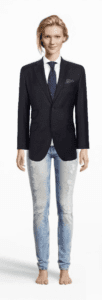
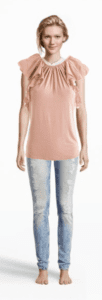
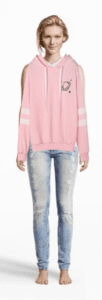
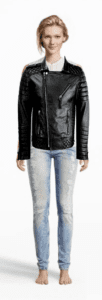
Then I adjust my work plan and I think if I really want to get a better visual result, the best way I can do for now is to map the clothes images directly into the body segmentation I get from bodyPix. So here I cropped the segmentation images into rectangular shaped position and they map the clothes images into this position. Some of the results are really fit with the model while some are not. There are two reasons behind.

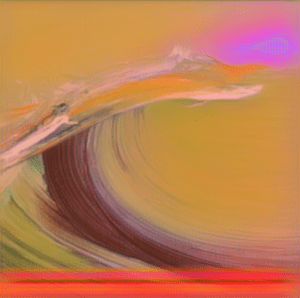
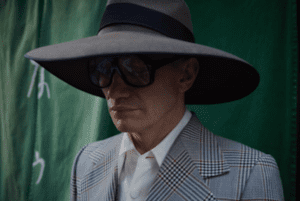
The first reason is that I used the rectangular shape to map clothes images rather than using the bodyPix outline. That may created some losses. The second reason is because I also use the rectangular shape of clothes images rather than the outline of the clothes images. Then in this way, I cannot perfectly map every outline of the clothes with the  model. There is always some gaps in between especially in the shoulder part. Here are the four clothes images I used to map on the upper body of the model.

ds  dewefw

Future Improvement

1)Outline detection 

In the future, the outline detection accuracy has a lot of space to improve. One simple method could be using bodyPix to get the segmented outline of the clothes image. But there are still lots of problems when matching the clothes images into the model. I think maybe different machine learning model similar but powerful than Pix2Pix may be really helpful since Pix2Pix basically detect the outline of one image. Also, I noticed that if I choose a model image which does not have a front body, then bodyPix will have a relatively low accuracy and the matching process will become tricky since you need to adjust not only the proportion but also the rotation of the clothes image. That part could be hard to realize in a 2 dimension way. I am wondering whether there is any 3 dimension machine learning model to refer to.

2)Video capture

I think the ideal way to make an interaction is to let the user stand in front of the camera and take an image of themselves. Then they can select different kinds of clothes from the computer that they would like to try on virtually. 

Source & Code

https://github.com/tensorflow/tfjs-models/tree/master/body-pix

https://www.dropbox.com/s/1vhf7qjawa5wv75/iML_final.zip?dl=0

Week 11 – Final Project Proposal – Jenny

Introduction

For my final project, I will continue work on my midterm project and further develop the body segmentation function and try to match the segmentation with the clothing image dataset I have.

Implementation

I plan to first develop BodyPix with p5 and get the body part segmentation images I want. Then I would like to training my own Pix2Pix model using the segmentation map I generated from the original database. And then I will try to optimize the output model I could get and try to adjust it into the machine learning model I want to achieve. In the end, I want to build an online interactive page just like the Monet project we go through in class. The user can change different outfit input images and they can see the virtual outfit generated on their body. 

Goal

The goal is try to transfer the clothes in the input image into the body part of my real-time video or the picture I captured from my real-time video. In this way, I could synthesize a virtual outfit on top of my body part. 

Resources

BodyPix: https://medium.com/tensorflow/introducing-bodypix-real-time-person-segmentation-in-the-browser-with-tensorflow-js-f1948126c2a0

Training Pix2Pix: https://medium.com/@dongphilyoo/how-to-train-pix2pix-model-and-generating-on-the-web-with-ml5-js-87d879fb4224

Week 10 – Deep Dream – Jenny

This week I explored some application of Deep Dream on my own computer. I choose one architectural photograph and manipulated with different parameters. This image does not have any outstanding pattern and I am quite curious about the output image after applying Deep Dream layers.

Input Image

ad

Parameter 1

step = 0.01 
num_octave = 3 
octave_scale = 1.4 
iterations = 20 
max_loss = 10

(I did not change the mixed features in setting this time)

Output  1

a

Parameter 2 

Change step to 0.1 

Output  2

2

Clearly, the generated pattern becomes more outstanding but the sharpness of pixels are increasingly lost. Therefore, I would prefer to say at a lower step and generate the image more times with Deep Dream rather than directly increase the step value.

Parameter 3

Change num_octave to 30

Output  3

I got almost the same result as output 2. The clarity of the image has been decreased sharply. I prefer to stay low for this parameter.

wef

Parameter 4

Change iterations to 200

Output  4

acf

There is no much difference with the first output. So I think the time of iteration does not influence much of the output image.

Parameter 5

In the end, in order to get a enormous different from the first output, I changed these parameters as follows. 

step = 0.005 
num_octave = 1
octave_scale = 14.0
iterations = 2000
max_loss = 10.

Output 5

fre

Compared with output 1, this image has relatively small texture and more shallow color of each pattern. I also found that num_octave cannot be changed to float. So there are some underlying restricts among these parameters. 

By adjusting these parameters, I can actually get different output from Deep Dream. But I think the image I choose does not have various color and an obvious pattern, therefore, the result does not look cool compared with our in-class exercise. 

Week 09 – Training StyleTransfer – Jenny

Inspiration

After the in-class demo, I noticed that the style image with more color vibrant and more graphical structure may bring better results. Then I choose one painting online which has a great combination of various color and unique style.  Since this painting is kind of unreal compared with real road view, I decided to input oil painting, architecture painting and fashion photography and transfer them into this unreal colorful style. I hope the output will be like a real painting.

Style Image

1

Training

At first I just followed the guideline online, connecting Intel, uploading my style image and trained model. The dataset really took a long time for me to download. I tried 3 times because the first two times failed in the end. After I successfully downloaded the dataset, I found that there are two dataset in my Intel environment. Since I also tried to download the dataset last week in-class, there is one incomplete dataset. I searched online and tried to delete the incomplete one.

But then I encountered with some technical issues regarding the last step.

tail train.sh.o1234

After I typed in this line, there is an error message. I tried to fix the numpy error but the code still did not work. Later on I learned that I need to disconnect with Intel first before I could be able to install numpy. I retired and then the model finally work.

11

Input & Output

( 1 ) Oli painting

1 2

( 2 ) Architecture photo

3 4

( 3 ) Street & Fashion Photography 

fr efew wfew efewr   

Above are all my input images and output images. Although there are some strange pinks, but overall the outline and details in the output images are clear and vibrant. I think the results look really cool. All these input images become kind of oil painted and have some film texture.