Recitation11: Serial Communication Workshops by Haoquan (Kenneth) Wang

In my final project, there is an interactive device which can allow users to send both digital and analog signal from Arduino to Processing. It is an important part of my project. So I decided to take the Serial Communication workshop given by Young. Basically, we have two exercises. One is Arduino to Processing and the other is Processing to Arduino.

Arduino to Processing

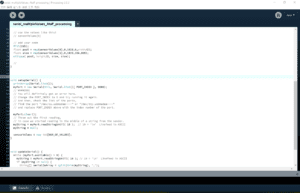
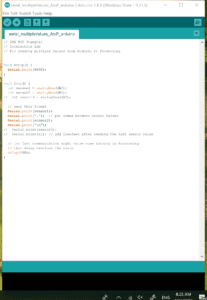
For AtoP exercise, I did a basic drawing graphics program. The code is here:

Arduino:

// IMA NYU Shanghai
// Interaction Lab
// For sending multiple values from Arduino to Processing

int buttonPin = 2;
int buttonState = 0;

void setup() {
Serial.begin(9600);
pinMode(buttonPin,INPUT);
}

void loop() {
int sensor1 = analogRead(A0);
int sensor2 = analogRead(A1);
buttonState = digitalRead(buttonPin);

// keep this format
Serial.print(sensor1);
Serial.print(“,”); // put comma between sensor values
Serial.print(sensor2);
Serial.print(“,”);
Serial.print(buttonState);
Serial.println(); // add linefeed after sending the last sensor value

// too fast communication might cause some latency in Processing
// this delay resolves the issue.
delay(100);
}

Processing:

// IMA NYU Shanghai
// Interaction Lab
// For receiving multiple values from Arduino to Processing

/*
* Based on the readStringUntil() example by Tom Igoe
* https://processing.org/reference/libraries/serial/Serial_readStringUntil_.html
*/

import processing.serial.*;

String myString = null;
Serial myPort;

int NUM_OF_VALUES = 3; /** YOU MUST CHANGE THIS ACCORDING TO YOUR PROJECT **/
int[] sensorValues; /** this array stores values from Arduino **/

void setup() {
size(500, 500);
background(0);
setupSerial();
}

void draw() {
updateSerial();
printArray(sensorValues);

// use the values like this!
// sensorValues[0]

// add your code

//
background(255);
fill(0);
float posX = map (sensorValues[0], 0, 1023, 0, width);
float posY = map (sensorValues[1], 0, 1023, 0, height);
ellipse(posX, posY, 50, 50);

if (sensorValues[2] == 1) {
fill(255,0,0);
rect(mouseX,mouseY, 100, 100);

}
}

void setupSerial() {
printArray(Serial.list());
myPort = new Serial(this, Serial.list()[ 0 ], 9600);
// WARNING!
// You will definitely get an error here.
// Change the PORT_INDEX to 0 and try running it again.
// And then, check the list of the ports,
// find the port “/dev/cu.usbmodem—-” or “/dev/tty.usbmodem—-”
// and replace PORT_INDEX above with the index number of the port.

myPort.clear();
// Throw out the first reading,
// in case we started reading in the middle of a string from the sender.
myString = myPort.readStringUntil( 10 ); // 10 = ‘\n’ Linefeed in ASCII
myString = null;

sensorValues = new int[NUM_OF_VALUES];
}

void updateSerial() {
while (myPort.available() > 0) {
myString = myPort.readStringUntil( 10 ); // 10 = ‘\n’ Linefeed in ASCII
if (myString != null) {
String[] serialInArray = split(trim(myString), “,”);
if (serialInArray.length == NUM_OF_VALUES) {
for (int i=0; i<serialInArray.length; i++) {
sensorValues[i] = int(serialInArray[i]);
}
}
}
}
}

Final product:
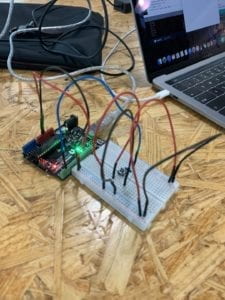
Because we have already had a similar practice in lecture before, so this exercise is relatively easy for me to achieve and I didn’t encouter any difficulties that really do a matter to my working process. 

Processing to Arduino:

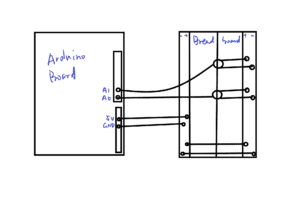
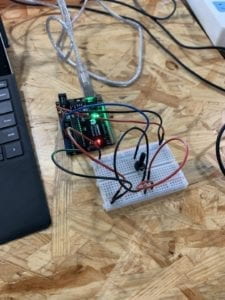
For this practice, we did a simple interaction from Processing to Arduino. When we change the position of the mouse on the screen, the Processing code will send the value of the position(x and y) to Arduino. For Arduino, the brightness of the two LEDs will change according to the position values from Processing.

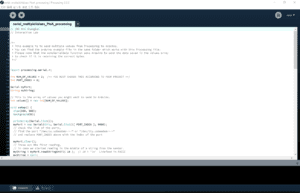
The code is here:

Arduino:

// IMA NYU Shanghai
// Interaction Lab

/**
This example is to send multiple values from Processing to Arduino.
You can find the Processing example file in the same folder which works with this Arduino file.
Please note that the echo case (when char c is ‘e’ in the getSerialData function below)
checks if Arduino is receiving the correct bytes from the Processing sketch
by sending the values array back to the Processing sketch.
**/

#define NUM_OF_VALUES 2 /** YOU MUST CHANGE THIS ACCORDING TO YOUR PROJECT **/

/** DO NOT REMOVE THESE **/
int tempValue = 0;
int valueIndex = 0;

/* This is the array of values storing the data from Processing. */
int values[NUM_OF_VALUES];

void setup() {
pinMode(9, OUTPUT);
pinMode(11, OUTPUT);
Serial.begin(9600);
}

void loop() {
getSerialData();

// add your code here
// use elements in the values array
// values[0] // values[1]

int brightness1 = map ( values[0], 0, 500, 0, 255);
int brightness2 = map( values[1], 0 , 500, 0 ,255);

analogWrite(9, brightness1);
analogWrite(11, brightness2);
}

//recieve serial data from Processing
void getSerialData() {
if (Serial.available()) {
char c = Serial.read();
//switch – case checks the value of the variable in the switch function
//in this case, the char c, then runs one of the cases that fit the value of the variable
//for more information, visit the reference page: https://www.arduino.cc/en/Reference/SwitchCase
switch (c) {
//if the char c from Processing is a number between 0 and 9
case ‘0’…’9′:
//save the value of char c to tempValue
//but simultaneously rearrange the existing values saved in tempValue
//for the digits received through char c to remain coherent
//if this does not make sense and would like to know more, send an email to me!
tempValue = tempValue * 10 + c – ‘0’;
break;
//if the char c from Processing is a comma
//indicating that the following values of char c is for the next element in the values array
case ‘,’:
values[valueIndex] = tempValue;
//reset tempValue value
tempValue = 0;
//increment valuesIndex by 1
valueIndex++;
break;
//if the char c from Processing is character ‘n’
//which signals that it is the end of data
case ‘n’:
//save the tempValue
//this will b the last element in the values array
values[valueIndex] = tempValue;
//reset tempValue and valueIndex values
//to clear out the values array for the next round of readings from Processing
tempValue = 0;
valueIndex = 0;
break;
//if the char c from Processing is character ‘e’
//it is signalling for the Arduino to send Processing the elements saved in the values array
//this case is triggered and processed by the echoSerialData function in the Processing sketch
case ‘e’: // to echo
for (int i = 0; i < NUM_OF_VALUES; i++) {
Serial.print(values[i]);
if (i < NUM_OF_VALUES – 1) {
Serial.print(‘,’);
}
else {
Serial.println();
}
}
break;
}
}
}

Processing:

// IMA NYU Shanghai
// Interaction Lab

/**
* This example is to send multiple values from Processing to Arduino.
* You can find the arduino example file in the same folder which works with this Processing file.
* Please note that the echoSerialData function asks Arduino to send the data saved in the values array
* to check if it is receiving the correct bytes.
**/

import processing.serial.*;

int NUM_OF_VALUES = 2; /** YOU MUST CHANGE THIS ACCORDING TO YOUR PROJECT **/

Serial myPort;
String myString;

// This is the array of values you might want to send to Arduino.
int values[] = new int[NUM_OF_VALUES];

void setup() {
size(500, 500);
background(0);

printArray(Serial.list());
myPort = new Serial(this, Serial.list()[ 0 ], 9600);
// check the list of the ports,
// find the port “/dev/cu.usbmodem—-” or “/dev/tty.usbmodem—-”
// and replace PORT_INDEX above with the index of the port

myPort.clear();
// Throw out the first reading,
// in case we started reading in the middle of a string from the sender.
myString = myPort.readStringUntil( 10 ); // 10 = ‘\n’ Linefeed in ASCII
myString = null;
}

void draw() {
background(0);

values[0] = mouseX;
values[1] = mouseY;

// changes the values

// sends the values to Arduino.
sendSerialData();

// This causess the communication to become slow and unstable.
// You might want to comment this out when everything is ready.
// The parameter 200 is the frequency of echoing.
// The higher this number, the slower the program will be
// but the higher this number, the more stable it will be.
echoSerialData(200);
}

void sendSerialData() {
String data = “”;
for (int i=0; i<values.length; i++) {
data += values[i];
//if i is less than the index number of the last element in the values array
if (i < values.length-1) {
data += “,”; // add splitter character “,” between each values element
}
//if it is the last element in the values array
else {
data += “n”; // add the end of data character “n”
}
}
//write to Arduino
myPort.write(data);
}

void echoSerialData(int frequency) {
//write character ‘e’ at the given frequency
//to request Arduino to send back the values array
if (frameCount % frequency == 0) myPort.write(‘e’);

String incomingBytes = “”;
while (myPort.available() > 0) {
//add on all the characters received from the Arduino to the incomingBytes string
incomingBytes += char(myPort.read());
}
//print what Arduino sent back to Processing
print( incomingBytes );
}

Final Product:

For PtoA, I am not quite familiar with it. Especially the code of Processing, how to declare an array of values and store them in Arduino really botters me. But after the workshop, I deepen the understanding of code of Serial Communicaiton.

Conclusion :

The exercises I did in the workshop are the basic serial communication. For my final project, the serial communication part is more complicated and hard to code. I will use several buttons and a potentiometer to do various kinds of interaction. 
Recitation10: Media Controller by Haoquan (Kenneth) Wangs

At first, I want to use a potentiometer to adjust the size of each rectangle of pixels when using the camera. But unfortunately, my camera is broken. The picture is green and the picture changes slowly. So I decided to use the potentiometer to change an image. 

Code:

Arduino:

// IMA NYU Shanghai
// Interaction Lab
// This code sends one value from Arduino to Processing

void setup() {
Serial.begin(9600);
}

void loop() {
int sensorValue = analogRead(A0);
Serial.write(sensorValue);

// too fast communication might cause some latency in Processing
// this delay resolves the issue.
delay(10);
}

Processing:

// IMA NYU Shanghai
// Interaction Lab
// This code receives one value from Arduino to Processing

import processing.serial.*;

PImage img;
int rectSize = 40;

Serial myPort;
int valueFromArduino;
int PORT_INDEX = 0;

void setup() {
size(600, 438);
img = loadImage(“XO.jpg”);

printArray(Serial.list());
// this prints out the list of all available serial ports on your computer.

myPort = new Serial(this, Serial.list()[ PORT_INDEX ], 9600);
// WARNING!
// You will definitely get an error here.
// Change the PORT_INDEX to 0 and try running it again.
// And then, check the list of the ports,
// find the port “/dev/cu.usbmodem—-” or “/dev/tty.usbmodem—-”
// and replace PORT_INDEX above with the index number of the port.
}

void draw() {
// to read the value from the Arduino

while ( myPort.available() > 0) {
valueFromArduino = myPort.read();
}
println(valueFromArduino);//This prints out the values from Arduino

img.loadPixels();

for (int y=0; y<img.height; y=y+rectSize) {
for (int x=0; x<img.width; x=x+rectSize) {
int i = y * img.width + x;

fill( img.pixels[i] );
rect(x, y, rectSize, rectSize);

//set(x, y, color(img.pixels[i]));
}
}

rectSize = int(map(valueFromArduino, 0, 255, 20, 100));
img.updatePixels();
delay(10);
}

Reflection:

What technology I use in my work is to use potentiometer to change the size of each rectangle pixel so as to change the sharpness of image. After finish reading “Computer Vision for Artist and Designers”, I was suprised by the “algorithmn communication” that I ignore commonly. In fact, computer vision art, or be more simple just like processing(computer graphics) is the manisfetation of code or algorithmn. It is amazing becaue commonly how we draw is to use pens, but now we can use a totaly different way–converting digits to graphics information. For my work, Arduino changes the value and then conveys the analog signal to processing. Processing run the code with the signal from Arduino and eventually output graphics. It is a type of communication which break the barries among digital signals, math values, visual effect and physical controller. In the future, I can also reverse the works that I have in this recitation–I can send message from computer to physical devices to draw or do something else. That is amzaing.

Recitation9: Final Project Process by Haoquan (Kenneth) Wang

Our project:

Tom’s project: meditation project

Tom’s project is to make a meditation thing which allows users to wave their hands. Their movement will be detected by the camera on the laptop. For his project, I suggest him to have the interaction part more clear. Especially I think that he should design some interaction by using Arduino. The concept of this project is pretty interesting because what I know about meditation are Yoga and Buddist. It is interesting to do meditation on computer.

Robert’s project: battleship game project

Robert’s project is to make a combination of physical battleship game and a digital battleship game. He wants to use 3D Printer to make a controller or joystic to control the ship attack on screen. My suggestion for Robert is that he needs to reduce the number of ships. Also at first, he wants to have ships in physical. But I think that is hard to achieve. So I recommend him to do this part in the processing. Actually, I never hear battleship game before. So I don’t know what it looks like.

Sheldon’s project: Save marine life

Sheldon’s project is a 2 players game. 1p needs to collect the rubbish in the ocean, 2p needs to dodge the rubbish when they are being collected. Sheldon wants to use this project to appeal to people to protect our environment and marine life. My suggestion for Sheldon is that this game is not necessarily to be a two players game. The concepts that using a game to appeal the protection of marine life is unique and very practical because it is easier to make people accept the appeal by letting them play a game than just talking to them.

What I find out about the similarity of how we define interaction is that game is one of the best interactive forms. All projects in our group are in gaming form. We all think that the gaming process is highly engaged, intense, and interactive. That is similar to my definition of interaction.

Feedback from peers

I got several feedbacks from my groupmates. Firstly, I can use Processing GUI to design users interfaces. Because my project is an escape room game, the users need to move back and forth to explore and discover clues. So my project needs to be highly clickable. The second is that I need to have more research to prove that playing an escaping room game can be a great help to the depressed. Thirdly, I need to make my project as simple as possible. I cannot make users think. For the first two suggestions, I don’t want to adopt because firstly, I am not familiar with Processing GUI, which means that it will take me a lot of time to learn and test. I don’t have time to learn; for another feedback, I don’t need more research because I am not doing a practical project, which will be used to solve a problem. Instead, I am doing an art project, which aims to raise awareness of the problem but not a solution. For the third feedback, I think it is quite good because I also realize the necessity of simplicity of my project. If it is too difficult to get out of the room for users, it will not be a good interaction project because users won’t want to use or play this project.

Final Project Proposal by Haoquan (Kenneth) Wang

Final Project Proposal Essay: Break Free

 In modern university, we take the pressure and be stressful sometimes. We need to keep getting A so that we can get a high GPA to get a good job or get an admission of the graduate university; we need to do a lot of work to maintain the relation with friends, professor, colleagues, etc.; we need to work and learn alone far away from home… We need to face many challenges. So depression or self-denying is pretty common in nowadays college life. My inspiration for my final project is that recently I experience something unhappy: family, love relation, academic life. I used to lock myself but I opened my mind luckily. I know the pain so I want to do something for the people who have the same experience as me. For an interaction project, the idea of making a game directly comes to my mind. But the challenge is that designing and making a game is a huge work, which means that it is hard for me to finish all the work within two weeks. I not only need to prepare hardware for my project but I need to code as well.
My project basically will be an escaping game, which means that the students need to try to get out of depression and open his mind. I will make the escaped room dark(but always visible) and depressing. In order to break the door and free the student’s mind, users need to finish four mission to get the password. Users need to enter the password by pressing the physical button(made by Arduino) to get out of the room. So it is clear that for button pad, we will use Arduino to make it; for the room and gaming part, we will use processing to provide users an autistic atmosphere by drawing the room and insert pictures in cold color. We will design some riddle or plot for the users to discover the password by themselves, which will make the users get involved and interact with our project and design. For next week, we will mainly focus on physical button making and the basic processing coding. The second week we will add our detailed design to the processing and finally connect the computer with the Arduino part.
My previous research actually does not provide me a direct inspiration for this project. Instead, it helps me break the basic definition of interaction. In fact, Input can be output, the output can be input. So the question occurs in my brain: what will happen if I make processing as input and output at the same time. So I break the boundaries between input and output. In my project, users will follow the instruction and plot which are shown on screen, which is definitely output. But at the same time, users still need to click the mouse to keep exploring, so the processing can also be the output. Also, I will consider adding some buzzer or LEDs in Arduino pad so that the Arduino part can also be the output. My project has two potential impacts. Firstly, for interaction, I think the barriers between input and output sometimes can be broken through. That will be more interactive. Secondly, my project aims to help the students who are in trouble with some tough situation. Even though my project will still be primitive and rough because I do not have enough time to decorate and make it to the best. But I want to use my project to appeal to people to help the struggling friends around you, especially your best friend.

Recitation 8: Serial Communication by Haoquan (Kenneth) Wang

Exercise 1: Make a Processing Etch A Sketch

Coding:

Arduino:

// IMA NYU Shanghai
// Interaction Lab
// For sending multiple values from Arduino to Processing

void setup() {
Serial.begin(9600);
}

void loop() {
int sensor1 = analogRead(A0);
int sensor2 = analogRead(A1);
// int sensor3 = analogRead(A2);

// keep this format
Serial.print(sensor1);
Serial.print(“,”); // put comma between sensor values
Serial.print(sensor2);
Serial.print(“\n”);
// Serial.print(sensor3);
// Serial.println(); // add linefeed after sending the last sensor value

// too fast communication might cause some latency in Processing
// this delay resolves the issue.
delay(100);
}

Processing:

// IMA NYU Shanghai
// Interaction Lab
// For receiving multiple values from Arduino to Processing

/*
* Based on the readStringUntil() example by Tom Igoe
* https://processing.org/reference/libraries/serial/Serial_readStringUntil_.html
*/

import processing.serial.*;

String myString = null;
Serial myPort;

int NUM_OF_VALUES = 2; /** YOU MUST CHANGE THIS ACCORDING TO YOUR PROJECT **/
int[] sensorValues; /** this array stores values from Arduino **/
int PORT_INDEX = 0;

void setup() {
size(500, 500);
background(0);
setupSerial();
}

void draw() {
updateSerial();
printArray(sensorValues);

// use the values like this!
// sensorValues[0]

// add your code
fill(255);
float posX = map(sensorValues[0],0,1023,0,width/2);
float size = map(sensorValues[1],0,1023,100,300);
ellipse( posX, height/2, size, size);

//
}

void setupSerial() {
printArray(Serial.list());
myPort = new Serial(this, Serial.list()[ PORT_INDEX ], 9600);
// WARNING!
// You will definitely get an error here.
// Change the PORT_INDEX to 0 and try running it again.
// And then, check the list of the ports,
// find the port “/dev/cu.usbmodem—-” or “/dev/tty.usbmodem—-”
// and replace PORT_INDEX above with the index number of the port.

myPort.clear();
// Throw out the first reading,
// in case we started reading in the middle of a string from the sender.
myString = myPort.readStringUntil( 10 ); // 10 = ‘\n’ Linefeed in ASCII
myString = null;

sensorValues = new int[NUM_OF_VALUES];
}

void updateSerial() {
while (myPort.available() > 0) {
myString = myPort.readStringUntil( 10 ); // 10 = ‘\n’ Linefeed in ASCII
if (myString != null) {
String[] serialInArray = split(trim(myString), “,”);
if (serialInArray.length == NUM_OF_VALUES) {
for (int i=0; i<serialInArray.length; i++) {
sensorValues[i] = int(serialInArray[i]);
}
}
}
}
}

Exercise 2: Make a musical instrument with Arduino

Coding:

Arduino:

// IMA NYU Shanghai
// Interaction Lab

/**
This example is to send multiple values from Processing to Arduino.
You can find the Processing example file in the same folder which works with this Arduino file.
Please note that the echo case (when char c is ‘e’ in the getSerialData function below)
checks if Arduino is receiving the correct bytes from the Processing sketch
by sending the values array back to the Processing sketch.
**/

#define NUM_OF_VALUES 1 /** YOU MUST CHANGE THIS ACCORDING TO YOUR PROJECT **/

/** DO NOT REMOVE THESE **/
int valueFromProcessing;
int tempValue = 0;
int valueIndex = 0;

/* This is the array of values storing the data from Processing. */
int values[NUM_OF_VALUES];

void setup() {
Serial.begin(9600);
pinMode(13, OUTPUT);
}

void loop() {
getSerialData();

// add your code here
// use elements in the values array
// values[0] // values[1]

// if (values[0] == ‘H’) {
while(Serial.available()){
valueFromProcessing = Serial.read();
}
if (valueFromProcessing == ‘a’) {
tone(13, 200, 200);
}
if (valueFromProcessing == ‘s’) {
tone(13, 300, 200);
}
if (valueFromProcessing == ‘d’) {
tone(13, 400, 200);
}
if (valueFromProcessing == ‘f’) {
tone(13, 500, 200);
}
if (valueFromProcessing == ‘g’) {
tone(13, 600, 200);
}
if (valueFromProcessing == ‘h’) {
tone(13, 800, 200);
}
if (valueFromProcessing == ‘j’) {
tone(13, 1000, 200);
}
if (valueFromProcessing == ‘k’) {
tone(13, 1200, 200);
}
if (valueFromProcessing == ‘l’) {
tone(13, 1400, 200);
}
}

//recieve serial data from Processing
void getSerialData() {
if (Serial.available()) {
char c = Serial.read();
//switch – case checks the value of the variable in the switch function
//in this case, the char c, then runs one of the cases that fit the value of the variable
//for more information, visit the reference page: https://www.arduino.cc/en/Reference/SwitchCase
switch (c) {
//if the char c from Processing is a number between 0 and 9
case ‘0’…’9′:
//save the value of char c to tempValue
//but simultaneously rearrange the existing values saved in tempValue
//for the digits received through char c to remain coherent
//if this does not make sense and would like to know more, send an email to me!
tempValue = tempValue * 10 + c – ‘0’;
break;
//if the char c from Processing is a comma
//indicating that the following values of char c is for the next element in the values array
case ‘,’:
values[valueIndex] = tempValue;
//reset tempValue value
tempValue = 0;
//increment valuesIndex by 1
valueIndex++;
break;
//if the char c from Processing is character ‘n’
//which signals that it is the end of data
case ‘n’:
//save the tempValue
//this will b the last element in the values array
values[valueIndex] = tempValue;
//reset tempValue and valueIndex values
//to clear out the values array for the next round of readings from Processing
tempValue = 0;
valueIndex = 0;
break;
//if the char c from Processing is character ‘e’
//it is signalling for the Arduino to send Processing the elements saved in the values array
//this case is triggered and processed by the echoSerialData function in the Processing sketch
case ‘e’: // to echo
for (int i = 0; i < NUM_OF_VALUES; i++) {
Serial.print(values[i]);
if (i < NUM_OF_VALUES – 1) {
Serial.print(‘,’);
}
else {
Serial.println();
}
}
break;
}
}
}

Processing:

// IMA NYU Shanghai
// Interaction Lab

/**
* This example is to send multiple values from Processing to Arduino.
* You can find the arduino example file in the same folder which works with this Processing file.
* Please note that the echoSerialData function asks Arduino to send the data saved in the values array
* to check if it is receiving the correct bytes.
**/

import processing.serial.*;

int NUM_OF_VALUES = 2; /** YOU MUST CHANGE THIS ACCORDING TO YOUR PROJECT **/
int PORT_INDEX = 0;

Serial myPort;
String myString;

// This is the array of values you might want to send to Arduino.
int values[] = new int[NUM_OF_VALUES];

void setup() {
size(500, 500);
background(0);

printArray(Serial.list());
myPort = new Serial(this, Serial.list()[ PORT_INDEX ], 9600);
// check the list of the ports,
// find the port “/dev/cu.usbmodem—-” or “/dev/tty.usbmodem—-”
// and replace PORT_INDEX above with the index of the port

myPort.clear();
// Throw out the first reading,
// in case we started reading in the middle of a string from the sender.
myString = myPort.readStringUntil( 10 ); // 10 = ‘\n’ Linefeed in ASCII
myString = null;
}

void draw() {
background(0);

//// changes the values
//for (int i=0; i<values.length; i++) {
// values[i] = i; /** Feel free to change this!! **/
//}
if (keyPressed) {
if (key == ‘a’) {
myPort.write(‘a’);
}
if (key == ‘s’) {
myPort.write(‘s’);
}
if (key == ‘d’) {
myPort.write(‘d’);
}
if (key == ‘f’) {
myPort.write(‘f’);
}
if (key == ‘g’) {
myPort.write(‘g’);
}
if (key == ‘h’) {
myPort.write(‘h’);
}
if (key == ‘j’) {
myPort.write(‘j’);
}
if (key == ‘k’) {
myPort.write(‘k’);
}
if (key == ‘l’) {
myPort.write(‘l’);
}
}
// sends the values to Arduino.
sendSerialData();

// This causess the communication to become slow and unstable.
// You might want to comment this out when everything is ready.
// The parameter 200 is the frequency of echoing.
// The higher this number, the slower the program will be
// but the higher this number, the more stable it will be.
echoSerialData(200);
}

void sendSerialData() {
String data = “”;
for (int i=0; i<values.length; i++) {
data += values[i];
//if i is less than the index number of the last element in the values array
if (i < values.length-1) {
data += “,”; // add splitter character “,” between each values element
}
//if it is the last element in the values array
else {
data += “n”; // add the end of data character “n”
}
}
//write to Arduino
myPort.write(data);
}

void echoSerialData(int frequency) {
//write character ‘e’ at the given frequency
//to request Arduino to send back the values array
if (frameCount % frequency == 0) myPort.write(‘e’);

String incomingBytes = “”;
while (myPort.available() > 0) {
//add on all the characters received from the Arduino to the incomingBytes string
incomingBytes += char(myPort.read());
}
//print what Arduino sent back to Processing
print( incomingBytes );
}

Interaction Part:

For the first exercise, I have done a similar one in my lecture. So I finished it in 10 minutes. But there was a problem that may be the connection between potentiameters and Arduino is not good, the value of potentiameter that I printed out sometimes will directly go back to 0. So we can see that in my recording video, the ellipse will sometime move to positionX = 0 or positionY = 0 . The interaction of this exercise is that, through the potentiameter, I can control the position of ellipse, moving it in X-axis direction and Y-axis direction. It is really fun because the Arduino circuit becomes a remoter, or a Joystic. That inspire me to combine something physical and something digital.

For the second exercise, I encountered some challenges. First is the coding. It is really hard to understand the Serial Communication code. So I took most of the rest of the time to figure out how to code for the interaction that I was asked to achieve. Luckily, with the help of Robert, we successfully made it.  But another thing is that I forgot to set the condition of changing the tone to both uppercase and lowercase. I realized it by accident. The interaction part in this exercise is that I can change the tone of buzzer by pressing the keyboard. But the keyboard is not very accurate.