Recitation 8 by Hangkai Qian

Exercise 1: Make a Processing Etch A Sketch

Step 1: draw with ellipse

I don’t have any difficulty in step 1, I just copy the code by IMA Lab to import data from Arduino.  And I found if I draw it with ellipse, we have to move extremely slow to ensure the graph is a line but no a bunch of circles. 

Step2: draw with lines

I was a little confused at the first time because pmouseX and pmouseY cannot be applied to the position of the variables from Arduino. However,after asking the fellow, I figured it out. What I need is just make a variable to store the previous number from Arduino. The code is attached:

fill(0);
line(a, b, sensorValues[0], sensorValues[1]);
a=sensorValues[0];
b=sensorValues[1];

The whole code is under:

Processing :

import processing.serial.*;

String myString = null;
Serial myPort;

int NUM_OF_VALUES = 2; /** YOU MUST CHANGE THIS ACCORDING TO YOUR PROJECT **/
int[] sensorValues; /** this array stores values from Arduino **/
int a;
int b;

void setup() {
size(500, 500);
background(255);
setupSerial();
}

void draw() {
updateSerial();
printArray(sensorValues);
fill(0);
line(a, b, sensorValues[0], sensorValues[1]);
a=sensorValues[0];
b=sensorValues[1];
}

void setupSerial() {
printArray(Serial.list());
myPort = new Serial(this, Serial.list()[ 4 ], 9600);
// WARNING!
// You will definitely get an error here.
// Change the PORT_INDEX to 0 and try running it again.
// And then, check the list of the ports,
// find the port “/dev/cu.usbmodem—-” or “/dev/tty.usbmodem—-”
// and replace PORT_INDEX above with the index number of the port.

myPort.clear();
// Throw out the first reading,
// in case we started reading in the middle of a string from the sender.
myString = myPort.readStringUntil( 10 ); // 10 = ‘\n’ Linefeed in ASCII
myString = null;

sensorValues = new int[NUM_OF_VALUES];
}

void updateSerial() {
while (myPort.available() > 0) {
myString = myPort.readStringUntil( 10 ); // 10 = ‘\n’ Linefeed in ASCII
if (myString != null) {
String[] serialInArray = split(trim(myString), “,”);
if (serialInArray.length == NUM_OF_VALUES) {
for (int i=0; i<serialInArray.length; i++) {
sensorValues[i] = int(serialInArray[i]);
}
}
}
}
}

Arduino:

void setup() {
Serial.begin(9600);
}

void loop() {
int sensor1 = analogRead(A0);
int sensor2 = analogRead(A1);

// keep this format
Serial.print(sensor1);
Serial.print(“,”); // put comma between sensor values
Serial.print(sensor2);
Serial.println(); // add linefeed after sending the last sensor value

// too fast communication might cause some latency in Processing
// this delay resolves the issue.
delay(100);
}

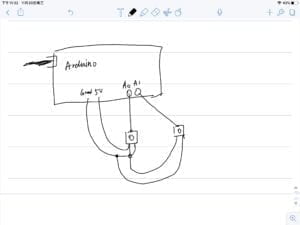
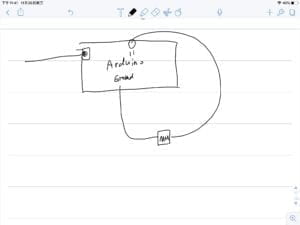
schematic :
Exercise 2: Make a musical instrument with Arduino

I have no difficulty in building this, but I really don’t know how to make different sounds through the code…   Sadly, because of the time limit, I couldn’t figure it out, but I will ask fellows when I do my final project. The interaction in this project is simple: when you click the mouse, the buzzer make sound.

Here are my codes:

Arduino:

define NUM_OF_VALUES 2 /** YOU MUST CHANGE THIS ACCORDING TO YOUR PROJECT **/

/** DO NOT REMOVE THESE **/
int tempValue = 0;
int valueIndex = 0;

/* This is the array of values storing the data from Processing. */
int values[NUM_OF_VALUES];

void setup() {
Serial.begin(9600);
pinMode(11, OUTPUT);
}

void loop() {
getSerialData();

// add your code here
// use elements in the values array
// values[0] // values[1]

tone(11,values[0]);
noTone(11);

}

//recieve serial data from Processing
void getSerialData() {
if (Serial.available()) {
char c = Serial.read();
//switch – case checks the value of the variable in the switch function
//in this case, the char c, then runs one of the cases that fit the value of the variable
//for more information, visit the reference page: https://www.arduino.cc/en/Reference/SwitchCase
switch (c) {
//if the char c from Processing is a number between 0 and 9
case ‘0’…’9′:
//save the value of char c to tempValue
//but simultaneously rearrange the existing values saved in tempValue
//for the digits received through char c to remain coherent
//if this does not make sense and would like to know more, send an email to me!
tempValue = tempValue * 10 + c – ‘0’;
break;
//if the char c from Processing is a comma
//indicating that the following values of char c is for the next element in the values array
case ‘,’:
values[valueIndex] = tempValue;
//reset tempValue value
tempValue = 0;
//increment valuesIndex by 1
valueIndex++;
break;
//if the char c from Processing is character ‘n’
//which signals that it is the end of data
case ‘n’:
//save the tempValue
//this will b the last element in the values array
values[valueIndex] = tempValue;
//reset tempValue and valueIndex values
//to clear out the values array for the next round of readings from Processing
tempValue = 0;
valueIndex = 0;
break;
//if the char c from Processing is character ‘e’
//it is signalling for the Arduino to send Processing the elements saved in the values array
//this case is triggered and processed by the echoSerialData function in the Processing sketch
case ‘e’: // to echo
for (int i = 0; i < NUM_OF_VALUES; i++) {
Serial.print(values[i]);
if (i < NUM_OF_VALUES – 1) {
Serial.print(‘,’);
}
else {
Serial.println();
}
}
break;
}
}
}

schemes:exercise 2
Processing:

import processing.serial.*;

int NUM_OF_VALUES = 1; /** YOU MUST CHANGE THIS ACCORDING TO YOUR PROJECT **/

Serial myPort;
String myString;

// This is the array of values you might want to send to Arduino.
int values[] = new int[NUM_OF_VALUES];

void setup() {
size(500, 500);
background(0);

printArray(Serial.list());
myPort = new Serial(this, Serial.list()[ 4 ], 9600);
// check the list of the ports,
// find the port “/dev/cu.usbmodem—-” or “/dev/tty.usbmodem—-”
// and replace PORT_INDEX above with the index of the port

myPort.clear();
// Throw out the first reading,
// in case we started reading in the middle of a string from the sender.
myString = myPort.readStringUntil( 10 ); // 10 = ‘\n’ Linefeed in ASCII
myString = null;
}

void draw() {
background(0);

value[0]=mouseX
}

// sends the values to Arduino.
sendSerialData();

// This causess the communication to become slow and unstable.
// You might want to comment this out when everything is ready.
// The parameter 200 is the frequency of echoing.
// The higher this number, the slower the program will be
// but the higher this number, the more stable it will be.
echoSerialData(200);
}

void sendSerialData() {
String data = “”;
for (int i=0; i<values.length; i++) {
data += values[i];
//if i is less than the index number of the last element in the values array
if (i < values.length-1) {
data += “,”; // add splitter character “,” between each values element
}
//if it is the last element in the values array
else {
data += “n”; // add the end of data character “n”
}
}
//write to Arduino
myPort.write(data);
}

void echoSerialData(int frequency) {
//write character ‘e’ at the given frequency
//to request Arduino to send back the values array
if (frameCount % frequency == 0) myPort.write(‘e’);

String incomingBytes = “”;
while (myPort.available() > 0) {
//add on all the characters received from the Arduino to the incomingBytes string
incomingBytes += char(myPort.read());
}
//print what Arduino sent back to Processing
print( incomingBytes );
}


Final Project Proposal by Hangkai Qian

Idea 1  “Cat”

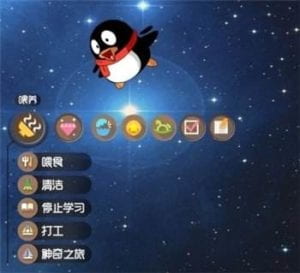
The inspiration comes from the Online Pet system. There are many websites that contain a pet raising system, like QQ penguin, (picture) which requires you to feed, shower and play some games to interact with it. However, we find it now so interactive—the pet is only in the screen and you will feel unreal to raise it, and also, after the first glance, you will lose interest on it since you need to “take care ”of it for a long time and gain nothing but the increased data of “happiness of penguin”. That’s why the project failed several months ago.

 the system  

As a result, what we want to do is divide into 3 different levels: the first is, building a real cat(or other pets);the second is to make the device have the mobility and the ability to store information; the third, which seems even harder, is to connect the system to the Internet, so that it can be a way to socialize, just like what QQ did.

The first level seems more realistic to realize (the fundamental function of the pet) and the cat is connected to the computer.

  1. Feeding function. To make the pet alive and be happy, you have to give something to the cat to eat. We will use a bowl for you to put “food” in—and as soon as the force sensor sensed something in the bowl, the cat will come to “eat” it. And the screen of the computer will show a full stomach image
  2. Touching function. To make your pets happy, you have to touch it every 20 minutes or the value of happiness will fall down. Once you successfully touched it, there will be some small games.
  3. Playing function. Due to the limitation, the function will mostly base on the computer, like you play some small games like chasing balls with your cat, it will be happier.

The second level is to give the cat the ability to move without wires, and as soon it is connected to the computer, the data stored inside it will be automatically uploaded to the computer.

The third level all about computer, but I have no idea how can we upload the data to the Internet…

Idea 2 Bouncing Ball Competition

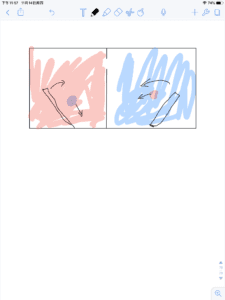
The second proposal is a game and the inspiration comes from the traditional bouncing ball example. I planned to divide the window into two parts: the left part is red and the right part is blue and there is one ball of a different color bouncing in the space. There will be a block moving on the bottom of the window. Whoever managed to make the ball go to the other side will win.

Here comes an interesting problem: how can we control the block? We planned to use a distance sensor to help you control the block. We will set a area where you can put your hand in and the location of the block is decided by your position in the area. We think it will be an interesting game with interaction and it is more practical to use.

Idea 3 Barrier Breakthrough !

Idea 3 is also a game. To be honest, the inspiration comes from the second proposal. There will still be two players interacting with the distance sensors. However, the game is different. The goal of this game is to get the fruit in the end of the window. To achieve this, you have to get rid of the barriers on the way. The speed of the character in y-axis is going up, so it would be harder in the end of the game. We’ll make several levels of the game.

Bonus

The idea of a “touch pad”

We came up the idea of a touchpad using several distance sensors. By sensering different distance in the x and y axis, we can come up with the location of the hand. In this way, we built a “touchpad” that you don’t really need to touch. I haven’t got an idea how to use it yet, but it may show up in the final project!

Recitation 7 Function by Hangkai Qian

Recitation Exercise:

Step 1:

This is my function code:

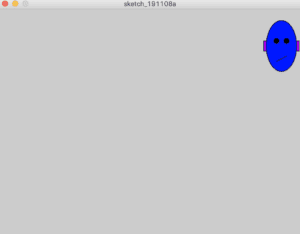
void funny(float x, float y, float c, float e) {
colorMode(HSB);
color d=color(c, 500, 500);
color f=color(e, 500, 500);
rectMode(CENTER);
fill(f);
rect(x-30, y, 10, 20);
rect(x+30, y, 10, 20);
fill(d);
ellipse(x, y, 60, 100);
fill(0);
ellipse(x-10, y-10, 10, 10);
ellipse(x+10, y-10, 10, 10);
line(x-10, y+30, x+10, y+20);
}

Step 2: 

Create a for loop in the setup() to display 100 instances of your graphic in a variety of positions and colors.  Make sure to use the display function you created in Step 1.  Then move your for loop to the draw() loop, and note the difference.

Here is my code for Step 2:

void setup() {
size(600, 600);
for (int i=1; i<=100; i++) {
funny(random(600), random(600), random(360), random(360));
}
}

void funny(float x, float y, float c, float e) {
colorMode(HSB);
color d=color(c, 500, 500);
color f=color(e, 500, 500);
rectMode(CENTER);
fill(f);
rect(x-30, y, 10, 20);
rect(x+30, y, 10, 20);
fill(d);
ellipse(x, y, 60, 100);
fill(0);
ellipse(x-10, y-10, 10, 10);
ellipse(x+10, y-10, 10, 10);
line(x-10, y+30, x+10, y+20);
}

move the code into draw:

Step 3:

Create three Arrays to store the x, y, and color data.  In setup(), fill the arrays with data using a for loop, then in draw() use them to display 100 instances of your graphic.  You can use this example to help you do this.  Make sure to use the display function you created in Step 1, and if you’ve added any other parameters to your display function you should create new arrays for them as well.

  1. I have got some trouble when I tried to create an array with 600 numbers in it with for function. After I asked fellows for help, I have successfully made that code:
    for (int i=0; i<xpos; i++) {
    x[i]=i;
    }
  2. The second trouble came when I tried to make a random integer from 0 to 600 because x[i] ‘s i  must be an integer. With the help of fellows, the code should be like this:
    float a=random(0, 600);
    int b=int(a);
  3. Here is my whole code:
    int xpos=600;
    int ypos=360;
    int[] x=new int[xpos];
    int[] y=new int[ypos];

    float colorH=random(360);

    void setup() {
    size(600, 600);
    for (int i=0; i<xpos; i++) {
    x[i]=i;
    }
    for (int i=0; i<ypos; i++) {
    y[i]=i;
    }
    }

    void draw() {

    for (int i=1; i<=100; i++) {
    float a=random(0, 600);
    int b=int(a);
    float c=random(0, 600);
    int d=int(c);
    float e=random(0, 360);
    int f=int(e);
    float g=random(0, 360);
    int h=int(g);

    funny(x[b], x[d], y[f],y[h]);
    }
    }
    void funny(float x, float y, float c, float e) {
    colorMode(HSB);
    color d=color(c, 500, 500);
    color f=color(e, 500, 500);
    rectMode(CENTER);
    fill(f);
    rect(x-30, y, 10, 20);
    rect(x+30, y, 10, 20);
    fill(d);
    ellipse(x, y, 60, 100);
    fill(0);
    ellipse(x-10, y-10, 10, 10);
    ellipse(x+10, y-10, 10, 10);
    line(x-10, y+30, x+10, y+20);
    }

Step 4:

Add individual movement to each instance of your graphic by modifying the content of the x and y arrays.  Make sure that your graphics stay on the canvas (hint: use an if statement).

I modify the value of xpos to ensure it is in the canva.

Here is my code:

int xpos=550;
int ypos=360;
int[] x=new int[xpos];
int[] y=new int[ypos];

float colorH=random(360);

void setup() {
size(600, 600);
for (int i=50; i<xpos; i++) {
x[i]=i;
}
for (int i=0; i<ypos; i++) {
y[i]=i;
}
}

void draw() {

for (int i=1; i<=100; i++) {
float a=random(50, 550);
int b=int(a);
float c=random(50, 550);
int d=int(c);
float e=random(0, 360);
int f=int(e);
float g=random(0, 360);
int h=int(g);

funny(x[b], x[d], y[f],y[h]);
}
}
void funny(float x, float y, float c, float e) {
colorMode(HSB);
color d=color(c, 500, 500);
color f=color(e, 500, 500);
rectMode(CENTER);
fill(f);
rect(x-30, y, 10, 20);
rect(x+30, y, 10, 20);
fill(d);
ellipse(x, y, 60, 100);
fill(0);
ellipse(x-10, y-10, 10, 10);
ellipse(x+10, y-10, 10, 10);
line(x-10, y+30, x+10, y+20);
}

Optional:

Add some interaction to your graphics.  Refer to Recitation 6 if you don’t remember how to do this.

Documentation

Question 1:

In your own words, please explain the difference between having your for loop from Step 2 in setup() as opposed to in draw().

In the setup(): the code run only once, so it only drawed 100 faces, then it stopped;

As for the draw(): It draws one hundred faces every time and it will keep drawing 100 faces.

Question 2:

What is the benefit of using arrays?  How might you use arrays in a potential project?

Array helps when a bunch of different values or data in the same category happened to be needed in the application. It will make it clear and not messed up in the code. 

I absolutely will use array in my final project to import data from Arduino to Processing.   I may also use it to simplify the code in the future.

Recitation6: Processing Animation by Hangkai Qian

For my recitation, I made a project that is like a football game, that when you click the keyboard, the ball will be moving. When you click the app button, the board will move up and the same as the other button. There is a red barrier on the middle of the window and there is also There is a red barrier in the middle of the window and also I go on the top of the window. When you operate the ball into the goal,” your win!!” will we print on the screen. However, if you touch the red barrier,  “You lose” well be printed instead.

I faced a lot of problems when I do this project. At first, I just want to build project where as soon as you press the button the board will keep going for that direction. However, I find it impossible because the function key doesn’t want to give me such an option. So I asked the fat off for help but they still couldn’t help me solve this problem. So I made a little compromise, it is that you press a key a ball will make an action.

Here is a video I shot.

Additional Homework

Here’s my code:

float r=20;
float i=1;
float colorH;
int x=300;
int y=300;

void setup() {
size(600, 600);
}

void draw() {
background(255);
i++;
colorH=180+180*sin(i/100);
colorMode(HSB);
color c=color(colorH,500,500);
stroke(c);
strokeWeight(10);
ellipse(x, y, r, r);

r=200+ 100*sin(i/20);
}

void keyPressed() {
if (keyCode == UP) {

y=y-10;
}
if (keyCode == DOWN) {
y=y+10;
}
if (keyCode==LEFT) {
x=x-10;
}
if (keyCode==RIGHT) {
x=x+10;
}
}

I had some trouble when I was using the sine function. Then I find that even the number of the radius is negative, it will do you translate it into positive.

Also ,I still have some problems with the colorMode. Typing in color c=color(colorH,99,100);  , I found the color is very dark. When I typed in color c=color(colorH,500,500); , Things went right. I still don’t know why??

Here is my video:

0FFFEDE4-B905-42D1-9BA3-6E56D70695EF

Code list:

    1. 1.color c=color(colorH,500,500); fill(c);
  1. stroke(c);
    strokeWeight(10);
  2. //up and down code:           r=200+ 100*sin(i/20);
  3. key moving code
    void keyPressed() {
    if (keyCode == UP) {

    y=y-10;
    }
    if (keyCode == DOWN) {
    y=y+10;
    }
    if (keyCode==LEFT) {
    x=x-10;
    }
    if (keyCode==RIGHT) {
    x=x+10;
    }
    }

Final Project Preparation

Final Project preparation

A. Chronus Exhibition

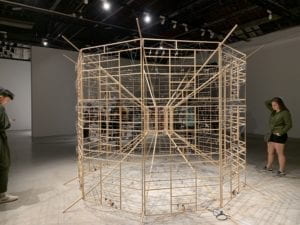
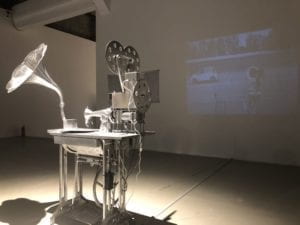
First, I’ll talk about my experience during our time in the field trip: Chronus exhibition. Different from an ordinary art exhibition, it’s a gallery where IT tech is used in the art work. At the entrance of the gallery, we found a project called Artificial Intuition, which is a sculpture that interacts with human motions. When you walk by it, it’ll block the audience, giving the audience a feeling of life in the machine. Walking into the room, a big device made of some huge frames. It’s called “Rechender Raum”.I saw many components we also use in our project, like smaller Arduino Boards and servos. To be honest, I cannot know the meaning of it and did not see any interactive part in it. Besides that, there are also many other devices, like Genesis, The Form of Becoming, etc.

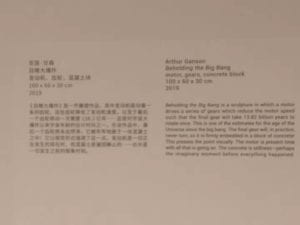
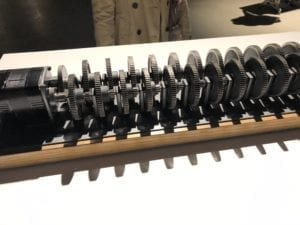
In all the art projects, the very art that impressed me is called “Beholding the Big Bang” It’s a sculpture made of concrete blocks and gears. A motor drives a series of gears which reduce the speed that it will take 13.82 million years for the final gear to rotate once, which is also the time of the Big Bang. The first gear rotated fast, while the final gear is fixed into concrete. The sculpture gave me a thought into the whole universe and the meaning of ourselves though it seems that there is no interaction part involved. I think the main difference between the tech-involved and none-tech artwork is that the tech-involved ones are just the different forms of artworks and the core thing of it is just the same. Moreover, tech-involved artwork are easier and more interesting to understand compared to the none-tech ones, though it is still hard to get the point without the introduction.


B.Research

The first interactive project I want to talk about is called “Drone Collision Avoid System”(https://www.youtube.com/watch?v=L3l-zJafOncNo.4). The developers used some Ultrasonic distance sensors, an Arduino Board, some servos and motors to build that. When something went near the Drone, 4 Ultrasonic sensors, which are built around the Drone, will detect the object and it will fly away. The reason why I chose this project is that I used the Ultrasonic distance sensor in my mid-term project, and I am familiar with it. However, the Drone seems more interesting than my helmet. Then I thought that it is idea that count much for the project. Also, I noticed that when someone came near to the drone, the drone will tilt a little, then fly away. This small thing told the user that the drone has got the information that someone is near it so that people won’t walk further.

The second less successful interactive project I want to talk about is called DIY Interactive LED Coffee Table(DIY Interactive LED Coffee Table – Arduino Project. YouTube, https://www.youtube.com/watch?v=L3l-zJafOnc. Accessed 5 Nov. 2019.)  It’s made of distance sensors, LEDs, and Arduino boards. When something is on the table, the distance sensor found out and makes the LED light up. It’s also connected to a Bluetooth module so that you can use a phone app to adjust the color of the light. It is an interactive project, however, I find it is just you give the device input, and the LED light up to give you output, and it’s over. The device lack the interaction between the coffee table and users, and if I were the builder, I will make the LED fade when the people comes, and when it’s closer—just like the distance of the object equals to the distance between the table—it will be stable. I think this will give an experience.

C.

First, I defined interaction as an input and an output from the machine. However, I find it no enough for a successful interaction. To make a great interaction, we have to not only contain an interaction, but also a loop of interaction, like give the user the response of the unfinished interaction. In this way, we can create a better experience.

Second, a successful interaction should be just interaction. It has to have some meanings or to be interesting or funny after the experience of the field trip, maybe I’m not able to create such a masterpiece with massive meanings,  but I have to inject some meanings to the project.