Duet Beat – Guangbo Niu – Rudi Cossovich

Duet Beat – Guangbo Niu – Rudi Cossovich

Individual Reflection

  • Context and Significance

Our last group project is about a feeding machine that feeds the user according to user’s voice command. Although there is possibility that the machine makes its user lazier and lazier, we do believe that it would actually make things a lot easier for the user, in an interactive way. It frees user’s hands and allows them to do what they want while eating. So this time, we take a step further to lift burden for humans, we want to do something that allows nonprofessionals to create stuff in a professional way. For example, we want our user to compose wonderful music even when they have disabilities or are not trained in any musical instrument. I want our project to align with my definition of interaction: simple inputs, sophisticated processing, and wonderful outputs, with the idea or human-centric.

The first project that came to our mind is the App Garageband developed by Apple. The App has many installed  chores and drumbeats with which you can compose a song easily by combining them with your own melody or notes . So we decided that our device needs to automatically generate chores according to the user’s need. The other project that has had significant impact on our project is the world’s first electronic musical instrument called Theremin made by Soviet Union scientist Léon Theremin.  The instrument uses sophisticated sensors to detect hand movement and allow the user to play different notes with hands in the air. We want our user to have minimum physical contact with the device just like the Teremin, because then it would probably allow people with disabilities to use.
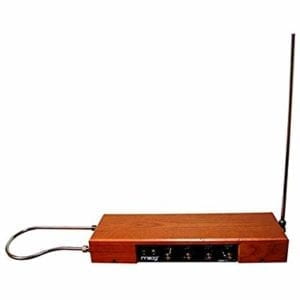
Theremin
Theremin, from amazon.com
  • Conception and Design

Now we have two principles of our project: automatic chord generating and minimum physical touch. For the first principle, after we saw another group using the heart rate sensor, we decided to apply that sensor to our project as well. It is because we need a kind of sensor to know the user’s need in order to generate the right chord, and the heart rate sensor can be used to detect the user’s mood so that our device can generate the chord based on the user’s current mood. Although hear rate may not the best indicator for mood, this is the best we can use for the time being. For the second principle, we decided to use what we learn from previous classes, which is an IR distance sensor. We set the distance range into different intervals and let each interval represent one note. So once the IR distance sensor detects an object in some distance interval, the buzzer would generate a note that is associated with that interval. This is the best way we cant think of to minimize physical contact. The reason why we didn’t use the ultrasound distance sensor is because we were told that the ultrasound sensor uses sound waves to detect distance. The sound waves could get scattered so the sensor doesn’t give accurate readings when the distance to be detected is long.

Other materials we used include laser-cut wood boxes (3D printed stuff are not a good one to contain components since they took its shape once printed out), 2 Arduinos (it’s not possible to use a single Arduino board since we later found out that the IR distance sensor doesn’t work well when there is another sensor on the board), 2 buzzers (for chord and for notes), 2 battery cases (we wanted our device to look wireless), countless wires and LEDs (3 for mood indicator, 1 for heart rate detecting indicator, 7 more for different notes. We wanted our device to provide adequate feedback for the user).

  • Fabrication and Production

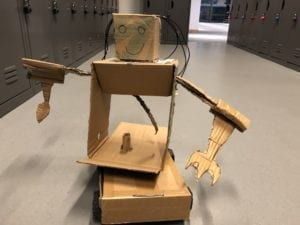
Hmmmm, we did not have a formal user test because we brought the creepy dog to the user test session. And in terms of failures, I guess our biggest failure is building that creepy dog in the first place. I don’t want to talk much about it but it did provide us with valuable experiences. For example, it let us know that 3D printing is difficult to handle. Once the 3D printed stuff took shape, it would be extremely difficult to put something in it or change its shape. For the dog head we had to use electric soldering iron to melt its mouth so that the ultrasound sensor could fit in. And the outcome is just as horrible as the video shows. Therefore, we turned to laser-cut boxes when we built the new device.

In spite of that, we also came across the problem that the IR distance sensor often give spikes and the readings jump up and down. To solve this problem, we looked up in Arduino forums and found a instruction online. We then followed the instruction and put a capacitor near the sensor’s power input in order to smooth the circuit flow. After doing this, the sensor worked a lot better though it still sometimes gives spikes.  Also, we wanted to prepared three chords that respectively associate with three kind of mood: calm, just fine, and excited, and the mood is determined by the heart rate. However, we had a big trouble on coding. The sensor was set to give a heart rate reading once in 20 seconds which is too slow and it took me an entire evening to figure out the code and make it give a reading every 5 seconds. Later, it took me another evening to figure out how to make the LEDs blink along with the heart rate and the sensor’s status. In general, it was a painful process to read and write the codes.

One of the biggest success I think is when Leon praised my heart rate sensor status indicator. I added this LED the night before presentation just to make it blink when the heart rate sensor is detecting heartbeat, so that it can tell the user whether the sensor is actually working properly when they use it. Previous user test of that creepy dog has taught me that feedback is one of the most important aspects in an interactive design, and Leon’s praise proved that!

  • Conclusions

“Simple inputs, sophisticated processing, and wonderful outputs, with the idea of human-centric”, my definition of interaction is well represented by Duet Beat. It was a generally successful project because it allows us to compose our own music easily even when we don’t have much training in music. Every human being can use it to make wonderful music as long as that human has a beating heart and has some body part that can move. Most people with disabilities can also use our device just as well as we do. I was so glad to see the whole class applauded when my partner Like started to play with it. With the some simple body movements and a heart beat reading, everyone can compose their own music even more easily than Garageband. We successfully let people create new stuff with minimum barriers.

Duet Beat also has some room for improvement. For example, if we had more time, we should rent a more accurate distance sensor, or we can laser cut a new box that can better contain all of our components (this one can’t hold all the wires), or we can invite people with disabilities to actually test it so that we can make some adaptions for them. The biggest takeaway I learned from this process is that: think more before you start. The reason why our head-shaking dog failed is that we did not expect so many difficulties – we started building it even without any sketch or analyzing. I now know that before we start, we have to actually analyze, for example, what’s applicable and what’s not, and make a detailed plan of each step we have to take.

Recitation 5: Drawing Machines by Guangbo Niu

  1. Build the circuit

Circuit diagram

The circuit looks complicated at the first glance. It took me a while to build it.Basic circuitBasic stepper motor circuit

With experience learned before, I finished the circuit in one shot – it worked as soon as I pasted my code and I clicked the upload button.

2. Control rotation with a potentiometer

Circuit diagram with potentiometer

This is the step that causes much pain on me. I added a potentiometer as the diagram shows and I am pretty sure the potentiometer should control the flow of the entire the circuit. The problem is, the stepper motor just didn’t respond to my potentiometer!

Then I had to turn to Rudi for help, he checked my circuit and everything seemed fine. And that’s when he spotted where the problem was: the potentiometer had a poor contact with the breadboard! All I had to do to fix my circuit was just to push the potentiometer a little harder onto the breadboard. Lol, that was both shocking and funny. It was such a minor problem that almost ruined my work!

And after that, Marcelle came to me and found I was recording it. She reminded me that it would be more visually friendly if I stick a piece of tape onto the stepper motor and then record it. And it turned out she was right, a tape helps make the movement more visible on a video.

3. Build a drawing machine!

Initially I thought the machine could draw something on its own until Luke reminded me that it was our job to use the potentiometer to draw. So we combined our stepper motors with the arms, holders, and couplings. And we started to draw!

Hmmmm it didn’t seem to work very well. It was hard to make the pen perfectly attached to the paper and the stepper motors kept shaking even when we tried to stop it. So our drawing looks ugly and makes no sense…  Anyway, we managed to build the machine and made it work!

Question 1:
What kind of machines would you be interested in building?Add a reflection about the use of actuators, the digital manipulation of art, and the creative process to your blog post.

I would like to build a machine that keeps me focused while I read. It can detect your eyeball movement and scan what your content on your laptop in order to determine whether you are looking at your laptop and whether you are using your laptop to read. If it determines that you are not focused on reading, it will yell “FOCUS!” at you and keep you back on track. The machine involves a camera, an eyeball sensor, a servo or stepper motor, a buzzer and many other stuff.

Actuators is something that transform digital signals and electric power into physical movement, or forces. It is kind of output that can impact the physical world. My machine will use a motor to move the camera that captures my eyeball movement. It moves the camera in order to keep track of my eyes. 

Digital manipulation of art is a process where you edit, alter, and change art works using a computer. The important presumption of that process is that the art to be manipulated must be transformed into a digital forms. Images, words, videos are arts that can be transformed digitally while physical devices can rarely be manipulated digitally. Digital manipulation can help create something that does not exist in physical world and empower artists with limitless ways of creating stuff out of nothing. It helps artists go beyond physical limits. Digital manipulation seems irrelevant to my machine since my machine has little thing to do with art. But the way of alarming the user can go beyond audio alarm and can take on the form of visual experience that uses digital manipulation. For example, the machine can take a picture of the user when he/she is not focused and manipulate the picture in a funny way to mock at the user.

Question 2:
Choose an art installation mentioned in the reading ART + Science NOW, Stephen Wilson (Kinetics chapter). Post your thoughts about it and make a comparison with the work you did during this recitation. How do you think that the artist selected those specific actuators for his project?

I like the project “Firebirds” created by Paul DeMarinis. It uses “gas flames modulated by electrical signals” (p. 118) to play the voice of Hitler, Mussolini, Franklin Roosevelt and Stalin. And the flame is trapped in a birdcage. I like this project because it uses a technology I have never heard of – control the flames to vibrate the air in order to make sound. The political speeches of the politicians echoes the birdcage and displays a strong sense of satire.

In comparison, my work in the recitation can be used to create something while project Firebirds displays something on its own. The latter needs human intervention while the latter doesn’t. So project Firebirds is not necessary interactive. I am not really sure what kind of actuators that project uses. It must have some actuator to control the flame and it can be a valve or blower.

Recitation 4: Group Research Project by Guangbo Niu

My definition of interaction

I understand interaction as the process of two or more cognitive systems communicating, processing information, and then actively responding to each other. This process requires three key elements in order to qualify as interaction, which are 1) two or more actors, 2) cognitive systems, and 3) “listening, thinking and speaking” (Crawford 5).

A project that aligns with my definition

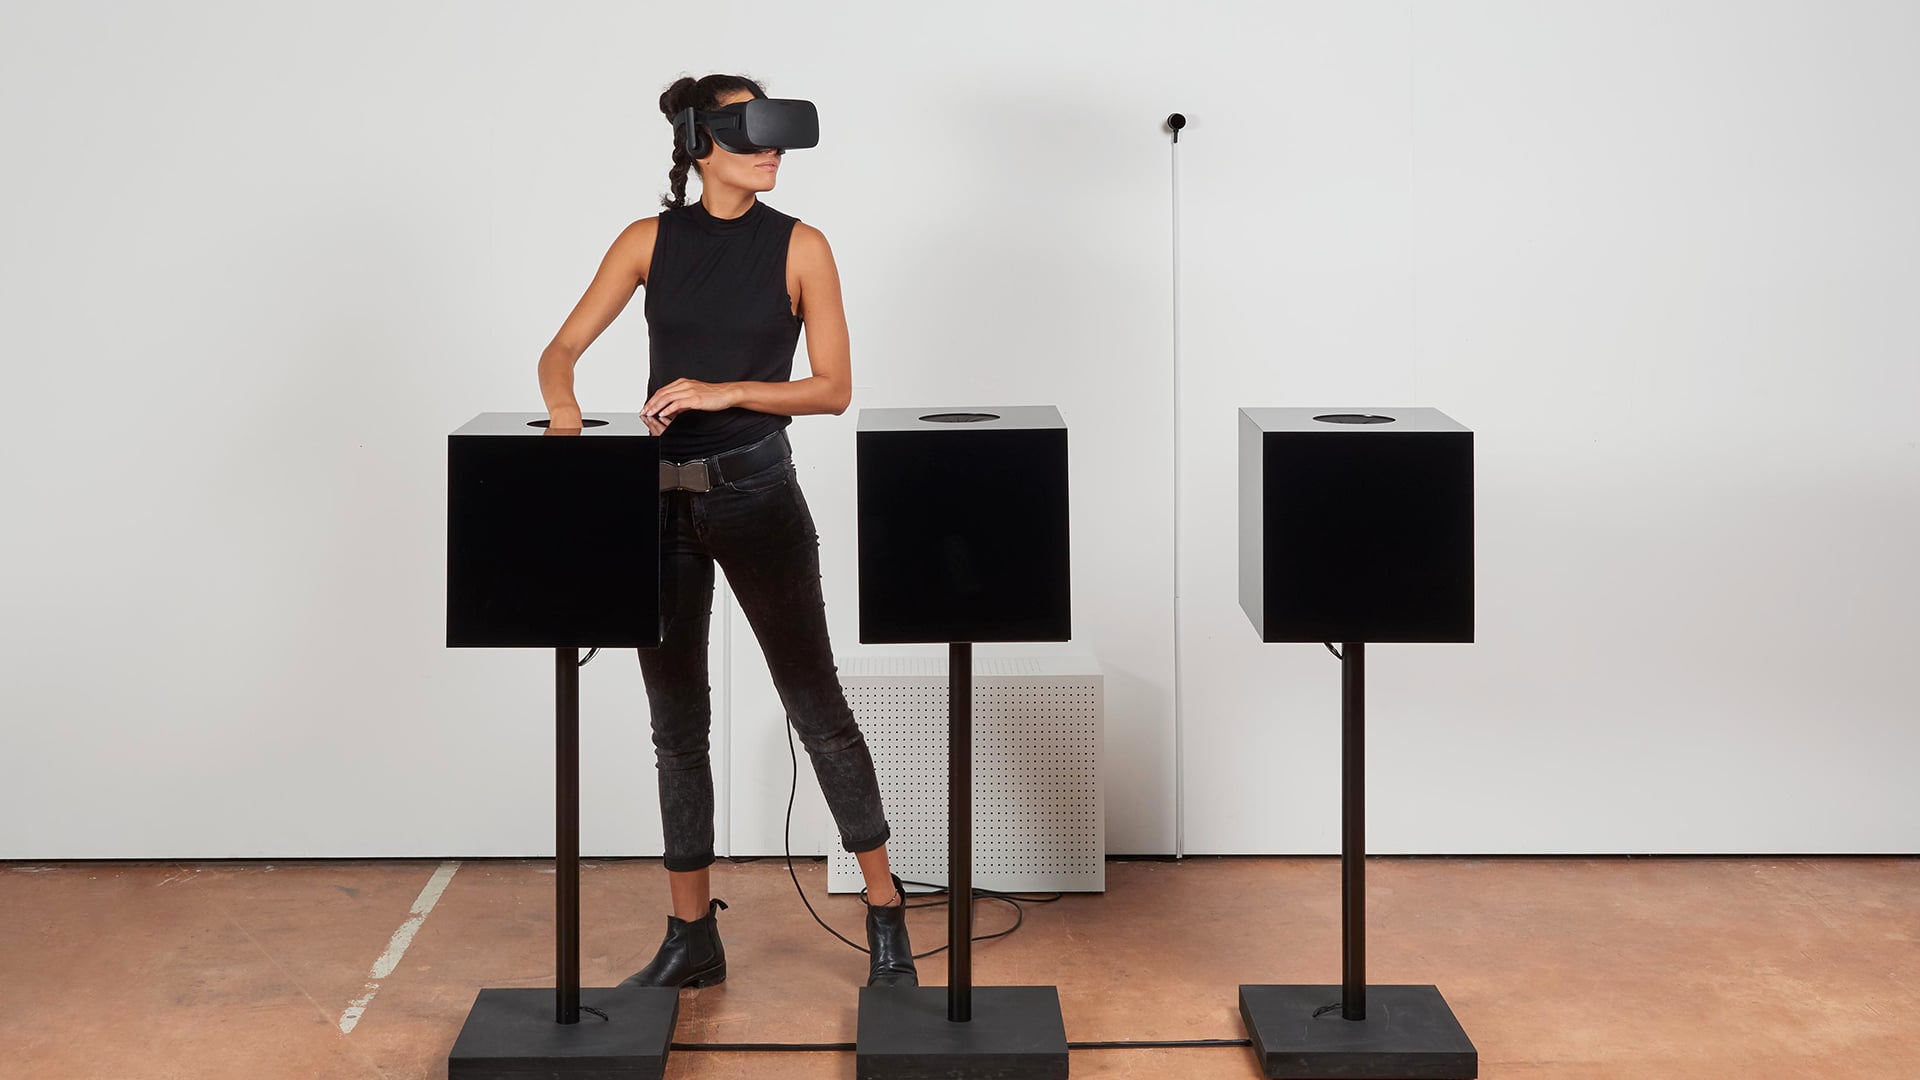
This project called “Tangibles World” created by Stella Speziali is a project that intertwines tactile experience with visual experience using VR and black boxes. The user puts on a VR helmet and reaches out a hand to one of the black boxes. The box will detect the hand and act accordingly with the hand movement, providing a designated tactile experience. While at the same time, the VR helmet provides a wonderful visual experience that fits the hand and eye movement.

Tangible Worlds

Tangibles Worlds – Adding a sense of material and touch to VR

The project can act accordingly with your hand and your eye both visually and tactilely. It triggers my definition of interaction not because “both visually and tactilely” (though it is important), but because it acts “accordingly”.  The key point I want to make is that it does not have a fixed pattern: the user experience varies between different people because of their different approaches. The user can choose wherever they look at and wherever they touch and the combinations of visual and tactile movements can be countless and thus the combined visual and tactile feedbacks can also be countless. What experience a user have almost depends entirely on their inputs.

A project that doesn’t align with my definition

This project called “Terra Mars” by Shi Weili uses AI to first learn the imagery information of Earth and then generate a new planet model using Mars’s data. The outcome is a planet that looks a lot like Earth but actually has the topographical data of Mars.

Terra Mars – ANN’s topography of Mars in the visual style of Earth

This project does not align with my definition of interaction because it does not involve more than one actor although it meets the criterion of “input, processing, and output”. The AI receives data, processes it, and then generates data. But it does not acts accordingly with the user – every one of the user has exactly the same experience. To put more radically, this project needs a spectator, but not a user.

Our group project

Our group project is basically a robot that feeds the user. It is called “Sfeeder”.  It is designed to serve the user when he or she finds it difficult to eat food with their hands. 

Sfeeder Poster Sfeeder

This is a project that best fits my definition of interaction. 1) It involves two or more actors: Sfeeder and users; 2) the actors are all cognitive systems that can perceive, think, and respond; 3) the interactive process requires input, processing, and output. Sfeeder detects what food that the user has at hand, and listens to what the user would like to have, and determines if the food is there, and then fetches the food and feeds the user. It can also order food for the user and offer health advice.

Similar to the first project I researched, both devices would detects the inputs from the user and act accordingly. What experience the user has almost entirely depends on what how the user interacts. In these two projects, every actor acts actively. For in our project, the user can choose whatever they would like to eat and then command the robot; and the robot can actively detect the food and give suggestions to the user on what to eat.

We started from the idea of human-centric because we believe that in the year of 2119, humans still exist in the world and whatever that lasts must be of some utility for human. So we decided to build an interactive device that is human-centric; it serves human needs interactively.

Regardless of that, although human is an important part of interaction, I do think interaction can happen without humans. A simple example is that a more sophisticated version of our Sfeeder can be used to feed a cat. And there is possibility that a robot serves another robot in the future.

Recitation 3: Sensors by Guangbo Niu

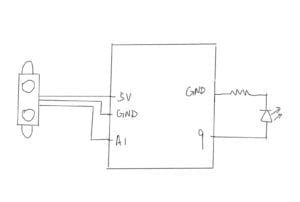
Diagram

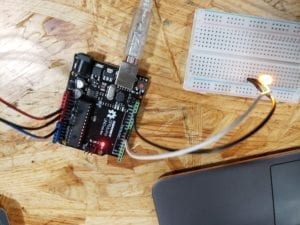
We picked an Infrared Distance Sensor for this recitation. This sensor uses laser to detect distance ranging from 4cm-30cm. We did not encounter many problems when completing the circuit – there is even no need for a breadboard. We just had to follow the instructions and diagrams. At first we did not use the map function and it worked well, as the following video shows.

Then we tried the map function. It also worked well – the LED dimmed as the distance became shorter – except for one problem – we forgot to add a resistor in the circuit and we didn’t realize it until a fellow pointed that out. 

IDS with map function, but not a resistor

At the end, we added a resistor, though the dimming effect is not clear enough in this video.

Question 1:
What did you intend to assemble in the recitation exercise? If your sensor/actuator combination were to be used for pragmatic purposes, who would use it, why would they use it, and how could it be used?

We assembled an Infrared Distance Sensor (IDS) with Arduino. I suppose, for example, a cellphone user would use it. To put in other words, an IDS or some simillar distance sensor would be built into a cellphone. People use it in their cellphones to avoid unintended touches. Because when people make calls, they put their cellphone near their face and the face sometimes touches the phone screen. With a distance sensor, the phone will know it is the face touching the screen during a phone call, so it will choose not to respond to the touch.

Question 2:
Code is often compared to following a recipe or tutorial. Why do you think that is?

Code is basically instructions. You write down code to tell the computer what to do, and the computer executes the code line by line. Recipes and tutorials are also some kind of instructions, so it is fair to copare code with recipes or tutorials.

Question 3:
In Language of New Media, Manovich describes the influence of computers on new media. In what ways do you believe the computer influences our human behaviors?

Computers have made possible for human to focus on what really interests them within their limited time, instead of spending much time on repetitive and heavy and less meaningful work. For example, in old days, people have to check their article more than twice for typos and mistakes after completing it. Now we have auto correct and auto grammar checker, which make writing a lot easier. In general, computers have reduced human labor in every possible way. To put this in a more fundamental way, computers have replaced every human wherever computing is needed. They have freed human from doing calculations.

Recitation 2: Arduino Basics by Guangbo Niu

Circuit 1 Fade

Circuit 1

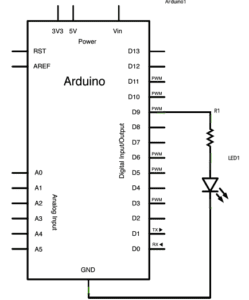
The first circuit is a rather simple one given the experiences we learned from recitation 1. We connected the white LED and a resistor with Arduino Uno using a breadboard and some jumper cables. And it suddenly occurred to us that we could use the red LED instead so it would look more beautiful, as shown in the second video.

Circuit 2 toneMelody

Circuit 2

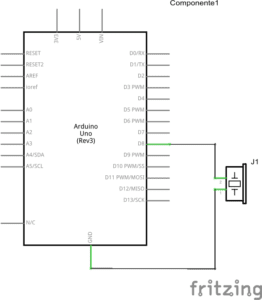
This circuit is also simple. We just had to connect the buzzer with Arduino Uno using some jumper cables and a breadboard. To have explore more, I searched through the code and found some letters with numbers such as A1, B3, etc. Then I realized those might be the tones of the melody. So I proposed to randomly replace some of the tones with different sets of letters and numbers. And it worked, as the videos show. We managed to play different melodies.

Circuit 3 Speed Game

Circuit 3

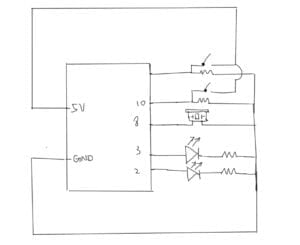
Circuit 3, own drawing

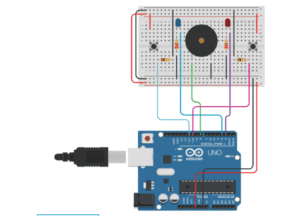
We encountered a few problems when building this circuit. At first we had no idea how it worked so we just followed the diagram and connected components blindly. After we finished, it turned out not to work on either side; we pressed the buttons and nothing happened. So we asked Leon to help us out. He checked the circuit for us and found that on player 2’s side there is a ground line connected to the wrong whole. He fixed it for us and player 2 worked. Yet we still couldn’t figure out how to make player 1 work. After about 10 minutes we thought we had to ask for help again and this time we turned to Dave. He checked the circuit and, to our surprise, it was the button’s problem! The button’s leg was bended too much and thus it couldn’t connect very well. We then replaced the push buttons with the bigger arcade buttons and it worked.

Question 1:

Reflect how you use technology in your daily life and on the circuits you just built. Use the text Physical Computing and your own observations to define interaction.

Interaction, based on my observations and the article, is defined as the exchange of information. When you open the door, it does not respond, but it reacts as what you expect it, and no information is given. When you interact with  a computer, however, it responds you with information and that kind of information is sometimes unexpected – it depends on how you give the input. The most brilliant interaction I see every day is the smart tray detector in our cafeteria. When you put your plates on that tray, it automatically gives out the price and charges you. The circuits we built today, especially the last one, are also interactions between humans and machines. As shown in the article, there are also different levels of interaction. When you use your laptop, that is a kind of low-level interaction because it only “sees” your fingers and eyes. The high-level interaction, however, is a mechanism that detects multiple human behaviors and acts accordingly. 

Question 2:

If you have 100,000 LEDs of any brightness and color at your disposal, what would you make and where would you put it?

I will build a screen with those LEDs (you know, simply put, screens are basically made up of millions of micro LEDs) and put it in some room in campus that does not have a window. The screen will automatically play the view outside 7×24, with a video camera capturing the view at Century Park.