Recitation 7. Functions and Arrays By Feifan Li

Step 1: Creating a Graphic

I was not sure what to draw, at first I wanted to draw a snowman, and I used functions like ellipse() and line() to make a cute snowman with 2 arms. But when I do the array the arms seem to messy, so I removed the arms and made it a kind of awkward snowman. (you can see it below in the video)

Step 2:

for loop in the setup()

float x;
float y;
color c;

void setup(){
  size(600, 500);
  background(255);
   for (int i=0; i < 100; i=i+1) {
     display(random(width),random(height), color(random(255), random(255),random(255)));
  }
  }

void display(float x, float y, color c) {
  //Use these parameters to create your graphics
  //x=300, y= 250
  fill(c);
 ellipse(x, y, 100,100); 
 ellipse(x, y+100, 150,100); 
 fill(c);
 ellipse(x-20, y-10, 10,10); 
 ellipse(x+20, y-10, 10,10); 
 fill(c);
 rect(x-5, y+15, 10, 10);
}

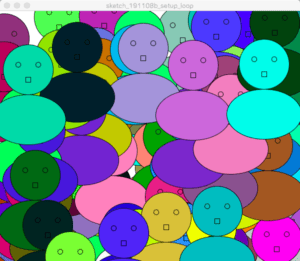
When for loop is in the setup(), the picture is static with 100 snowmen. Processing only draws the picture once.

for loop in the draw()

After moving the for loop to the draw(), Processing keeps drawing 100 snowmen and they appear moving.

Step 3:

float[] x = new float[100];
float[] y = new float[100];
float[] c = new float[100];

void setup(){
  size(600, 500);
  background(255);
    for(int i= 0; i<x.length; i++) {
    //Fill the arrays with values for the positions and colors
 x[i] = random(width);
 y[i] = random(height);
 c[i] = color (random(0,255),random(0,255),random(0,255));
    }
  }
  
  void draw() {
  for(int i = 0; i<x.length; i++) {
    //Use your display function and the arrays to show your graphic
      display(x[i], y[i], int(c[i]));
  } 
}
void display(float x, float y, color c) {
  //Use these parameters to create your graphics
  //x=300, y= 250
  fill(c);
 ellipse(x, y, 100,100); 
 ellipse(x, y+100, 150,100); 
 fill(c);
 ellipse(x-20, y-10, 10,10); 
 ellipse(x+20, y-10, 10,10); 
 fill(c);
 rect(x-5, y+15, 10, 10);
}

Having for loop in both setup() and draw() does not make the picture move.

Step 4:

float a=400;
float b=400;
float speedX=5;
float speedY=3;
float[] x = new float[100];
float[] y = new float[100];
float[] c = new float[100];
float[] positionX = new float[50];
float[] positionY = new float[50];

void setup(){
  size(800, 800);
  background(255);
    for(int i= 0; i<x.length; i++) {
    //Fill the arrays with values for the positions and colors
 x[i] = random(width);
 y[i] = random(height);
 c[i] = color (random(0,255),random(0,255),random(0,255));
    }
  }
  
  void draw() {
  for(int i = 0; i<positionX.length; i++) {
    //Use your display function and the arrays to show your graphic
      display(x[i], y[i], int(c[i]));
      x[i]+=random(-10,10);
      y[i]+=random(-10,10);
       if(a > width || a <0){
    speedX = -speedX;
  }
    if(b > height || b <0){
    speedY = -speedY;
  }
}
  }
  
void display(float x, float y, color c) {
  //Use these parameters to create your graphics
  //x=300, y= 250
  fill(c);
 ellipse(x, y, 100,100); 
 ellipse(x, y+100, 150,100); 
 fill(c);
 ellipse(x-20, y-10, 10,10); 
 ellipse(x+20, y-10, 10,10); 
 fill(c);
 rect(x-5, y+15, 10, 10);
}

Question 1: In your own words, please explain the difference between having your for loop from Step 2 in setup() as opposed to in draw().

Having for loop in setup() only makes a static picture, because it is in the setup section, it does not involve any change. Having the for loop in draw() makes changing graphics, because the draw section keeps drawing different graphics and they appear moving.

Question 2: What is the benefit of using arrays?  How might you use arrays in a potential project?

Arrays can store any type of value by an index number representing each value’s position in the array. It is a collection of variables in a single line. It makes coding multiple variables more convenient.

I might use array in my potential waste classification project because it involves several values (different categories of waste) and they are expected to randomly show up continuously. I think array can make the process easier.

Final Project Proposal. By Feifan Li

Proposal 1

TITLE:  Waste Classification Game

STATEMENT OF PURPOSE:

This project focuses on the heated topic of waste classification in Shanghai. It is intended for a general audience, like ordinary citizens who are struggling to classify their daily waste. My initial plan is to make the waste classification process an entertaining game as well as a learning opportunity. I plan to design a game with constant waste popping up on the screen, and the player is responsible for classifying the waste as fast as possible. There would be 3 or 4 buttons in front of the player, each representing a different category of the waste. By pressing the button, the waste would go to that category, and if it is the right one, the player would earn points. This is the basic design of this game, and other incentives like bonus points for continuous success can be added. 

The challenge this project seeks to address is the difficulty of classifying waste in our daily life. I think all those who are not so confident in their ability to do classification can benefit from playing this game. The intended impact is that the player would learn waste knowledge while having some fun.

Proposal 2

TITLE: Bouncing Ball

STATEMENT OF PURPOSE:

This project aims to create a game composed of a bouncing ball and bricks. When the ball touches the bricks, the bricks will disappear and the ball will bounce back, and the player needs to try to catch it with a plate so that the ball bounces back to hit the bricks again. This project proposal is inspired by a classic computer game (link here: http://www.4399.com/flash/51753_2.htm).

The longer the ball does not fall off the plate, the better; but the player also needs to make sure that the ball hits all the bricks to win. To control the plate, we will make a handle which can move easily through digital fabrication. I think this game can be very entertaining and really interactive – the player has to react to the different situations given the movement of the ball. It is also achievable as we learned to make the bouncing ball in processing. The intended impact of this game is not only to entertain but also to train the flexibility of the player. The player needs to predict beforehand to do well in this game.

Proposal 3

TITLE: Let’s Dance!

STATEMENT OF PURPOSE:

This project is inspired by the dancing machine in the arcades. On the computer screen there will be a set of signals (left, right, up, down) that constantly pop up. Through digital fabrication we will make the corresponding arrows to be placed on the floor. The player needs to touch those arrows as soon as they see the signals on the screen. The pace of the game might get faster as the game progresses,and it poses a physical challenge to the player. 

This project can potentially encourage the player to do more sports. Nowadays we spend too much time in front of the computer screen and rarely move. The project still features a computer screen, yet the player is constantly moving in front of it. This helps people get on their feet and move around creatively.

Final Project Preparatory Research and Analysis. By Feifan Li

A.

I think the art pieces at the Chronus exhibition appear to me as something unfamiliar. I had visited exhibitions of non-technology based art work, but I rarely go to see technology-based art pieces. At first the art pieces there seem to me very strange. They are mostly dark in color and made with machinery or some working parts of a machine. Most of the art pieces are in motion for some purpose, and the components that allowed the pieces to move are often servos and motors, which we are also using in this class. Among the art pieces, the following ones caught my attention.

This is a very interesting gigantic project. I like the design very much – it looks like a big bird nest to me at first. Upon closer observation, I noticed that it is delicately designed, with many servos working and the threads moving in a coherent way – from the outer part to the inner part. It is really amazing that the many parts of such a giant yet delicate project is working so harmoniously. 

This is another striking piece. The main part of the project is a combination of a record player and a sewing machine. It is such a weird mixture, and the projector is screening a black and white film which ends with the explosion of an atomic bomb. I cannot tell exactly what this project intends to tell the audience, but I suppose it has something to do with human development and the potentially negative impact of technology on humans.

 I think a big difference between technology-based and non-technology based exhibitions is the movement of the art pieces. Technology-based art works almost always involves a constant movement, they are always in motion, in the process of development. While non-technology art works can be static and simply for visual appreciation. Also, technology-based art works tend to reflect on the development of technology and its relationship with humans.

B.

One project I have researched is “Chatty Coaster.” It is an interactive drink holder that detects silences in conversation and inserts provocative questions as starters to break awkward silences. I think it aligns with my definition of “interaction” well. The input in this case is the silence – a very creative input. The output can be all kinds of casual questions that would start a further conversation. This output is not easily predictive as it is random, so this is not a merely responsive project. What’s more, the project is symptomatic of people’s growing inability to talk to each other face to face. I think this project captures precisely a social phenomenon, or dilemma, that many of us feel strongly about. With technologies that enable chatting apps, humans are losing their ability to sustain a long face-to-face conversation. This project offers people not only laughter (because hearing it talk is in itself so entertaining), but also reflection on the relationship between human and technology.

link: https://create.arduino.cc/projecthub/team-avocado/chatty-coasters-e6b6a0?ref=tag&ref_id=interactive&offset=5

Chatty Coasters
Chatty Coasters-bringing interesting conversations back!

One project I have found that does not necessarily fit my definition of interaction is “Interactive Mario Mushroom Block.” It is a Mario block that users can punch and in turn get a mushroom out of it. It imitate the classical game scenario and people can literally use their head to hit the block. But this project does not go to far in terms of interactivity. It is with a fixed input and output – the users can predict the outcome after experiencing it once. I think it is more responsive and repetitive than really interactive. Also the project does not have a very meaningful purpose behind it – it is primarily for the fun of imitating the game scenario. When I do my final project, I would strive to make the experience more interactive and the reflection on the experience more meaningful.

link: https://create.arduino.cc/projecthub/sclandinin/interactive-mario-mushroom-block-2235dd?ref=tag&ref_id=interactive&offset=2

C.

When I did my group project, my definition of interaction involved “a clear input, a processing procedure of the input and an output that is different from the original input.” This idea is inspired by the Crawford reading where the author discuss the nature of interactivity. I focused on the processing of the input and the generation of a new output. Usually a human devotes an input, and some machine processes it and then generates some feedback as an output. What I emphasized in my definition was the output should be different from the original input, so that the interaction becomes meaningful.

When I began to brainstorm for my midterm project, I modified my definition of interaction. Inspired by the class discussion, I realized an interactive project should not be merely responsive. A responsive process would also involve an input and an output, and they are likely to be different, but it may not be really interactive. An “interactive” project should ask the user to respond to the different feedback of the device. The device does not offer a fixed output, but it offers a variety of different reactions, and the user reacts to those different situations accordingly. My midterm project also follows this  definition. My project NOT A MOUSE would act unexpectedly to human/cat action, and would try to escape from the catch. While the “Mario Block” project I have researched this time is more repetitive and responsive. I think a good “interactive” project means more than a mere fixed response.

This time for the final project, I would like to explore the deeper meaning associated with “interaction.” Interaction is so widespread in society, whether it is human-machine interaction or interpersonal interaction. A central element that makes interaction so intriguing is that the feedback of interaction outcome is often unpredictable. The user may be delighted with what he/she gets at the end of the process, or he/she may learn something new that he/she had not expected. An interactive project can sometimes be a declaration or statement piece. The interactive process can be a journey of exploration, and that is what attracts the users to participate. The result of the participation can often be enlightening. For example, the belt piece by Lozano Hammer shown in class is so meaningful because it catches the essence of surveillance through an interactive process. Statement like this would leave a deep impression on participants as the project presents itself as a metaphor for users to chew on. Also, the “chatty coasters” I have research this time functions as a conversation starter which can improve interpersonal relationships in this world dominated by technology.  These projects are metaphoric expressions of  really insightful thoughts, and they inspire us to reflect on the relationship between humans and technology. So for my final project, I want to aim for something that could tell a story or show something meaningful through an engaging interactive process.

Works Cited

Crawford, “What Exactly is Interactivity,” The Art of Interactive Design,  pp. 1-5.

Clandinin, Scott. “Interactive Mario Block.” https://create.arduino.cc/projecthub/sclandinin/interactive-mario-mushroom-block-2235dd?ref=tag&ref_id=interactive&offset=2

Hemmer, Lozano. “Standards and Double Standards.” http://www.lozano-hemmer.com/artworks/standards_and_double_standards.php

TEAM AVOCADOS UNLTD. “Chatty Coasters.” https://create.arduino.cc/projecthub/team-avocado/chatty-coasters-e6b6a0?ref=tag&ref_id=interactive&offset=5

Recitation 6. Processing Animation By Feifan Li

Exercise:

Interesting functions I used:

fill, ellipse, noStroke

mousePressed

keyPressed

Drawing on what I learned in class this week, I modified the code for a bouncing ball and made it a sketch with 2 colorful bouncing balls. To change the balls’ color, I used both keyPressed and mousePressed. I separate the code for color-changing, so that the 2 balls would display different colors whenever I hit the mouse or the keyboard. I also made the 2 balls bouncing in a symmetric manner, it is interesting to see them crossing each other.

the code:

float x = 0;
float y = 0;
float Xspeed = 5;
float Yspeed = 3;

float red = 255;
float green = 255;
float blue = 255;

void setup(){
  size(500, 500);
  background(0);
}
void draw(){
  noStroke();
  fill(255, 255, 255, 50);
  rect(0, 0, width, height);
  
 fill(red, green, blue);
  if(keyPressed){
  fill(random(255), random(255), random(255));
  }
  ellipse(x, y, 50, 50);
  
 fill(green, red, blue);
 if(keyPressed){
   fill(random(255), random(255), random(255));
 }
  ellipse(y, x, 50, 50);
 
  if (x > width || x < 0){
    Xspeed=-Xspeed;
  }
    if (y > height || y < 0){
      Yspeed = -Yspeed;
  }
  x = x + Xspeed;
  y = y + Yspeed;
}
void mousePressed(){
  red = random (255);
  green = random (255);
  blue = random (255);
}

Homework:

Step 1: the basics

Code:

size(600, 600);
background(255);
stroke(0);
strokeWeight(18);
ellipse(width/2, height/2, 280, 280);

Step 2:  to expand and contract

In order to expand and contract the circle, I defined the circleSize function. Using the “if” sentence I can expand the circle as I want, but to contract is more difficult. At first I wrote the code as follows:

  if (circleSize<=120){

    ellipse(circleX, circleY, circleSize, circleSize);

    circleSize = circleSize + 0.5;

  }

  if (circleSize>120){

    ellipse(circleX, circleY, circleSize, circleSize);

    circleSize = circleSize – 0.5;

The problem with this is the circle does not contract when it reaches the limit. Because the when circleSize>120, circleSize-0.5, and it goes back to the first stage and increases 0.5, then it enters the second stage again. So it is an endless and meaningless loop. I cannot write the code like this. With a Fellow’s help I separate the process into 2 stages. The following code works:

//speed control
if (state ==1){
circleSize=circleSize+5;
}

if (state ==2){
circleSize=circleSize-5;
}

ellipse(circleX, circleY, circleSize, circleSize);

//change state

if(circleSize>=250){
state=2;
}

if(circleSize<=50){
state=1;
}
}

Step 3: to add color

I changed the colorMode to HSB, defined “float c” and used the code

stroke(c, 255, 255);

Step 4: to move around with keyboard arrows

To move the circle around with keyboard, I used the “void keyPressed(){ ” I made the center of the circle a variable, and sets its initial place at the center of the canvas. Using the following if/else sentence I can move the circle freely.

if (keyCode == UP) {
circleY -= 10;
} else if (keyCode == DOWN) {
circleY += 10;
}

complete code:

float circleSize = 20.0;
int state = 1;

int circleX;
int circleY;
float c;

// state 1 = increase, state 2 = decrease;

void setup() {
  size(600, 600);
  colorMode(HSB);

  circleY = height / 2;
  circleX = width / 2;
}

void draw(){
  background(0, 0, 255);
 if (c>=255) c=0; else c++;

stroke(c, 255, 255);
strokeWeight(18);

//speed control
if (state ==1){
circleSize=circleSize+5;
}

if (state ==2){
  circleSize=circleSize-5;
}

ellipse(circleX, circleY, circleSize, circleSize);

//change state

if(circleSize>=250){
 state=2; 
}

if(circleSize<=50){
  state=1;  
}  
}

//to move around
void keyPressed(){
  
    if (keyCode == UP) {
      circleY -= 10;
    } else if (keyCode == DOWN) {
      circleY += 10;
    } 
     if (keyCode == LEFT) {
      circleX -= 10;
    } else if (keyCode == RIGHT) {
      circleX += 10;
    } 
}

The video:

Recitation 5. Processing Basics By Feifan Li

I chose my motif on a website called artnet. It is called Balaton, from Ion Album, made in 1989 by artist Victor Vasarely.

link: http://www.artnet.com/artists/victor-vasarely/balaton-from-ion-album-a-z95kw_9jDEPNSCeDfuVCRw2

my motif

I chose this motif simply because I like its color and design – the messy lines with arcs and semi-ellipses make an interesting combination and presents a visual impact to me. Also, I think it is a good practice for basic processing functions like line, rect, bezier, fill, nofill, stroke and so on.

I want to draw an exactly same picture in Processing.

My Code:

size(600, 600);
background(#212120);

fill(#A59E66);
rect(30, 35, 540, 540);

//the small rect
stroke(0, 0, 0);
strokeWeight(1.5);
fill(#CECECC);
rect(225, 280, 150, 150);

//the straight lines
stroke(#272726);
strokeWeight(4);
line(50, 300, 155, 300);
line(50, 320, 155, 320);
line(50, 340, 155, 340);

line(50, 380, 175, 380);
line(50, 410, 180, 410);

line(50, 410, 180, 410);
line(50, 430, 185, 430);
line(50, 485, 223, 485);
line(50, 530, 255, 530);


line(225, 430, 550, 430);
line(225, 280, 550, 280);
line(376, 310, 550, 310);
line(376, 440, 550, 440);
line(376, 460, 550, 460);
line(376, 490, 550, 490);

line(253, 520, 550, 520);
line(268, 538, 520, 540);

//diagonal
line(220, 480, 550, 516);
line(180, 410, 340, 490);
line(150, 230, 200, 300);

//the curves
noFill();
stroke(0, 0, 0);
bezier(450, 200, 120, 250, 120, 390, 280, 550);

stroke(0, 0, 0);
bezier(550, 75, 380, 250, 100, 280, 40, 65);
fill(0);
bezier(380, 188, 350, 35, 250, 35, 120, 180);
fill(#CECECC);
bezier(380, 190, 220, 270, 200, 260, 125, 182);

my drawing

I think my drawing is pretty similar to the motif. I drew the lines and arcs using “line” and “bezier” function, and they resemble those in the motif a lot.

The difficult part in the process is how to draw the arcs. It is difficult to calculate exactly the position of the anchor/control points, so I have to constantly try and make the shapes fit. The most difficult part is to draw the small grey area above the big curve. I could not simply do it with “fill” function, so I drew another arc shape and filled it with grey color. This leads to upper curves appear a bit disconnected. But, overall, I think Processing is suitable for realizing my design.