Interaction Lab Final Project: Collab Drawer
by Steve Sun and Kris Chen
Instructor: Rudi
I would say our project went through a very tough and long way.
The first stage was the concept stage.
From here we went from our first thought which the first blogpost on this project shows, to deciding this idea needs too many advanced technologies which has too much uncertainty that we cannot control, to finally completely abandon this idea and start a new one based on similar inspirations.
Our first idea: everyone carrying a hand gadget and walk around to make contact with other people using it, with a little light spot which is projected on the ground indicating the characters of each player. How this game works is that if you don’t constantly make contact with people, your character will die. This project indicates the importance of human connection. However several components of this project are just too advanced to our level, like how to track and record the information of each player and how to use individual Arduino board and transmit the signals to other devices. These things are just beyond our control so we decided to abandon it.
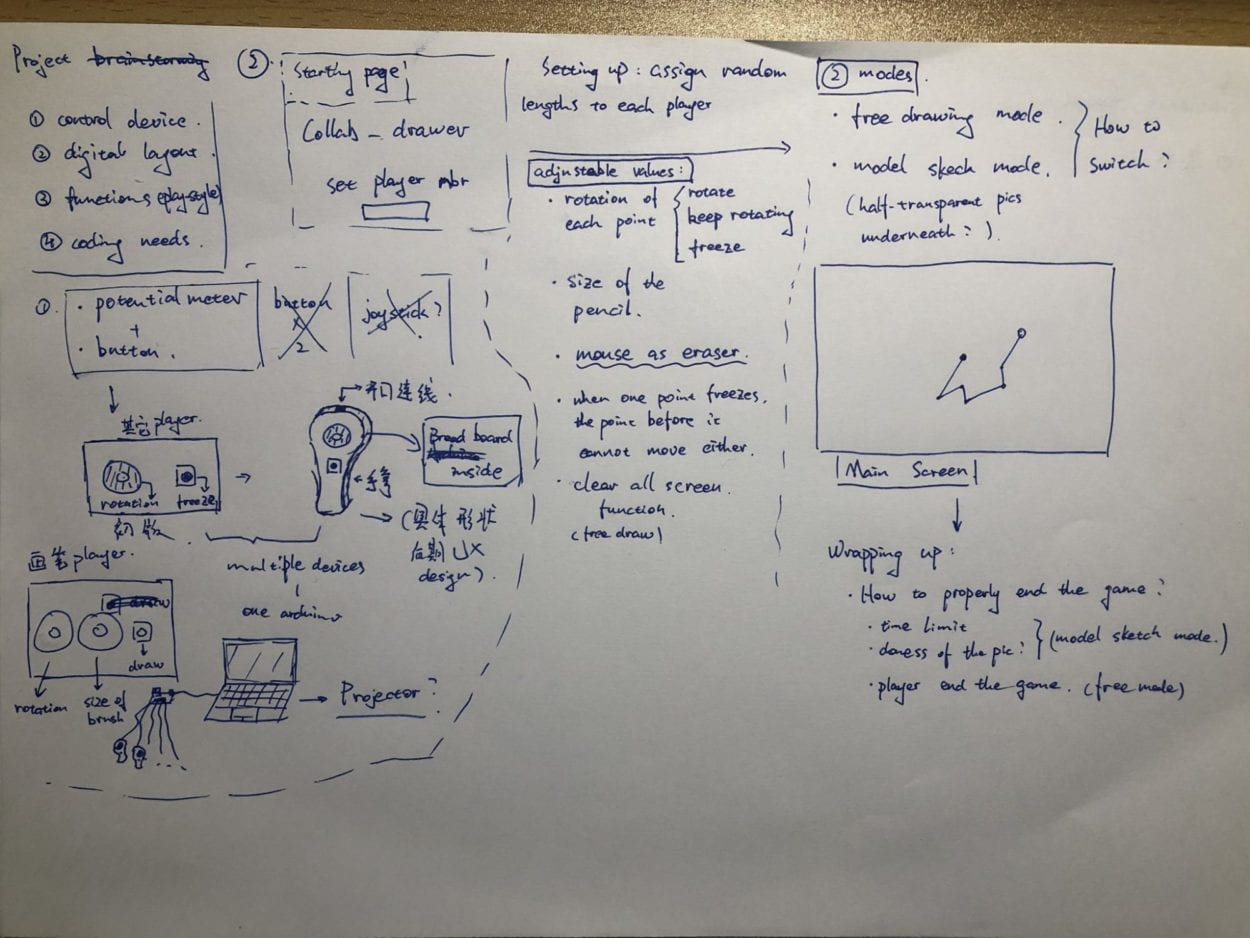
Modified idea: we still want to highlight human connection, but this time not through making contact but through collaborating and communicating with each other. So we generated an idea of “the collab drawer”. Which basically is several circles which is connected to each other with sticks. Each player will be in charge of the control of the rotation of their small circle. The circle on the end of the whole thing is a pen, where another player can decide if it draws lines or to go back to the former step. This project encourages communication and promotes team collaboration, which fits our initial goal, and the whole thing seemed way easier to achieve using the materials and knowledges we have.

my initial designing sketch
The next phase I would call it design and functionality.
For our second idea we first decided not to use the potentiometer if possible, which turned to be one of the dumbest decisions that we made. Because what we used instead was a set of rotary encoders whose coding and functions are completely new to us. Anyways, we spent about two whole days trying to figure out how this little thing works, only to discover that the current library we are using does not support multiple inputs, even on multiple Arduino boards, which is completely opposite to out initial thought.
Up to here we actually got almost nothing done before the user testing session. So during that we argued quite aggressively and decided to choose between to alternative thought, one being we use only one encoder but with other inputs like changing the length of the stick or changing the color of the pen etc. The other one is we go back to our initial thought which is using the potentiometer. We agreed on the latter one and began assembling stuff.
We plan to use an algorithm that Kris wrote before to rotate the sticks. It takes one input from the potentiometer and convert it to the angle (in π) and send it to processing. And also there are two buttons that control the draw and “go back one step” function. We also added some simple templates


(some good works……)
that the users can draw along with, which turned out to be crucial for the goal of our whole game because if we don’t set up certain missions for the users to follow there are a lot less likelyhood for them to collaborate, if any.
We assembled most of the wires and according to the wiring I began designing the fabrication.
The next phase of course is the fabrication.

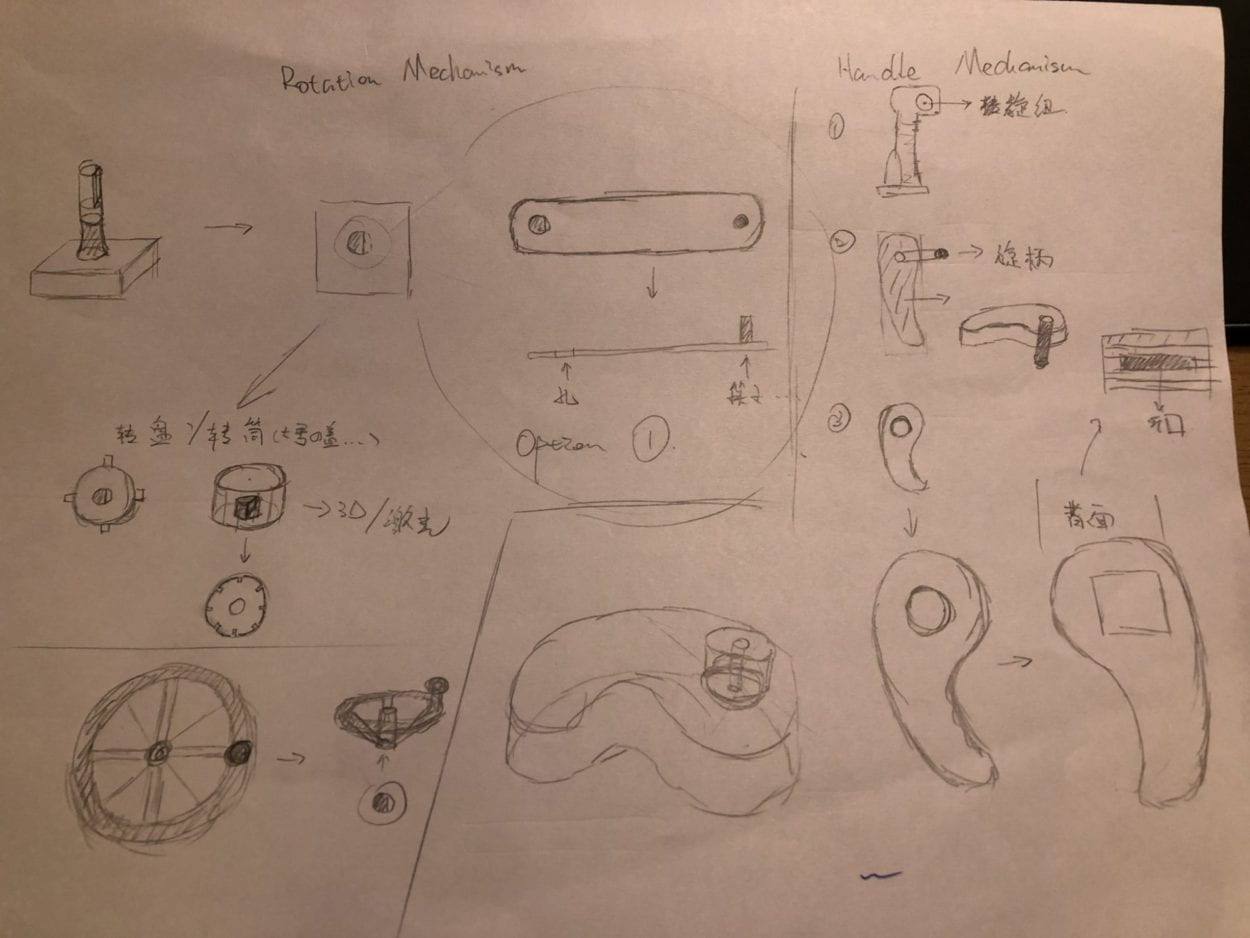
fabrication sketch
At first I thought I could cut out pieces to assemble a “comma-shaped” box with hook face side walls, and put the potentiometers right into the box. But then I figured it would take more time than I excepted so my alternative options is that I made individual little boxes for the potentiometers and put them on “comma-shaped” handles which I laser-cut and made space for the boxes to fit in. I drilled holes for the cables to go through and I cut out the rotary knobs.

For later final adjustment’s sake I gave every box a way to open. And once it’s done, I could seal them with paper tapes. This is mainly time and energy consuming rather than brain and patience consuming……
Also on the handle I drew different shapes that indicates which ball the handle is controlling, but is turned out not as clear as I though it would be, so instead I changed the color of the balls and put tapes of the matching color on each controller.

The debate on whether it is necessary to add more functions.
For this project I felt like we were always struggling between better UX/functionalities and less work.
For example, the using potentiometer or rotary encoders. The advantage of the latter is that the user could keep rotating without having to stop because of the device has a limit of rotating. Which indeed turned out to be a problem that our current version of the project have.
Also, I always had this idea that if the users could change the radius, drawing straight lines would be so much easier. But after several round of user testing it seems that it is not really necessary if out goal was not to draw a perfect picture at the first place. But nevertheless I’m still curious to see how things would turn out if I added this function.
One thing Ezster pointed out was if we could add the function of changing the color. We thought that although it could bring more to the idea of drawing, it still seems a little redundant of a function. Again, the idea is not to draw a perfect picture but is how people interact and communicate during the process. However, we do have an idea how to incorporate the changing color function which I will expand on in the future development section.
About achieving our goal (aka. Significance)
So this project is all about collaboration. From our inspections in the reaction of multiple user-testers and the users in the IMA show, the groups with people who has the patience to slowdown and talk with their teammates usually do better in the game. Also the teams that played the game seemed more close with each other which is a good sign. (That’s when I figured out that this could be a good ice-breaking game) And that’s exactly what we are looking for in this game. So in terms of how we achieved our goal I think we did a pretty good job.
Mistakes, things that we could become mistakes otherwise, and (possibly) further developments
There are still some obvious mistakes in our project. First, the handle. In the show I found that no one is using the handle the way I wanted them to


(look at their hands……)
… so that is a big mistake in designing the thing. (I didn’t feel that way before because the handle looks quite straightforward to use to me…… but during the show even with my instructions most people still just put it on the table……). Similarly is the shape I drew on the handle indicating the ball one person is controlling. (another thing I thought would be clear enough but no……). Also the fabrication on the two buttons seemed to be just a little rushy…… I could have printed or cut a box for the two buttons to fit.
Things that we would regret otherwise: 1. Not going with our first version of the project…… 2. Switching back to potentiometer fast enough. 3. Using only three controllers (otherwise if I used more, like five, the whole thing will just become too much on the screen and people would just be not as collaborative as this version, I could imagine that……) I’m actually glad that we only did 3……
Further improvements: 1. Better fabrication (but like you can improve your fabrication indefinitely so that’s not really a good point……) 2. Add more functions like changing colors or changing the length of the stick (might get confusing but I would still like to see) or like the thickness of the brush and all the stuff we might see on a drawing software (we literally wanted to reuse the color censor to pick the color from the real world for the brush…… I thought it would be really cool on another project) 3. Better inputs! The potentiometers are just about enough to finish the job and with a crappy UX, so if we could get some kind of input with more precise rotation recording and can rotate without limit. Maybe not the encoders this time……