RAPS Assignment 1: Simple Arpeggiator – Celine Yu

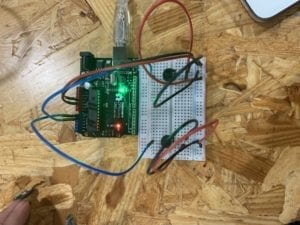
Initial Attempt: (Far Right Side/Not Final)

CODE: NOT NEEDED/GIVEN

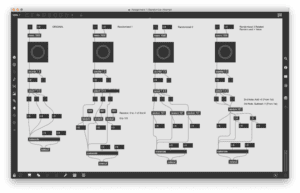
For this first assignment, I went in head straight with only the information provided during class, my memory and research skills. I duplicated the original code onto a new patcher and began to work. With my knowledge from previous IMA courses, I understood that in order to complete the task, I would need to use some sort of randomizing text/code. I was not sure how to achieve this on Max, and therefore, went online to search for any kind of material that could help me progress through the assignment. I was able to find this website: https://docs.cycling74.com/max7/refpages/random, through the page, I was able to understand the “Random Object.” How it functions, how I should set it up, how its inputs and outputs work, how it should be connected to other components and so on. I attached the random message to the ends of each of my three buttons. I’ve learned that the number that follows the command, is the value that sets the range for the output. I realized that whatever value I place, the range would be equal to one less of the number. To ensure that the range would be contained through 0 – 100, I wrote “Random 101“ and then connected three separate number boxes to the random’s output section to display the numerical values throughout the process. Afterward, I reattached the whole piece to the makenote/noteout. This was the final product I was able to achieve with my own understanding and representation of the instructions provided for the assignment. In the end, I scrapped this design of the assignment due to a misunderstanding of the instructions on my part. I got to work on the second and final completion of the assignment in the next section with help from my professor. 

Final Attempt: 

CODE: https://gist.github.com/cy1323/265ec3f03e55b4a0a527b8061245e6c1

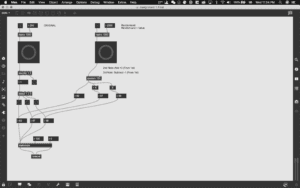
I finally understood the prompt when I asked for clarification during Tuesday’s class. I learned that I am supposed to have two separate sections by building off of the original patcher provided during the class and sending a new set of values to the original every two seconds. I continued usage of the randomizer command as well as the +/- values in order to relate the three values to one another. I did not change much for this final attempt. Rather than adding new components, I deleted the unnecessary sections and connected the two patchers together. With help during class, I learned that I needed to connect the second patcher to the first’s number (i) inputs. This would allow the second patcher to transfer its given sets after each two second bang to the main section that outputs music. 

Video: FinalVideo

Break Free – Final Project – Celine Yu

Project Name: Break Free

Partner: Kenneth Wang

Professor: Young

Conception and Design 

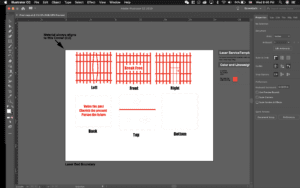
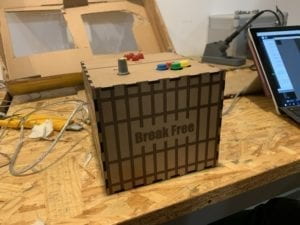
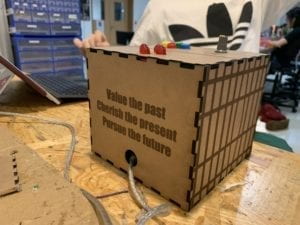
My Partner, Kenneth and I decided that for this project, we would resemble it after the popular game genre known as escape rooms. We were especially intrigued by how within its nature, Escape Rooms are constantly asking for input from the users involved. Kenneth and I knew that we wanted our users to continuously place input,  and found that it would be interesting for the users to interact with the project by navigating its interface and deciphering all of its clues and hints in order to reach its goals. The project would then process the user’s information and input and then create its own input to help the user complete the game, together they would be working towards a common goal: escape from the room.  We wanted the room to be easily recognizable and easily understood as to where the end goal should be, which is why we only created one room instead of multiple. we wanted the user to familiarise themselves with the room and not to confuse themselves with multiple aspects and attributes. the next decision we accounted for on behalf of the user’s interaction with the project was the physical gameplay. I designed the box through illustrator and spent a lot of time decorating the box to make it fit the criteria of the project, which I did by creating a bunch of bars around the box to resemble those of jail cells. In my intentions, this design would further the objectives we wish to convey: a restrictive environment. We then purchased multiple buttons, joysticks, and potentiometers off of the internet and then borrowed LEDs from the equipment room to use atop of the main controller for the game, which is the box. These components proved to be the best for our project for they gave users a reminiscent feeling of video game controllers which automatically told the user that the project was indeed a video game that they could interact with. Another option was simply just using the computer’s keyboard and mouse for the user to interact with the interface, but we rejected that idea because we thought that it would be inferior, redundant and boring for the user to just use the keyboard and mouse to solve the game.

Fabrication and Production

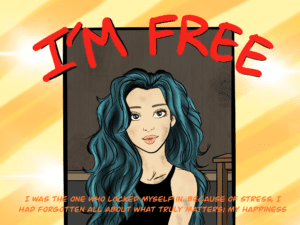
In the beginning, Kenneth and I had a lot of difficulty with trying to understand what we wanted to do for this Final Project. For the midterm, we had created a game that did not require any sort of strategizing or deep thinking, and so we wanted to change that this time around. As I was put in charge of the designing process for the project, I put a lot of effort and attention into the physical appearance of the project, which includes the box as well as the art for the Escape room. Creating the box took a few times to get used to, but because of my previous experience from the last project, I was able to minimize my trials with the fabrication lab. I wanted the design to be sleek and minimal so that it would appear clean and easy to understand for the user. Then, I went on to creating art for the project. Each picture and image found within the project was hand drawn by myself through applications such as Illustrator, Photoshop and Procreate on my iPad. It wasn’t until during the drawing process that I had familiarised myself with the Procreate app. I had to watch several videos and tutorials on the internet in order to understand the complete interface of the application, only after that, did I feel comfortable with creating my own pieces of art.

Kenneth and I had to discuss and brainstorm a lot of aspects to the design because we wanted it to be perfect and congruent. There are times where agree with another as well as disagreed, which I believe only created a better outcome in the end. There are many times where I would have to draw for 5 to 6 hours a day, which I did not entirely mind because I was doing it to create a better project for both my partner and I. For the user testing, we received a lot of compliments but also a lot of suggestions and worries for the rest. We were told that the game was kind of confusing due to the lack of instructions,  the users believed that if we were to add simple instructions that were minimal and did not distract them from the game, then the project would benefit overall.

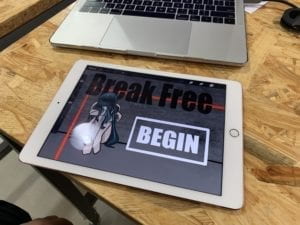
To conform to these suggestions, I added symbols and labels to the items found on top of the box so that they would be easier to locate. Kenneth then added instructions to the game through forms of animation that would direct the user through the interface. We also incorporated newly added LEDs to the box so that they could correspond to the codes and hints that we created throughout the game, which furthermore helped the user understand the game’s intentions and goals. Honestly, I do believe the suggestions helped us in creating a better project and so they were effective as well.

Conclusions

The goal of this final project is to create a fascinating interface or game that reflects our ideals of interactive devices. To Kenneth and I, we believe that interaction details a dynamic relationship between two or more users who continuously place input into one another depending on the other’s output, and of course, they must work towards a common goal. In our project, the user is working to understand the rooms’ hints in order to decipher them and discover a clue that allows the character to escape from the final room. The interface of the room is then processing the input that the user places into it, processes it, and then creates it’s on output that would help the user to reach the final goal. For the most part, I believe that the final project perfectly aligns with our definition of interaction, but I do believe that there could be a misunderstanding of a reaction instead of interaction. We were thankful and in relief that with user testing and our final project presentation, the volunteers perfectly interacted with the project as to how we had planned.  I do wish if we had the luxury of time, that we could create more complex levels and rooms for the user to go through, this would lengthen the overall project also raise even more awareness to the issue we had chosen. We’ve learned, how much thinking and designing must go into the project in order to create a fully useful device. We should have implemented different aspects such as sound effects and a longer story in order to deepen the project’s meaning. I believe that teamwork is super important in this aspect and communication as well, I am grateful to have worked with Kenneth this time around for the final project.

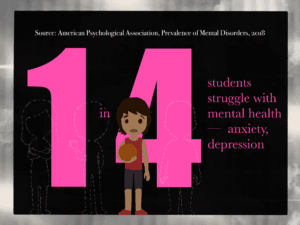
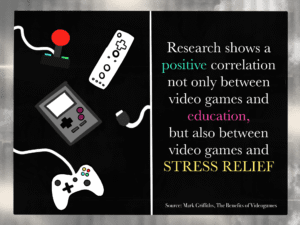
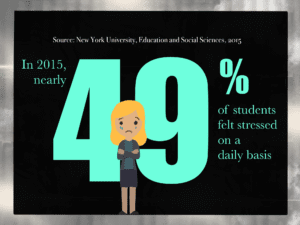
With this Project,  we wanted our goal to be that of raising awareness on the stress and mental illnesses that arise within college students and in academic environments. We both understand that is it is extremely difficult and even almost impossible to cure someone of these illnesses through a simple project like this, but we wish to at least raise awareness of the growing issue. We conducted an immense amount of research in information in order to back up our claims and goals. We wanted to turn the awareness issue into the form of a game in order to make it seem more interesting, and for it to reach out to even more users in a more meaningful way. We believe that these people, students, and all users should care because it affects all of them, whether or not the mental illness is chronic or subtle, it is a part of us that should not be ignored.

Recitation 11: Workshops, Celine Yu

Recitation 11: 

For this week’s recitation, my partner, Kenneth and I, decided that we would split ourselves into separate workshops so that we could gather a large sum of knowledge from various categories of interaction and coding. While Kenneth attended Serial Communications, I went to the Media Manipulation workshop next door. There, my instructor, Leon, gave us a brief preview of the class and proceeded to ask students what kind of things they wished to learn from the workshop. When it came to me, I was not unable to vividly describe my aspirations and visions for the class, for Kenneth and I were still in the midst of planning our final project. Which is why, for the workshop, I refrained from creating a specific product for the final, and instead, decided that I would keep my options open. I would perform this action by learning the various effects I could use to manipulate video and live feed, for I knew, that they were going to be possible aspects Kenneth and I would use in our final.

Process: https://github.com/cy1323/CelineYu/blob/master/Recitation%2011

I first imported the video library from the Processing’s Sketch and followed previous lectures by setting Movie myMovie above setup and draw. Then, similar to image manipulation, I sourced the video in the data folder by implementing: “new Movie (this, nye.mp4)” and made sure that it would play upon loading with “myMovie.play.” After setup, I followed the order and moved onto void draw(). Here, with reminders from the teachers present, I let Processing determine if whether or not the video was ‘available’ with an if() function at the beginning of void draw(). Up until this point, I had used information that had already been taught during previous lectures.

I wanted to implement as many effects I could understand within the short period of time I was given, regardless of the product’s final appearance. I wanted the video to move depending on the position of my mouse. I set up the code as I had done a numerous amount of times before, but for some reason, the code did not work. This is where I was reminded that I needed to use the push and pop matrix functions when dealing with positions within Processing. Soon after, I was able to create a moving masterpiece. After the positioning, I thought I would create an attempt at manipulating timeStamps within a video, an aspect that was mentioned and portrayed during the workshop. Following the teacher’s procedures and close evaluation, I ‘floated’ timeStamp = myMovie.time(), and had it called for action through the usage of println (timeStamp); I then manipulated this timeStamp variable through if and else if functions that would tint the video whenever I desired. For example, I set the tint to (100, 255, 0) when timeStamp was over and above 10 (seconds) and then tinted the video red whenever Processing read that the timeStamp was below 10. I also wanted to manipulate the speed, size, and shape of the video through the timeStamp variable but was not able to achieve this due to time constraints.

Video: Screen Recording 2019-05-08 at 11.30.48 PM

Reflection: Overall, I believe that I learned a list of new things from Recitation 11, most significantly, the easy usage of timestamps to my advantage and desire. I do believe, that if I had come to the workshop with a more definite plan and wish, I could have achieved even greater results that further benefit my final project and coding experience in the long run. Nonetheless, I am happy and satisfied with the work I have done this week, and am, therefore, looking forward to how I could implement these new lessons into the final project parallel to my definition of interaction.

Recitation 10: Media Controller, Celine Yu

Github Code: https://github.com/cy1323/CelineYu/tree/master/Recitation%209

Setup:

For recitation 10, I am told to manipulate media through the serial communication of Arduino and Processing. I immediately made the decision that I would work with the live camera over actual photographs. First, I created a circuit that would focus on the two potentiometers I plan to send input from to Processing through the Arduino software. This part was quite easy considering the number of times I’ve made the same circuit, making sure that I connect the potentiometers to A0 and A1. I then implemented the required information from the recitation folders and placed them into their respective places in Arduino and Processing, then ensuring not to leave out anything that was crucial to the success of the overall project. I changed the NUM_OF_VALUES integer to a 2 to correlate with the two potentiometers from the circuit, set PORT_INDEX to a 10 and worked to incorporate the code from previous coursework that reprinted the live camera feed through the shape of rectangles. 

Next, I created integers: hue and resizing to correlate with the Arduino values being sent to processing. Then, as I learned from my previous lectures and recitations, set those integers to sensorValues 0 and 1, making sure that afterward, I set them to a limited range through the usage of the map function.

I was surprised to find out that the resizing function was not working, but with the help of teaching assistants, I learned that this was because there were no values being sent from Arduino to Processing. I went back to Arduino and confirmed that the potentiometers were indeed showing altered values. It was quick to find the source of the problem after this, I realized that I had counted the PORT_INDEX value incorrectly in Arduino, instead of starting with 0, I started counting from 1. The actual PORT_INDEX integer value was supposed to be a 9, not a 10. After changing this, the potentiometer worked perfectly, and soon the rectangles that reconstructed the camera feed changed in size as I turned the potentiometer around and around.

With the other potentiometer, I intended to use its values to alter the tint of the camera feed. This was significantly difficult, no matter how I tried to achieve this aspect, nothing worked. I tried tint, fill, opacity and a lot of other things, but ultimately asked to receive help from the teaching assistants. Together, we had a bit of difficulty with trying to understand what was stopping the code from working but then was given the hint to create an overlying layer of squares that stained the one below giving the effect that the camera feed was tinted. I immediately went to work and was also given the suggestion to use ColorMode (HSB), as learned from previous recitations in order to use values of hue, saturation, brightness, and opacity as compared to the original fill function that only represented color codes. I set the Arduino integer hue (sensorValue 1) as the first value and then set brightness and saturation to 100 and opacity to a 100 as well. The remaining potentiometer worked flawlessly after this.

Final Product (Video):  Rec9

After finishing the reading for Computer Vision for Artists and Designers I have learned how Processing is just one example that takes the form of the environment that provides direct read-access to “the array of video pixels obtained by a computer’s fame grabber.” It is the implementation of machine vision techniques directly from first principles, rewarding users a memorable experience. It’s amazing to see how the computer reads an array of numbers and is able to process it and create output from this compilation of numbers. I find how this matter of technology use in my project in this recitation is prominent through my usage of serial communication between Arduino and Processing. I allow the computer to communicate with one another, send values to one another and from there, create an endless cycle of input and output. 

Recitation 9: Final Project Process, Celine Yu

Group Mates: Karen Zhang, Sharon Xu, Alice Frank

Project Partner: Kenneth Wang

Sharon Xu:

The Project

Sharon’s project for the final will be based on the traditional mask-changing performance known to originate from Sichuan opera. The title of the project is still in the making and thus, will be termed “Bian Lian(变脸; the Chinese name for the traditional performance)” for the duration of this documentation. Sharon intends on creating a project that, to my understandings, works similar to that of functions from Snapchat and Snow. Similar to these applications, she will have software that recognizes human faces and cover them will different versions of masks throughout the history of 变脸. Through the use of OpenCV, she will allow the user to choose between these masks through the use of a sensor involving hand movements. The project will allow users to take videos of their performances, where Sharon will also provide wardrobe for the users to personalize and wear throughout their 变脸 video. The videos can then be accompanied by background music and be sent out to the user by means of Airdrop or email. The purpose for the project, as Sharon explains, is to introduce more people about the cultures of China and the many beautiful traditions that Sichuan and performance can show to the rest of the world, raising awareness amongst countries and identities, an aspect I truly admire. 

The Feedback

Karen, Alison and I, all enjoyed Sharon’s idea of transgressing borders and the learning aspect of her project. We thought that this assignment would work even better if this teaching of the 变脸 dance and culture could be emphasized. The main suggestion was for Sharon to have text alongside each mask to provide additional information to the user about its culture. We also suggested that the point of interaction be changed and much more intuitive and creative by placing the sensor next to the camera. At the very end, though the thought may be difficult, we left her with the question of whether or not she could implement different cultures into the project, we also suggested and asked if she could insert different forms of interaction. Overall, Sharon’s project conforms to her own definition of interaction that it must enable users to create art but also reflect on the relationship between humans and machines. This definition is not necessarily different from my own definition but does provide a new angle and perspective to the ambiguous genre.

Karen Zhang:

The Project

The project Karen will be creating is the “Pickmon,” a play on between the words pokemon and pick, which is exactly what the project entails. Karen and her partner will create a software that distributes the user with one of 4 pokemon based off their heartbeat as well as answers to a set of questions. It is supposed to entice memories of our childhood with pokemon and the sorting hat from Harry Potter. The final result granted to the potential user will be presented through 3D printed poke boxes, an aspect that I find significantly adorable and very understanding of visual attraction. It will, from my perspective truly give the user an aspect of personalized material and information, a factor I admire. It did, however, lack in terms of intractability and encouragement for me to use the project.

The Feedback

In terms of feedback, we all pitched in ideas we thought would help Karen’s project receive more interest, something that compels other students to continue implementing input, an aspect of my interaction definition. For the most part, I pitched the big idea that Karen could possibly make the project into somewhat of a personalized game, where 2 players go through various ‘tests’ that will determine their pokemon for them. The tests will include the original heartbeat sensor but also movement, button pressing agility and much more. Once the results are made through this input, the two pokemon the users were given would then ‘battle’ to resemble that of a true pokemon episode. This will encourage users to continue indulging in the game in order to change their pokemon and battle their friends again. Karen’s main definition of interaction is that the process must result in a reward for the user, which I believe is something that they have achieved through Pickmon. It also, like Karen’s project, provides me new insight into the definition of interaction without contradicting my own.

Alison Frank:

The Project

Alison’s project will revolve around audio for its essence with a name that currently has yet to be decided. It will be a video game that resembles popular storytelling formats that ultimately make the user’s decisions and actions the main source for input and focus of the story. She will follow the story created by her partner and use her understanding of coding to create the project, that will, for its purpose, test the relation of interaction exploration and the connection of the senses to ourselves. The main point of interaction will be made through the use of distance sensors that will record if whether or not the user’s hand movements have been detected, continuing their story with ease. The project will allow users to create a meaningful experience by placing users into the driver’s seat, providing them with something to govern and control over, liberating them of what one usually finds in a video game. To me, Alison and her partner seem to have everything organized and ready for creation. I’ve always enjoyed user based storytelling games like Detroit: Become Human, and am, therefore, excited to see the outcome of their project.  

The Feedback

For the main part, Alison’s project received few suggestions from the group. We all enjoyed her idea of the storytelling through audio and instead of just suggesting, we wanted to ask her more about the project so that she can further clarify for the group as well as herself. We asked her how she will be implementing audio and where she would be finding these audio links from and if whether or not they would be copyrighted. We also suggested new forms of interaction that would further entice the user to continue playing with the story. Although the distance sensors seem interesting, I do not think that they will be enough to suffice the overall project and its requirements. Similar to Karen, Alison emphasizes the focus of art and natural interaction in her definition of interaction. Natural interaction and art are both aspects of interaction I had previously not thought of myself but now agree with after this recitation.

My Own Project: Feeback

The suggestions and advice I received from my tablemates were quite helpful to my overall project. For the most part, they liked the focus of stress and anxiety on the project and enjoyed the implementation of escape room mechanisms. They wanted me to watch out for a balance in difficulty, if the user can not achieve success because the interface is too difficult, they will opt not to continue playing, however, if the game is too easy and simple, users will also choose not to play. This balance will be difficult to achieve. They also suggested the joystick as the main point of interaction in place of the 2×2 button pad, advice that I will relay to my partner as fast as possible. Then they suggested that there be multiple rooms for the user to escape from, which will create a sense of continuity and achievement for the user. I know that this will be difficult to achieve through Processing and Arduino, but Kenneth and I will be considering it for our final proposal. According to my group members, the most successful aspect of my first proposal is the research I’ve done in regards to NYU and the stress that students suffer from on a daily basis. They suggested that I implement a page after the user has successfully escaped from the room that explains the reason I’ve created the project and implement such research and information for the user to understand more about the subject at hand. The part that lacks the most would be the point of interaction for at the time, Kenneth and I were still researching and exploring the forms of interaction we will use, which now include: potentiometers, buttons, joysticks, live camera feed and much more. For the most part, I wholeheartedly agree with the decisions and suggestions my group mates have provided because they will allow me to create the project through a combination of all of our definitions of interaction, which is something I find quite beautiful