Touch the Stars – Caren Yim – Eric Parren

partner: Lana Henrich

CONCEPTION AND DESIGN:

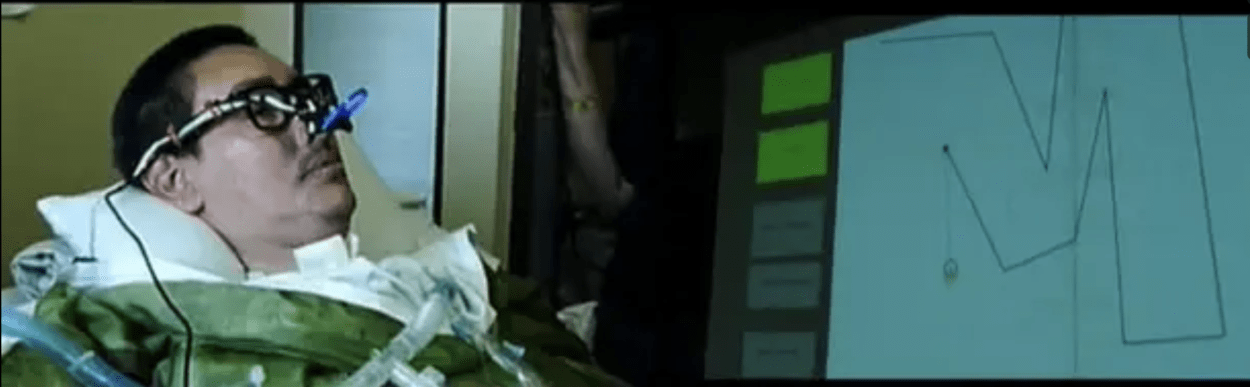
Initially, my partner and I wanted to create a guessing game where an individual had to race against the clock to guess a distorted image. We realized that this project would not consist of any meaningful interaction so we decided to change our entire project concept. Also, taking feedback from the sharing of the final project idea with the class, we were able to acknowledge how hard it would be to create a working, interactive game. We were inspired by Mick Ebeling “The Eyewriter” that was shown to us at the beginning of this course. “The Eyewriter” is a tool originally created for a paralyzed graffiti artist, that tracks an individuals eye movement to create art. We ended up creating an interactive art piece that is aimed at helping disabled and injured kids practice using their hand muscles. Since technology is becoming so prominent today, this is a fun way to encourage kids to move their arms. Because this is intended to be a physical therapy tool for kids we had to consider our intended audience. With this in mind, we knew it had to be simple enough for kids to use.

eyewriter
“The Eyewriter”, where our inspiration came from.

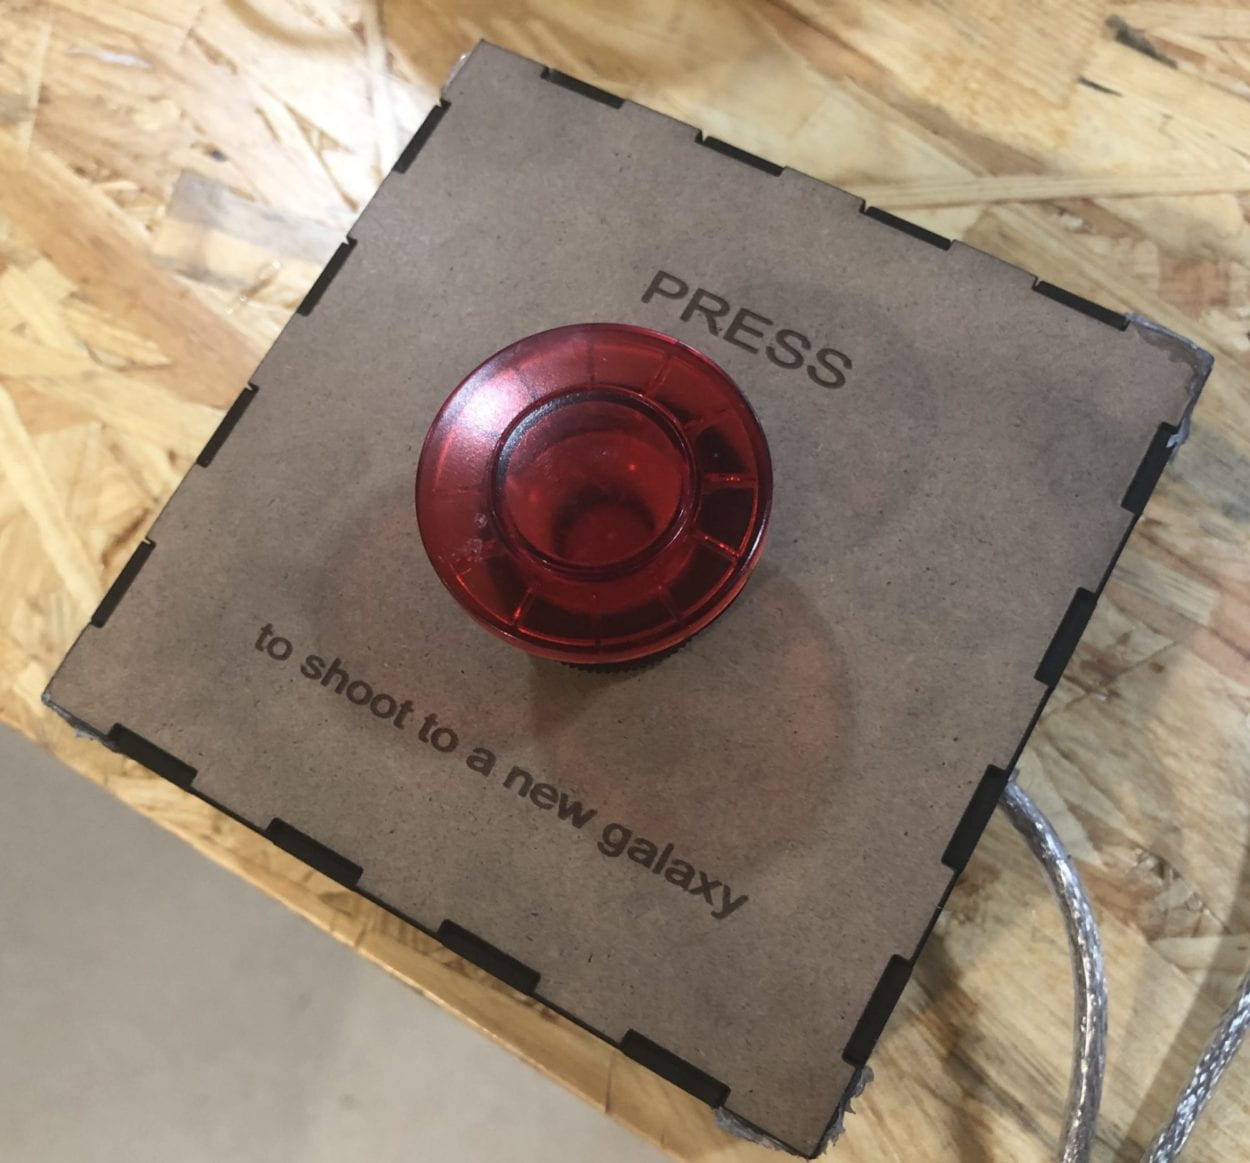
Our project consisted of a leap motion and a laser-cut box that had a button. We used a laser-cut wooden box because we didn’t want any wires showing. We wanted the user to feel comfortable using the device without being confused or intimidated. It is also designed to be compact so that it is a portable tool. We used a big red button with a built-in LED because it is part of the experience. Since our project is space themed, our project is meant to be used in the dark so using a big LED button makes it visible. With it being both big and red, kids will be intrigued and want to push it. On the box, it states “PUSH to shoot to a new galaxy” we incorporated this because it added a nice touch to out space theme.

box
Laser-cut box with LED button

Initially, we wanted to use the computer built-in camera so that it would follow motion but we were advised by a fellow to use a Leap Motion Sensor instead. We settled on using a leap motion because it aided in the interaction part of our project. We wanted individuals to feel like they are virtually touching the stars and we believed that the tool that would work best would be the leap motion since it is utilized for augmented reality based virtual experiments. We also added futuristic calming music so that it would really encapsulate the space theme and incorporate another human sense. In addition, with the leap motion, we had an idea to laser-cut a clear casing so that people would not be inclined to touch the leap motion. We ended up rejecting this because we realized the light within the leap-motion might reflect off the clear casing and cause the leap motion to not have accurate readings of a users hand placement.

FABRICATION AND PRODUCTION:

For the particles, we used an existing code as a template (https://www.openprocessing.org/sketch/529835). Because this code is in another programming language I went in and changed it into a language that Processing could read which is JAVA. Using this code, I altered it so that it would change into a random color when the button was pressed and. We also altered it so that instead of the mouse moving the particles, it was the movement of the hand motion that was captured through the Leap Motion. We downloaded the Leapmotion example code within Processing.

The shooting stars were not hard to program as it was just creating a separate class, and having ellipse start from the center and randomly come forward. With this class we incorporated pushStyle(); and popStyle(); to change the settings and then be able to return to the original.  

For the background image, we got it off an opensource website (https://www.pexels.com/photo/starry-sky-998641/) . For the background music we got it off (bensound.com).

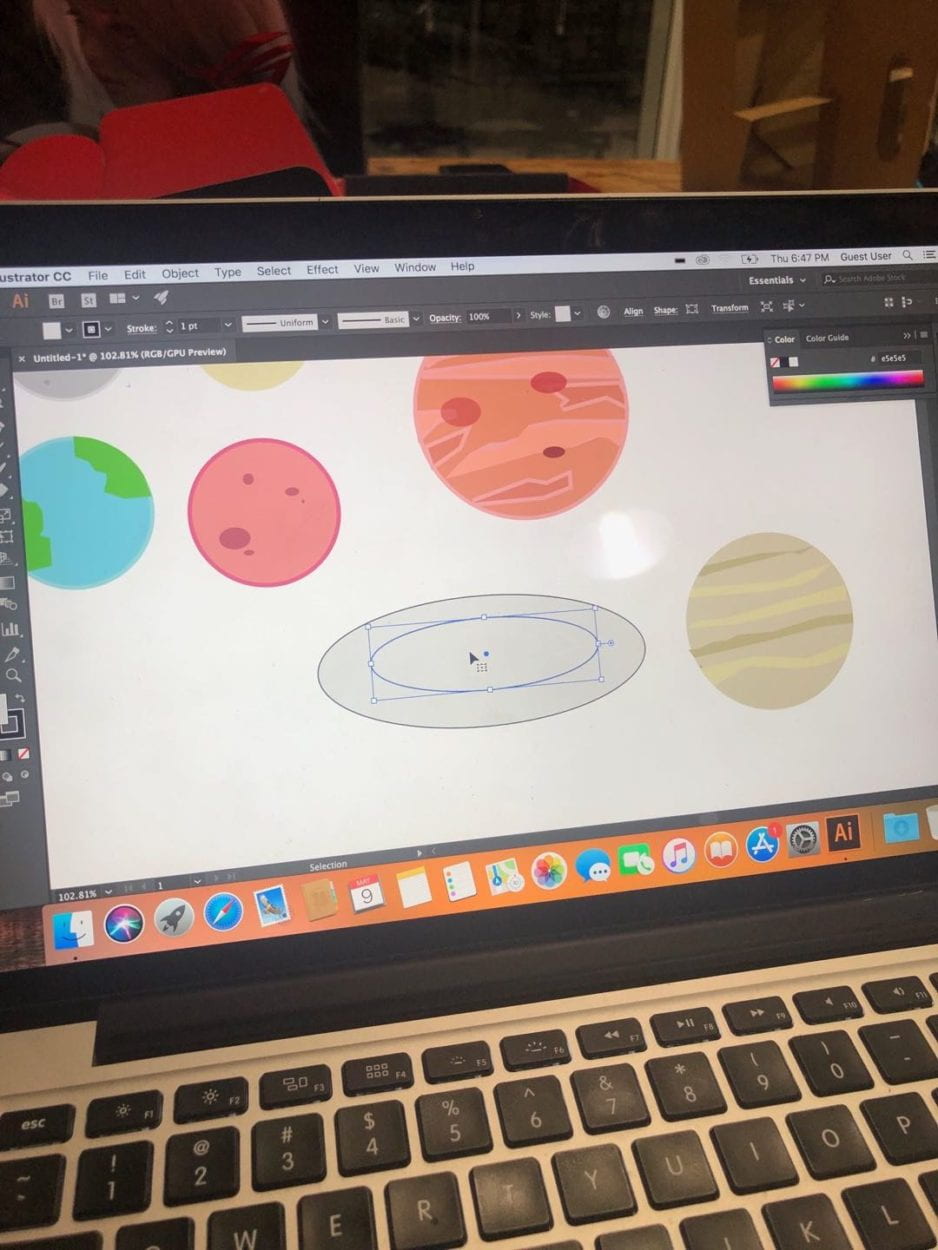
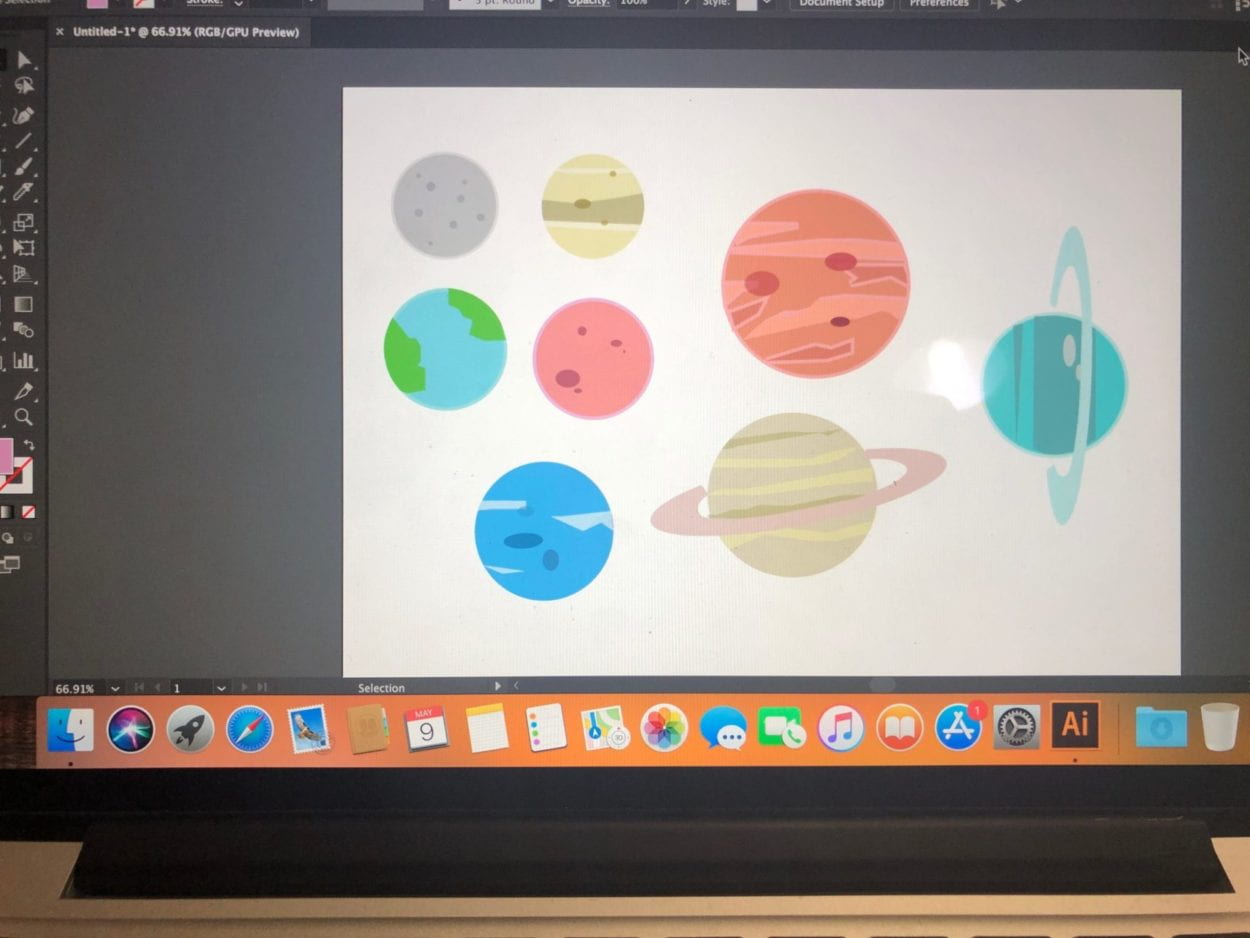
The most challenging part for my partner and I was setting up the code for the planets. Since we drew all the planets on adobe illustrator we uploaded the planets as individual photos. Because of this, we had to create an array and a separate class for the planets. The most challenging part of all this was trying to get the planets to reset to a new position every time the button was pressed. This was extremely difficult for us because we had to incorporate it into an already created code. With the help of a fellow who advised us to use boolean, we were finally able to get it working.

planets
 Using Adobe Illustrator to draw planets
planets
Finished Adobe Illustrator created planets

During user testing, we got a lot of feedback. Most of the feedback that we got we included it into our project. For instance, we were told that our initial animation was too simple and that we should add animated shooting stars as a background. We decided to follow through with this advice because we realized what we had did not seem 3D. We were also told that we should find a way to store all the wires, which we then laser cut a wooden box to fit all the wires. A suggestion that we didn’t go ahead it was reformatting the Leap Motion so that instead of lying flat on the table it would be facing the individual so that they know not to touch the leap motion. We didn’t go ahead with this because we felt that it would be a distraction and people wouldn’t understand what to do when they have a leap motion facing directly at them and a screen in front of them.  A lot of people enjoyed our project, they found it to be very soothing and relaxing. The changes that were made benefitted the overall project. It allowed for a better experience because it made the visuals more compelling and realistic.

BOX
Blueprint of laser-cut box

CONCLUSIONS:

The intended goal of our project was to create an interactive art tool that aids as a physical therapy tool for kids. Our project results aligned with my definition of interaction because as an individual moves their hands a certain way, the “stars” on the screen moves with their hand. There is a reciprocal action taking place where different actors, the hand and the “stars” on the screen, are engaging with one another. In my definition of interaction I also noted that in an interactive piece, it incorporates our different senses where different senses are interacting with one another. This is what our project entails, the human senses of hearing, touching and seeing are all working with one another. One aspect that doesn’t align with my definition of interaction is our interaction can be argued as too simple. One might ask “An individual is just moving their arms, how does that interaction fit with a space theme?”, the answer is, a part of virtual artworks is the use of imagination, through imagination the individual is faced with many different types and levels of interaction.

For the most part, individuals reacted positively to our project. They enjoyed the calmness that came with interacting with it. I have had experiences working with kids with disabilities such as Cerebral Palsy and I think developing fun tools for disabled kids to interact with allows them to have fun and not this of their disability as a constraint within their lives.  If I had more time and resources I think I would test this on the disability community and see how they interact with it. I also want to make it instead of a one screen thing, perhaps making it a dome where the experience seems more realistic.

With this project, we ran into a lot of failures. Having never used the leap motion, we had to learn how to use it on our own we also had to familiarize ourselves with using classes within our code. Although challenging at first, we were able to push through and at the end achieved our intended goal. From these setbacks, I learned that as a designer you should not have a set blueprint that you follow from beginning to end, instead, you should be open to change and know that everything might not work the way you intended it. It’s about learning to find different solutions to solve a single problem so that you have options. Designing, fabrication, and production is not a linear process. Like with our coding for processing, we were initially set on just having stars on a black background, but after feedback and re-analyzing our project, we had to come up with a different design better suited for our intended goal.

This project matters because kids who go into physical therapy for arm and hand injuries or muscular injuries may dread going to therapy. This puts a fun twist to therapy which not only encourages kids to move their muscles but also allows their different senses to interact with one another. We should care because often times the disabled community is overlooked when it comes to creating and designing mediums of entertainment. By creating a device that is meant for the disabled community, but can also serve as a fun interactive art piece, it bridges both worlds together.

PROCESSING CODE: 

ARDUINO CODE:

INTM-SHU 101 (006) – Recitation 11: Workshops – Caren Yim

REFLECTION:

For this week’s recitation, I attended the Object Oriented Programming workshop to better familiarize myself with using O.O.P. since I had trouble understanding it during class. I took what I had learned both in class and during the workshop to create my own work. During the workshop, I was able to better understand that OOP simplifies the workplace within programming and makes the code easier to understand. I was able to practice with the different parts of the class. I know that this is going to be very helpful to utilize for our final project.

For this exercise, I decided to create boxes that bounce off the borders and when the mouse is pressed, the boxes disappear. Although I initially struggled because I was not familiar with the different sections of the class, I was finally able to create my own work after some trial and error. 

CODE: 

ArrayList <Box> box;

void setup() {
size(600, 600);
noStroke();
background(0);

box = new ArrayList <Box> ();

for( int i=0; i<30; i++) {
box.add(new Box(random(width), random(height), random(30, 100)));
}
}
void draw() {
background(50,60);

for (int i=0; i < box.size(); i++) {
box.get(i).display();
box.get(i).move();
box.get(i).bounce();
}
}
void mousePressed() {
if(box.size() > 0) {
box.remove( box.size()-1 );
}
}


class Box {
float x, y, size, speedX, speedY;
color col;
boolean onScreen;

Box (float _x, float _y, float _size) {
x = _x;
y = _y;
size = _size;
col = color (random( 225), random(50), random(100));
onScreen = true;
speedX = random(-5,5);
speedY = random(-5,5);

}

void display() {
fill(col);
rect(x, y, size, size);

}
void move() {
x += speedX;
y += speedY;
}
void bounce() {
if (x<0||x>width) {
speedX=-speedX;
}
if (y<0||y>height) {
speedY=-speedY;
}
}
}

VIDEO OF EXERCISE: 

INTM-SHU 101 (006) – Recitation 10: Media Controller – Caren Yim

Reflection:

The purpose of this recitation was to create a Processing sketch that controls a video or image through manipulation of the media using a physical controller attached to Arduino. I chose to work with an image that would be altered by a potentiometer. I chose an image of a Tiger off of Unsplash (https://unsplash.com/photos/DfKZs6DOrw4).  

In Golan Levin’s article “Computer Vision for Artists and Designers: Pedagogic Tools and Techniques for Novice Programmers”, he introduces the term “Computer vision”. He defines Computer Vision as “a broad class of algorithms that allow computers to make intelligent assertions about digital images and video” (1). The utilization of Computer Vision techniques have paved the way and made it accessible for individuals to create artistic works. In this project, the algorithms within Processing has allowed students like me to alter live videos and create our own projects. Levin notes that processing is an ideal platform because it “provide[s] direct read­ access to the array of video pixels obtained by the computer’s frame­ grabber” (7). In my project for this recitation. I chose to work with an image and using a potentiometer, altering the clarity of the image. As you turn the potentiometer left, the image becomes more pixelated and as you turn right, the image becomes clearer. In Processing, images are merely stored data that show the amount of red, green, blue in a given pixel. This is the basis of Levin “Computer Vision” term which he points out in his article. The improvement of technologies and software tools are opening doors for interactive artworks, games and other media.

recitation exercise:

schematic

Arduino Code:

void setup() {
Serial.begin(9600);
}

void loop() {
int sensorValue = analogRead(A0) / 4;
Serial.write(sensorValue);

// too fast communication might cause some latency in Processing
// this delay resolves the issue.
delay(10);
}

Processing Code:

import processing.serial.*;

Serial myPort;
int valueFromArduino;
PImage img;

void setup() {
size(800, 1202);
background(0);
img =loadImage(“tiger.jpeg”);

printArray(Serial.list());
// this prints out the list of all available serial ports on your computer.

myPort = new Serial(this, Serial.list()[ 1 ], 9600);
// WARNING!
// You will definitely get an error here.
// Change the PORT_INDEX to 0 and try running it again.
// And then, check the list of the ports,
// find the port “/dev/cu.usbmodem—-” or “/dev/tty.usbmodem—-”
// and replace PORT_INDEX above with the index number of the port.
}

void draw() {
// to read the value from the Arduino
noStroke();
while ( myPort.available() > 0) {
valueFromArduino = myPort.read();
}

int rectSize = int(map(valueFromArduino,0,255,1,100));
int w = img.width;
int h = img.height;

img.loadPixels();

for (int y = 0; y < h; y=y+rectSize) {
for (int x = 0; x < w; x=x+rectSize) {
int i = x + y*w;
fill(img.pixels[i]);
rect(x, y, rectSize, rectSize);

}
}
img.updatePixels();
println(valueFromArduino);//This prints out the values from Arduino
}

The coding for this project was not hard, being that I used the format of code taught to us during class. I did have trouble mapping the values though. One part that I had a little trouble with was when I remapped the values from (0,255) to (0,100). The Processing code was not working. I then remapped the values to (1,100) and got the code to work. 

Conclusion:

Through the completion of this weeks recitation, and reading Golan Levin’s article, I have a clearer understanding of the algorithms that allow us to create interactive works. I have also learned how complicated it can be to incorporate human interaction with technology. “Computer Vision” is creating interactive works incorporating human movements. Although my project is simple and does not incorporate the level of interaction the projects Levin brings up in his article. Through completing this exercise, I was still able to gain a better understanding of how the pixels work within Processing. It made me reflect on my own final project and allowed me to rethink how I can incorporate the level of interaction he displayed in his article. Instead of merely having a button to interact with, I can find a way to include human movements within my own work.

INTM-SHU 101 (006) – Recitation 9: Final Project Process – Caren Yim

Step 1:
Jennifer: Labyrinth

Jennifer’s project is a two player game where one individual is Theseus and the other is the Minotaur. Theseus goal is to exit the maze before getting caught by the Minotaur and the Minotaurs goal is to catch Theseus. The speed of the players during the game will be determined by a heart rate sensor. So the main goal of the players is to try to get their heart rate as high as possible. One of the main suggestions suggested by Malika really stood out to me, she suggested to maybe make it so that the player behind can see the trial of the other player. I think this would add something to the project because it will a new dimension to the project. I think this was a very interactive project because the rate in which the players are running is determined by the player’s heart rate which will be displayed on Processing. This project is different from my view of interaction because it incorporates the player’s human senses within the interactive portion of the project.

Malika: E-Maze

Malika’s project is a maze game in which an individual using a controller is guiding a ball through a maze. The ball is rolling on top of tiles that are laid on the floor. The player’s purpose is to try to color all the tiles on the floor. The level in which you are placed is determined by the time in which you are spending to finish the easy maze. I suggested Malika add sound effects to the game so that it can be helpful to the player. Like if the ball hits the wall, there can be a sound effect. I think this can help in creating another interactive element to the project. The interaction in this project is the difficulty of the game is determined by how well a player is able to complete an easy level of the game. This project aligns with my definition of interaction because an individual is interacting with a controller which controls the game. 

Citlaly: Ball of Confusion

Citlaly’s project is inspired by problems that are happening around the world. Her goal is to highlight these problems through a game. There is a clear goal; to educate individuals. Her games design is going to be similar to the game Mario, where the player is supposed to catch the bad guys. The player’s movement is determined by vibration sensors that are attached to a wooden platform. When the player stomps hard then their character moves down and when they jump up lightly they move up. The educational aspect would pop-up after a bad guy appears. We proposed to Citlaly that instead of making educational pop-ups appear after each bad guy is caught, she should create separate levels where each level has a set problem it is trying to educate the player. This way, the player won’t feel disrupted when playing the game.

Step 2:

My group members brought up some problems with my proposal that I hadn’t thought of myself. For instance how many players is this game intended for? Initially, I thought perhaps it can be a 2+ player game, but my group said that it would be hard to track points. After this was brought up, I think Lana and I should instead of only making one set of buttons we can make two sets of buttons that way it can be clear that it is a two player game. Citlaly also brought up maybe designing it so that it is like Kahoot, where the quicker a player is able to answer, the more points they get. This way, the game would be more competitive and the players will want to answer as fast as they can. I think having an outsider’s perspective and opinion really added to the development of my project. With the advice and suggestions I got, I will definitely be incorporating the feedback into my final project.

INTM-SHU 101 (006) – Final Project Process: Final Project Essay – Caren Yim

Project Title:  Ready, Get Set, Guess!
Partner: Lana Henrich
Project Statement of Purpose

For our final project, we want to create an interactive game in which two individuals will have to race against the clock to guess a pixelated image before the clear image appears. The players will be given choices of what the image is, there will be three buttons for the players to choose from their three choices. In addition, we plan to incorporate different categories the players may choose from, from celebrities to animals. The goal of this game is to be able to create an entertaining competitive game that tests people’s knowledge. By incorporating different categories this game will speak to different audiences. From pop-culture lovers to history junkies.

Project Plan

From doing research on examples of interactive projects I realized that a lot of projects focused on audience interaction, keeping this in mind, I knew that our project had to be easily navigable. Our project will utilize Processing to display the images and Arduino to add controllers to the project. The game will have different rounds, so whoever guesses the correct choice the fastest for each round will win. One game will contain three different rounds so whoever guesses two out of three the fastest will win.

Lana and I will work together on both Processing and Arduino. We will start off by building the circuits for our project utilizing Arduino boards, wires, and buttons. We hope to get this part completed between April 27-30. We will then create the visuals for our project. We will find images and store them within Processing and create a code that will make each image start out very pixelated and then gradually become clearer. On the bottom of the display will be three choices for individuals to choose from. I think we have enough coding experience with pixelating images and utilizing images from outside sources. The challenge I can see us running into is storing a lot of images, creating multiple categories, and combining interactive buttons on the screen with external buttons. We will also need to find a way to connect the buttons connected to Arduino to Processing. We plan to work on this portion of the project between May 1-13th. That way we will be prepared for user testing. We also plan to 3D print or laser-cut two boxes to house the buttons, and in essence to create our own controllers but will leave it till the end when we have the code working. We hope we will have enough time before user-testing to create a visually appealing display, if not at least we will still have a working game. After the user-testing, we will make last-minute alterations based on the feedback we receive. 


Context and Significance

In the preparatory stage of the final, I came across interactive projects that focused a lot on human interaction and visuals. For instance, the ‘Ghost’ installation incorporates each visitor into the actual display. This influenced what we decided for our final because it made rethink what interaction entailed.

The project we are creating, these type of brain games already exist. However, by making our game multi-player and having a physical aspect to it, it enhances each individuals interaction and experience with the game itself. Each time two people or groups of people play with our game, each round they will experience something different depending on the result of their previous round. For instance, if they lose the first round, the next round they will be more motivated to beat the other player. Not only does our game encourage interaction between the player and the game itself, but it also encourages interaction between the players.

Our game is intended for individuals ages 7 and older. It is simple enough for everyone to understand how to interact with it. I can see this project placed in school settings or offices for when people want to engage in a competitive game and take a break from work. This game holds value because it mentally challenges people and brings out the competitiveness in people. After successful completion, there is always room to expand the game. Perhaps by adding more categories, and creating more devices so that more than 2 people/ groups can play. This would create more possibilities and allow people to be more engaged and make the game more competitive.