Week 7: Midterm Methodology + Experiments (Cassie)

My project concept went through a few changes, so first a short introduction to the most recent concept: I was inspired by the artist Heather Hanson and her series of performance art pieces where she uses her body to create giant symmetrical charcoal drawings:
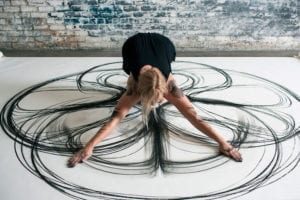
I like the concept of capturing body movements in an artwork, and wanted to see if I could use Posenet to create a tool to help me create interesting pieces, like a new medium of art.

Methodology

Code: https://drive.google.com/open?id=1gQd5Y2zuFOc1hy0bvWIUCVA3vMfjIuMy

I used the week03-5-PosenetExamples-1 code as a base to build on top of. I then searched in ml5.min.js to see the possible body parts to use, and integrated the nose, eyes, ears, shoulders, elbows, wrists, hips, knees and ankles. I actually forgot to include the elbows at the beginning of my experimentation, but added them in later. I also alternated between using and not using the nose and ears while experimenting with different aesthetics.

The next step was figuring out an interface that would be the most conducive in easily creating a work that could be recorded in a visually appealing way. I first created a green ellipse that serves as a “start” button when the user hovers their mouse over it. It also serves as a restart button so that if you would like to start over, you simply hover your mouse elsewhere and then hover back over the green ellipse to start the drawing process again.

When the user first sees the screen, the web camera is on so they can see themselves. I decided to have this kind of interface because it is important to first see your body’s placement on the screen so you understand where exactly your different parts are before you start creating the artwork. When they hover their mouse over the green ellipse, however, the screen turns black and the drawing starts so that the user can no longer see themselves, but the art they are creating instead. This way, they have a clear view of what the piece looks like. One of my friends who user-tested backed this up, saying she liked being able to see the art forming as she moved around. I found that this way is also fun if you screen-record the process, so that you have what looks like an animation as an end result rather than just a final still image piece. This was my friend’s user-test/piece which she calls the “interpretive mountain dance.”:

Her piece had a cool result because it almost looks like a human figure with mountains in the background, hence the name.

Experiments

Most of the experimenting came from tweaking different components to see what was the most visually appealing. As mentioned earlier, for example, I played around with different combinations of keypoints.

Playing around with different movements was interesting to experiment with. Some were still, some were fast and some were slow. Here’s a rather still movement of my friend sitting on the couch, for example:
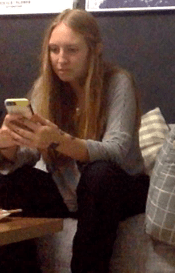
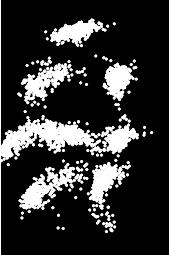
Here’s another example of a movement experimentation, which turned out to be a bit of an abs workout:
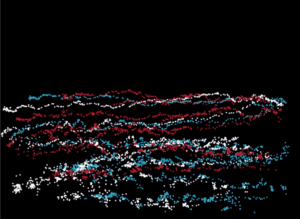
I still wasn’t super satisfied with the visuals until I experimented with the color. I found that a combination of different colors, along with a combination of still and slow movements, seemed to produce the most interesting visual effects. Here are some of my favorite pieces produced (recommended to watch at a faster playback speed)…the title of the videos describe the kind of movement that was used:

I thought it was interesting how, even if I wasn’t trying to make anything in particular and was only testing out different movements, my brain would try and find patterns or different images in each piece. These all sort of look like abstract aliens or robots to me, which is kind of ironic considering AI is very “futuristic” in the eyes of the media, as are aliens or robots.
Week 6 Assignment: Midterm Project Concept – Cassie

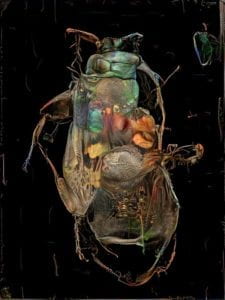
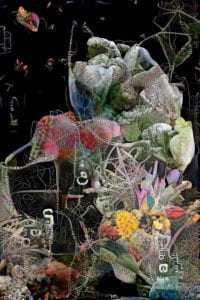
I remember seeing Sofia Crespo’s Neural Zoo during the first week of class when I was perusing the AI Art Gallery website and being completely awestruck by the pieces she produced. There was something so beautiful about these organisms that a neural network created:

Inspired by Neural Zoo, I want to focus my midterm on creating a collection of generative art. I love the concept of a neural network being able to create realistic yet whimsical objects we have never seen before, and want to apply this to my project.

I did a little bit of research on AI generative art and found that many works use GANs (general adversarial networks), where one neural network tries to create increasingly “realistic” outputs while another neural network attempts to reject each of these outputs, the play between the two resulting in more and more convincing outputs (Source: Mike Tyka’s “Portraits of Imaginary People”).

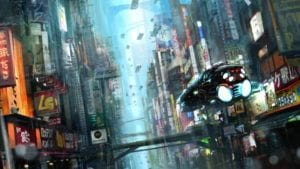
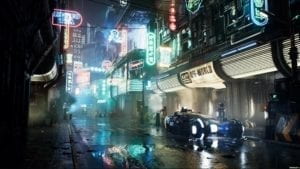
Thus, I would like to try and train a GAN to create generative art, with a focus on cityscapes. If I feed a GAN pictures of cities from all around the world, what kind of new city would it produce? Would they look dystopian? Utopian? What kind of cultural elements would be present in each generated city? Many works of fiction try and depict what future cities look like, but these fictional worlds are all determined by humans. Blade Runner, for example, is really interesting to me because everything is extremely urban, dark, neon and partially inspired by Asian cityscapes.

If a neural network created this fictional world, however, what would it look like? This is the question I am curious to explore through my midterm project.

Week 5 Assignment: Training CIFAR-10 CNN – Cassie

I thought it was interesting how in the experiment we did in class, even if the epoch number was higher, the accuracy didn’t necessarily always increase, even if the general trend was upward. I wondered if this would still be true if I changed all the epoch numbers on my own laptop.

Machine specs:

When I opened the week05-02-trainCNN python code I was surprised to see such large numbers for the epochs, especially because in class we kept the epochs to double and single digits. I decided to run the code just as it was as a control/starting point (100 epochs + 2048 batch size). However, as soon as I ran it, I instantly regretted it – I was 8 minutes in and only on the 4th epoch when I decided to terminate the program.

Instead, I consulted this stack overflow forum as to what a good starting point for the batch size would be. One person mentioned a batch size of 32 is pretty standard, so I decided to use this batch size number as a control for testing out different epoch numbers.

Test 1

  • Epochs: 1
  • Batch size: 32
  • Time spent: 4 minutes
  • Accuracy: 0.4506

That was honestly a lot more accurate than I thought it was going to be. For the next test, I increased the number of epochs to 5 under the assumption that the accuracy would increase.

Test 2

  • Epochs: 5
  • Batch size: 32
  • Time spent: 22 minutes
  • Accuracy: 0.6278

This was a significantly larger accuracy than I was expecting, since in my mind 5 seems to be a pretty low epoch number compared to the original 100 that was written in the code. Although the overall accuracy increased, it was interesting to note that after it passed through the first epoch the accuracy was only 0.4413, which was lower than the accuracy was in test 1. I assumed it would be the same or at least higher, considering I am using the same computer and same numbers except for number of epochs.

Now I was curious about how changing the batch number would affect the accuracy. I was also curious as to how it would affect the time, because when I initially ran the 100 epoch + 2048 batch size code it was running at a faster rate than my first two tests (even though I was still too impatient to sit through it). I decided to keep the number of epochs at 5 for these tests as a control, so I could compare the results to test 2.

Test 3

  • Epochs: 5
  • Batch size: 100
  • Time spent: 18 mins
  • Accuracy: 0.546

As suspected, this test took less time. However, what surprised me was that the accuracy was lower in comparison to test 2. For some reason I assumed that if the batch size was higher, then the accuracy would also be higher.

The biggest takeaway from this experiment is that training takes a lot of time! At least in these three tests, the one that took the most time gave the highest accuracy which made the time seem worth it. I also didn’t experiment nearly enough to try and find the ideal factors for an optimal accuracy rate – it definitely seems that it takes a very specific combination of factors and a lot of testing in order to get the desired results.

Week 4 Assignment: Relationship Between Neural Networks & Neurons – Cassie Ulvick

When you get down to the details of now artificial neural networks work, they differ from neurons in the human brain. However, the basic concept of how they work is very similar – an unsurprising discovery considering the idea of artificial neural networks was loosely based on how biological nervous systems work.

Both artificial neural networks and brains take inputs, go through some sort of “hidden layer” process, and then return an output. In a convolutional neural network, for example, the input could be an image. After the “hidden layer” process of calculating probabilities is complete, the output is a classification, or category for that image. In a human brain, the input could be touching something very high in temperature. Throughout the “hidden layer” process, neurons and synapses interact with each other which in turn signal you to feel pain as an output.

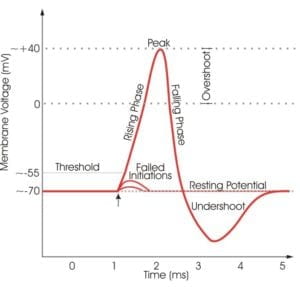
While this very basic concept may be similar, there are many differences within the “hidden layer” process. Take this graph, for example:

This graph shows the process our human nervous system goes through to produce signals. Cells need a certain amount of membrane voltage in order to transmit a signal; they must be stimulated by their input synapses. This can be related to how in artificial neural networks the input data must be added up before going through a non-linearity. However, neurons follow the all-or-nothing principle: the transferring of signals is binary. With artificial neural networks, the signals are continuous. The amount of power it takes to accomplish tasks also differs: some deep neural networks such as Nvidia GPU requires 300W, whereas our brains only require about 20W of energy.

The learning mechanisms for biological nervous systems and artificial neural networks also differ. Artificial neural networks use gradient descents which take a large amount of data and convert it into a minimum based on a predefined function. On the other hand, while the human brain’s learning process is not entirely known, there is strong evidence for it using Hebbian learning or Spike-Timing-Dependent Plasticity. With these kinds of learning processes, if a set of neurons frequently transmit signals between each other, these connections are made stronger.

As mentioned, there are both similarities and differences between artificial neural networks and human brains. While the details of both are quite different, the inspiration for neural networks still stemmed from biological brains, accounting for the similarities.

Sources:

https://becominghuman.ai/natural-vs-artificial-neural-networks-9f3be2d45fdb’

https://ml4a.github.io/ml4a/convnets/

Week 3 Assignment – Cassie

Code: https://drive.google.com/drive/folders/1iYzpoaUQ30HNqOw04meyBtWoBm53cihh?usp=sharing

I really liked the Posenet examples we went through in class so I wanted to experiment a bit with those. I especially liked the week03-5-PosenetExamples-1 example where you could draw with your nose, and initially wanted to adapt this example so that you could draw with a different body part. I started off searching for the word “nose” within the ml5.min.js code in order to see what the other options are. However, after experimentation with other body parts, the nose was still the most fun to create shapes with.

So, I decided to create a very simple game where the user gets to use this nose movement but in a game format:

Essentially, there are a set of five circles, and the user must “boop” each circle with their nose to change the circle’s color.

Of course, I ran into a couple of challenges while doing this assignment. The main challenge was getting the ellipse to change once the nose reached it. I initially constructed the if statement like this:

However, nothing was happening when I touched my nose to the ellipse. Eventually, I ended up widening the range of the positioning values for the nose to be in in order to get a result:

After broadening the range, it started working properly. I ended up narrowing it by half later, as the above screenshot had too wide of a range. Once this essential part of the game was working, I worked on the user interaction part of the game. This included adding more ellipses and having the ellipses change color once the user touches them in order to indicate they have been touched.

If I were to build upon this project, I would want to add more UI components such as a timer or some kind of score-keeping system as well as prompts to start and finish. It would also be cool if the ellipses were randomly generated as the game goes along.