Recitation2-Arduino-Basics-Clover

Materials:

From Arduino Kit:

1 * Arduino Uno
1 * USB A to B cable
1 * breadboard
1 * buzzer
2 * LEDs
2 * 220 ohm resistors
2 * 10K ohm resistors
2 * pushbuttons
A handful of jumper cables

From cart:

2 * arcade buttons
1 * Multimeter (optional)

Circuit 1: Fade

For this one, we didn’t meet troubles we just follow the pictures and finished the circuits. We are really interested in the code so we change the time of the delay() function to see what happened. We tried 100 and 0. When we tried 100 , it became slower however when we tried 0, it seems nothing happen. We decided to ask the professor during class about why nothing happen when it’s delay(0).

Then we build the second circuit.

Circuit 2: toneMelody

We first pick out all the components we need and then begin building it. We made this also quite successfully.

Circuit 3: Speed Game

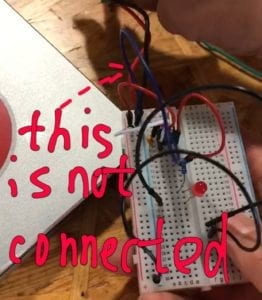
We first got the wrong map for this one and built the wrong circuit. Then the assistant pointed out our mistake. She guided us to the right map which can click on to find each name of the components. The circuits is really complicated but we finally build this. However when we tested it, there was only sound but the lights didn’t shining.

We then noticed we make it into the wrong direction so we change the direction and this time it works.

There still some time left so we tired the optional questions. We partnered with another groups and worked on building a four people game. We build the circuit and connected their cables to our breadboard. 

However how to change the code confuse us. We first added variable button3 and button4 to the code. (int button3 = 9; int button4 = 8;) Then we added the counter1 < goal && winner2 == false&& winner3 == false&& winner4 == false, however it still not working. Then the class is over and we decided to fix it out during the next class.

Q1: Interaction needs all the sense from our body. Not just the eye but also the ear just like the circuit we built using sound to remind people.

Q2: The 10k Resistor is to control the current and make the current in a certain range. When the button is pushed, the current pass through the circuit and the resistor helps controlling the current in a certain range to make the lights on and the sounds on. When pushing differently, the resistors help controlling the current into different range to decide which lights on(who is the winner).

Q3: I may use it to make an emotion showing blackboard. Different colors of lights can show their emotion whether it is happy or sad or angry and the brightness of the lights can show how strong is their emotion. Also, 100,000 lights is big enough to make a board that many people can use at the same time so besides interact with the emotion-showing board, people can also interact with each other to exchange their feelings. I may put it on the road of the Century Avenue because everyday many people pass-by and it can show different colors which is cool. Also, it can help to remind people care about their mental health if the lights keep showing they are in bad mood while at the same time, it can help people make friends and receiving help from others(if they were seen in really bad mood).
Week1-building-circuits-Clover

We first learned how to weld using the pen things. When doing this, we learned where to put the pen and what metal should we use to connect the two devices to make the button.  The problem we face is the pen always not hot enough to melt down the metal. We polished it but it still not working so we change to another machine and it works well.

Components Used:

    • 1 * Breadboard
    • 1 * LM7805 Voltage Regulator
    • 1 * Buzzer
    • 1 * Push-Button Switch
    • 1 * Arcade Button
    • 1 * 220 ohm Resistor
    • 1 * 10K ohm Resistor
    • 1 * 10K ohm Variable Resistor (Potentiometer)
    • 1 * LED
    • 1 * 100 nF (0.1uF) Capacitor
    • 1 * 12 volt power supply
    • 1 * Barrel Jack
    • 1 * Multimeter
    • Several Jumper Cables (Hook-up Wires)

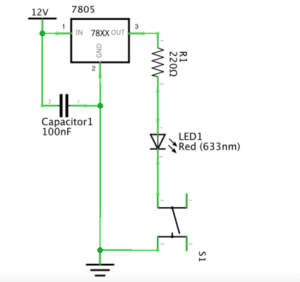
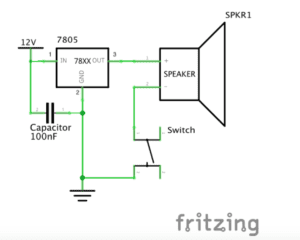
Then we work on the circuit 1: Door Bell. We first figure out what components  we need to use. We picked out the Capacitor, the Voltage Regulator, the Push Button (Switch), the Speaker. The first problem I met is the structure of the Breadboard. I don’t know how it works and where should I put the cables. I turned to the assitant for help. She explained to me that the cables are insides the breadboard and we just need to put the components on it and use the cables to connect the components. I also learned that the long leg of the led is where electricity goes in. So we follow the pictures of the circuit and began working. After we finish connecting all the components, we found the switch didn’t work.

As soon as we connect the power, it began to ring. We doubled checked the circuit and didn’t noticed any mistakes. 

Until we heard one of our classmates said the switch has direction. So we rotate the switch 90 degrees then put it on the breadboard. This time it’s working. From this, we learned that the switch has it’s direction and this helped me a lot for my future work.

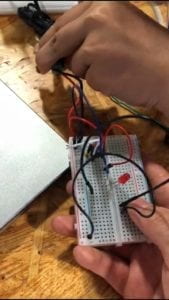
Then we continued to the Circuit 2: LampWe only changed some components and add more cables to connect them. But during this process, I was confused by the structure of the breadboard. I forgot how the wires are connected insides. Then I seek help from the assistant. She showed us the back of the breadboard and I finally understand how it works. After we finish the circuit, we found that it is not working again.

We checked the circuit and found that we missed on details. The cable connecting the power was loose.

We corrected the mistake and it works

For the third circuit, the only problem we met is the Variable Resistor. I really don’t know how it works so I peeked help again. Then I learned that it has three parts. One is the electricity go in. One is the changing of the level of the registration. One is where the electricity go out. After we figure out how it works, we did it successfully. ( We forgot to take the photo because at that time the class was ended).

The reading response:

Q1: I think the first thing include interactivity is the interaction with my partner when we made the circuits. We shared our opinions when we were working. I held a different opinion on how the breadboard works, then two of us started an argument on it. My partner interact with me by objecting my opinion then giving his own opinion oh how it works. He listened to me, then he thinks, then he offer his opinion. The second thing include interactivity is about the circuits and us. When the circuits were working, we were really happy and when they were not working, we felt bad. In this way(affecting our emotion), I think the circuits were directly interact with us. The third thing include interactivity is the process the assistant teaching us how some components work. Building the circuit is a process, during this process we had conversation with the assistant. I think this is also how the circuit include interactivity, letting us to learn how it works. The assistant explained how it works, then we think and tried to understand how it works. When we don’t understand, we asked again and interact with the assistant. I think this is also the interaction the circuit include.

Q2:

In Zack case, I think he made great combination of this two to make Interactive art. He first consider what the problem people have then makes the Interaction Design. To finally create the art work, he used the Physical Computing. I think the design is the main part and the physical computing is to support the design which is also an important part of the Interactive arts. The design provide the idea and the physical computing make the art existing. If the design is not good, the whole art piece lose this meaning. And without the computing, the artwork cannot conveying to its audience what the designer is thinking.

Week14: NetArt-Project–Clover

Link:http://imanas.shanghai.nyu.edu/~zw1745/finalpro/first.html

Partner:Jamie

Description:

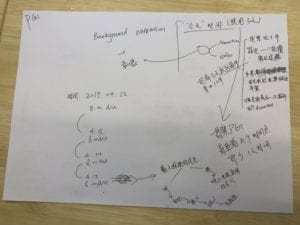
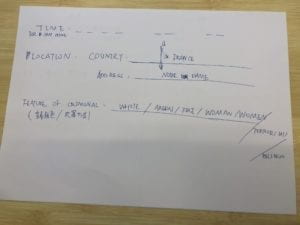
The user is a detective and basing on the information provided, he needs to catch a criminal and prevent the next crime from happening. At first we set the background that the user(you) is a detective and you have chasing a criminal for years. Then we told the user that base on the information, you need to find out where and what the criminal is going to do next. Then the user need to fill in a form to see whether they have collected the right information. Then there will be three endings. If you gather all the right information, you catch the criminal. If you get the wrong time, then the ending will tell you, you miss the time. Then, if you get the time and the location both wrong, the third ending will tell you, you make both of them wrong.

Process:

The preparation:

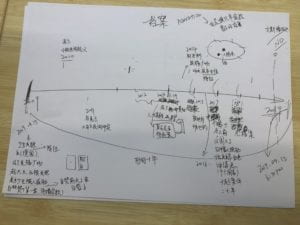
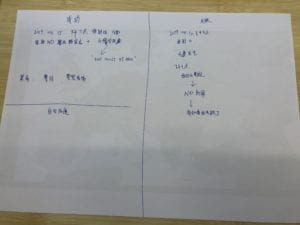
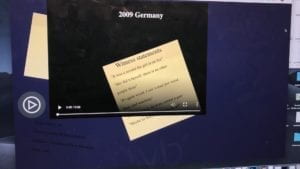
We first discussed the detail of the script. We plan to use the fire of the Notre Dame as a background. Then we find the map and decided to make a circle of the country then finally come back to Paris. Then we decided to make the investigation period for ten years. Since the fire is happen at 2019.4.15, the start date of the first crime is also in 4.15 but in 2009. We decided to set the first case in Germany, then make a circle come back to France. We set the date of the crime mainly using the number 4 and 15 so it is easier for the user to get the information. Also, we put a map down there so the user can check it. To make it more exciting, we set the time limit. We decided to set 8 clicks equals to a day and if you click 8 times, there is voice reminding you a day have pass. Also, we set the time count for each page, so after 20 seconds the page will close to make it more exciting.

Process:

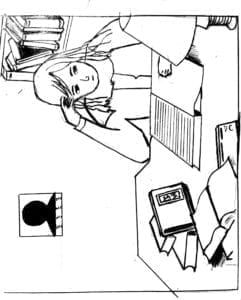
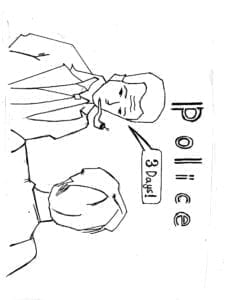
The introduction page, we first draw the picture then we use final cut pro to make it into a video and add audio to it. In the audio part, we introduce the background information.

The information part:

I set up the information for each crime and decided the time and the story for each crime. I hided the name Esmeralda and Quasimodo(the major character in Notre Dame) in the information, hoping the user to find it out. In one of the case, I even named the couple’s name in Esmeralda and Quasimodo, hoping the user to find it. We also use the new of the white hat man as part of our story to make it looks like a criminal who is doing religious things. We also use the count function to count times so that after 8 clicks, the audio will remind the user of the time. The css is also a difficult problem and I spent a lot of time on changing that.

The ending:

We use the white hat man as a criminal as part of our story, so we cut the news report of the white hat man who was actually a firefighter. Jamie record the audio part and it perfectly match with the video introducing the ending. Then we set a html link so the user can go back to the start page to play the game again.

Further Inprovement:

  1. The user sometimes may don’t know which part of the page is clickable, so they may lose information. We can add some information that the map and the form is clickable.
  2. We think we can make the whole story more connected and improve the introduction part to add more information and make the whole script more perfect.

Final Project Proposal–clover

For the final project, Jamie and I will work together. Jamie come to the idea of setting up a crime investigation base on a notorious crime. Since Jamie is good at making video, she will cut the video and add sound effect to our project. I really like the idea and I will do the code work.

We plan to do this like a crime investigation game. We want to let the audience discover evidence by themselves and find the right path to the truth of the incidence. Letting the audience be the detective to invest the whole crime is the interaction we plan to have. We will create a time line along with some crimes happened before with some hints in each crime and let the audience explore and find out the truth of these series of crime. At last, we will have some questions to test whether the user find the correct answer of the crimes.

For more details, we will first introduce the background of our story and tell the users what they are going to do in the story. Then, we will give users some hints so that they can make their choice and judgement. During this process, we will set time limitation so that the user feel like they are really in the position of a detective because every detective have to hurry up or the suspect may do another crime. At the end of this game, we will let the users answer some questions to test whether they get the correct answer. There will be two endings, when the user gave the correct answer they will come to a happy ending and on the contrary, the wrong answer will lead to a bad ending.

One great artist inspire me is Tiny Boy. I knew him because of a game the escape room from the app store. I really like the game he designed which includes sound, conversation and video. Another artist who inspire me is David Fincher. I really like the visual style of his movie and TV series. This gave me some ideas on how to design the webpage.

To achieve this goal, we plan to use text, image, audio and video. We may use text and audio to introduce the background of the story, we plan to set the whole background in black using some background styles we found online. We will also add some text floating on the screen. We also plan to set a clock on the screen so that the user can see how much time he already spent. We may also add some audio on the first page to create the exciting atmosphere. Or we may film a video introducing the background. Then on the second page, we plan to create a time line with files on specific time. We may use css to set up some profile that the user can click on. We may also add video in the profile so that the user can get the visual and hearing experience. We also hide some hints in the profile to let the user discover and predict what the criminal will do. On the third page, we will let the users answer some questions base on the information we provided in the profile then different answers will lead to different results.

       We want to try how to better interact with our users and what is the best way to do this. Also, we both interested in making games and the exploring game that ho

Response-to-“History of Net Art”(clover)

  This article introduces the history of how the internet art was formed. At the beginning only very simple art work came out but it represents a new way of art. The artist has more freedom to create his or her work which is great and can be seen by people around the world. The number of the audience became bigger which means that your work will be more likely to find the group of people who like it. This encourage the development of the art, more the audience is, more enthusiastic the artist is. The combination of internet and art really open a new page in the history of art, providing many new ways of expressing ideas.

  Then it mentioned the technology. The upcoming technology is also a great promotion to the art. Before, you can only use a paper or a pen to create your art work, but nowadays, you can use many tools online to help you do that. You can use photoshop to easily mix up colors creating your own style, you can also use AE to add great effect to your video. These new technology opens the new page of art, making it interacte with the audience from sound to visual effect. I think this is the biggest changes after the combination of internet and art. The technology will not only make the process easier but also giving us more ideas.

  In the article, the author also mentioned a point which is people worry the Internet would soon be colonized by mainstream media. I think this is a serious problem. Nowadays, if you want to be a great designer, you have to let your audience like your work. Also, the view of the audience is influenced by the mainstream media. So the work of the designer has to change to meet the need of the audience, but does that means these art work is great? We all know that some great art work in the history were not accepted by the audience at that time but are accepted by people many years later. This make me think of what is a good artwork and how can the designer not be influenced by the mainstream media. After thinking for a long time, I decided that if I work as a designer, I will make artwork that meet the mainstream of the audience but I will still working on my own piece of artwork but not to meet the mainstream media.

  Another thing really touches me is the diversity of the Internet art. People of all ages can create art and share them on the website. More women artist appeared with their impressing artwork. I think the Internet gave many people a chance to do their artwork and to become artist that is the shining part.