Recitation08-clover

When doing the step1, the first thing I found challenging is how to set the start point and the end point for the line. For the ellipse, I just need to put the end point in the new circle but I don’t know where to put the end point in the line();. I first created the start point then I don’t know how to link the end point with the start point. Then after looking at the code in the Arduino I noticed that the processing is to read the statistic from Arduino. Then I realize I only need to set xp=x; yp=y after the line(xp,yp,x,y); then it can draw the line controlling by parameters. Then I met the second question is that the line will draw out the canvas. I solve this problem by using the map to lower the range. x=map(sensorValues[0],0,1023,0,500);
y=map(sensorValues[1],0,1023,0,500) and now it can draw in the canvas. By doing this I learn the importance of the position of the xp=x; yp=y is really important. Because before when I put them in front of line(xp,yp,x,y);  this doesn’t work. Then I learn that the xp and yp is to read the changing location of the line and it should set after the line(xp,yp,x,y); to measure the end point of the line. Also, step1 strengthen the importance of map.

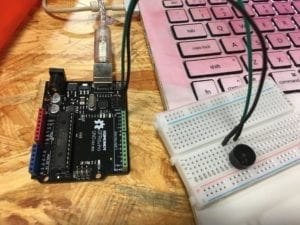
When doing step2, the first difficulty I meet is how to connect a buzzer. I search and I learn that one should be connect to 13 and the other should be connect to the ground. Second difficulty is how to change the code in the Arduino. I peeked helped and learn that I need to use a if statement to link the buzzer( if (values[1] == 1) {tone(13, values[0],values[2]);(make the buzzer rings)
} else {noTone(13);(make the buzzer not rings)})with the mouse and I need to set three values to let the mouse control the buzzer. Once the mouse pressed, the buzzer rings. Then I also need to change the code in processing to make it connect with the Arduino. If mouse pressed, it will jump to value[1]. During step2, I learned how to connect the processing with Arduino when there are multiple values changing and how to read the mouse Pressed and link it with the Arduino. I also enhance my understanding of how to set values and how to connect two if statements(one in Arduino and one in processing) to make the mouse link with Arduino.

This is the code and the video for step1 and step2.

import processing.serial.*;

String myString = null;
Serial myPort;
float x;
float y;
float xp;
float yp;
int NUM_OF_VALUES = 2;   /** YOU MUST CHANGE THIS ACCORDING TO YOUR PROJECT **/
int[] sensorValues;      /** this array stores values from Arduino **/
void setup() {
  size(500, 500);
  background(0);
  setupSerial();
  
  //rectMode(CENTER);
}
void draw() {
  //background(0);
  updateSerial();
  printArray(sensorValues);
  //rect(width/2,height/2,400,400);
  x=map(sensorValues[0],0,1023,0,500);
  y=map(sensorValues[1],0,1023,0,500);
  stroke(255);
  strokeWeight(1);
  ellipse(x,y,30,30);
 
  
  //line(xp,yp,x,y);
  xp=x;
  yp=y;
   ellipse(xp,yp,30,30);
  
  
  //// use the values like this!
   
  // //fill(sensorValues[0],sensorValues[1],sensorValues[2]);
     

  //// add your code

  //
}


void setupSerial() {
  printArray(Serial.list());
  myPort = new Serial(this, Serial.list()[ 1 ], 9600);
  // WARNING!
  // You will definitely get an error here.
  // Change the PORT_INDEX to 0 and try running it again.
  // And then, check the list of the ports,
  // find the port "/dev/cu.usbmodem----" or "/dev/tty.usbmodem----" 
  // and replace PORT_INDEX above with the index number of the port.

  myPort.clear();
  // Throw out the first reading,
  // in case we started reading in the middle of a string from the sender.
  myString = myPort.readStringUntil( 10 );  // 10 = '\n'  Linefeed in ASCII
  myString = null;

  sensorValues = new int[NUM_OF_VALUES];
}


void updateSerial() {
  while (myPort.available() > 0) {
    myString = myPort.readStringUntil( 10 ); // 10 = '\n'  Linefeed in ASCII
    if (myString != null) {
      String[] serialInArray = split(trim(myString), ",");
      if (serialInArray.length == NUM_OF_VALUES) {
        for (int i=0; i<serialInArray.length; i++) {
          sensorValues[i] = int(serialInArray[i]);
        }
      }
    }
  }
}

ellipse(the video for it)
import processing.serial.*;

String myString = null;
Serial myPort;
float x;
float y;
float xp;
float yp;
int NUM_OF_VALUES = 2;   /** YOU MUST CHANGE THIS ACCORDING TO YOUR PROJECT **/
int[] sensorValues;      /** this array stores values from Arduino **/
void setup() {
  size(500, 500);
  background(0);
  setupSerial();
  
  //rectMode(CENTER);
}
void draw() {
  //background(0);
  updateSerial();
  printArray(sensorValues);
  //rect(width/2,height/2,400,400);
  x=map(sensorValues[0],0,1023,0,500);
  y=map(sensorValues[1],0,1023,0,500);
  stroke(255);
  //strokeWeight(1);
  //ellipse(x,y,30,30);
 
  
  line(xp,yp,x,y);
  xp=x;
  yp=y;
   //ellipse(xp,yp,30,30);
  
  
  //// use the values like this!
   
  // //fill(sensorValues[0],sensorValues[1],sensorValues[2]);
     

  //// add your code

  //
}


void setupSerial() {
  printArray(Serial.list());
  myPort = new Serial(this, Serial.list()[ 1 ], 9600);
  // WARNING!
  // You will definitely get an error here.
  // Change the PORT_INDEX to 0 and try running it again.
  // And then, check the list of the ports,
  // find the port "/dev/cu.usbmodem----" or "/dev/tty.usbmodem----" 
  // and replace PORT_INDEX above with the index number of the port.

  myPort.clear();
  // Throw out the first reading,
  // in case we started reading in the middle of a string from the sender.
  myString = myPort.readStringUntil( 10 );  // 10 = '\n'  Linefeed in ASCII
  myString = null;

  sensorValues = new int[NUM_OF_VALUES];
}


void updateSerial() {
  while (myPort.available() > 0) {
    myString = myPort.readStringUntil( 10 ); // 10 = '\n'  Linefeed in ASCII
    if (myString != null) {
      String[] serialInArray = split(trim(myString), ",");
      if (serialInArray.length == NUM_OF_VALUES) {
        for (int i=0; i<serialInArray.length; i++) {
          sensorValues[i] = int(serialInArray[i]);
        }
      }
    }
  }
}

11.15 step1(the video for the line)


Step2:

// IMA NYU Shanghai
// Interaction Lab

/**
This example is to send multiple values from Processing to Arduino.
You can find the Processing example file in the same folder which works with this Arduino file.
Please note that the echo case (when char c is ‘e’ in the getSerialData function below)
checks if Arduino is receiving the correct bytes from the Processing sketch
by sending the values array back to the Processing sketch.
**/

#define NUM_OF_VALUES 3 /** YOU MUST CHANGE THIS ACCORDING TO YOUR PROJECT **/

/** DO NOT REMOVE THESE **/
int tempValue = 0;
int valueIndex = 0;

/* This is the array of values storing the data from Processing. */
int values[NUM_OF_VALUES];

void setup() {
Serial.begin(9600);
pinMode(13, OUTPUT);
// pinMode(9, OUTPUT);
}

void loop() {
getSerialData();

// add your code here
// use elements in the values array
// values[0] // values[1] // if (values[0] == 1) {
// digitalWrite(13, HIGH);
// } else {
// digitalWrite(13, LOW);
// }

if (values[1] == 1) {
tone(13, values[0],values[2]);
} else {
noTone(13);
}

}

//recieve serial data from Processing
void getSerialData() {
if (Serial.available()) {
char c = Serial.read();
//switch – case checks the value of the variable in the switch function
//in this case, the char c, then runs one of the cases that fit the value of the variable
//for more information, visit the reference page: https://www.arduino.cc/en/Reference/SwitchCase
switch (c) {
//if the char c from Processing is a number between 0 and 9
case ‘0’…’9′:
//save the value of char c to tempValue
//but simultaneously rearrange the existing values saved in tempValue
//for the digits received through char c to remain coherent
//if this does not make sense and would like to know more, send an email to me!
tempValue = tempValue * 10 + c – ‘0’;
break;
//if the char c from Processing is a comma
//indicating that the following values of char c is for the next element in the values array
case ‘,’:
values[valueIndex] = tempValue;
//reset tempValue value
tempValue = 0;
//increment valuesIndex by 1
valueIndex++;
break;
//if the char c from Processing is character ‘n’
//which signals that it is the end of data
case ‘n’:
//save the tempValue
//this will b the last element in the values array
values[valueIndex] = tempValue;
//reset tempValue and valueIndex values
//to clear out the values array for the next round of readings from Processing
tempValue = 0;
valueIndex = 0;
break;
//if the char c from Processing is character ‘e’
//it is signalling for the Arduino to send Processing the elements saved in the values array
//this case is triggered and processed by the echoSerialData function in the Processing sketch
case ‘e’: // to echo
for (int i = 0; i < NUM_OF_VALUES; i++) {
Serial.print(values[i]);
if (i < NUM_OF_VALUES – 1) {
Serial.print(‘,’);
}
else {
Serial.println();
}
}
break;
}
}
}

import processing.serial.*;

int NUM_OF_VALUES = 3;  /** YOU MUST CHANGE THIS ACCORDING TO YOUR PROJECT **/


Serial myPort;
String myString;

// This is the array of values you might want to send to Arduino.
int values[] = new int[NUM_OF_VALUES];

void setup() {
  size(500, 500);
  background(0);

  printArray(Serial.list());
  myPort = new Serial(this, Serial.list()[1], 9600);
  // check the list of the ports,
  // find the port "/dev/cu.usbmodem----" or "/dev/tty.usbmodem----" 
  // and replace PORT_INDEX above with the index of the port

  myPort.clear();
  // Throw out the first reading,
  // in case we started reading in the middle of a string from the sender.
  myString = myPort.readStringUntil( 10 );  // 10 = '\n'  Linefeed in ASCII
  myString = null;
}


void draw() {
  background(0);
values[0]= mouseX;
values[2]= mouseY;
if(mousePressed){
values[1]=1;
}
else{
  values[1]=0;
}


  // sends the values to Arduino.
  sendSerialData();

  // This causess the communication to become slow and unstable.
  // You might want to comment this out when everything is ready.
  // The parameter 200 is the frequency of echoing. 
  // The higher this number, the slower the program will be
  // but the higher this number, the more stable it will be.
  echoSerialData(200);
}

void sendSerialData() {
  String data = "";
  for (int i=0; i<values.length; i++) {
    data += values[i];
    //if i is less than the index number of the last element in the values array
    if (i < values.length-1) {
      data += ","; // add splitter character "," between each values element
    } 
    //if it is the last element in the values array
    else {
      data += "n"; // add the end of data character "n"
    }
  }
  //write to Arduino
  myPort.write(data);
}


void echoSerialData(int frequency) {
  //write character 'e' at the given frequency
  //to request Arduino to send back the values array
  if (frameCount % frequency == 0) myPort.write('e');

  String incomingBytes = "";
  while (myPort.available() > 0) {
    //add on all the characters received from the Arduino to the incomingBytes string
    incomingBytes += char(myPort.read());
  }
  //print what Arduino sent back to Processing
  print( incomingBytes );
}

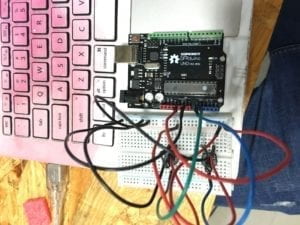
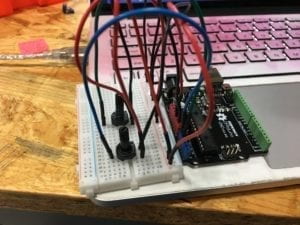
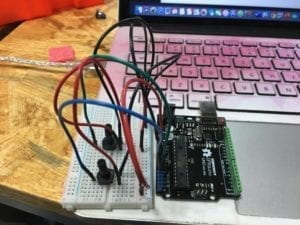
The circuit:
Three Idea-clover

  1. The name of the project is Cooperate! Partners! The user of this project will be a team of two person who is going to work on a group project. I come to this idea bases on my personal experience and the responses I got from interviewing some two person’s partner team. I noticed that when working in a team of two, people often experience unhappiness.  Some partners even turn from friends to enemies after the group work, so how to do group work is really important. The unhappiness happens, sometimes because the partner is doing nothing, sometimes because the partner is hard to negotiate and he stick to his own points and never listen to you, sometimes because two of you both think yours idea is good and won’t give up from both sides. Basing on these problem, I plan to use a game to let two people experience what is group work and how can they work better as a team to create a great project. I plan to let the team play the game first before they actually start to working on the project so that I hope this can let them have a better group work experience and become friends but not dislike each other after the teamwork.

  I will do this by setting two pieces which separate from a cube. This means that the two pieces can eventually get together to create a cube. The two pieces represent two person(teammates), getting the cube together means creating a project. In the beginning, the two pieces will be shown on the screen. There will also be two sensors one for player1 and one for player2. The sensors will sense the movement of the palm of the users which can turn the pieces on the screen to different angles to help the users find the right angle to put the cube together. There will also be four keys for each users to use on the keyboard to make the pieces moving up, down, left, and right. Then by finding the right angle of the pieces and move the pieces to the assigned location, the cube get together. This is stage1. For stage2, there will be a instruction “player1 needs to remove a part of the piece so the two pieces can get together”, then player1 needs to figure out which part of the piece needs to remove then finish the cube like what is done in stage1. For stage3, there will also be a instruction”player2 needs to add something as the shape shown here(there will be a shape showing in front of the piece of player2 to let he know what is shape he is going to find)”, then player 2 needs to find the location of the shape in the piece, add the piece, then finish the cube.   For stage4, there will also be a instruction”player1 needs to remove a part of the piece so the two pieces can get together, player2 needs to add something as the shape shown here(there will be a shape showing in front of the piece of player2 to let he know what is shape he is going to find) to finish the cube”, then player1 needs to figure out which part of the piece needs to remove then finish the cube and player 2 needs to find the location of the shape in the piece, add the piece, then finish the cube. Then they can switch the position, player1 be player2, player 2 be player1 to play again. The first stage represent the concept that to do a project, both person need to control and do good of their work(finding the angle of the piece). Then they have to cooperate to finish a piece(change the position up, down, left, and right). The second stage represents the situation that one person needs to gave up some part of his ideas to finish the piece. The third stage represents one person needs to do more to finish the piece because his partners may be lack of skills(so person1 don’t need to change his piece, however he still needs to find the right angle to dock his partners’ piece showing he is paying effort in the project but not doing nothing and be a free rider). The fourth stage represents if your partners come to some new ideas that can improve the project(the cube means perfect work), you need to remove some of your part to help the project be perfect instead of sticking to own points which may not good to the whole project. The challenge of this project first is building 3D model. Second is considering all the possible situation in teamwork.

2. The name of the project is Escaping Room. The target group is people who like exploring games. Nowadays, Escaping Room is a popular game but sometimes it may be too expensive for some people for a good escape room is 100 yuan a time. Some people love this game but them won’t play because it is too expensive. So our target group is people who love playing escape room but can’t afford the fee for the real life game. We turn this into an online game which cutting costs and can let more people play it.

I plan to set three rooms. For each room, only player who answer correctly can get into the next room. The story is set in the background of a detective story. The player is a detective who has to catch a killer who has already committed many crimes. In the first room, giving the previous time when the killer committed crime, the player have to infer then answer the question when will the next crime happen. If the user answered the correct time, he will move to the next room. In this room, I plan to give some hints about the information about the past crime the killer committed then to let the player infer then answer what is the next crime about. If he answered correctly, he will move to the last room. Here I plan to give some information about the location of past crime. Then if he answered all the three questions right, the page will jump to a new page saying “You are a great detective! You successfully catch the killer!”. The challenge of this project first is how to let the player engage in the online game just like how they will feel in real life game. How to set the decoration for each room is a big challenge. Also, how to write the plot and organizing the information showing to the player is another big difficulty.

3. The name of my third idea is Feel it! It is a game let people directly feel how their words and the way they speak affect other people. When doing research, I found some projects testing the body temperature of people to show their emotions. This inspire me to use a sensor to test and show people’s feeling. In daily lives, I feel that sometimes people don’e realize they are getting angry and they hurt their friends unconsciously with snide words. Sometimes friendships break up because of those unconscious words and anger. When the friendship broken, people feel really sad and at that time they realized it’s their unconscious words hurt their friends but the friendship is hard to fix. So my project is created for children under 18 years old because this is a period that they can’t make good control of their emotion. I will also have a temperature sensor sense their body temperature, if it above a certain temperature, there will be a sentence showing on the screen saying, “Control your emotion!” At first, the sentence may be in light red, if the people still in bad mood, the sentence will turn in dark red. By doing this, I hope it can help children better control their emotions and maintain a better friendship.

Recitation07-clover

For step1, I used triangle rectangle and ellipse to create a man wearing a pair of glasses. I used x, y and c to set the position of the triangle rectangle and ellipse, then call the display(200,200,0); in setup();

step1 (the video of step one).

For step two, I used random to fill in the ruction. I first put the display(random(width),random(height),color (random(0,255),random(0,255),random(2,255))); in setup(); then I put it in the draw();

step2(1) and step2(2)(the video of step2).

For step3, I used three Arrays to store the data and use for loop to create the graphic.

step3 (the video of step3).

For step4, to make it move, I first added two new Arrays in the code. Then I change i<x.length into I<xpositions.length. Then I make the x position and y position to be random. x[i] += random(-5, 5); y[i] += random(-5, 5);

step4 (the video of step4)

Q1: In the setup(), things only happen once, then the whole things end after one time. So there is only 100 graphics drawn if the loop is in setup();

In the draw(), things happen many times and keep going on. After one time finish, then the computer executes the loop again and keep executing. So the computer draw 100 graphics randomly for many times which make the graphic moving.

Q2: Arrays can store many variables it is like  a collection of variables of the same type. Programmer can shorten the line of the code and simplify the code using one line instead of keep storing the variables using many lines. So all the values stay in Arrays and each time when the programmer want to call the value, he can first set int[] numbers = new int[]; then call numbers[] . This simplifies the code. Also the Arrays can store different type of value, it can store booleans, ints and other which is very convenient and can apply to different situation when using different type of value. It can also store the data when managing large statistic.

The code:

https://github.com/clover0208/recitation07/commit/8756c609e41f3a85989a2dd954da6ab4ee47406a

https://github.com/clover0208/recitation07/blob/master/step4.pde

Preparatory-Research-and-Analysis-clover

When go in the Chronus exhibition, the first art work we saw is this one.

It is trying to prevent people from getting in. It will suddenly shaking when people pass by. I noticed that some of my friends were frightened by it and ran away when it suddenly moving. I think this interaction in more intense compare to some paintings I saw before. The painting can have an emotion interaction with people letting them feel the happy or sad of the artists, but is not as intense as this one to scare people away.

(This is the paintings I saw in the gallery next to the Chronus exhibition).
Comparing to the painting, the movement supported by technology makes the art work more interactive, and let the user have a stronger feeling of what the artist is expressing.  The second artwork we saw is also very appealing. 

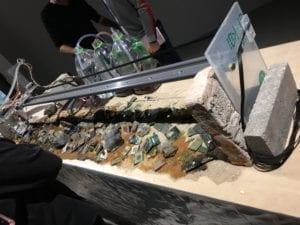
The machine is moving pouring liquid on the  Arduino. Every time the liquid pouring in front of me, I can directly feel the destruction. The machine is destroying the Arduino in front of me, comparing to some statues I saw before, the movement of the art work really engaged me, making me feel the sense of loss. Also, along with the movement, I can hear the sound when the water hit the sand. The sound of the art work make it more interactive and strengthen the feeling  of loss. Then I saw the third art work.

I noticed this one is using motor we used in class but create a completely new effect. Each movement created by the motor influence the movement of the other lines. The whole process is connected and continuous. Each movement having an influence on the whole project. Comparing with the statues and the paintings, this art work make me feel the process and it looked like each line is interacting with other line contributing to the whole project. It make me feel the strength is converting. The fourth art work is also really interesting, it shows our walk on the screen. Some of us even tried the dance movement, and it is really fun.

The fifth project is the rolling gear.

The movement become slower and slower, making me feel the obstruction and the time is floating. The movement of the gear let me having a direct feeling of the concept of slow. It let me feel the moving of the time which is great. The last art work is like a moving bridge.

It make me have the same feeling like the third art work(the motor one). Every movement is connected and interact with the other line. I have a stronger feeling of what is interaction here. It is like a back and forth movement, you do something, then other give you feedback, then you respond back, then the whole process(the interaction) happen again. In general, the technology-based art pieces creates movements that make great interaction with the audience and make me have a stronger feeling of what the artists trying to express. Compare to the non-technology based art work like the paintings and the statues, the technology-based art pieces have more interactions with the audience. Also, the technology-based art pieces not only use the visual effect but also the sound effect to intense the interaction.

One interactive project inspire me for my final project is a game named Little Nightmares. It is a game that the user control the character to run and move escaping from a cage. The first reason I think this is a good interactive project is because you have to respond to the movement of those monsters who are trying to catch you in the game. They may suddenly appear and trying to catch you. You have to make quick interaction which is to run away. Also, the interaction in a continuous process because for different scenarios in the game, there will be different monsters coming from different places creating different interaction to escape(to hide or to run). This make me fully engaged in this game and it is really fun because each time I have to think of a different solution to escape.

(to run)

(to hide)

The second reason I like this game is when you playing the game, you need to think about the solution when you are playing. You need to change the solution base on the circumstance which I think is another good interaction with the player. Even two circumstance look similar, there are still differences you need to observe then change the solution. The third reason I like this game is besides the visual effect, the sound effect increase the excitement of the game. For some scenarios, you need to listen carefully because the monsters only make noises instead of showing up to warn you running. This make the game a multi-sensory interaction game which make the game more funny. The fourth reason I like the game is the thesis of the game. I really love the plot of the game. You escape from the monsters and finally you beat the strongest monster, then you become the strongest monster. In the beginning, you feel you are weak because you can only hide and run. Then by beating some monsters, you feel you are growing and become stronger. Then at the end, when you beat the monster, you are standing on the top of the stage and those monsters who you once afraid of are afraid of you. I feel a sense of growing through each level of the game which I feel it is like an emotional interaction the play convey. This is why I like this game.

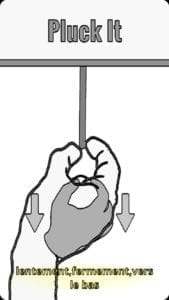
Another interactive project inspire me for my final project is the pluck it. It is letting the users explore different ways to pluck the lines. For each stage, how to pluck the line is different. When you touch the line, the line will shake. Every time, you need to think of different way to pluck the line down. Also, the game trained players’ observation skill and improve our creativity to explore different solutions. Plucking the line is like solving a problem in daily life. From playing the game, the player is actually training their mind and have educational meaning which I think is great for a game.


The project I think less interactive is an interactive webpage. It is the Dutch strategic design and development studio Bolden’s website. The webpage looks like this at first.

Then if the viewer’s mouse move to the corner of the page they can see the messages properly.

I think this is a bad interactive webpage because it make its users confuse by what the webpage is trying to convey. If they move the mouse, they will never know what is the meaning of this webpage and the designer’s idea will never known by his customers. Although it contains interaction but the interaction don’t support the conveying of the thesis. The interaction make the thesis of the project confusing rather than help the users better know the thesis and that’s why I think it is a bad interactive project.

The definition I gave in group project is: Interaction is an action (communication, emotion express, feeling changing) with mental thinking which people make while can using inanimate objects, computer, technology or media to support emotion expressing then have self-reaction or emotion changing on themselves after this action. Basing on the definition and the research, the first character I think a successful interaction project should have is the interaction should be a continuous process. During this process, the interaction should be appealing enough for the user to make further interaction with the project but not stop in one loop of interaction. The interaction giving from the project needs to attract the user to do more interaction with the project. So a successful interaction project can let the user keep giving back interaction and willing to engage in the project. The second character I think a successful interaction project should have is multiple sensing interaction. The interaction should not only be visual interaction but can also be sound interaction, like the sound effect warning the players in the game Little Nightmare. The third character I think a successful project should have is a clear concept and the concept need some informative meaning. Seeing the webpage interaction, I learned that a clear thesis is very important and the interaction is to support the convey of the thesis. Learning from the game Pluck Me, I learned that a game can have educational concept throughout the whole game. Besides engaging the players in the game, they are also improving their observation skill and problem solving skill. So I think a successful project should have an interaction supporting concept and the concept needs to be clear and informative helping the users learn something when using your project.

References:

1.“Bad Design vs. Good Design: 5 Examples We Can Learn From.” Interaction Design Foundation, https://www.interaction-design.org/literature/article/bad-design-vs-good-design-5-examples-we-can-learn-frombad-design-vs-good-design-5-examples-we-can-learn-from-130706.

2.“Little Nightmares.” Wikipedia, https://en.wikipedia.org/wiki/Little_Nightmares.

3.“Pluck It.” Feeling Game Company, https://www.feelinggamecompany.com/pluck-it.

4.The Art of Interactive Design, Crawford

Recitation06-clover

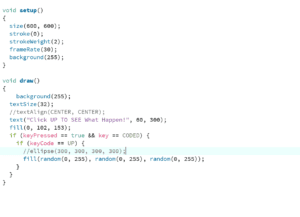
The animation I created is when you click the “up”, the text will change color randomly. 

When doing this I learn that each time before I write something in the draw(); I need to set the background(255); or it will draw on the same canvas as before. I also learned how to add text in processing and using key to control the color change of it.

Homework1:

When doing the circle, first I tried to make it becomes bigger. I first set the circle’s position to be in the central of the canvas using int circleX=300 and int circleY=300. Then I set the circleSize to be 50, and the moving of the size to be 0.5. I use the code bellow and it works, the circle is becoming bigger. 

ellipse(circleX, circleY, circleSize, circleSize);
circleSize = circleSize + c;
c = 0.5;

However, when I tried to make the circle become smaller, it don’t work.

if (circleSize<=120) {
  ellipse(circleX, circleY, circleSize, circleSize);
  circleSize = circleSize + c;
  c = 0.5;
 } else {
ellipse(circleX, circleY, circleSize, circleSize);
circleSize = circleSize + c;
c = -0.5;

 }

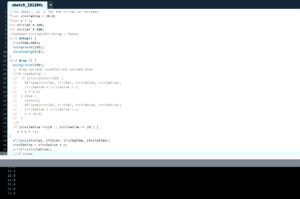
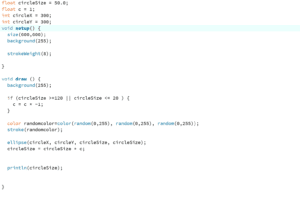
But the circle just become bigger, then it stop there and not move. I used the println(circleSize) to check what happened. The number is becoming bigger, then becoming smaller. So the circle is changing but not show on the canvas. Then I thought there maybe something wrong with the else statement so I change to else if but it still don’t work. I asked my friends, they said maybe I should set state1 for the circle to become bigger and state2 to become smaller to separate the two process. I tried but it still not work. I really don’t know what happened so I asked for help. After seeing the code, Professor  said that the background color should be set or the changing will not show on the screen. He add the background(255) and the code finally worked. I then changed the value c to change the moving speed of the circle.This is the code.

//int state = 1; // for the circle to increase
float circleSize = 50.0;
float c = 1;
int circleX = 300;
int circleY = 300;

//boolean circleIsShrinking = false;

void setup() {
size(600,600);
background(255);

strokeWeight(8);

}

void draw () {
background(255);
// draw current location and current size
//if (state==1) {
// if (circleSize<=120) {
// ellipse(circleX, circleY, circleSize, circleSize);
// circleSize = circleSize + c;
// c = 0.5;
// } else {
// state=2;
// ellipse(circleX, circleY, circleSize, circleSize);
// circleSize = circleSize + c;
// c = -0.5;
// }
//}
if (circleSize >=120 || circleSize <= 20 ) {
c = c * -1;
}
ellipse(circleX, circleY, circleSize, circleSize);
circleSize = circleSize + c;

println(circleSize);

//if state
//else{
// ellipse(circleX, circleY, circleSize, circleSize);
// circleSize = circleSize – 0.5;
// }
}

Homework2:

This one is to change the color while the circle is changing. At first, I tried added the fill(random(0,255), random(0,255), random(0,255)); in the void draw() but only the back ground is changing. Then I thought of add this in the stroke(random(0,255)); but the color still not change. I asked for help again. Then I learned that I need to use the color to call the function.

color randomcolor=color(random(0,255), random(0,255), random(0,255));

Then it still don’t change the color because I put this in the setup(); Then I learned that if it is put in the setup(); the process only happen one time, so I should put in the draw(); 

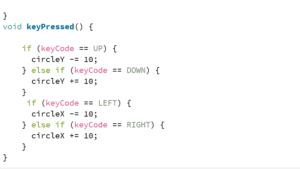
Then I used the key to control the movement of the circle. I learnt the up and down key should be link with circleY the Y position. The left and right should be link with circleX the X position. I also learned that the circle-= and circle+=can control the moving speed of the up, down, left and right. 

Some interesting function I learned is:

1.void keyPressed() {

if (keyCode == UP) {
circleY -= 10;
} else if (keyCode == DOWN) {
circleY += 10;
}
if (keyCode == LEFT) {
circleX -= 10;
} else if (keyCode == RIGHT) {
circleX += 10;
}
}

2.color randomcolor=color(random(0,255), random(0,255), random(0,255));
    stroke(randomcolor);

3. textSize(32);
//textAlign(CENTER, CENTER);
text(“Click UP TO SEE What Happen!”, 60, 300);
fill(0, 102, 153);
if (keyPressed == true && key == CODED) {
if (keyCode == UP) {
//ellipse(300, 300, 300, 300);
fill(random(0, 255), random(0, 255), random(0, 255));
}
}