Week 04: Interactive Comic Project Update – Chloe Chan

So far, Allie and I have decided that we wanted to have about 10 panels in total for our project, with the last panel being the only one that isn’t a split screen between the both of us. We have decided that we wanted to just use photos that we have previously taken in our lives to illustrate our lives. We have collected 9 photos each for each split panel, and plan to take the last one together in school. We will put a filter on each image so that they will look similar.

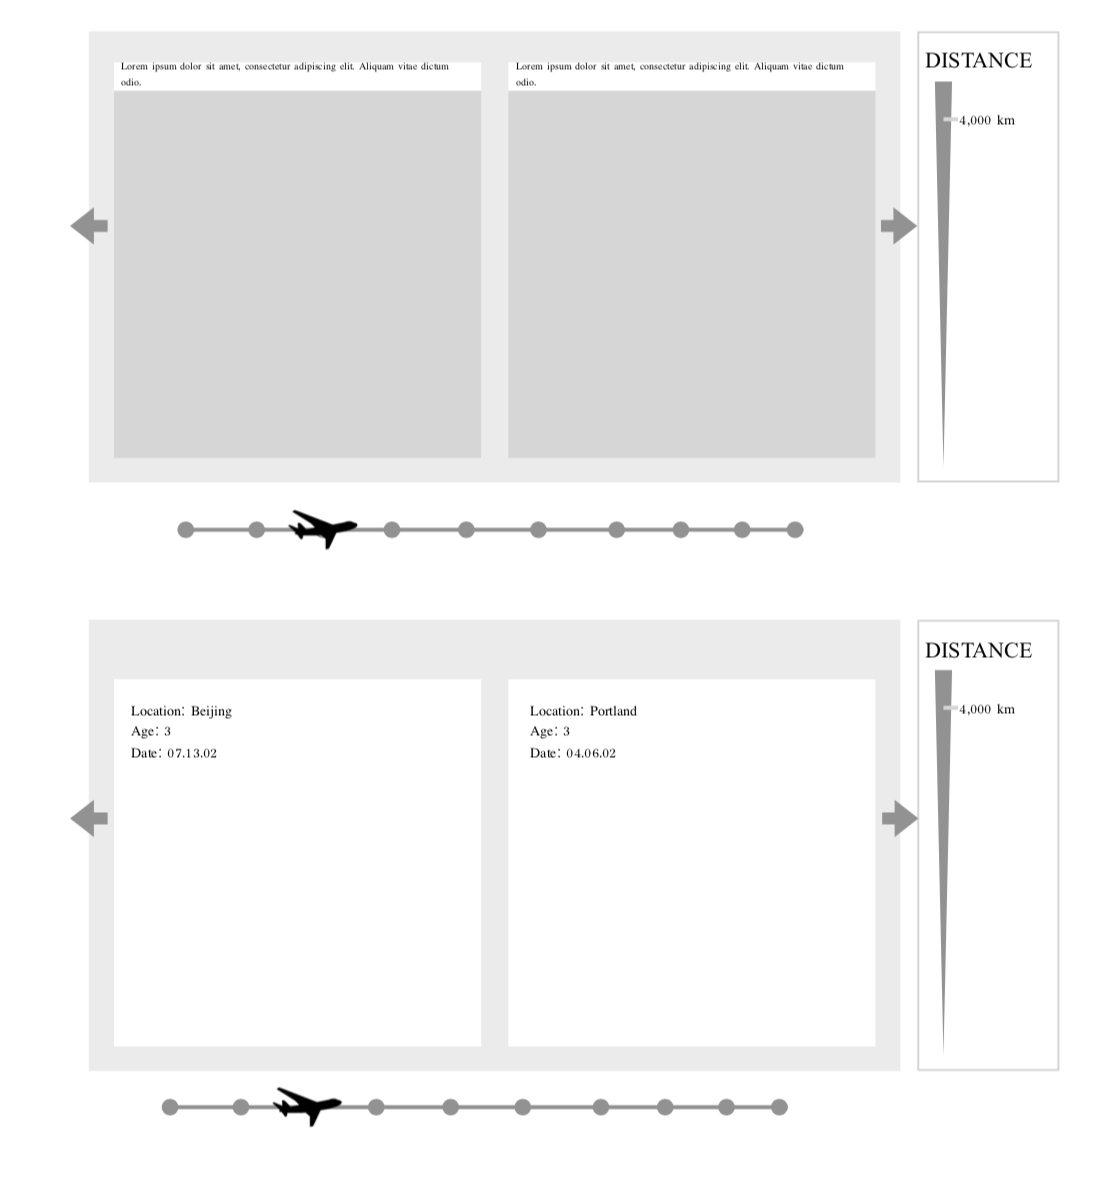
So far we have also designed what our interactive comic will look like: 

Users will be able to interact with the comic by clicking on the image, which would allow the users to see where we were in the world, the specific date that the image was taken and more details that we will collectively decide on later. On the side bar, there will be a distance meter that measures how far we were from each other, and at the bottom there will be a timeline with an airplane that moves with each panel. 

We haven’t started inputting our design into the website just yet, but so far we just wanted to make sure we collected all of our images before we 

Week 03: Javascript Assignment – Chloe Chan

http://imanas.shanghai.nyu.edu/~cc5581/week03/assignment.html

For this assignment, I did struggle a bit with Javascript, I thought it was much more difficult than the other assignments that we got but towards the end, I started to understand how to use Javascript much better. I ended up looking through our class examples a lot to figure out how to use Javascript. 

I managed to use HTML fairly easily, and CSS as well, it took me a while to organise my Ids and Classes but once that worked it went fairly well. My biggest issue was that nothing I was coding on the Javascript was showing up on my page, I got all the images and buttons up on the page but nothing was changing, I knew that there was something wrong, and when I went into ‘inspector’ it said that there was something wrong. It took me a long time before I realised that I didn’t close

 <script src=”js/photoshop.js” type=”text/javascript”>
</script>

and instead left the tag open. After I figured that out it was a fairly smooth process to finish the page. 

Week 3: Photoshop Assignment – Chloe Chan

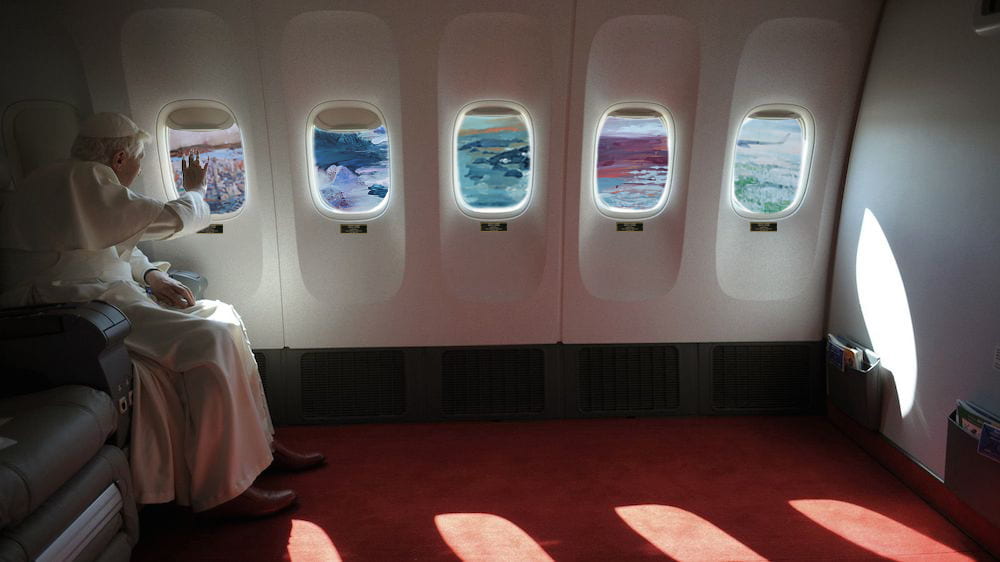
This is the final photoshop image that I came up with: 

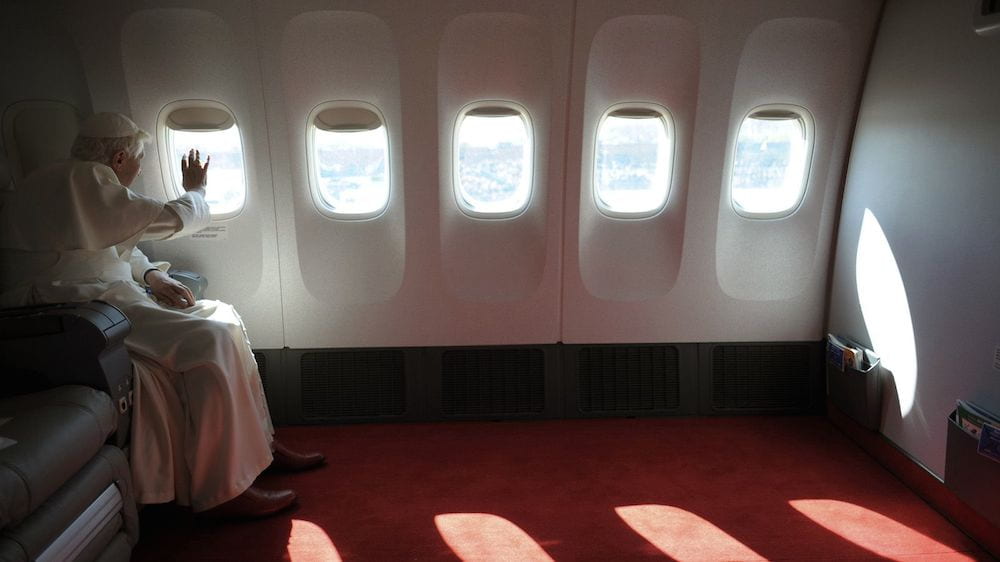
I took three different elements and combined them together, my original image is the picture of the pope looking out of a plane window. 

I used five different paintings, an example of the ones that I used is shown below: 

And to finish off the effect of transforming the image, I took the small gold plaque shown underneath to put underneath the paintings. 

I first took the original image and took out the view from each of the windows using the magic wand tool and the select mask tool to increase my accuracy. Afterwards, I put all of the paintings behind the original image and resized them to fit each of the windows. I then cropped the picture of the plaque and resized it underneath each of the windows, I had to create a new layer for the pope’s sleeve in order to put the plaque behind his arm. It was a pretty smooth process and a really fun little project.

Week 3: Interactive Comic Idea – Chloe & Allie

Introduction:

Chloe and I had the idea of creating a comic with a storyline which follows each of our lives up until the point where we first met in NYUSH Communication Lab. We discussed that we want to create a timeline where when the user clicks on a specific period of time they will be directed to a split screen that will show what both Chloe and I were doing at that time. More details regarding what we imagine our project will look like can be found in the text below.

Storyboard:

  • We illustrate a timeline of both our lives leading up to the point where we meet in NYU Shanghai, the extraneous circumstances that lead us to be where we are today.
  • We decided to tell the story by using a split screen that will allow the user to see what the both of us were doing at a specific point in time.
  • Allow the user to click on certain objects in the panel that will pop up allowing the reader to learn more

Illustrations:

  • We aren’t exactly sure how we were going to go about illustrating the comics, but I think that we will use our knowledge of photoshop to put together a comic.
  • We will also draw upon outside resources to find images to support our comic.

Java:

  • We are using Javascript to move the story along, there will be a fixed timeline at the bottom of the comic and the readers will be able to drag an icon along the timeline in order to advance the story.
  • The timeline will illustrate the year
  • The icon that is dragged across the screen will be a small airplane.

Week 03: CSS Portfolio Page – Chloe Chan

CSS Page: http://imanas.shanghai.nyu.edu/~cc5581/week01/portfolio_chloechan.html

I really enjoyed this project, I thought it was a really great way to figure out for ourselves how to add different styling onto a simple HTML page. I knew that this was a page that I wanted to come back to in the future, so I definitely put a lot of effort into making it look nice and pretty and including my portfolio. I had a pretty smooth time styling my page, however, towards the end of styling I hit two major problems that lead to me pouring hours and hours into trying to figure out the problem.

On my homepage, I decided to include a bunch of images that documented a portion of my travels because it’s a big part of who I am as an individual and it’s something that I love doing, and spend most of my money on. However, each image was huge, and I couldn’t figure out how to resize it using CSS because either the proportions would be warped, or they weren’t all the same, therefore I ended up just resizing it in HTML. Even though I had resized the image properly, the images were not lining up together. They ended up positioning themselves in really awkward places with huge gaps in between each image even though they were organized quite nicely in rows. I poured hours on the internet trying to figure out how to remove the huge gaps of space in between the images but I couldn’t solve the problem. I then decided to put flexboxes around the images in rows so that I could remove the huge spaces in between the images. This worked, and eventually the lined up together, however, because the images were of different sizes, there were still gaps in between images because one image would be portrait, and the other two in the row would be landscape. 

I ended up going to see the fellows and realized that no matter how much I tried to reformat the images, I wouldn’t be able to achieve a stacked format without using grid, which was something that was much harder to do than just using flexbox. So, to close the gaps so that they weren’t as obvious, I just resized the portrait images that I used to make them less tall so the gaps would not be as obvious as they were if the portrait images were quite tall. 

The second major issue that I ran into was when I uploaded my final website onto Cyberduck, although all of the images had shown up when I was creating the page, after uploading them to the server, the photos failed to show up, it took a lot of trial and error before I realised that the images were labelled .JPG in my folders and I had labelled all my images .jpg in atom which caused the discrepancy. After changing the extension, all the images showed up again and it was working great!