Introduction
In this recitation, I created the base outline for a function and added it it through multiple steps. These steps included using the for() function to create different arrays. My goal for this recitation was to thoroughly understand every line of code that I was creating. I didn’t want to copy and paste lines from the example without knowing how they interacted with my function first. This way, I could understand how to use the code in future purposes for my project if necessary.
Step One
I started step one by creating a simple motif using a rectangle, an ellipse, and a square. It alternated black and white colors to signify the difference between shapes. I entered these units under void display to have the three shapes represented on the canvas. The code for void display can be found below.
void display (float x, float y, color c)
{
fill(c);
rect(x, y, 300, 300);
fill(255);
rect (x, y, 150, 200);
fill(0);
ellipse(x, y, 55, 55);
}
This step in the process just resulted in the shape and colors being represented on the canvas without any manipulations.
Step Two
In step two, I created a for loop under setup to move my motif in 100 different positions at the same time. In setup, my for loop consisted of the following code:
for (int i = 0; i < numberOfInstances; i++)
Before creating this loop, I defined “numberOfInstances” at the top of my code as equaling 100. So, this code will run until it reaches 100 instances of my motif hitting the screen. But because it is in setup, it will only one once, so I have to move it into draw in the future. Because every time the for loop is running, the “i” value is gaining “+1” because of the “i++” value. This for loop combined with my defined “numberOfInstances” ensures that the function will only run until “i” is no longer less than the “numberOfInstances” which in this case, is 100.
Step Three
In step three, I created three arrays to store my x, y, and color data for the original function I created. In order to do this, I had to start within setup and fill them with data. Below is the code I had up until this point within display.
void setup() {
size(600, 600);
background(255);
rectMode(CENTER);
for (int i = 0; i < numberOfInstances; i++) {
xPositions[i] = random(0, 250);
yPositions[i] = random(0, 255);
cPositions[i] = color(random(0, 255));
The for loop stayed the same, but in order to fill each “i” position with data, I set it equal with random values. What should be noted is that in order to setup the array, I needed to include three lines at the beginning of my code that are as follows.
float[] xPositions = new float[numberOfInstances];
float[] yPositions = new float[numberOfInstances];
color[] cPositions = new color[numberOfInstances];
These three values set x, y and c positions to float the numberOfInstances (100) within my code. So, under setup, I was essentially assigning random numbers to be placed within these addresses (xPositions[i], yPositions[i], and cPositions[i]). I needed to differentiate cPositions as color in the above code because otherwise it wouldn’t coordinate to a random color, but instead a random position. Then in Draw, I used the array to make sure the function is displayed 100 times.
void draw() {
background(255);
for (int i = 0; i < numberOfInstances; i++) {
if(xPositions[i]>600){xMovement[i]= -xMovement[i];}
if(yPositions[i]>600){yMovement[i]= -yMovement[i];}
display(xPositions[i], yPositions[i], cPositions[i]);
xPositions[i] += xMovement[i];
yPositions[i] += yMovement[i];
cPositions[i] += cMovement[i];
}
}
This can be seen in the original for loop that I correlated with “numberOfInstances”, thus creating 100 repetitions in the function. This code for these 100 different positions are also correlated by manipulating the variable “i” in (display(xPositions[i], yPositions[i], cPositions[i]);) on line 7 of the above code.
Step Four
By this step, I had created 100 different positions of my motif across the screen with random numbers assigned as positions and colors. To first add any movement to the variables, I had to define xMovement, yMovement, and cMovement as “float” and “color” and set it equal to “numberOfInstances” so in the for loop it could occur 100 times.
float[] xMovement = new float[numberOfInstances];
float[] yMovement = new float[numberOfInstances];
color[] cMovement = new color[numberOfInstances];
Under setup, I then added three lines of code signifying the randomness of each movement correlated with the originally defined “x/y/cMovement” variables.
xMovement[i] = random(0, 10);
yMovement[i] = random(11, 20);
cMovement[i] = color(random (0,255));
After establishing the variables and the randomness, under draw I set the positions equal AND adding “one” to the movements to ensure they would be moving from the random position they were put in.
xPositions[i] += xMovement[i];
yPositions[i] += yMovement[i];
cPositions[i] += cMovement[i];
After, and in order to make sure they don’t float off of the screen, I inserted an if statement just below the original for loop in draw.
if(xPositions[i]>600){xMovement[i]= -xMovement[i];}
if(yPositions[i]>600){yMovement[i]= -yMovement[i];}
By doing this, I was essentially saying that if x or y positions reached a certain point on the canvas, that the shapes would bounce off of the side and come back into view. This was when I inserted the xMovement equaling “-xMovement” so reflect back into the picture when it reached 600. Thus completing the step where the function cannot move off screen. All of my code can be viewed at the bottom of this post listed under “My Full Code.”
A video of the completed project can be viewed below.
Questions
Question One
In your own words, please explain the difference between having your for loop from Step 2 in setup() as opposed to in draw().
When I used a for loop in setup, the purpose was to set a random factor to happen only once during the course of the function. Setup only runs things once as opposed to draw. When I inserted the for loop into draw, it repeated it as many times as I set it to. In this case, I set it to run continuously because I did not insert any code to say “stop” once it hits a certain value. All the code knew was to keep repeating on and on under draw.
Question Two
2. What is the benefit of using arrays? How might you use arrays in a potential project?
Arrays can be used to store different types of data within a function. As I did here, I store colors and positions which matched with my position, movement, and color data. The benefit of arrays are their ability to store large quantities of this data within their own function and repeat this how ever many times you need it to. For a potential project, I may use an array to store random color data and have it linked to something physical within the arduino kit. So that when a button is hit for example, the array will display a different, random color value every time.
My Full Code
int numberOfInstances = 100;
float[] xPositions = new float[numberOfInstances];
float[] yPositions = new float[numberOfInstances];
color[] cPositions = new color[numberOfInstances];
float[] xMovement = new float[numberOfInstances];
float[] yMovement = new float[numberOfInstances];
color[] cMovement = new color[numberOfInstances];
void setup() {
size(600, 600);
background(255);
rectMode(CENTER);
for (int i = 0; i < numberOfInstances; i++) {
xPositions[i] = random(0, 250);
yPositions[i] = random(0, 255);
cPositions[i] = color(random(0, 255));
xMovement[i] = random(0, 10);
yMovement[i] = random(11, 20);
cMovement[i] = color(random (0,255));
//void display(random(0,255), random(40, 90), random(80, 160))
// display (width/2, height/5, color(125));
// display (width/4, height/2, color(220));
//}
}
}
void draw() {
background(255);
for (int i = 0; i < numberOfInstances; i++) {
if(xPositions[i]>600){xMovement[i]= -xMovement[i];}
if(yPositions[i]>600){yMovement[i]= -yMovement[i];}
display(xPositions[i], yPositions[i], cPositions[i]);
xPositions[i] += xMovement[i];
yPositions[i] += yMovement[i];
cPositions[i] += cMovement[i];
}
}
void display (float x, float y, color c)
{
fill(c);
rect(x, y, 300, 300);
fill(255);
rect (x, y, 150, 200);
fill(0);
ellipse(x, y, 55, 55);
}

 Music Notes
 Music Notes
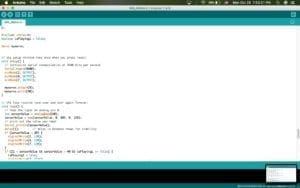 LED Code
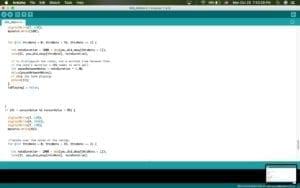 Speaker Code
 Speaker Code