sent.ai.rt – Final Project – Abdullah Zameek

Introduction and Project Rationale: 

I had a very clear idea of what I wanted to do for my final project for Communications Lab for a while. I had been exploring different facets of Machine Learning for most of the semester, and while doing so, one particular topic struck my fascination more than any of the others – Neural Style Transfer. What this does is as follows – imagine you have two images, Image A and Image B. What if you wanted the content of Image B to be presented in the style of Image A? This is precisely what Neural Style Transfer facilitates. But, what I wanted to do was one step further, what if you could have an entire video stream be relayed back in some different style? And, what if the video is reactive to changes in your environment? When thinking about the latter question, I thought of different ways the user can spark some sort of interaction. Could they maybe press a button that switches styles? Or, maybe  as slider that you drag that progressively changes styles? I thought about this for a while, but none of these screen-based options seemed to excite me much. If I was the user presented with  a strange video feed,  I wouldn’t want to have to do much to cause a dramatic change in the behavior of the feed.  It needed to be reactive, it needed to be responsive in the strangest, yet most natural of ways. What sort of stimulus could I capture that would be reflective of changes in the environment? Throughout this semester and what we have been discussing in Communications Lab, we have been prompted to think about different ways of facilitating interaction. And through these discussions, one of the lessons that I learnt is that we all have different perceptions of what “interaction” really means. To this extent, my idea of interaction is that even a small stimulus provided by the user should be able to prompt a great change in the behavior of the project. This is something that I wanted to really emphasize upon  in my project.
After thinking about this, I decided that I could do away with any buttons or on-screen elements, and make the most of the video feed, in particular, the user and his environment.The first that came to mind is the user’s facial expressions/emotions. – they are dynamic and can prompt a great deal of change in the behavior of the video feed, all in real time. The response could be multifaceted too – in addition to the different styles being applied, it could also be music that is relayed back, and the appearance of the canvas. And, this requires minimal effort from the user’s end, and so they can pay attention to making the video react in different ways. Above all, this was technically feasible, so I thought why not? In an ideal case, I envisioned that this piece would make for a nice installation somewhere, and this sort of interaction seemed to be ideal for such a project.  I thought of different places where this could go; one particular place was the corridors in the Arts Centre at NYU Abu Dhabi. In the past, there have been screens set up close to the IM Lab there, where there was some interactive sketch that would react to the user’s motion. These sort of projects do not require a keyboard/touch screen or any sort of deliberate input device of sorts, just  a screen and a camera.  
With all of this in mind, I set out to bring “sent.ai.rt” to life. For the sake of completion, here is a complete description of sent.ai.rt:

sent.ai.rt is a real-time interactive self-portrait that utilizes techniques in machine learning to create an art installation which changes its behavior depending on the user’s mood derived from his/her facial expressions. The user looks into a camera and is presented a video feed in the shape of a portrait which they can then interact with. The video feed responds in two ways to the user’s emotion – it changes its “style” depending on the expression, and the web page plays back music corresponding to the mood. The style that is overlaid onto the video feed comes from famous paintings that have a color palette that is associated with the mood, and the music was crowd sourced from a group of students at a highly diverse university. The primary idea is to give individuals the ability to create art that they might have not been otherwise been able to create. On a secondary level, since the styles used come from popular artists such as Vincent Van Gogh, it is essentially paying homage to their craft and creating new pieces that essentially draw from their art pieces.

The phrase “sent.ai.rt” comes from the words “sentiment” which is meant to represent emotion which dictates how the portrait responds, and “art”. The “ai” in the middle represents the term “artificial intelligence” which is the driving force behind the actual interaction.

Implementation:

Following the initial peer-review, I did not get any concerns/questions with regards to the technical feasibility, so I went ahead with planning out how I was going to implement my project. Since there were multiple facets to it, I’ll break down the different facets to detail the entire process. 

a) Gathering of Assets.
My project required both visual and auditory assets. The visual assets would be the images that I would use as the style sources for the different style transfers. When thinking about what sort of emotions I wanted to capture, these were the first few to come to mind :
Happiness
Sadness
Anger
Confusion.

The next step was to determine what sort of paintings were representative of each emotion. I decided to use color as my deciding factor, and came up with the following mapping where the color is representative of the emotion:
Happiness – Yellow
Sadness – Blue
Anger – Red
Confusion – White/Grey. 

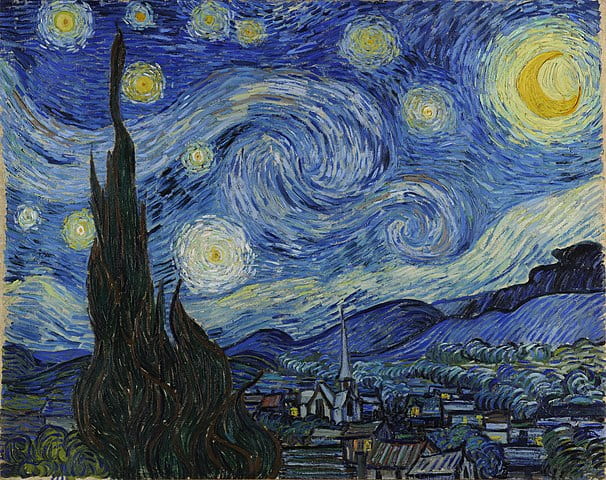
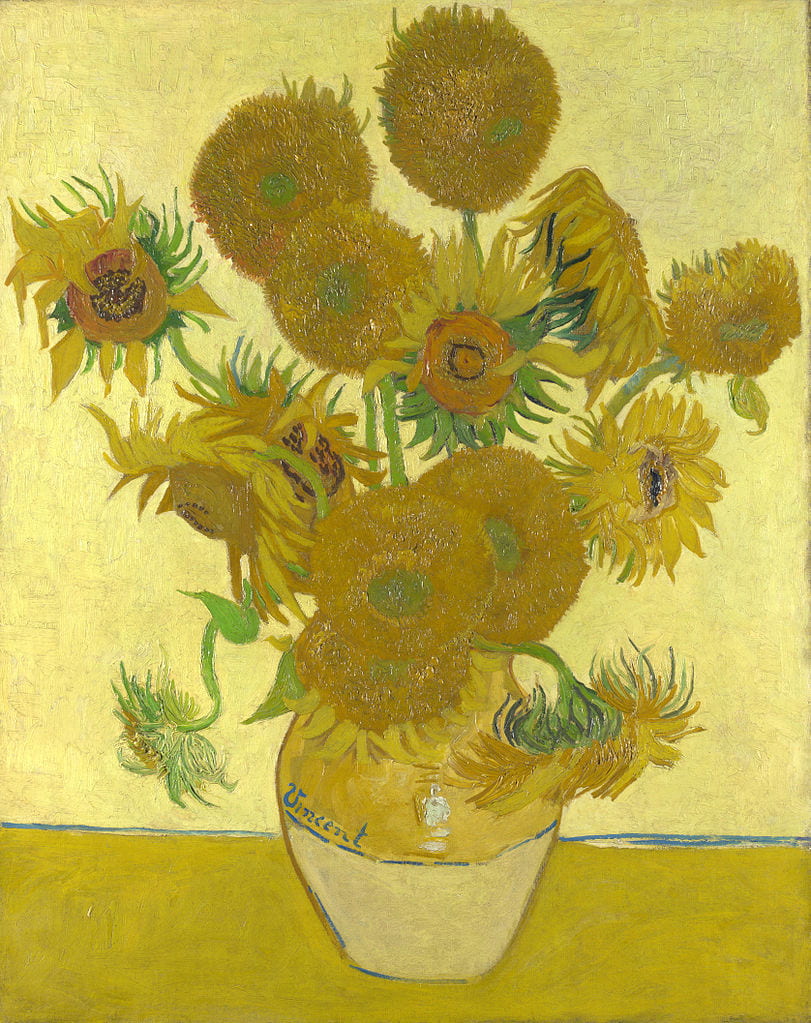
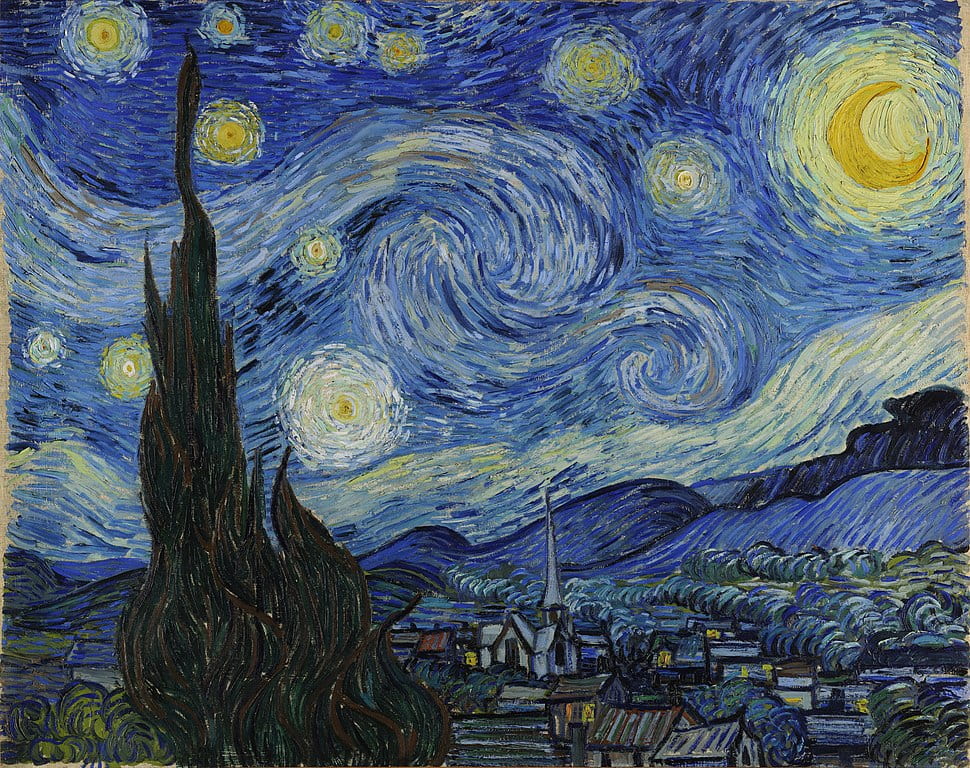
Next, I sourced out famous paintings that had these color palettes as the primary colors. These four paintings are what I settled on in the end:
fqwf
Happiness – Sunflowers by Vincent Van Gogh
faw
Sadness – Starry Night by Vincent Van Gogh
f
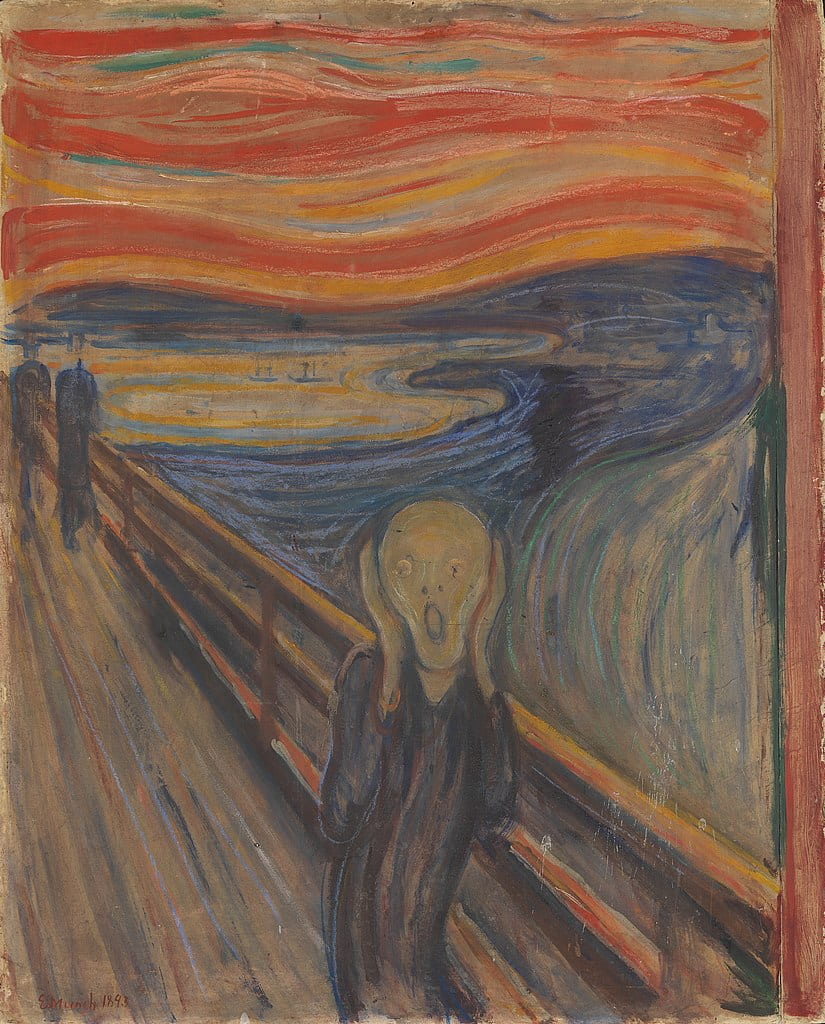
Anger – The Scream by Edvard Munch
qf
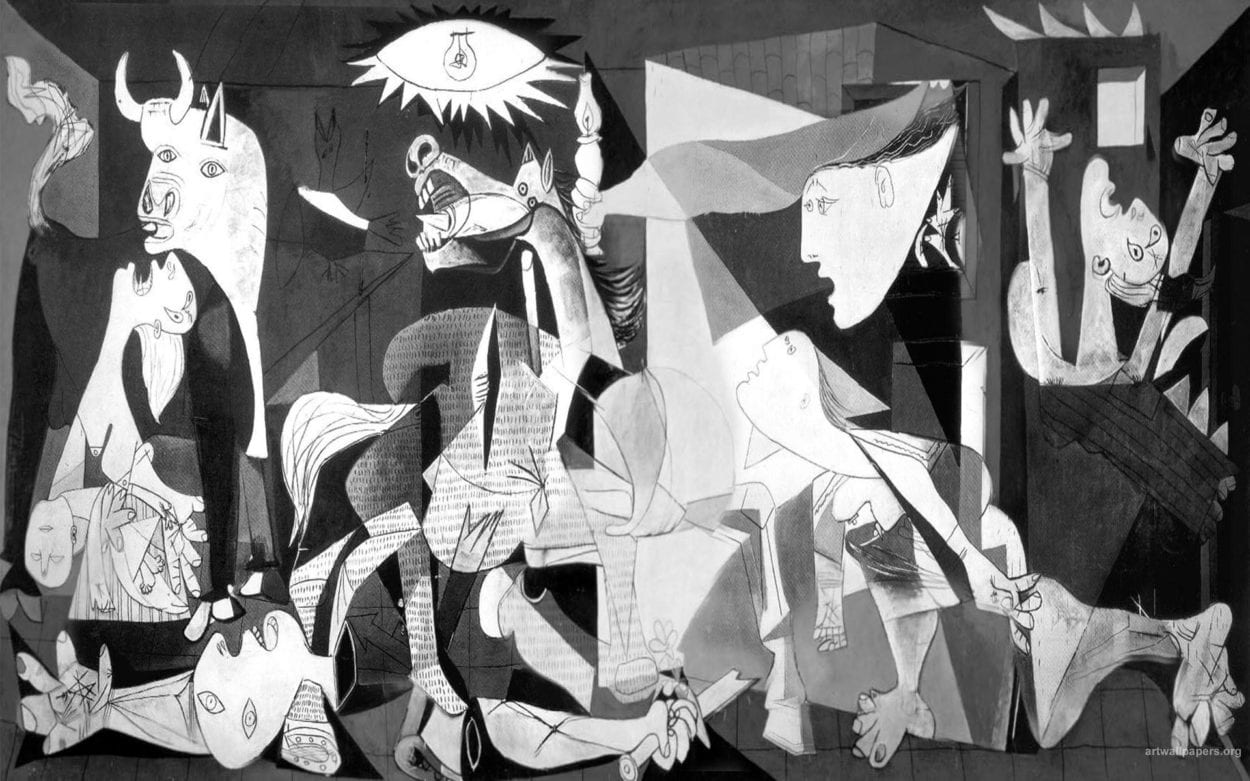
Surprise – Guernica by Pablo Picasso

While the selection of these paintings were somewhat arbitrary in nature, I believe that since I was more interested in sourcing out paintings with a desired color palette, these images fit the description pretty well.
In addition to these visual assets, I also needed to gather music that corresponded to the different emotions.  In order to minimize personal bias on this step, since I did not have any fixed criterion to decide what songs correspond to what mood, I decided to crowd-source these. I compiled a collection of songs after conducting a survey on NYUAD’s campus Facebook group. 

Here are the songs that I used from the results of the survey:

Happy
1) Queen – Don’t stop me now
2) Goodbye Yellow Brick Road by Elton John
3) Surrender by Cheap Tricks
4) Juice by Lizzo
5) On The Top Of The World By Imagine Dragons

Angry
1) Kawaki wo Ameku – Minami
2) Na Na Na – My Chemical Romance
3) Copycat – Billy Eilish
4) Kanye West, Jay Z, Big Sean – Clique
5) Paranoid Android – Radiohead

Confused
1) Tiptoe through the Tulips
2) clocks by coldplay
3) Babooshka – Kate Bush
4) Sleepwalker by Hey Ocean
5) joji – will he

Sad
1) Orange Blossom – Ya sidi
2) Linking Park – Blackout
3) Coldplay – Fix You
4) Hurt by Johnny Cash
5) limp bizkit-behind blue eyes

b) Machine Learning Models

There are two facets to the Machine Learning – the actual Neural Style Transfer models and the facial expression detection. 
For the neural style transfer part, I used ml5js’s training script to train a model with the necessary images. 
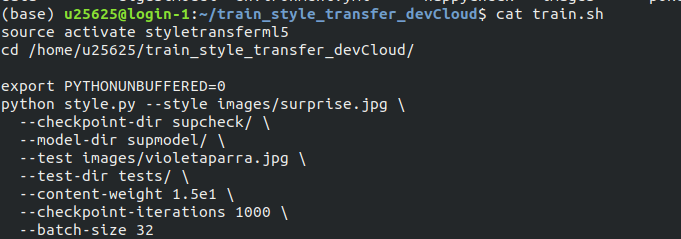
training script

Usually, training such a model could take over two days on a regular computer, but since I had SSH access to an Intel CPU cluster from Interactive Machine Learning, I was able to train 4 of these models in under 24 hours. Once the models had trained, it was a matter of transferring the models back to my laptop via scp and then preparing the ml5js code to inference the output. 

code code

More details about style transfer in ml5.js can be found here
The code to train the actual models for the style transfer can be found here

The next step was to figure out a way to do the facial expression detection, and luckily, there was an open source API called face-api.js.
Built on top of the Tensorflow.js core, the API allows various image recognition techniques with faces, and one of them is Facial Expression Detection. They provided different pre-trained models, which were trained on a variety of faces, so that saved me a lot of time in trying to train a model from scratch, which would have proven to be quite difficult in the limited time that we had.
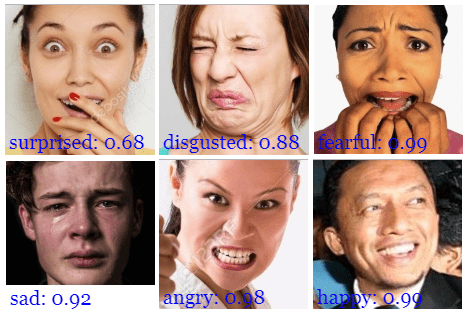
exp

They provided a simple endpoint through which I was able to use the API in order to do the necessary detection, and calculate the most likely expression. 
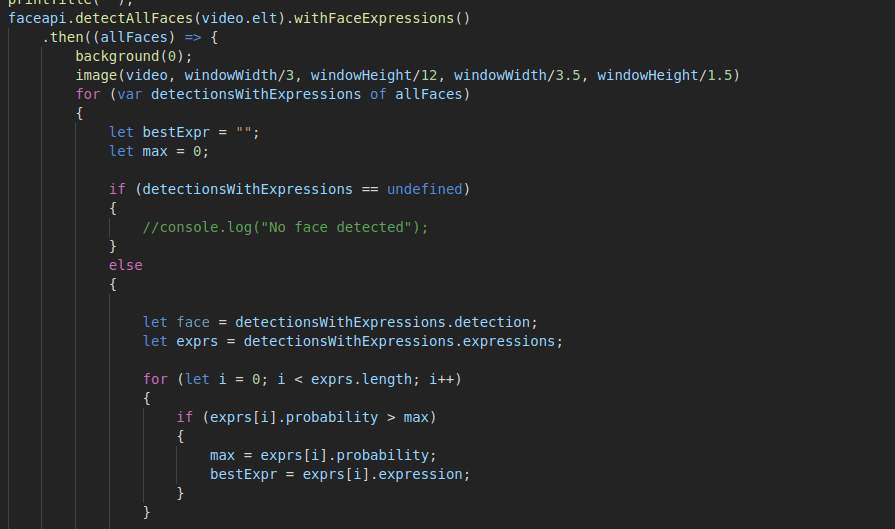
facepi

After I had confirmed that the model was working, I was ready to put all the different components together.

c) Integration

This was probably the lengthiest stage of the entire process,  If I were to sum up the workflow of the piece, it would be as follows:

->Capture video
 –> Detect Expression
—–> If Neutral – > do nothing
——> Otherwise -> Perform style transfer
———-> Update canvas with elements related to the detected expression (play audio, show name of track, and display which emotion has been triggered) 
———————-> Repeat
(In addition to the above, the user can disrupt the workflow by pressing the spacebar, causing the program to momentarily halt to take a screenshot of the video feed) 

In order to create a real-time video feed, I used p5.js’s createCapture() functionality with Video. At this stage, three of my major components- the video, facial expression detection and style transfer – are solely Javascript based. With that in mind, I decided to use the whole webpage as a p5.js canvas which would make it easy for me to integrate all these components together. This also meant that any text and styling would also be done in p5.js, and this seemed to be a much better option than regular HTML/CSS in my case because of the fact that all the different elements depend on some Javascript interaction, so it was easier to do all the content creation directly on a canvas. 

The layout of the page is very straightforward. The video feed sits in the middle of the page, with different words describing the active mood lighting up in their respective colors on both sides of the video. The audio assets are loaded in the preload() function while the weights for the machine learning models are loaded in the setup() function because ml5js has not integrated support for preload() as of yet.  The face-api models are also loaded in setup(). Once that is done, the draw() loop handles the main logic. Before diving into the main logic, I also wrote some helper functions that are called in the draw() loop, so these will be described first. 

getStyleTransfer() – This function gets the index of the best facial expression detected from the styles array

playSong() – This function plays a random song from a random point for a given expression. 

stopSong() – stops all audio streams

getTitle() – This returns the name of the song that is currently being played. 

keyTyped() – This function checks if any key has been pressed. In this case, it checks if the spacebar has been pressed, and if so, it runs a block of code to get the pixels from the video feed and save it as a png image that is downloaded by the browser.

writeText() – This writes the decorative text to the screen

printTitle() – This updates the title of the currently playing song on the screen.

displayWords()- This function displays words corresponding to the given expression/mood at pre-defined positions in colors that correspond  to the mood.

windowResized() – This function helps make the page as responsive as possible. 

The first thing that is done in the draw loop is that all the text is displayed. Then, the face-api is triggered to pick up facial expressions, and once the expression has been processed, the algorithm will decide whether or not to do a style transfer. If the expression is determined to be “neutral” , then the feed remains unchanged, and if not, there is another block of logic to deal with activating the transfer for the given mood/expression. The logic for this block works in such a way that the algorithm checks the currently detected mood with the previously detected mood. This ensures that there is continuity of the video stream and that the music playback isn’t too jittery. Figuring out the logic for this part was the biggest challenge. My initial code was quite unstable in the sense that it would swap styles very unexpectedly, causing the music to change very rapidly, so you wouldn’t really be able to hear/see much because of how unstable it was. I recalled that in any feedback control system, using the previous output as part of the next input helps ensure that there is a smoother output, and so, incorporating such a feedback system really helped make the stream a lot smoother. 

d) Deployment (WIP)

The biggest issue right now is figuring out a stable way to host my project on the internet.  When it was tested, it always ran through a Python server, and once I put it up onto IMANAS, I realized that the IMA server did not have the same functionality as a Python server. So, I had to look out for alternative ways to host my project. One option that I was already reasonably familiar with is Heroku, 
My initial attempt at deploying it to Heroku was through a Python Flask application, but I ran into a lot of issues with pip dependencies. This was quite annoying and I later learnt that Flask and Heroku don’t really play well together, so I opted to use a Node app instead. After setting up a Node server, and setting the routes, the app was deployed! 
But, note, the keyword is “deployed”. Even though the app was deployed successfully, the page took an unreasonably long time to load up. This is because of the fact that I was loading 4 ml5js models onto the browser memory, and this took a really long time. And, once this was done, the page was extremely laggy and would sometimes cause the browser to crash, especially if there are multiple tabs open.  This is a circumstance that I did not anticipate, and so right now, the only stable way to run it is through a local server. While this is quite annoying and prevents me from deploying my project to a suitable public platform, I think this also raises some very important questions about ml5.js and its underlying framework, Tensorflow.js. Since both of these frameworks rely on front-end processing, there has to be suitable method of deployment, and until there is such a  method, I feel that running the heavy computations on the back-end would be a much better option. 

Final Thoughts/Future Work/ Feedback 

All in all, I’m pretty happy with the way things turned out, I was able to get all the elements working on time. However, one of the more glaring problems is the fact that the video stream is quite laggy and renders at a very low frameRate. Moon suggested that I use openCV to try to capture the face before feeding the stream to the faceAPI so that there would be fewer pixels rendered in real time. Dave and I sat down with Visual Studio Code LiveShare to try and integrate openCV but it would cause trouble on the ml5js side and since it was already quite late, we decided to shelf that feature for later. Ideally, that would make the video stream a lot faster. Another feature that I might integrate at some point is a function to maybe Tweet any photos you take via a Twitter Bot to a public Twitter page. Additionally, I’m still in the process of searching for a proper host that could serve my site in a reasonable amount of time without crashing.
After presenting in class, I learnt there were a few more minor adjustments that could have been made, after taking into account Cici’s, Nimrah’s and Tristan’s feedback. One thing that was brought up was the very apparent lag in doing the style transfer (which is something that I’m working on). However, at the actual IMA show, I found that there was another glitch which was that the program would often get “confused” when there were multiple faces in the frame, so I’m looking  for a way to make it actually detect a single face instead. 
But, again, I’m quite pleased with what I’ve put up, its been quite the journey, and as frustrating as it was at some points, I’m glad that I did it. 
ani.me – Final Project – Abdullah Zameek

As described in my previous post, I wished to explore GANs and generative art in my final project. In particular, I was very interested in cross-domain translation, and since then, I feel I’ve come a decent way in terms of understanding what sort of GAN model is used for what purposes. 
After doing some initial research, I came across multiple different possibilities in terms of the possible datasets I could use. 
Since this involves two domains, I need two datasets, namely human faces and anime faces. Getting the human faces dataset was quite easy, I used the popular CelebA dataset. Since this set came with over 250000 images, I decided to just use 25000 since that would speed up training time. (Later, I found out that 25,000 is way too much and would still be extremely slow,  so I opted for a much, much more smaller set) 

For the anime faces dataset, I had a few options to pick from. 

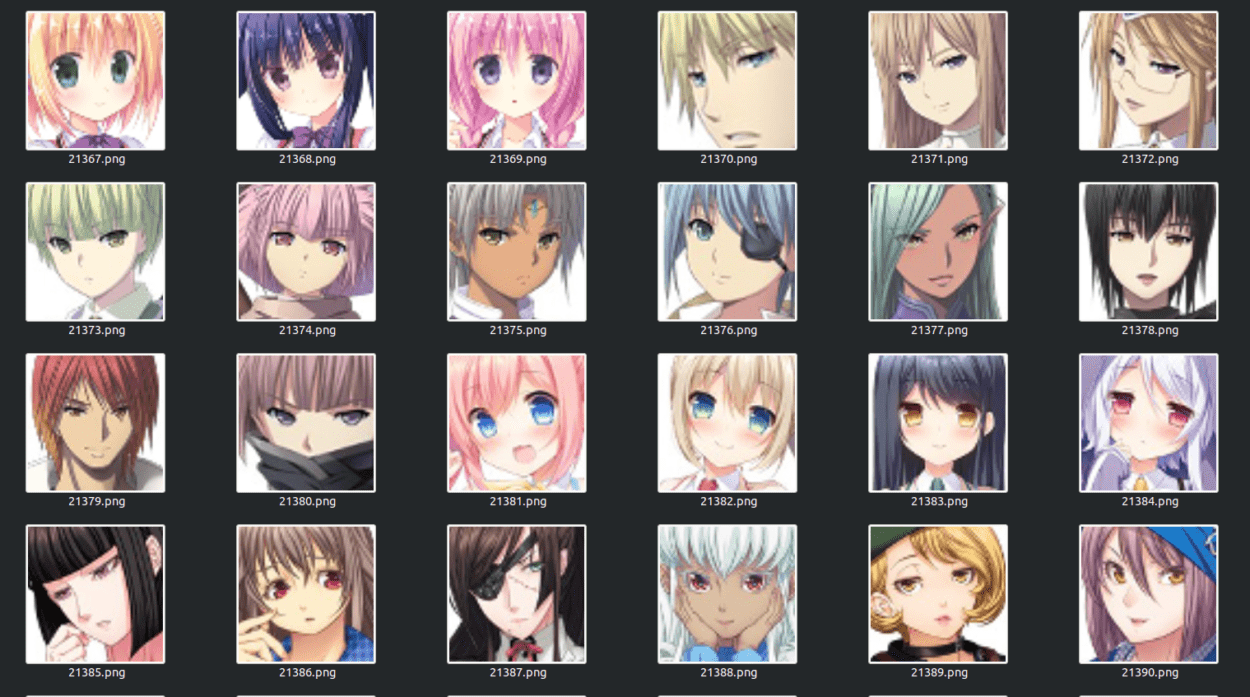
Getchu Dataset – This dataset came with roughly 21000 64×64 images
Danbooru Donmai – This dataset had roughly 143,000 images
Anime Faces – This had another 100,000 or so images. 

I decided to go with the Getchu dataset since that would mean an equal load on each GAN in the cycleGAN model.

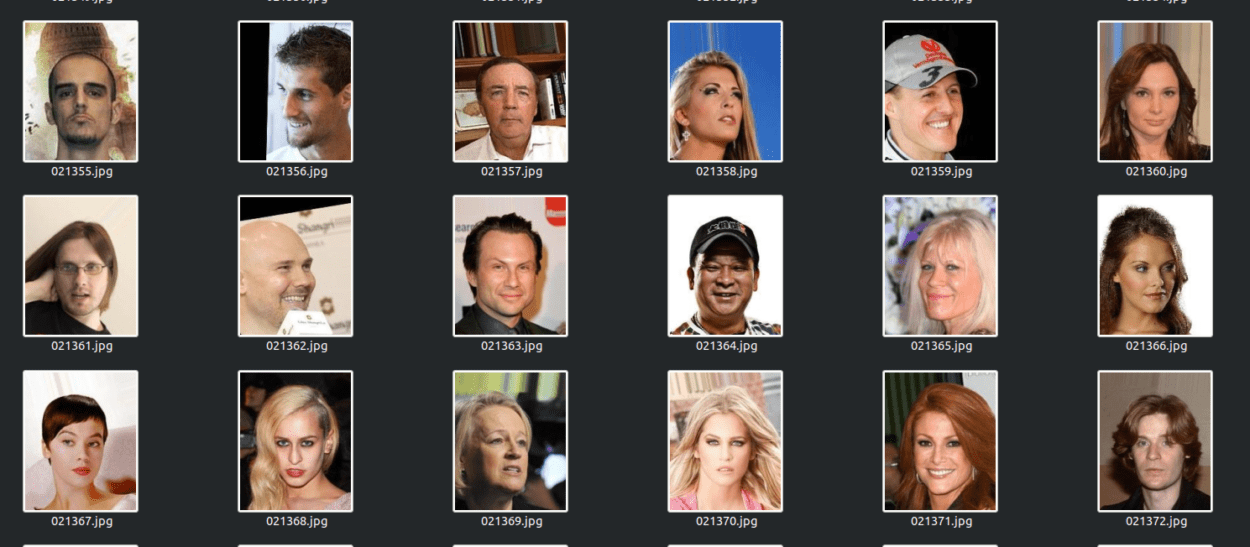
Here is a sample from both datasets. 

gg
Getchu Dataset
CelebA
CelebA Dataset

Having done the cycleGAN exercise in class, I came to understand how slow the Intel AI cluster was ,and proceeded to find other means to train my final project model. Aven mentioned that some of the computers in the IMA Lab have NVIDIA GTX1080 cards and are very well suited for training ML models. I then went on to dual-boot Ubuntu 18.04 onto one of them. Once that was done, I needed to install the necessary nvidia drivers as well as CUDA, which allows you to use TensorFlow-GPU. I severely underestimated how long it would take to set up the GPU on the computer to run Tensorflow. This stems from the fact there is no fixed configuration for setting up the GPU. It requires three main components – the Nvidia driver, the CUDA toolkit and CuDNN. Each of these have multiple different versions, and each of those different versions have different support capabilities for different versions of TensorFlow and The key idea is to grow both the generator and discriminator progressively: starting from a low resolution, we add new layers that model increasingly fine details as training progresses. This both speeds the training up and greatly stabilizes it, allowing us to produce images of unprecedented quality​_Ubuntu. So, setting up the GPU system took multiple re-tries, some of which resulted in horrendous results like losing access to the Linux GUI, and control over the keyboard and mouse. After recovering the operating system and going through multiple Youtube videos like this, as well as Medium articles and tutorials,  I was finally able to set up the necessary GPU drivers that can work
cat /usr/local/cuda/include/cudnn.h | grep CUDNN_MAJOR -A 2with Tensorflow-gpu.

Once, I had my datasets, I proceeded to look for suitable model architectures to use my images on. I came across multiple different models, and came down to a question of which one would be most suitable. 
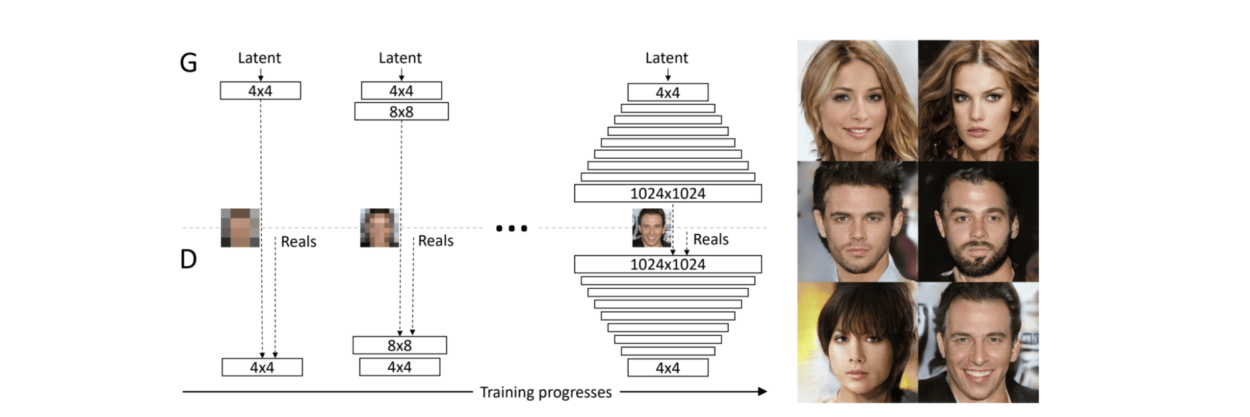
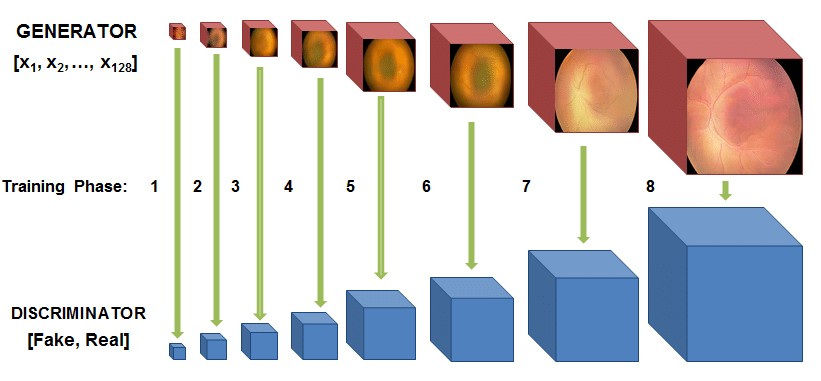
The first model I came across was called TwinGAN  which the author described as “Unpaired Cross-Domain Image Translation with Weight-Sharing GANs.” This particular model of GAN is based on an architecture called a Progressively Growing GAN or PCGAN. The author describes the architecture as “to grow both the generator and discriminator progressively: starting from a low resolution, we add new layers that model increasingly fine details as training progresses. This both speeds the training up and greatly stabilizes it, allowing us to produce images of unprecedented quality.”
It is clear that this architecture would allow for higher resolution outputs as opposed to the classic cycleGAN. 

Here’s an illustration of how PGGAN (the model that TwinGAN is based on) works.
PGGAN

pg

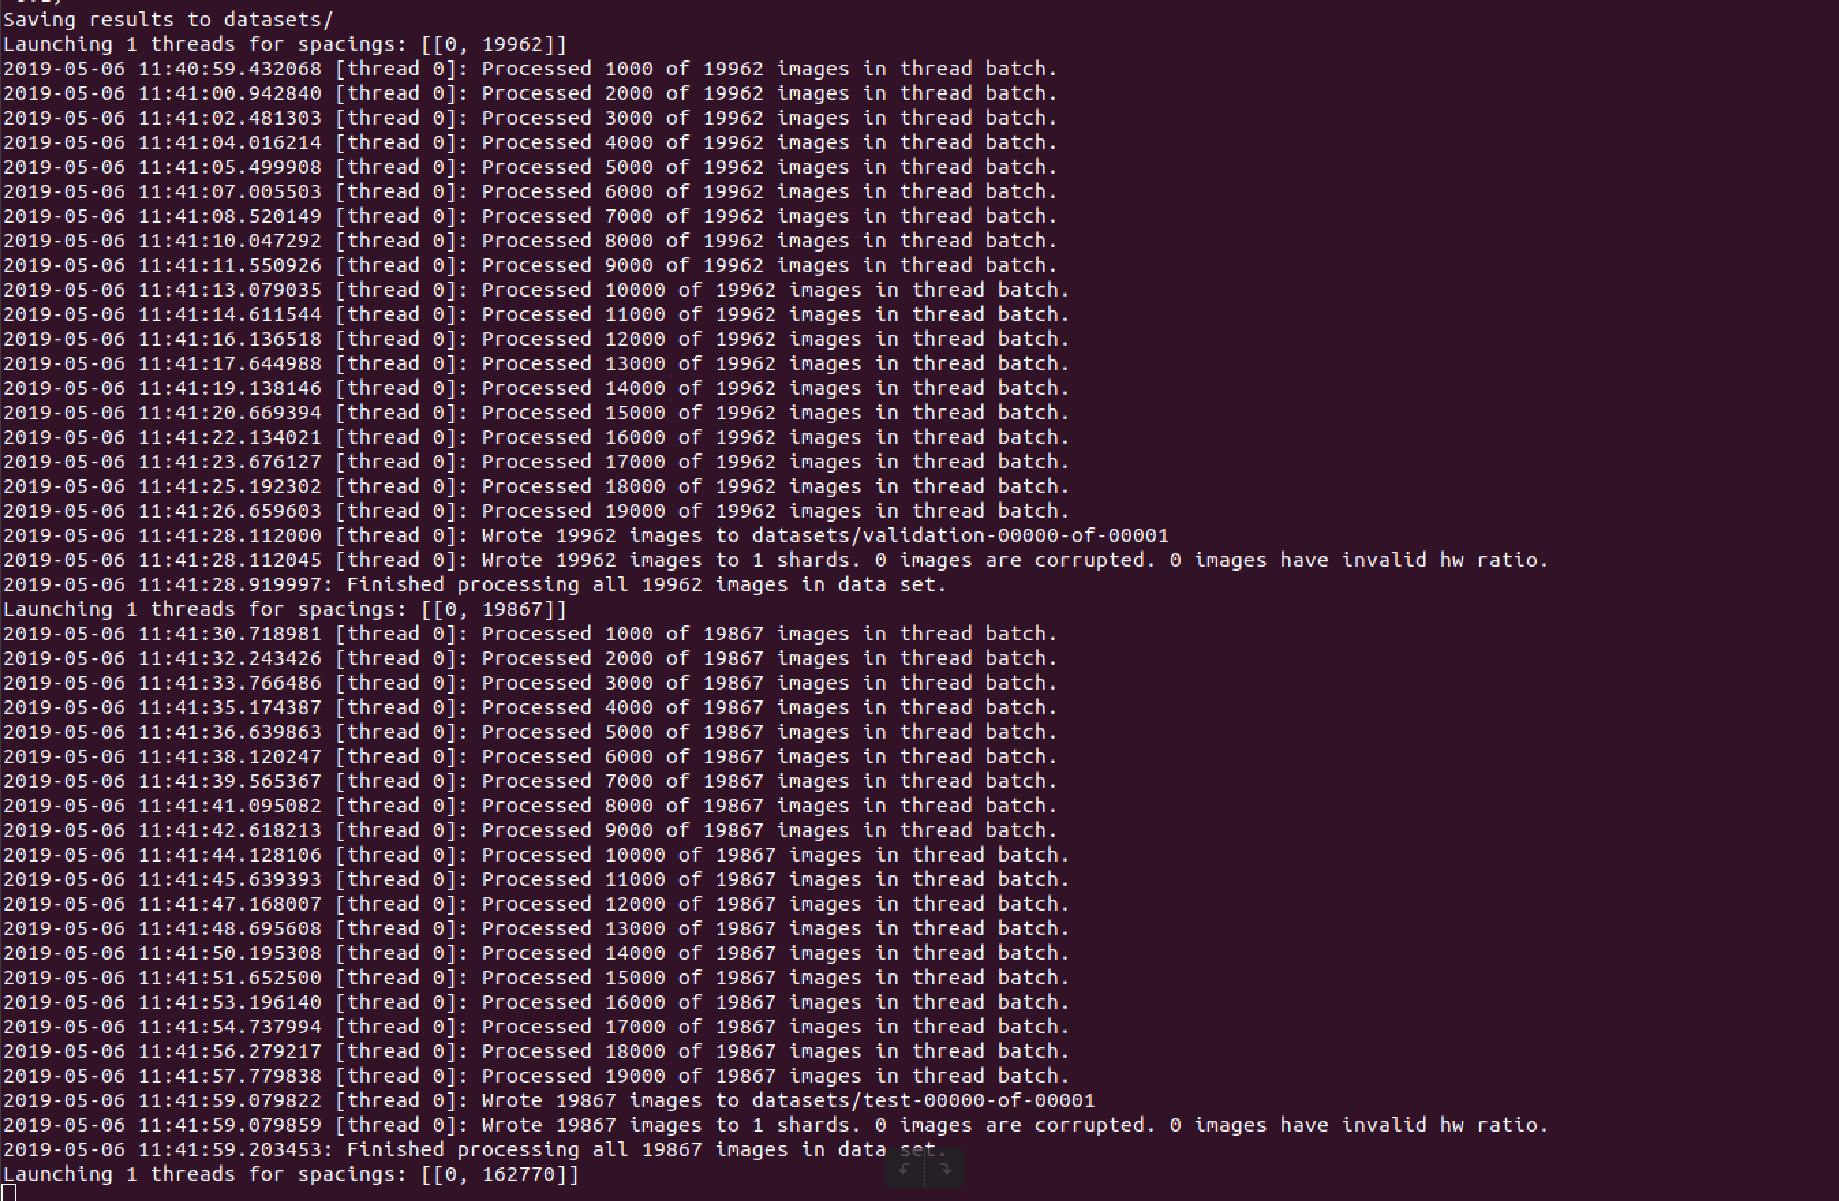
The first step was to prepare the datasets, and the author of the TwinGAN model had structured the code in such a way that the code takes in .tfrecord files as inputs instead of regular images. This meant there was an additional pre-processing step but that was fairly easy using the scripts provided.

preprop

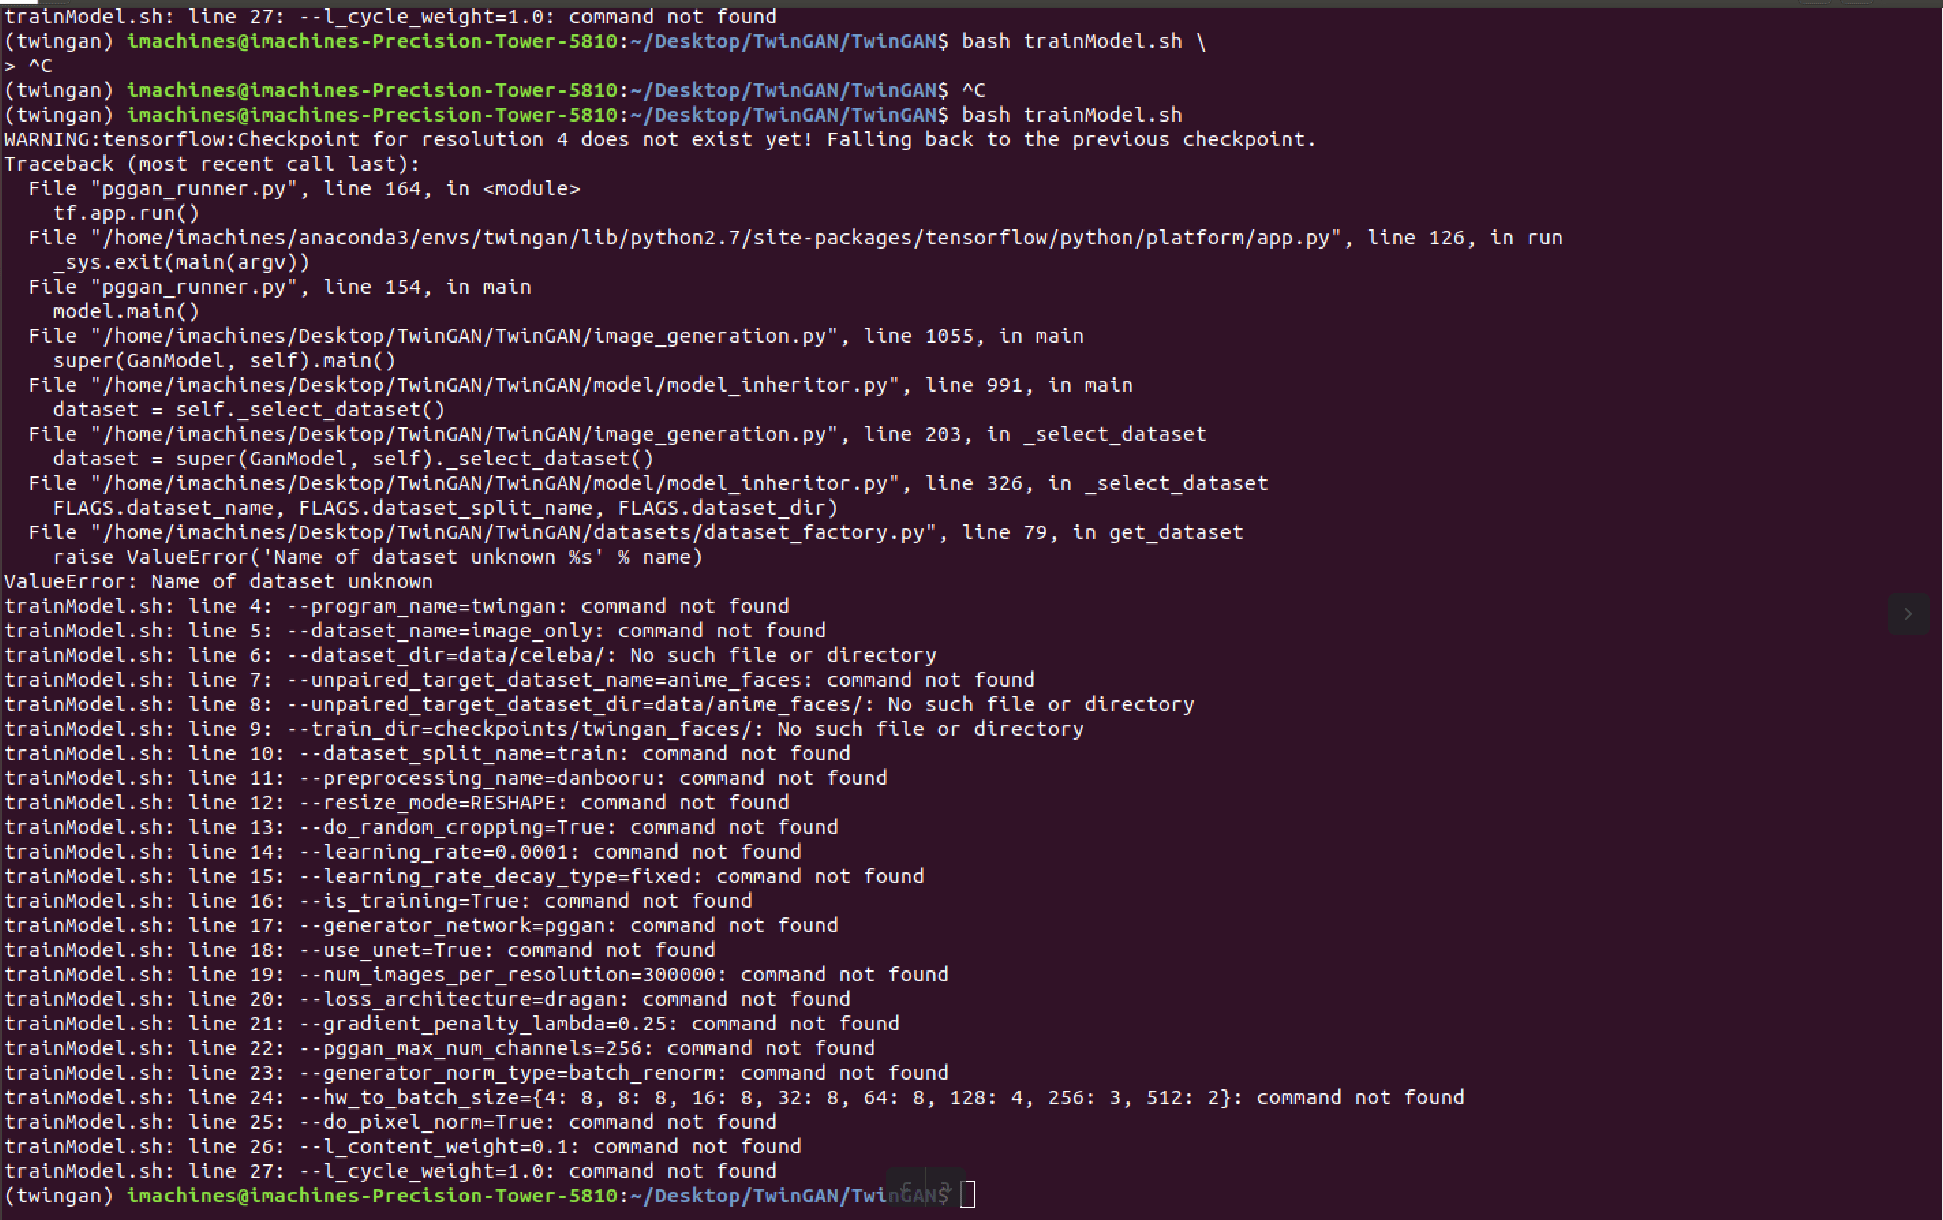
After that was done, it was a matter of setting up the training scripting script with the updated datasets and relative paths with the new training sets. Once that was set up, it was just a matter of launching the script and hoping that it would start the training task. However, it turned out that that wouldn’t be the case. I was presented with errors such as these. 

erorr1

Initially, I was presented with a few “module not found” errors but that was resolved fairly easily after installing the relevant module through pip/conda. 
With errors such as the one above it is difficult to determine from where they began propagating far since I had a very limited understanding of the code base. 
Prior to running the code, I set up a conda environment with the packages as described by the author. This meant installing very specific versions of specific packages. His requirements.txt is below:
tensorflow==1.8
Pillow==5.2
scipy==1.1.0

However, he did not mention which version of Linux he had been using, nor had he mentioned whether or not the code was CUDA-enabled, and if it was, which version of CUDA it was running on at the time. This made it difficult to
cat /usr/local/cuda/include/cudnn.h | grep CUDNN_MAJOR -A 2determine which version of CUDA/Tensorflow-GPU/etc would be most compatible with this particular codebase. 
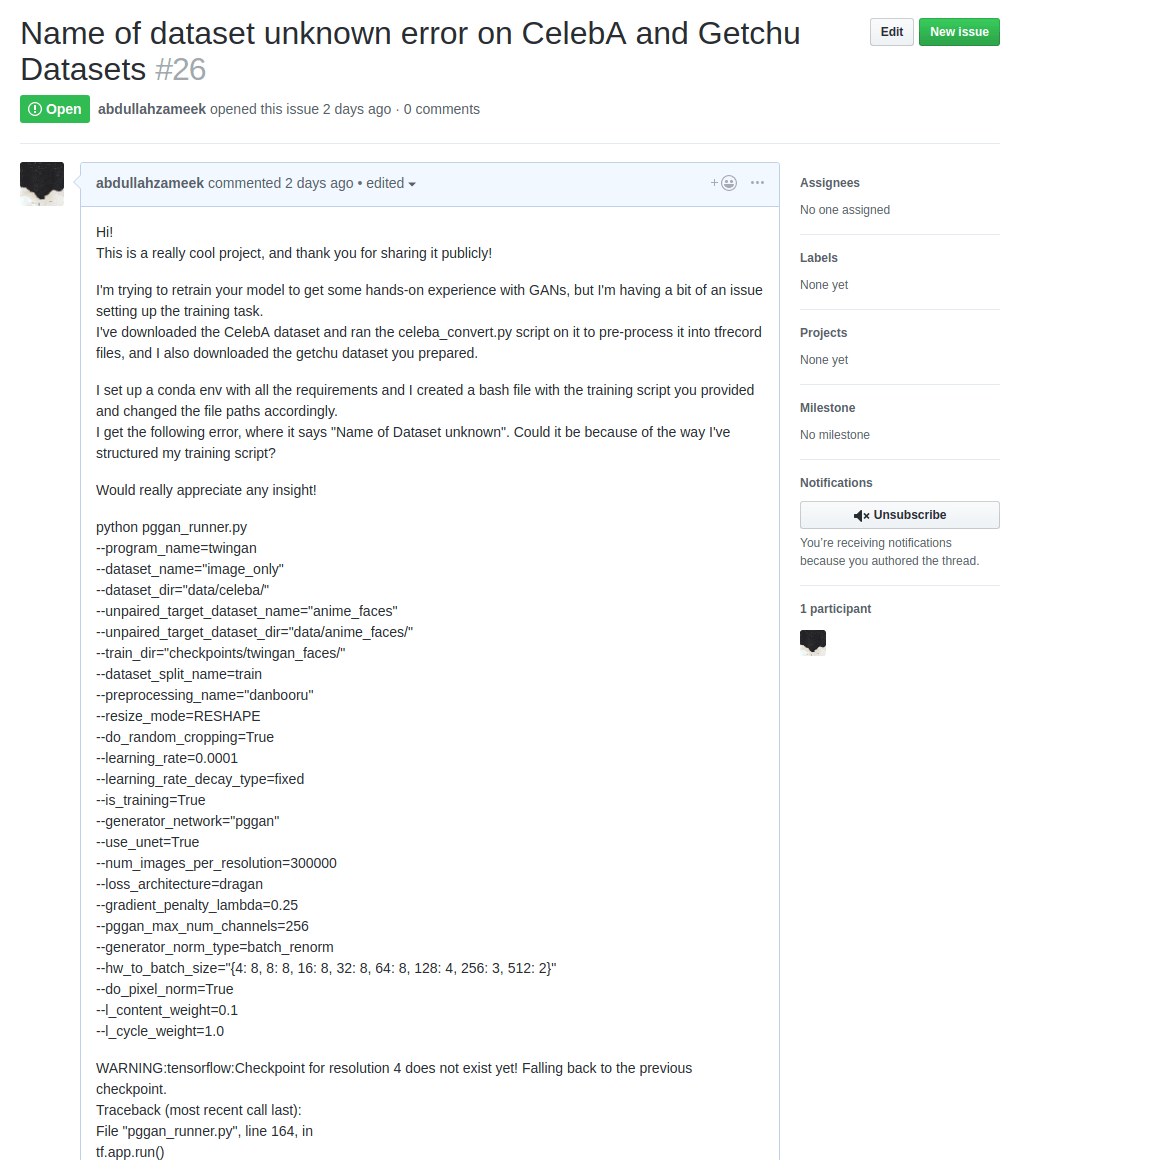
I went through the past issues on his Github repo, but could not find any leads on what the issue might have been, so I decided to open up an issue on his repo. issue

At the time of writing this post, two days have past since I opened the issue, but I haven’t received any feedback as of yet.

Seeing that I wasn’t making much progress with this model, I decided to move onto another one. This time around, I tried using LynnHo’s cycleGAN (which I believe is the base of the model that Aven used in class).  The latest version of his CycleGAN uses Tensorflow 2, but it turned out Tensorflow 2 required the latest CUDA 10.0 and various other requirements that the current build I set up didnt have. However, Lynn also had a model previously built with an older version of Tensorflow so I opted to use that instead. 
I took a look at the structure of the training and test sets and modified the data that I had to fit the model. 
So, the data had to be broken down into 4 parts : testA, testB, trainA, trainB.
A is the domain you’re translating from, and B is the domain you’re translating too. 

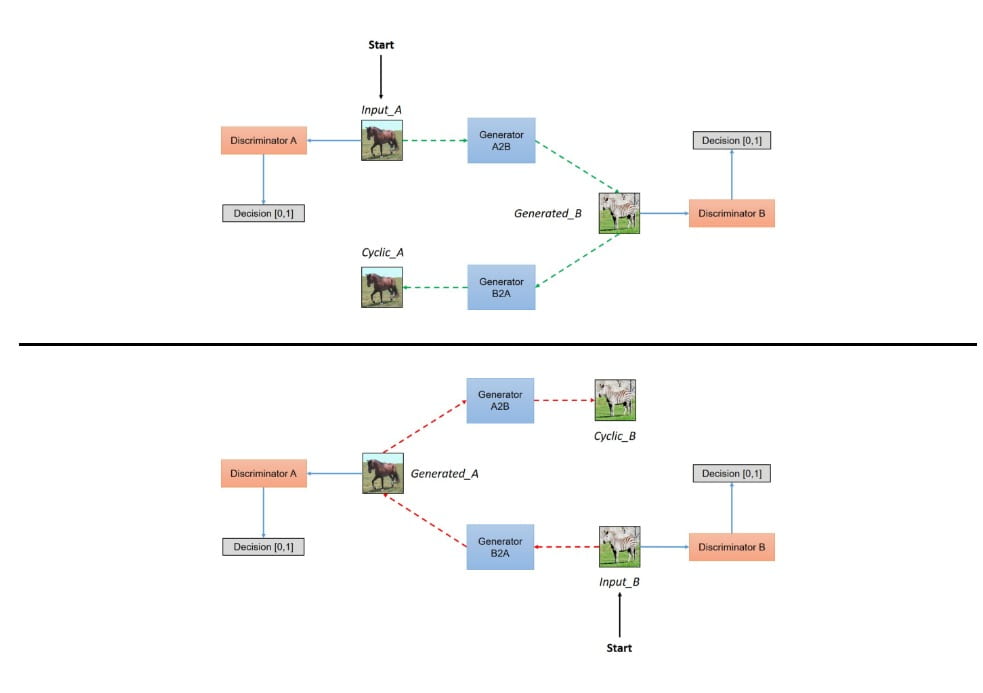
For the sake of completeness, here’s a illustration of how CycleGAN works. 
vg

The next step was set up the environment and make sure it was working. Here are the requirements for this environment: 

  • tensorflow r1.7
  • python 2.7

I looked fairly straightforward and I thought to myself, “What can go wrong this time?” Shortly after, I went through another cycle of dependency/library hell as many packages seemed to be clashing with each other again.
After I installed Tensorflow v.1.7, I verified the installation, it seemed to be working fine. 

tf

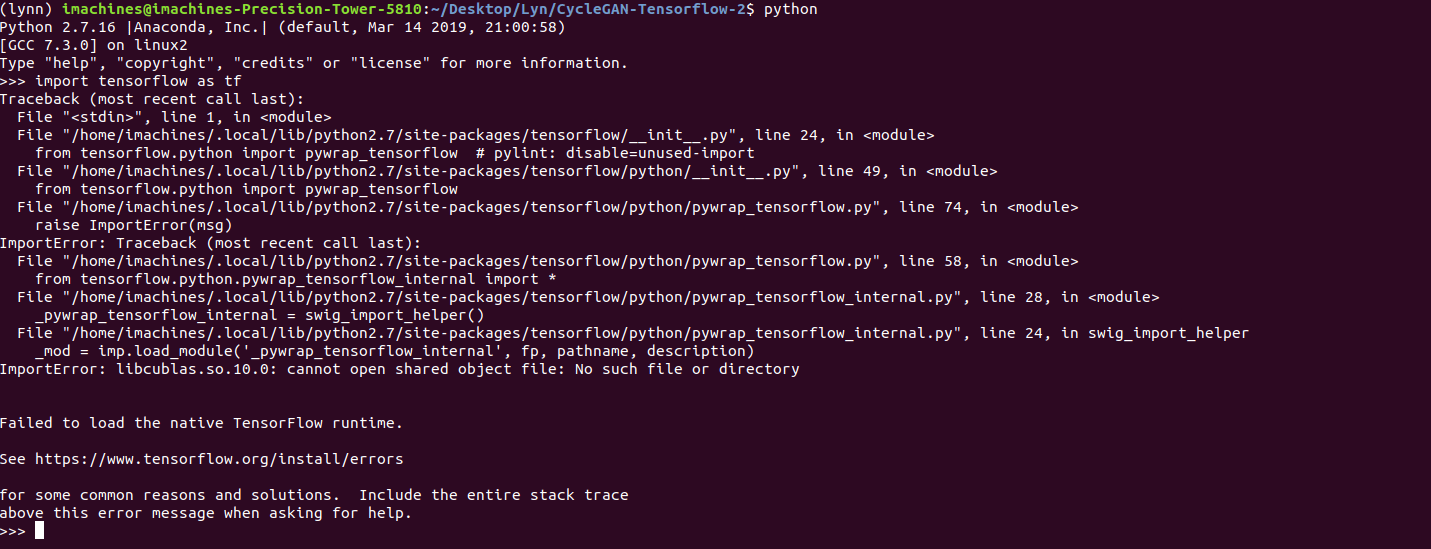
However, after I installed Python 2.7, the Tensorflow installation broke. 
tf

Once again, I had to deal with mismatched packages, but this time, it was incompatibilities between Tensorflow and Python.  After looking up what  
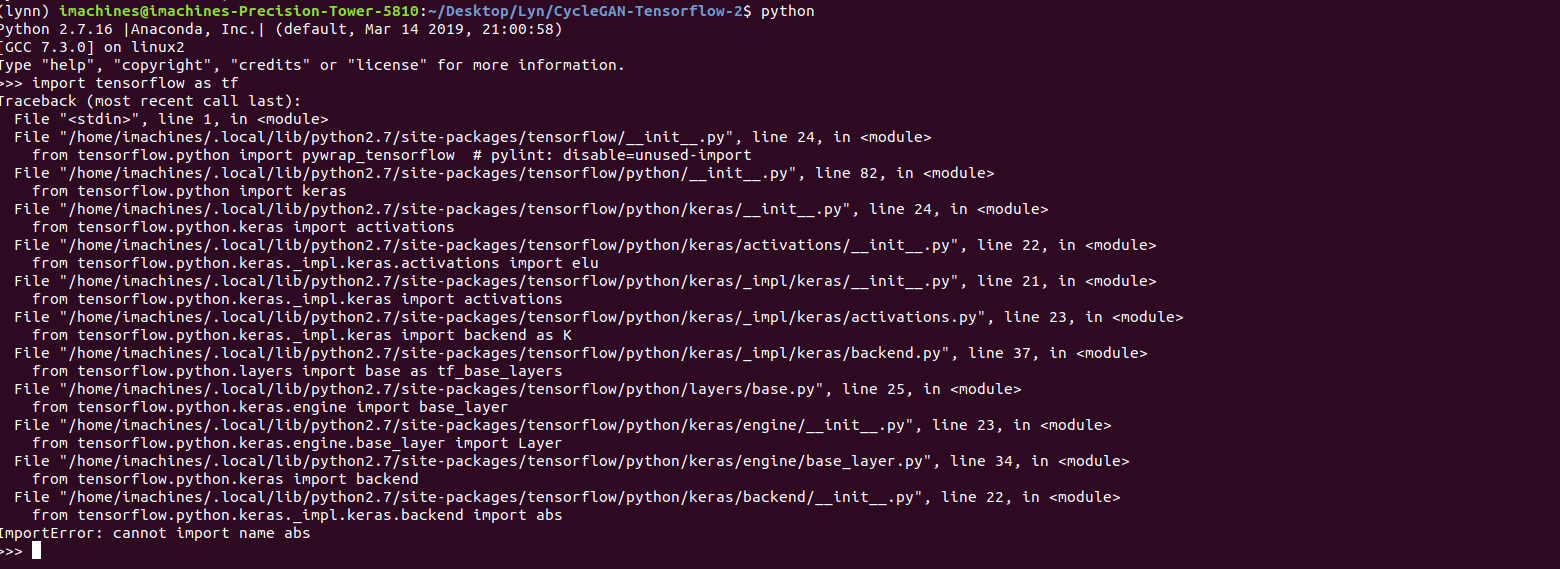
“ImportError: libcublas.so.10.0: cannot open shared object file: No such file or directory”, I then learnt that it was because Tensorflow was looking for the latest version of CUDA and CuDNN. One solution was to install CUDA and CuDNN through conda and once I did that, I tried to verify Tensorflow once again. This time, I got another error.
er

The error this time read, “ImportError: cannot import name abs” and it was spawned by tensorflow.python.keras which from my very brief experience with TF, was a generally troublesome module. After going through multiple fixes, the environment itself was ridden with many inconsistencies and it got to a point where the Python terminal couldn’t even recognize the keyword “Tensorflow” 


At this point, I hit a complete dead end, so I cleaned out the conda cache, deleted all the environments, and tried again. Once again, I was met with the same set of errors. 

Since it looked as if I wasn’t making much progress on these other models, I opted to use Aven’s Intel-AI cluster model since it was already tried and tested. Note that the reason why I opted to use another model was because my intention was to train it on a GPU and that would allow me to use a larger dataset to obtain weights in a relatively shorter amount of time. Additionally, it gave me the ability to explore more computationally complex models such as PGGAN that require way more resources than regular cycleGAN models. 

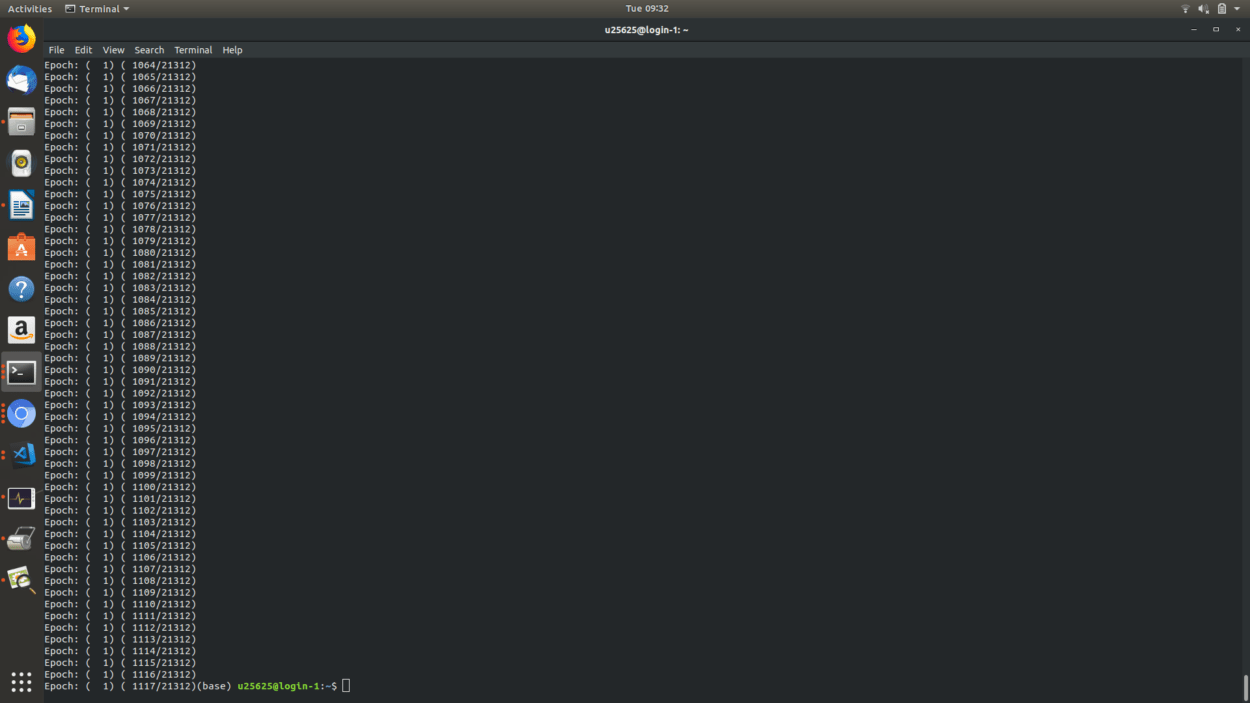
In any case, I began configuring the AI cluster optimized model with my dataset, and initially, I set it to run with 21,000 images (not intentionally). The outcome however, was quite amusing. After roughly 16 hours, the model had barely gone through one and a half epochs.
TrainFail4

Afterwards, I trimmed the dataset down greatly as follows:
Train A :   402
Train B :  5001 
Test A : 189
Test B:  169

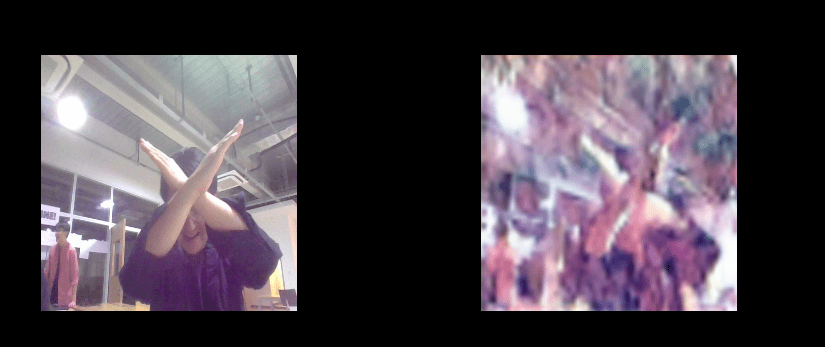
With this set, I was able to train the model to 200 epochs in just over two days. Once I copied the weights over and converted the checkpoints to Tensorflow.js, I put the weights through the inference code to see the output, and this is what I got. 
sr

The result is not what I expected because of the fact that I did not train on a large enough dataset, and I did not train for enough epochs. But, judging by the amount of time I had plus the computation resources at my disposal, I feel that this is the best model I could have put up. At the time of writing this post, another dataset is currently training on the Dev Cloud, which will hopefully render better results. 
With regards to the actual interface, my idea was that the user should be able to interact with the model directly, so integrating a real-time camera/video feed was essential. Enter p5js. 
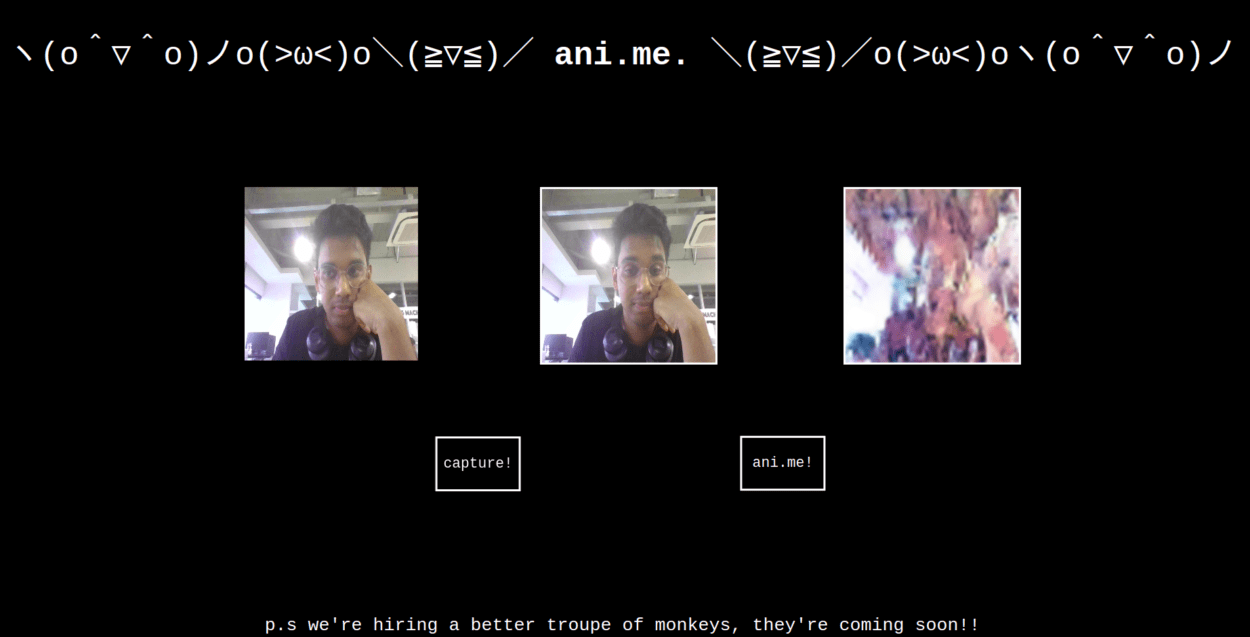
I wanted to present the user with three frames – a live video feed, a frame that will hold the picture that they click, and the GAN generated picture. Going from the second to the third frame was really easy, we had done it already in class, so doing that was really easy. The problem was going from the first frame to the second. I thought it would be fairly easy, but turns out it was actually a tad bit more complicated. This is because while p5js has the capability to “take a picture”, there is no direct way to actually render that picture back to the DOM. The solution was to extract the pixels from the necessary frame and then convert those to base64, and pass it through the src of the second frame using plain, vanilla JS,  

The actual layout is very simple,  The page has the three frames, and 2 buttons. One button allows the user to take a picture and the other initiates the GAN output. I’m really fond of monochromatic, and plain layouts, which is why I opted for a simple and clean black and white interface. I’ve grown quite fond of monospace, so that’s been my font of choice. 

gg

Additionally, I decided to host the entire sketch on Heroku, with the help of a simple Node server. The link to the site is here . (You can also view my second ML-based project for Communications Lab, sent.ai.rt, over here 
However, please do exercise a bit of caution before using the sites. While I can almost certainly guarantee that the site is fully functional, I have had multiple occasions where the site causes the browser to become unresponsive and/or clog up with computer RAM. This is almost certainly because of the fact that all the processing is done on the client side, including the loading of the large weights that make up the machine learning model. 

The main code base can be found here and the code for the Heroku version can be found on the same repository but under the branch named “heroku”

Post-Mortem:

All in all, I quite enjoyed the entire experience from start to end. Not only did I gain familiarity with GAN models (upto some extent), I also learnt how to configure Linux machines, work with GPUs, deal with the frustrations of missing/deprecated/conflicting packages in Tensorflow, Python, CUDA, CuDNN and the rest, learning how to make code in different frameworks (Tensorflow.js and p5.js , in this case) talk to each other smoothly as well as figure out how to deploy my work to a publicly view-able platform. If there were things I would have done differently, I would have definitely opted to use PGGAN rather than CycleGAN since it is way better suited for the task. And, even with CycleGAN, I wish I had more time to actually train the model more to get a much cleaner output.
On the note of hosting and sharing ML-powered projects on the web, I am still yet to find a proper host where I can deploy my projects. The reason why I opted for Heroku (other than the fact that it is free) is because I am reasonably familiar with setting up a Heroku app, and in the past, its proven to be quite reliable. On another note, I think it is important to rethink the workflow of web-based ML projects seeing that 
a) Most free services are really slow at sending the model weights across to the client
b) The actual processing on the browser seems to be taking a great toll on the browser itself, making overloading the memory and crashing the browser very likely. 
I think that, in an ideal scenario, there would be some mechanism whereby the ML-related processing is done on  the server side, and the results are sent over and rendered on the front end. My knowledge related to server side scripting is very, very limited, but had I had some extra time, I think I would have liked to have tried setting up the workflow in such a way that the heavy lifting was not done on the browser. That would not only lift the burden off the browser but would also make the user-experience a lot better.

sent.ai.rt – Final Project Proposal – Abdullah Zameek

sent.ai.rt – an interactive portrait  

concept :

sent.ai.rt is a real-time interactive self-portrait that utilizes techniques in machine learning to create an art installation which changes its behavior depending on the user’s mood derived from his/her facial expressions. The user looks into a camera and is presented a video feed in the shape of a portrait which they can then interact with. The video feed responds in two ways to the user’s emotion – it changes its “style” depending on the expression, and the web page plays back music corresponding to the mood. The style that is overlaid onto the video feed comes from famous paintings that have a color palette that is associated with the mood, and the music was crowd sourced from a group of students at a highly diverse university. The primary idea is to give individuals the ability to create art that they might have not been otherwise been able to create. On a secondary level, since the styles used come from popular artists such as Vincent Van Gogh, it is essentially paying homage to their craft and creating new pieces that essentially draw from their art pieces.

The phrase “sent.ai.rt” comes from the words “sentiment” which is meant to represent emotion which dictates how the portrait responds, and “art”. The “ai” in the middle represents the term “artificial intelligence” which is the driving force behind the actual interaction.

inspiration:

The use of machine learning in the arts has never been more prominent. With more technical tools coming out each day, artists have found new and exciting ways to display their craft. One such artist, Gene Kogan, was one of the pioneers in the use of machine learning learning to create interactive art. Inspiration for sent.ai.rt was heavily drawn from his project “Experiments with Style Transfer (2015)” where Kogan essentially recreated several paintings in the styles of others. For example, he re-created the popular Mona Lisa in styles ranging from Van Gogh’s “Starry Night” to the style of the Google Maps layout. Another popular artist, Memo Akten, also created a portrait based AI piece called “Learning to See : Hello World (2017)” which involves involves teaching an AI agent how to see. Thus, my project draws heavy inspiration from both these artists and their work in order to create a cohesive piece that takes into account human emotion and its interaction with computer based intelligence.

production:

The project is completely web-based – it uses standard web technologies such as HTML (which defines the structure of the website), CSS (which dictates how the website looks) and JavaScript (which allows for programming/algorithmic knowledge to be implemented). In addition to these, the website will also use several JavaScript-based frameworks, namely p5.js(which allows for a great deal of design and multimedia work to be done) and ml5.js (which is a machine learning framework). The machine learning components can be further divided down to two distinct tasks – recognizing human emotion, and applying the style related to that emotion to the video feed. The former is referred to as “sentiment analysis” and will be done with the help of an additional JavaScript add-on called FaceAPI. The latter is referred to as “neural style transfer” and will be done with the help of a ml5js functionality.

Additionally, the assets for this project such as the images and music have been procured from the Internet. The choice of music was determined by an online survey in a closed university group where students were asked to list songs that they associate with a particular set of moods.

In terms of feasibility, the technology exists to make this project reality and can certainly be extended to add further functionality (such as the ability to freeze, save and tweet out a frame from the feed) if necessary.

Week 12 : CycleGAN – Abdullah Zameek

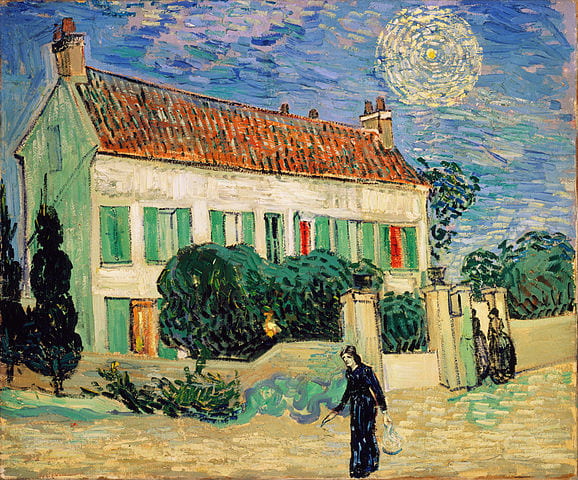
For this week’s assignment, I decided to use the vangogh2photo dataset that came with the cycleGAN model due to lack of time to procure a custom dataset. Not to mention the time taken it takes to train a GAN model.
That being said, this particular dataset took roughly 36-40 hours to train 200 epochs. 
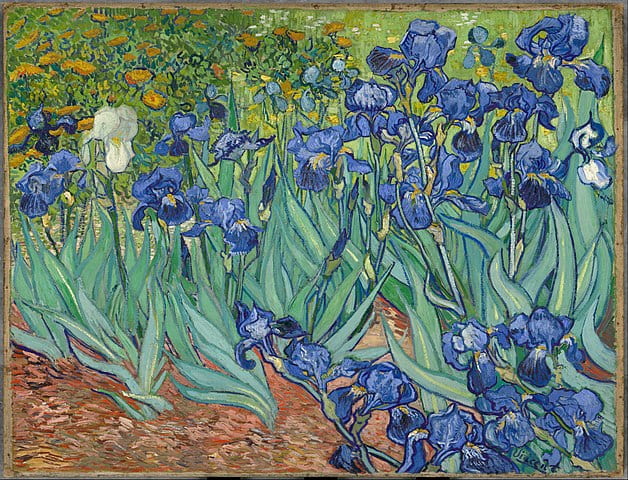
The results were interesting to say the least. I tested it with 3 different images, and unironically, I chose 3 paintings by Van Gogh to see how a model trained with his style would respond to the cycleGAN.
Additionally, what I did was that I recursively fed back the outputs of the GAN back into the model to see what sort of outcome I’d get. 

Here are the results :

iris
Irises – Van Gogh

Here are the images generated by the model

vanggh

wh
White House at Night

The results of White House at Night is my personal favorite because of the fact that the artifacts that came about on the first image kept getting amplified as you progress down to the other images. 

SN
Starry Night

Week 12 : An.i.me – Final Project Proposal – Abdullah Zameek

For the final project, I wanted to experiment with some sort of generative art since I felt there is no better time and place to try out some sort of generative model first hand. Throughout the semester, I kept using a recurring Pokemon theme in most of my projects because of how fond I am of the series and came across this article that spoke about machine generated Pokemon.
This time, however, I wanted to do something a tad bit different, but along the same lines. So, I decided to bring in one of my other all-time favorite interests – Anime. 

Idea

We’ve all heard of Snapchat and their filters that allow various kinds of special effects to be applied onto your face. But, I think we could go one step further than that with the help of generative models such as GANs. 
I came across this paper that described a GAN model to generate anime characters, and this proved as a great source of inspiration for my project. What if a given human face could be translated across domains from reality into an animated face? After a bit of reading, it turned out that this exact application is doable with GAN models. 

The project presentation is here

Implementation

As I described in the presentation, I investigated two different models – pix2pix and CycleGAN. The reason why CycleGAN is a clear winner is because of the fact that it allows for unpaired image-to-image translation. This is highly desirable because of the fact a given anime character dataset is not going to have a corresponding “human” face pair. This allows for a great deal of flexibility in creating a model where  the anime character images and human faces can be treated independently. 
One of the key papers in cross-domain translation is this paper published by Facebook AI and tackles the matter of Unsupervised Cross Domain Image Generation. 
Going forward, I haven’t honed in onto a very specific model as of yet, but there are some great CycleGAN derived models out there such as DRAGAN, PCGAN and most notably, TwinGAN , which is derived from PCGAN. 
With regards to the dataset, once again, there are multiple datasets out there and while I will make a decision within the next few days, there are some strong contenders such as TwinGAN’s Getchu  and the popular Danbooru dataset

I’m very much inclined to go with the Getchu Dataset with the TwinGAN model because of the ease of access. However, the resulting model is not directly compatible with ml5js or p5js so there will be a bit of interfacing to do there which I’ll have to tackle. 

Goal

The final outcome can be thought of as a sort of “inference” engine where I’d input the image of a new human face and then generate its corresponding animated face. Ultimately, by the end of this project, I want to get a better understanding of working with generative models, as well as make something that’s amusing.