Recitation 2: Arduino Basics by Elysia

CIRCUITS

In week two recitation, we were told to make four circuits. The first one is Fade, a simple circuit with LED and resistor. Using the code that we put on Arduino, the LED was able to slowly fade and light up based on the amount of current passing through it.
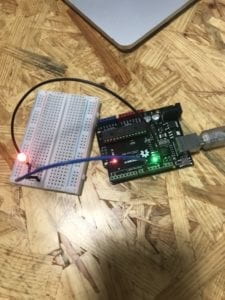
The second circuit is toneMelody. The scheme is very similar to the previous one, but the goal is to make a buzzer ring.

The last circuit is the most complicated one. This one is pretty unique because it is a very interactive circuit as we’re going to play a game with it. The game was whoever pushed the button the fastest win. The coding itself is already very complicated. We managed to make it and play with the circuit.

Unfortunately, we were not able to make the fourth circuit. The objective was to make it a four-player game, not just two. We tinker with the circuit for a while, but in the end, we couldn’t make any significant progress.

QUESTIONS

Q1: Technology has always played a big part in our daily lives. It appeals to people because the idea of an entertaining interaction is simple and nice. But often, we limit the amount of interaction that is going on between us and the technology. In the text Physical Computing, humans are described as a being that only had one eye to focus on one certain spot and one hand with five fingers. Even though our interaction with the circuit is so minuscule and limited, we are learning to appreciate how far we’ve gone with technology. So even if our definition of interaction is not as broad as it can be applied, we are still learning and finding something new each project.

Q2: We use the 10K resistor to regulate the amount of current flowing through the LED. It is very important because if we do not use the resistor, the chances of having a short circuit are very high. Therefore, we lessen the amount of current flowing as necessary.

Q3: If I have 100,000 LEDs, I would make an interactive tunnel that would light up whenever someone walk through it. The tunnel will be filled with sensors that would detect touch and movement and send signals to the LEDs to light it up.
RECITATION 1 : ELECTRONICS & SOLDERING – Elysia

BUILDING ELECTRICAL CIRCUITS AND SOLDERING

During the recitation, we were told to pair up and build three separate circuits. Before we start, we gathered the necessary component; A breadbox to put our component and test our circuit designs, a voltage regulator to maintain the constant voltage level, a resistor to limit the current flowing to other components, a capacitor that stores electrical charge, a variable resistor or potentiometer that works as a voltage divider, a Light-emitting Diode (LED) and a speaker that signifies the output of the current in the circuit, a button switch to connect and disconnect the circuit, a handful of wires, and a 12 volt power supply.

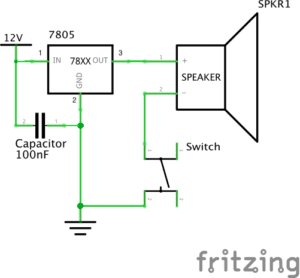
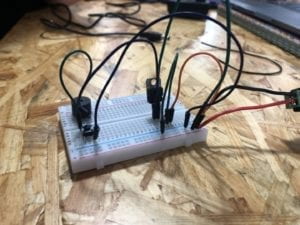
The first circuit was the Doorbell, we managed to follow the instructions albeit with some difficulties figuring out the vertical and horizontal flow of the breadbox. After a few tries, the circuit worked and the speaker gave a faint sound.

doorbell

Doorbell Circuit

Next is the soldering workshop, we connected an arcade button to two separate wires so that it could be used in the next circuits.

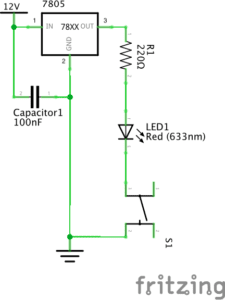
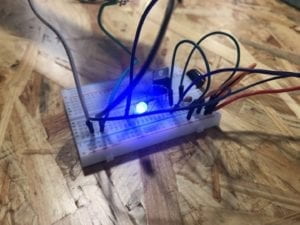
When we made the Lamp circuit, we tried out both the push button and the arcade button. The result was that the arcade button works significantly better. We later found out it was because we put the push button orientation wrong, there are certain legs that should be wired together. This is also why our speaker in the first circuit only gave out a faint sound, unlike other speakers.

Lamp

Lamp Circuit

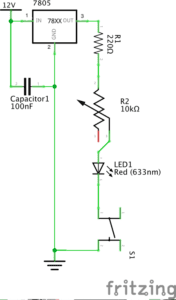
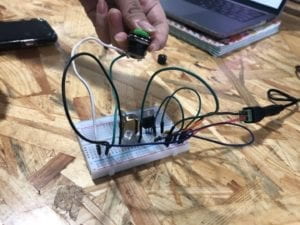
The last circuit was the dimmable lamp, it was quite similar to the previous circuit. The only difference was the use of the potentiometer. At first, the lamp didn’t light up, it turns out we didn’t put the wires in the correct order for the potentiometer, because there are input and output ports. Even though the circuit works, due to the limited time, we weren’t able to try the dimmer.

circuit3: dimmable lamp

Dimmable Lamp Circuit

In conclusion, we learned a lot about how circuits work and the many ways to interpret interactivity that range from small circuits to more advanced forms such as big art projects.

READING

The Art of Interactive Design was quite an interesting read as I have never considered what interactivity genuinely means. The passage stated that anything can be interactive, the degree just varies. In regard to the circuits that we made during recitation, I believe that it involves a substantial form of interactivity. We interact to the circuit by putting the components in certain order and it responds by giving us the outcome, both good (the circuit works) or bad (the circuit didn’t work or short circuit).  

Furthermore, I believe that the utilization of Interaction Design and Physical Computing in an era where everything is evolving rapidly will certainly benefit the artist in exploring areas that never previously considered. As quoted from the reading, “Interactivity is the core idea of computing”, this allows the artist to examine and focus on how people interact with the product, both physically and emotionally. Thus, creating art that would connect more with the people who sees it.