Partner: Mimi
Step 1: Build the circuit
Materials:
1 * 42STH33-0404AC stepper motor
1 * SN754410NE ic chip
1 * power jack
1 * 12 VDC power supply
1 * breadboard
1 * Arduino
Jumper cables


Process:
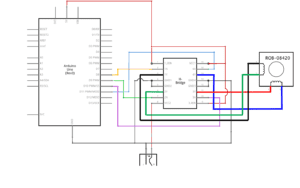
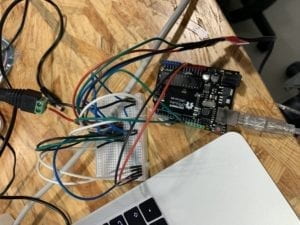
The schematic diagram is complicated at first sight and simply understanding the circuit cost several minutes. While connecting the components, I realized that the circuit was more symmetric and neater than I thought it will be, which makes the mistake quite obvious if the connection was wrong. After double-checking the connection of each jumper cables to avoid the “potential damage to the computer,” I uploaded the code in the example and the stepper motor started to rotate regularly. To further test the circuit, I made some change to the number in the bracket of delay to adjust each of its rotating time. The stepper motor worked as I expected.
Step 2: Control rotation with a potentiometer
Materials:
1 * 42STH33-0404AC stepper motor
1 * SN754410NE ic chip
1 * power jack
1 * 12 VDC power supply
1 * breadboard
1 * Arduino
Jumper cables
1 * 10K potentiometer

Process:
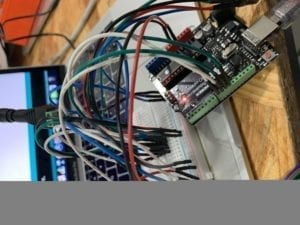
Though step 2 only required us to add a potentiometer into the circuit, I was confused about how to connect the three legs of the 10k potentiometer to their matching access port. Since the 10K potentiometer looked different with the potentiometer we used before. After seeking help from the assistant, I ultimately made it clear that the leg which is on the top of the potentiometer should be connected to the input port. And the other two legs respectively should connect power and the ground. Another problem I confronted with was how to edit the code so that the stepper motor can rotate as I rotate the potentiometer. At first, I defined some new variables to describe the value of the potentiometer and try to use the map function to link it with the stepper motor. But soon I realized that the variable was already described in the code and all I need to do was to add a map function. This time it also worked, yet there was some apparent delay time between rotating the potentiometer and the stepper motor changing its position.
Step 3: Build a drawing machine
Materials:
2 * Laser-cut short arms
2 * Laser-cut long arms
1* Laser-cut motor holder
2 * 3D printed motor coupling
5 * Paper Fasteners
1 * Pen that fits the laser-cut mechanisms
Paper

Process:
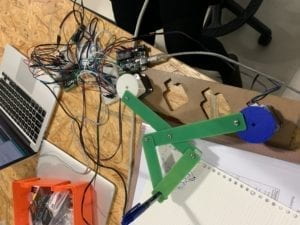
On the foundation of step 1 and 2, the third requirement seemed simple, yet the most interesting. We assembled two devices together with all the other components. During the process, the paper fasteners would drop from time to time and it was hard to fix the arms tightly together. The first time the distance between the pen and the paper was too far so we put some books under the paper to make them exactly just touch each other. Our operation afterward was smooth and though the final work was just like a doodle of a kid, it means a lot to us.
Question 1:
What kind of machines would you be interested in building? Add a reflection about the use of actuators, the digital manipulation of art, and the creative process to your blog post.
I will be interested in building a machine that can record and mimic the movement of the planets and the fixed stars in the universe to help the celestial observer observe the motion of the galaxy. To realize this program, sensors and observing machines can be installed in spaceports to record positions of stars at any time. The real-time data will be transferred back to the research centers on the ground. According to the data that reflects star’s positions, the stepper motors will change their position accordingly and planetary models installed on the stepper motors can also move their position to mimic the real-time movement of stars in the universe.
The theory is basically similar to the drawing machine. The observing machine serves as the potentiometers to change the information that computer receives, then the real-time data will be transmitted to the stepper motors which will act as the commands and instructions that the computer gives.
Question 2:
Choose an art installation mentioned in the reading ART + Science NOW, Stephen Wilson (Kinetics chapter). Post your thoughts about it and make a comparison with the work you did during this recitation. How do you think that the artist selected those specific actuators for his project?
Among all the programs mentioned in the reading, Virtual Brownies is a really interesting project which synthesizing the virtual world on the computer screen and the reality and catering to the nowadays sweeping trend of virtual reality. The feature of this project that changes, in reality, will also cause accordingly influence to the virtual world adds to the attractiveness and playability of this art installation. Comparing to our drawing machine, it leaves more space for users to explore, this can be more entertaining. It also shows a strong sense of interactivity as those small digital creatures will react to the changes in the reality following the regularity. To realizing this device, the artist may need a camera on the back of the device to observe the changes happening in the real life and then scan some specific objects onto the screen and then interact with the small digital creatures.