Lab Date: Feb 15, 2019
Instructor: Marcele
Lab Partner: Daniel Qin
Aim of Today’s Lab: build three sets of circuits breadboard-based and learn how to solder
Circuit 1: Door Bell
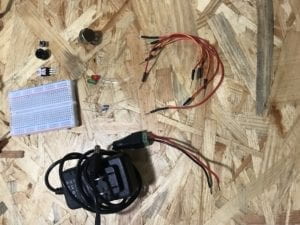
The material used: 1 * Breadboard, 1 * Buzzer, 1 * LM7805 Voltage Regulator, 1 * Push-Button Switch, 1 * 100 nF (0.1uF) Capacitor, 1 * 12 volt power supply, 1 * Multimeter, Several Jumper Cables (Hook-up Wires), 1 * Barrel Jack
I began by collecting all the materials that I needed to buid the circuits. I read the instructions of the 3 sets of circuits we were going to make for the lab today. The circuits and the introduction of each electrical components are straightforward, which saves a lot of time.
We finish the first circuit quickly, but we still face a little problem about the breadboard. At beginning, I am a little confused about the current flow of different part inside the breadboard. With the help of Leon, we figure out the direction and succeed to make the buzzer have sound.
But we suddenly found that the voltage regulator became so hot after test, we assume that we might put it in a wrong side. We try agin after reversing it and everything perfect.
Circuit 2: Lamp
materials: 1 * Arcade Button, 1 * 220 ohm1 * Breadboard, 1 * LM7805 Voltage Regulator, 1 * Push-Button Switch, 1 * 100 nF (0.1uF) Capacitor, 1 * 12 volt power supply, 1 * Multimeter, Several Jumper Cables (Hook-up Wires), 1 * Barrel Jack
Only a few components change compared with the first circuit. We feel fluent in the first part and no big problem happened. We replaced the old button with the soldered arcade button we made from soldering.
Soldering part

Circuit 3: Dimmable Lamp
materials: 1 * Arcade Button, 1 * 220 ohm1 * Breadboard, 1 * LM7805 Voltage Regulator, 1 * Push-Button Switch, 1 * 100 nF (0.1uF) Capacitor, 1 * 12 volt power supply, 1 * Multimeter, Several Jumper Cables (Hook-up Wires), 1 * Barrel Jack, 1 * 10K ohm Variable Resistor (Potentiometer)
The third circuit challenges a little because it is more complicated. We spent more time on it. Firstly, we found we put each component so close that there is limited space for the variable resistor, and the wires are too much to check. Therefore, we rearrange their position and adopt different colors of wire for the check convenience.
However, we still can not make the LED become light, we checked again and found we lose a wire between the voltage regulator and the power supply. After that, we can light it up and change the level of light by using the variable resistor.
Readings Questions
- In “What Exactly Is Interactivity”, the author defines the interactivity, which is not simply what I previously thought. It is more complicated because it involves people and other factors organically. It is not merely a side-to-side process, but mutual communication. Effective interactivity need at least three standard steps, listen, think, and response. If I apply this evaluation into the work, we can understand better about the inside value of our art design and work. Meanwhile, a different level of interactivity requires us to improve and promote our work consistently.
In terms of the task I made in the recitation, I think at the beginning when every component is put on the table, they have no interaction because they have no communication. But I know that I have a mission to connect them. This goal of interactivity pushes me to design, to think, to organize, and to make. During this period, I start to communicate with these components, they are no longer a single product. I use wire to alive them. When I success to make the buzzer have the sound, I feel a sense of enjoyment, I make them alive and interactive with the outside environment. I push the button and I make a difference. And as a creator, I receive the feedback from my work. When the LED have the light, people can see the red and green light. When I change the resistor level, I can see literally the change of the level of light. We are communicating. When the circuit doesn’t work, I need to think about how I can improve it. Such kind of thinking is also a component of interactivity. In other words, interactivity should be the core and foundation of our work and design.
2. By watching the video, I understand the significance of both physical computing and interaction design. The former and the latter serve each other to create modern interactive. Zack Lieberman applied the new technology to create new art, which shows a current popular trend and also indicates a future trend. Physical computing is a powerful tool which helps us to realize creative interactive ideas.