Inspiration
The main inspiration for my project is a video I saw. It’s an “interactive” wall where the silhouette of Disney characters will be imprinted on people passing by.
First I thought this was an interactive project where the silhouette was generated by some kind of programming. I was amazed by how vivid the visuals looked. But in the end, they revealed that it was actually performers in Disney costumes dancing behind the wall. To be honest, I was a little disappointed.
While we were learning Posenet and movement detection in class, it reminded me of this project. And I thought, why don’t I create a “smart” version of this project for my final? So that’s when I decided my final project for this class would be, an interactive program that would generate Disney characters’ features onto the user’s bodies.
The choosing of the characters
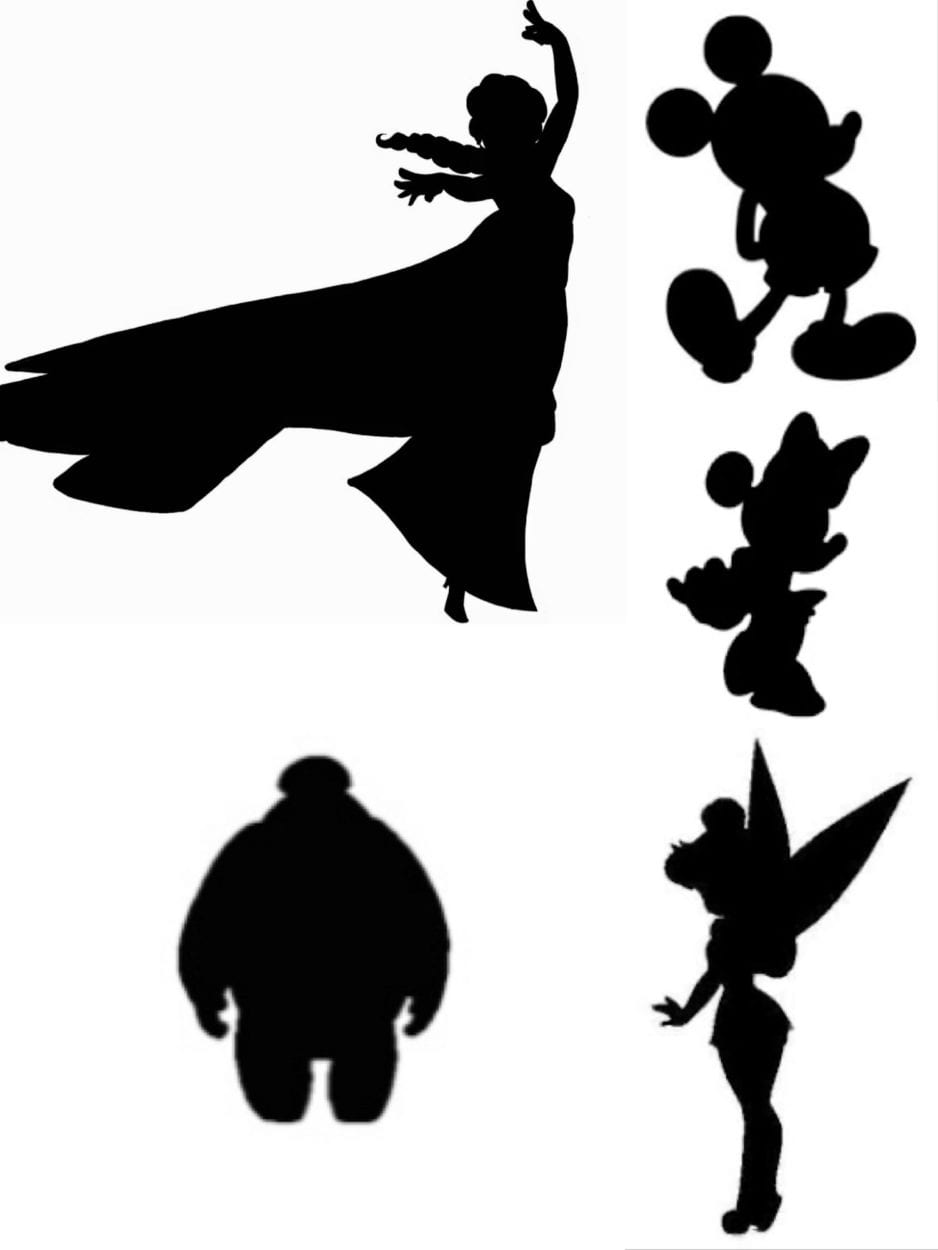
The first step to start off this project was to choose the characters I would use for my project. I kept two things in mind while I researched on what characters I should use. First, it should be human-like, as in they would use two legs to walk. It would be hard to shadow a human with Bambi features. Second, since I am using partial features, I need the character to be noticeable and well-known. So for people who aren’t that familiar with Disney, they might still know which character it is. So based on these standards, I narrowed my options to five characters. They are Mickey Mouse, Minnie Mouse, Baymax, Tinker Bell and Elsa.
Visual Elements Design
I had an idea o the visual and animation design of each and every character. For Mickey and Minnie, the ears, the gloves, and the shorts/skirt are the most important features. For Baymax, basically the entire outline of his body. For Tinker Bell, it would be the wings, And for Elsa, it’s the magic power she has to snow and the long dress that identifies her. With these features in mind, I started off with creating the still visual elements first.
- Still image visual elements
I thought it would authentic if I just draw all the character features using p5.js. So here is the first version of the Mickey and Minnie ear I drew in p5. I used ellipse and curveVertex to draw these two graphics. When I combined it with Posenet, it turns out it was slowing down the detection.
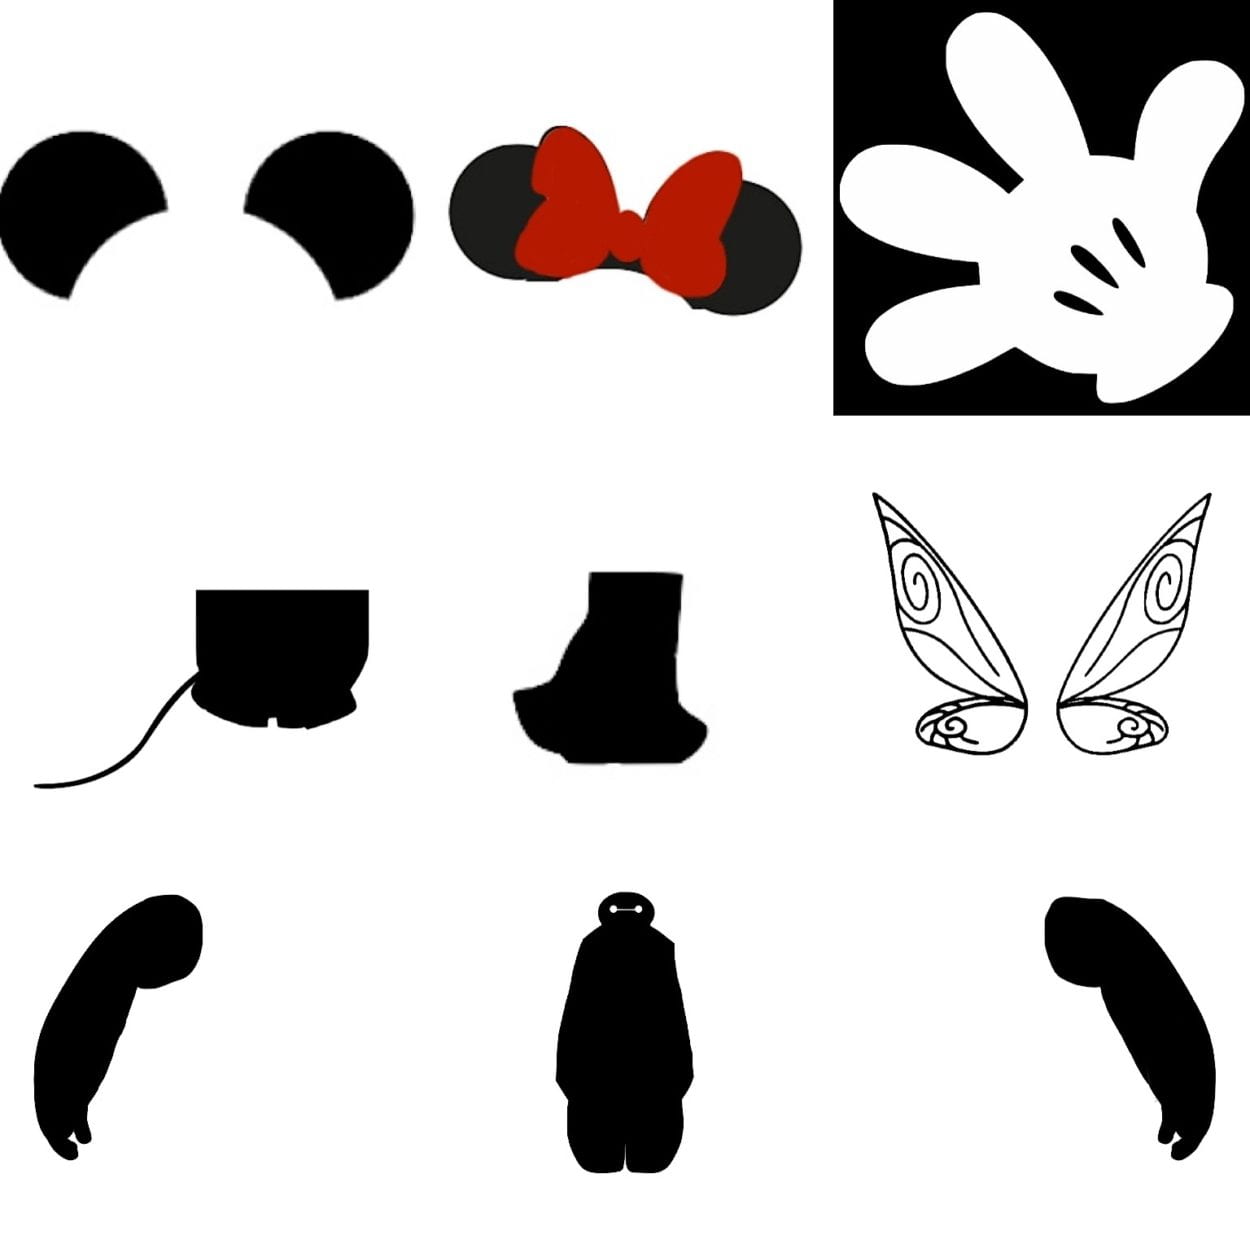 Professor Moon then suggested that it would be better if I just use already existing PNG images for all the still visual parts. So I took his advice and searched online for images of all these characters. At first, I was searching for images of the exact front of the character and tried to use it as a whole. But it turned out to be dull and too much. Then I thought I would cut out parts of the character that would represent the feature. And then just leave the rest of the parts to show the user’s own body. With this thought in mind, I started cutting up all the features for the characters. In the end, these are all the still images I used for visuals.
In between, I did try to add other still images into the visual elements. For example, I tried to add shoes for Mickey and Minnie, I tried to add the long dress for Elsa, and I tried to use the entire silhouette of Baymax (not having the two arms separate). But I ultimately didn’t use them because it was not well inserted and messed up the visuals.
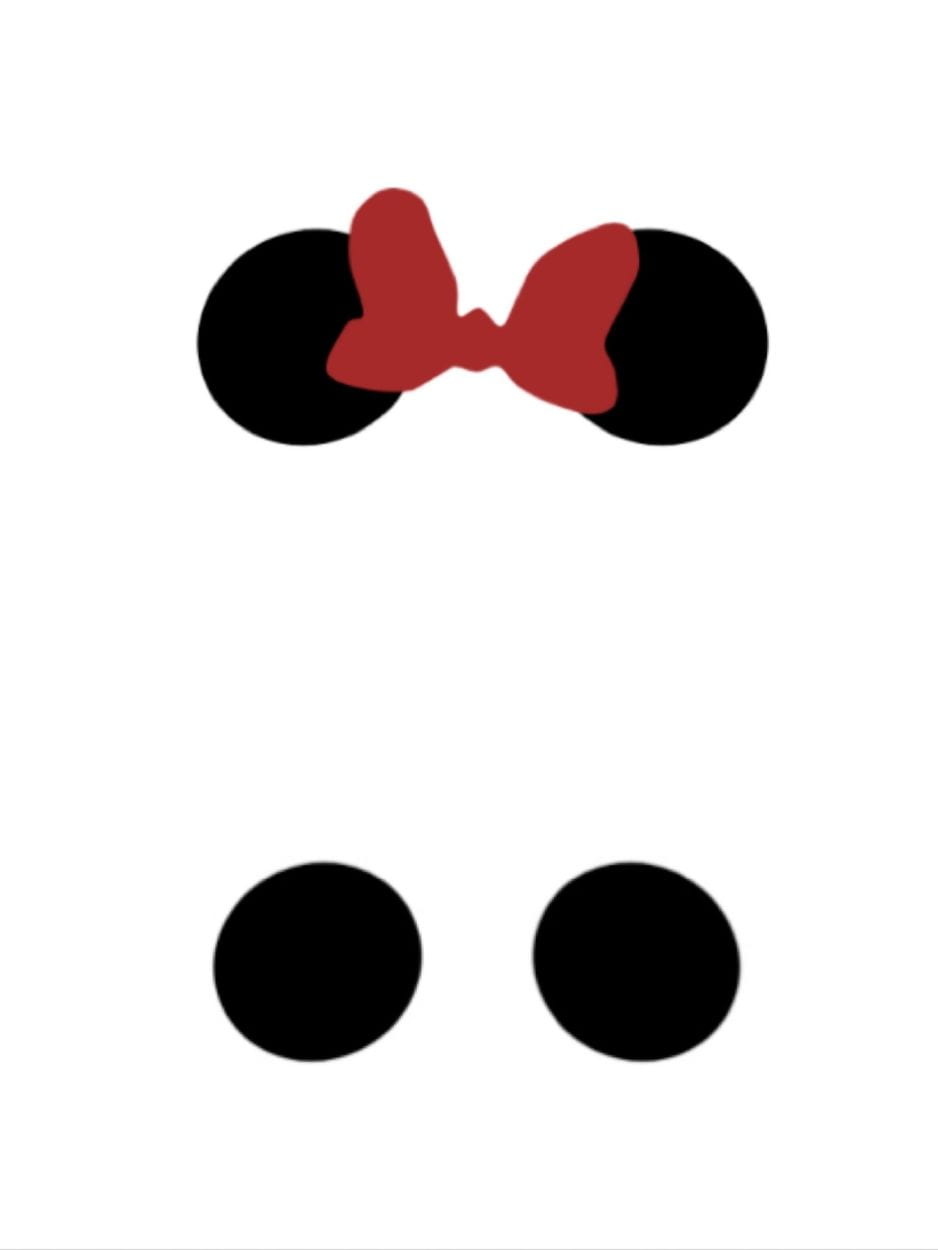
 Another still visual I added was the red nose for Mickey and Minnie. It was a surprise addition. I originally used the red ellipse to mark the nose position while using Posenet. While I was meeting up with Professor Moon, he suggested that it would be great if I actually keep the red nose, looking like Rudolf. I also received well feedback on the red nose while others played with my project. So I kept it. And even though it’s not really related to the character, since Mickey and Minnie do have a nose tip, and it would be hard to show it when the user is facing front, this ellipse adds on. It fits perfectly!
- Animation visual elements
After I’ve solved all the problems I had with still images, I started designing the animation for each and every character. The original idea I had was to only have the animation for Elsa, for her magic powers. So I started off with that.
– Elsa’s magic powers
 While designing the animation for Elsa, I rewatched the clip from the music video “Let it go” where she uses her powers several times. There were a lot of things going on when she uses her magic. I decided to simplify it. While doing some research online, I saw a code from the p5.js example library, called Snowflake. I thought it would be perfect for this animation. So I started to switch the position of the snowflakes falling according to the mouse position. Then I remembered Eszter drew a lot of rotating lines for her midterm project. So I asked her how she did those and took it as inspiration to also add some rotating strokes to the animation. And then I got my first version of the Elsa animation.
 But I still think that there’s something missing for this animation. I rewatched the music video and noticed that there’re snowflakes being created every single time she does magic. So I did some research some more and found this video created by The Coding Train on Youtube, where they used processing to draw a snowflake. I followed his tutorial and completed a drawing snowflake in p5.js. Then I tried to add it with the previous version of the animation. But for some reason, the rotating strokes could not be combined together with everything else. In the end, I only kept the snowing particles and the drawing snowflake. For the final version, the snow will fall down based on the wrist position on one side, and the other side of the wrist will first draw the snowflake, and then fall snow.
– Mickey and Minnie’s glove rotation

I was only to add animation for Elsa. But while meeting up with Professor Moon, he suggested that it would be great if the glove of Mickey and Minnie will rotate based on the direction the user is waving their hand. He also said I could try using it based on the angle between the position of the wrist and the elbow. I thought it was wonderful advice. So I added the elbow as a key point to detect. Then I researched online on how should I calculate the angle 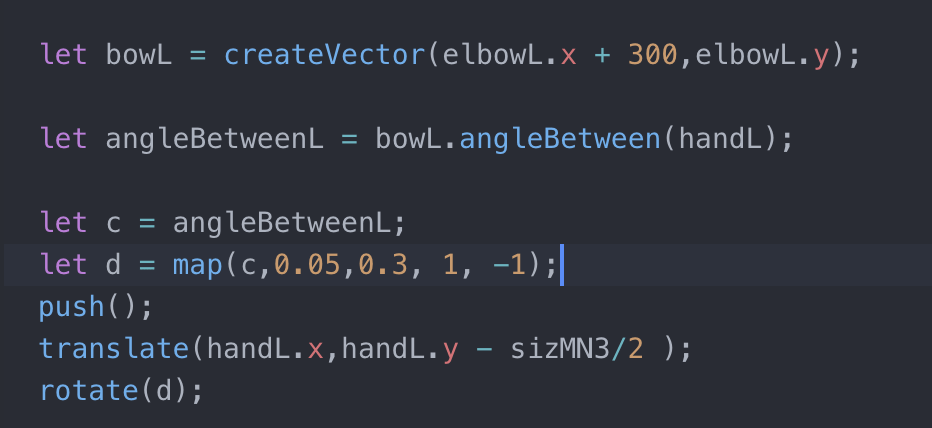 between and relate to the angle the image is rotating. I first developed a code for a square to rotate based on the mouse movement angle. And then I tried to transfer it using the Posenet key points. It worked. Then I tried to adjust the image to rotate with the angle. But since the image’s size was weird. It was difficult to find an exact calculation that worked exactly well with the hand rotating. I tried using sine, cos, and tan to calculate. And I tried mapping it. After several times of retrying and adjusting, I finally fount a similar result for the calculation to match. In the end, I just applied this glove rotate animation to both hands for the Mickey and Minnie character.
– Baymax’s arm rotation
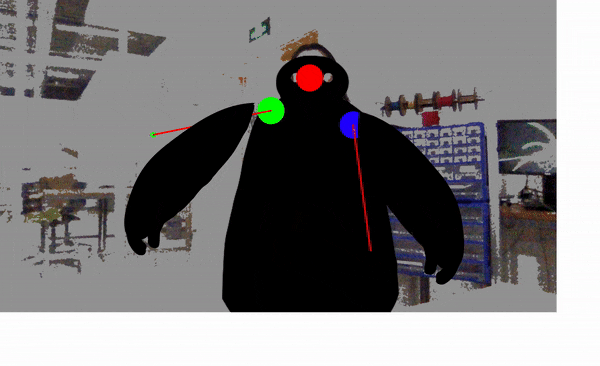
After designing the glove rotate for Mickey and Minnie, I thought, why not add some animation to all the characters? So when it comes to Baymax, I thought I would apply the similar glove rotating animation to his arms.  Before, I said I was going to use the entire outline of Baymx. But it turned to be too stiff and dull. And since I’m thinking about adding this animation, I cut off both of his arms and made them into separate images. And I applied the similar code for the glove rotate to the arm rotate. Of course, it did take me a lot of time to adjust it and trying to find the perfect mathematic calculation to match the angle between the user’s shoulder and wrist. But It sort of worked in the end.
– Tinker Bell’s floating sparkles
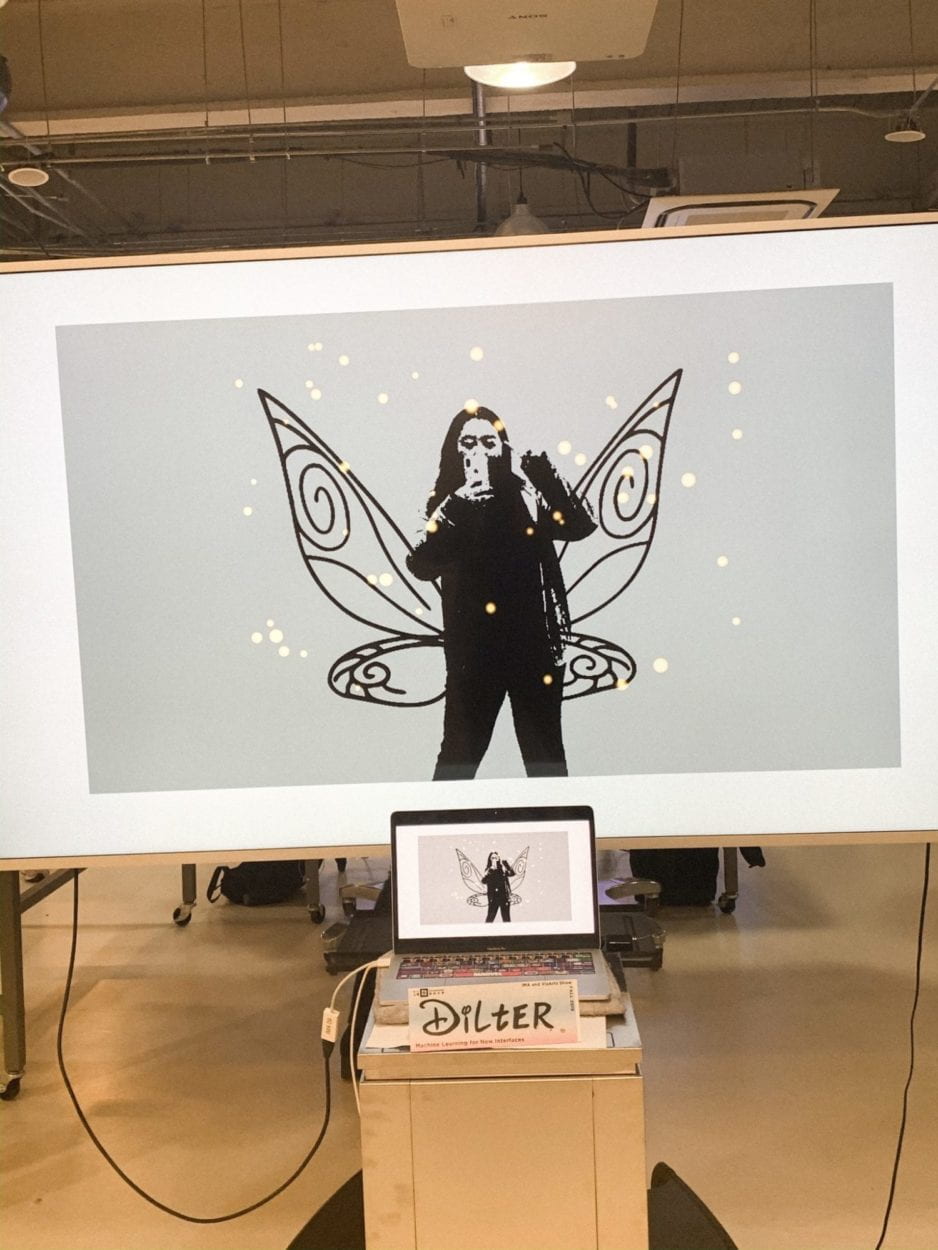
Now, everybody besides Tinker Bell they all have some kind of animation with them. I thought I would find a suitable animation for her too. I googled some images of Tinker Bell in her movies. I noticed that she has magic sparkling particles glowing around her when she flys. So I thought I would add this as an animation for her character. To achieve the floating particle effect, I first created a code to add random ellipse floating in a certain area. in p5.js. Then I added it with the wings I have for Tinker Bell. To achieve the glowing effect for the particles, I used the code I have for my midterm 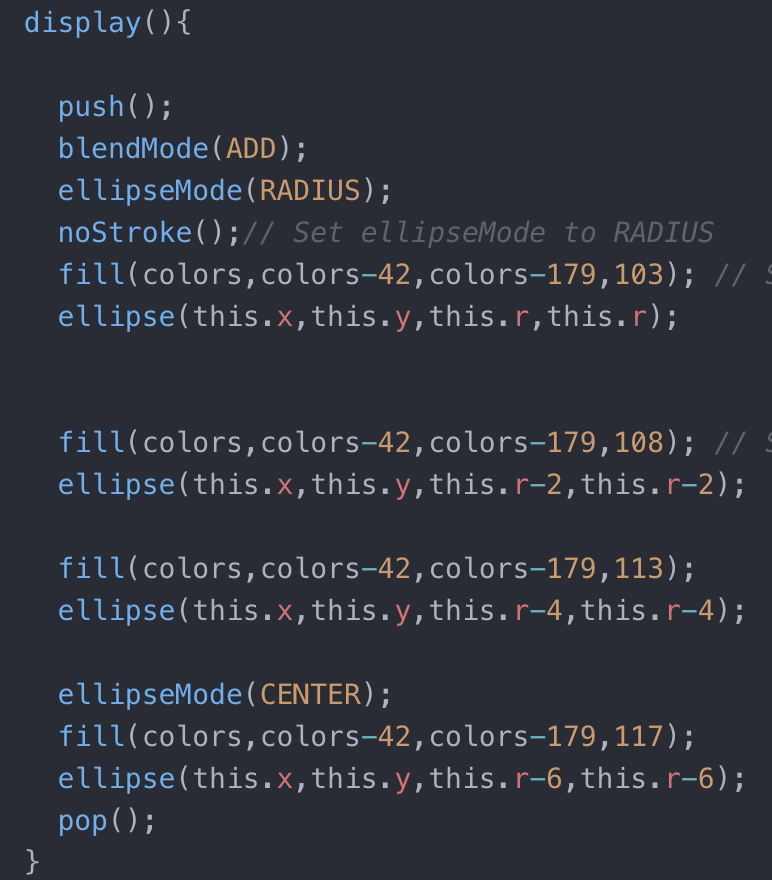 project, which is basically layering ellipses with increasing radius and blend them together. I did try to make the particle move according to the wings position detected through Posenet. But for some reason, every time I tried to add it, it breaks down. So I just settled for it to have a certain area for the particles to float.
- Camera filter visual element
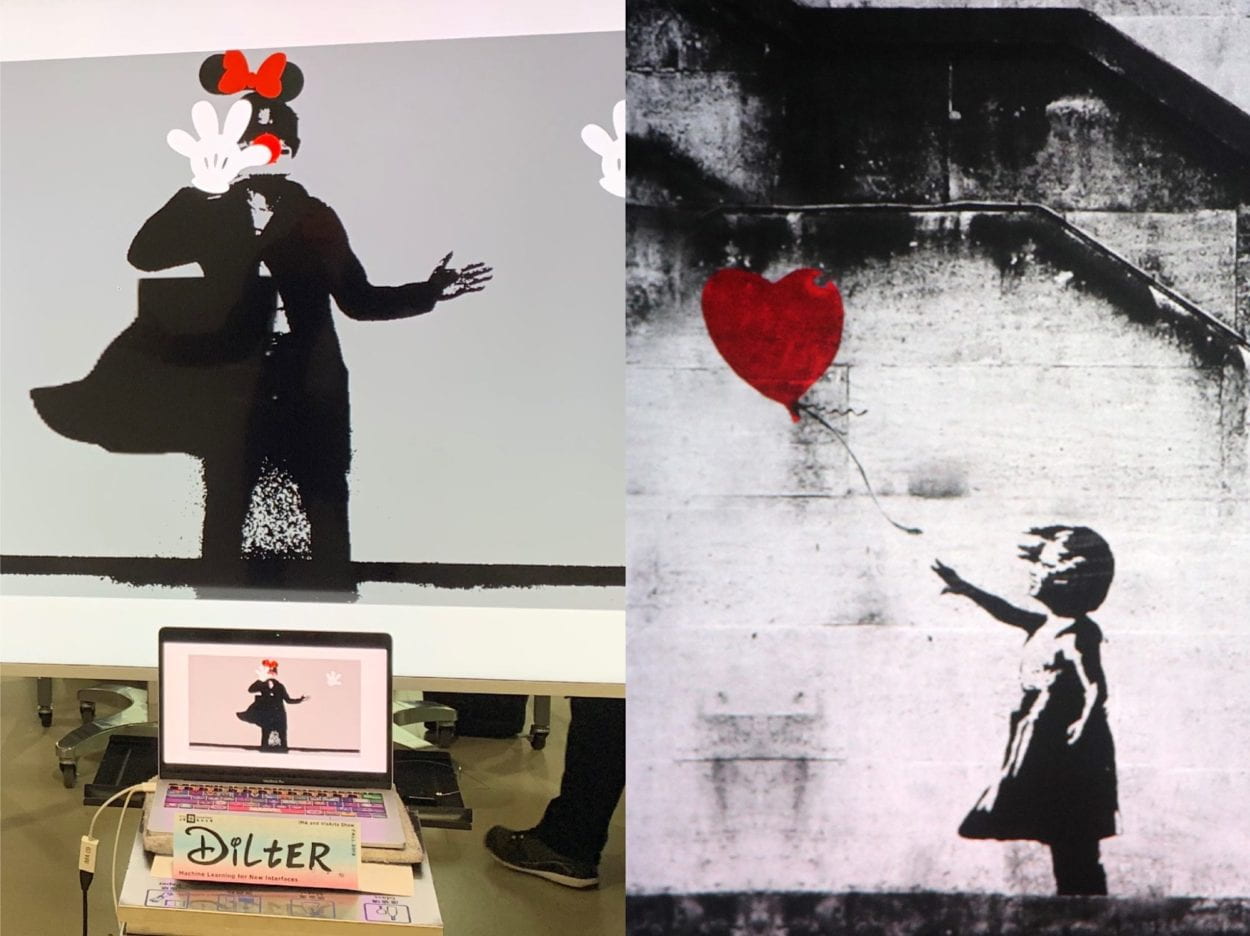
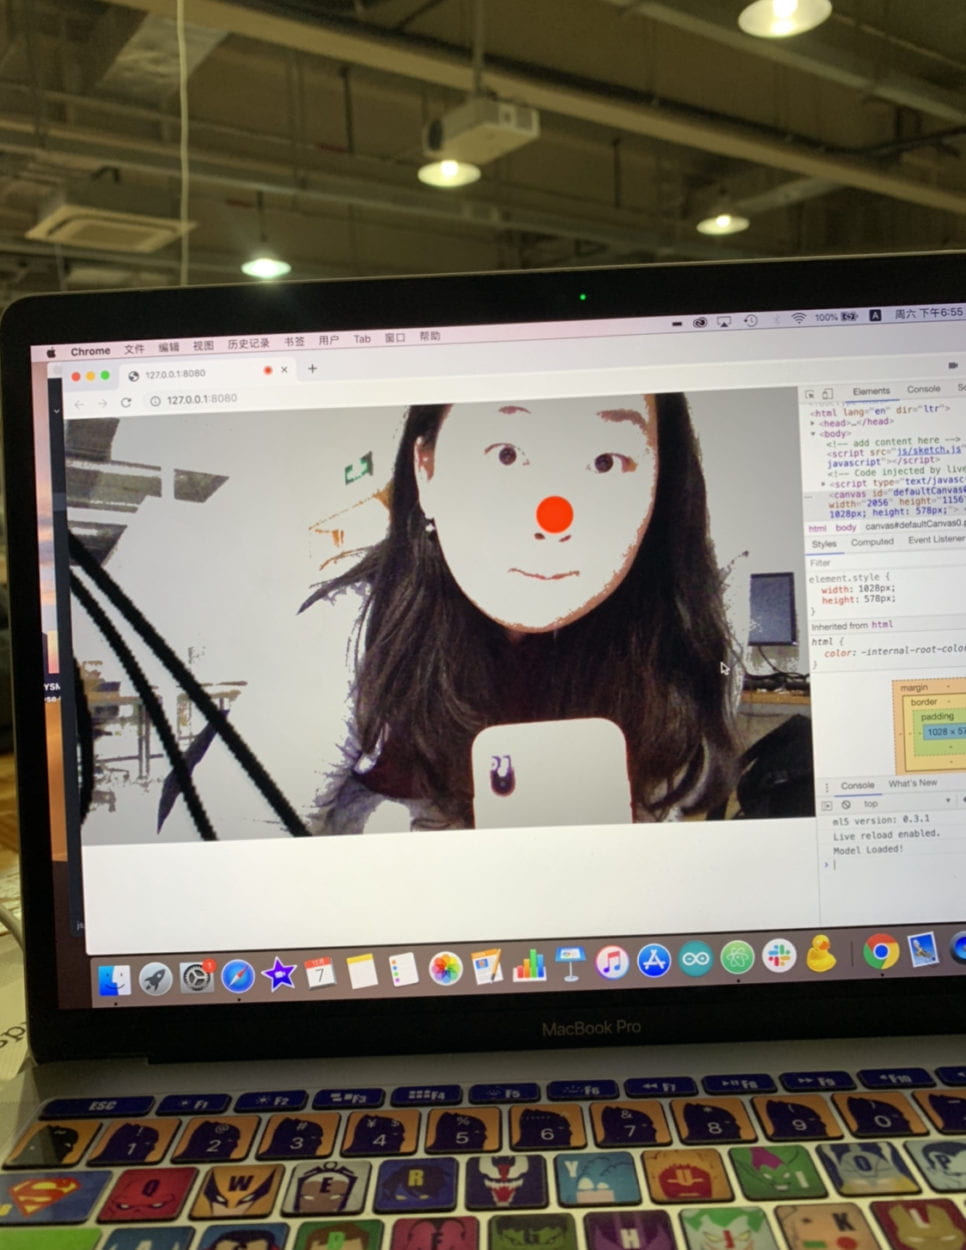
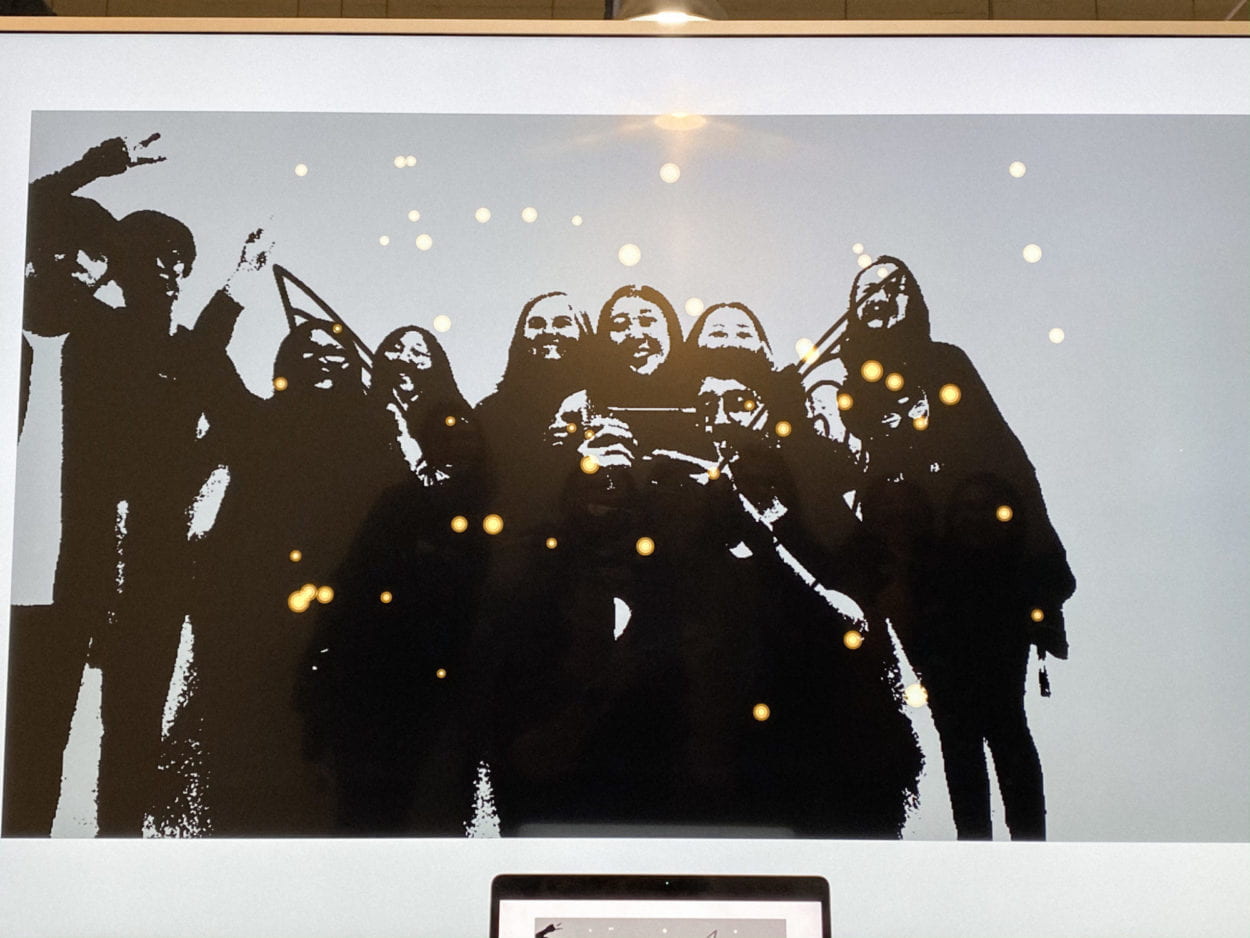
When I first started the project, I know I wanted to still show the shadow of the user instead of having a colorful image. I first thought of using BodyPix. 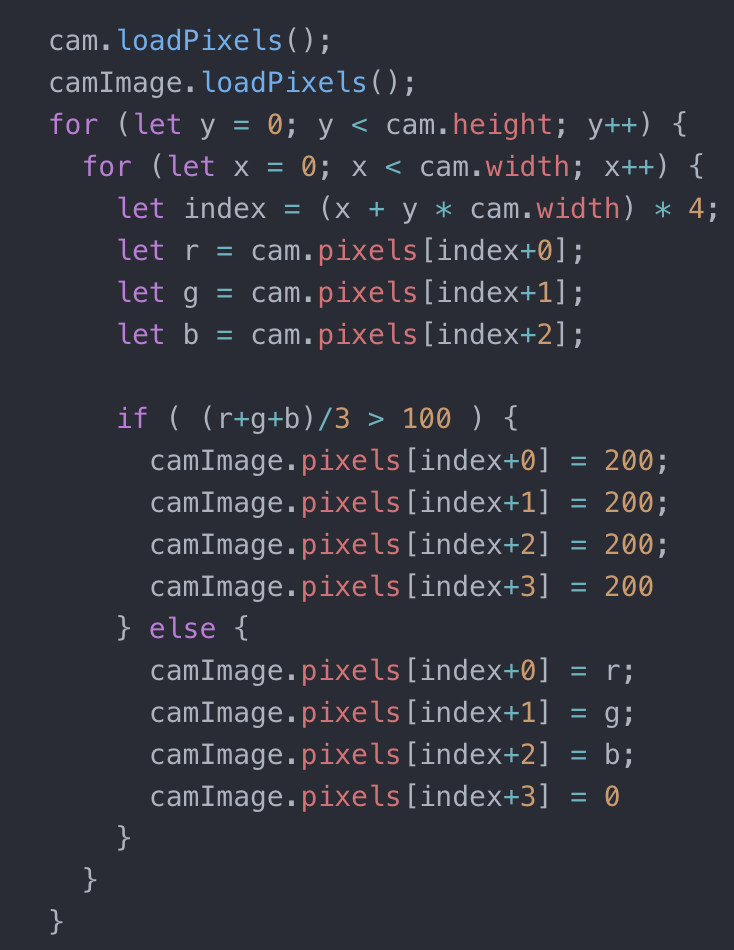 But that would slow down the Posenet detection. Then Professor Moon suggested that I could try using filters to adjust it making it look like only the shadow is showing. I first explored with the filter function. Then Professor suggested that I could explore with image pixelation, which is a much better way. I used the white wall in room 818 to adjust the filter several times until I got the exact filter I wanted. During the IMA Show, another professor said that the esthetics of the filter combines with the Disney characters actually reminded her of Banksy‘s style of art.
During coding
- The use of Posenet
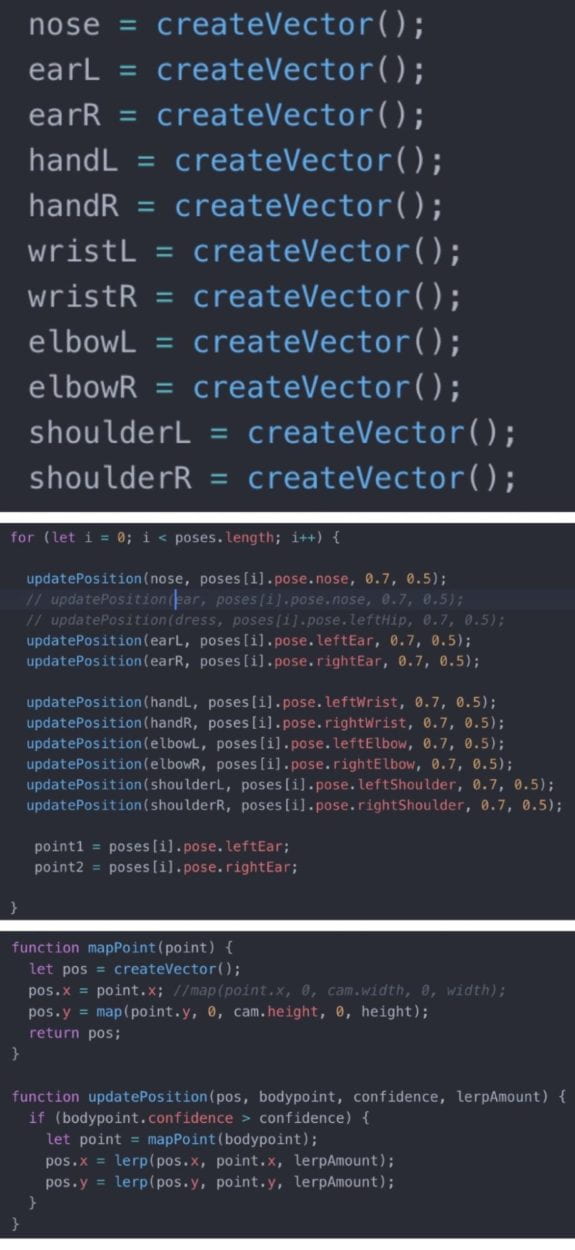 The machine learning I’m using for my final project is Posenet. The most use I get out of it is to detect the key points of the user. In order to complete all the characters, I detect several key points of the user’s body. It’s easy to detect, it’s difficult to make it work fast and stop glitching so easily. When I tried just the standard coding of Posenet myself, it was not stable and the detection was oftentimes incorrect. So I met with Professor Moon again to discuss what’s a better way to improve the code. And he introduced me to using three separate functions “create vector( )”, “map position( )” and “update position( )”. While using these three functions to update the coordinates of the key points, it fastens the detection making it running normally even added several draw functions.
After I use the function to fasten it, the next step was to stabilize it. Since I 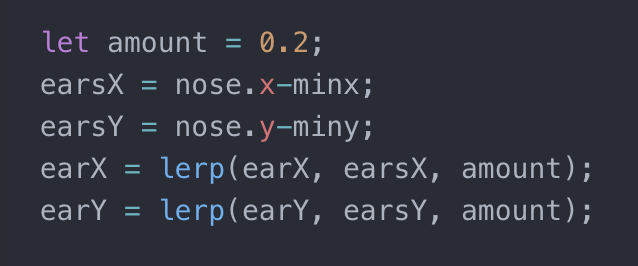 am inserting images based on the key points detected, it glitched moves wiggling like crazy when there is any distraction in the camera. Then Professor again helped me with a function called lerp. This function will smooth the action when an image is trying to get from one point to another. So I used this function several times with one point and it does smooth the flow of all the images movement.
- Scale
The project basically realizes the vision I have for it. But I wanted to perfect 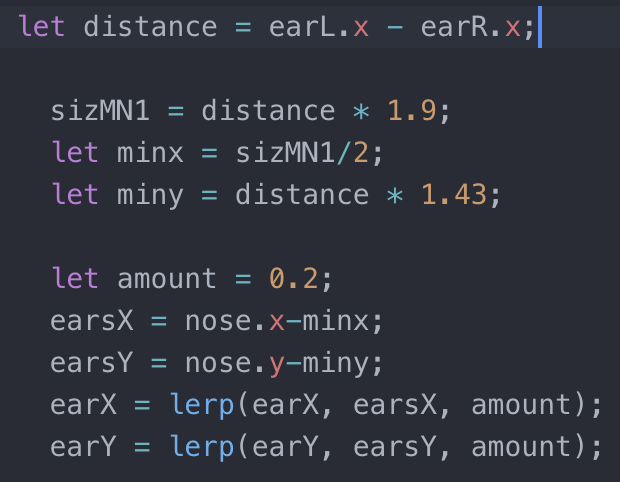 it more. I decided to add a scale function to all the character’s features, where the images would increase or decrease according to the distance between the user and the camera. To do this, I used the detection of the distance between the two shoulders of the user. Then through console logging the distance, I tried to take a few groups of numbers and figure out the math relations between them. I did this scaling function for the features of Mickey, Minnie, Baymax and Tinker Bell. For Elsa, since it’s all animation, I didn’t apply this function to her features.
- Switch modes
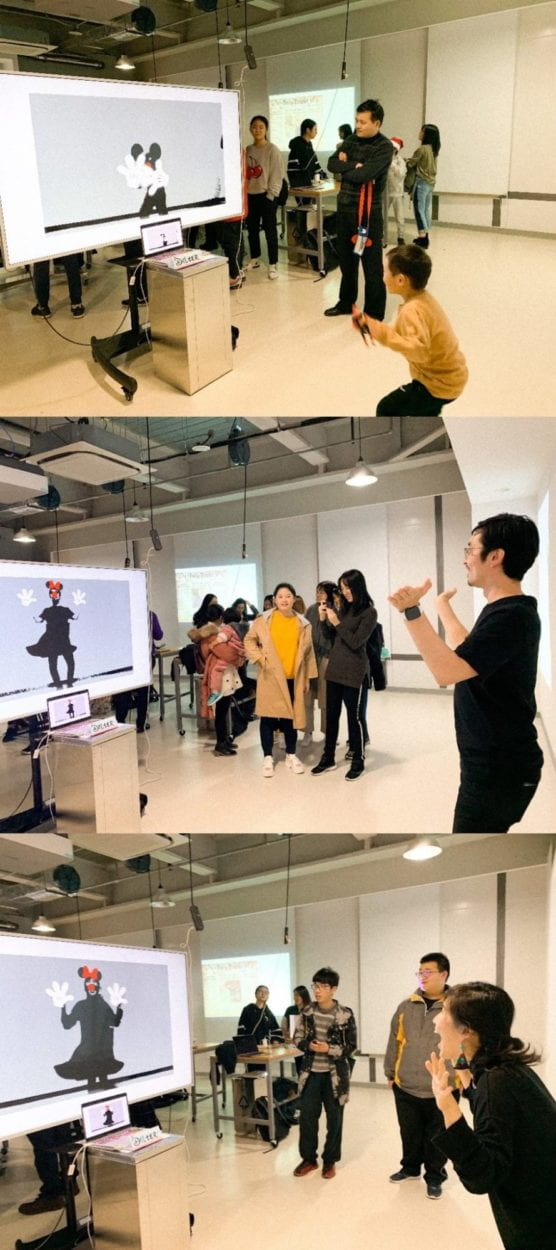
I first completed all five character’s filters separately in five javascript files.  Then there’s the question of how am I supposed to mix them into one project. I considered using KNN, but I didn’t want to make it into a guessing game. So again, Professor Moon helped me by introducing the function of switching modes. Basically I do this in the draw function, I have a variable called “mode”, and by using keypress to change the number of the mode, it will trigger different functions. When the professor demonstrated it, he used keypress. I did consider switching it to changing the filter according to time increase, but I really want the user to explore the character they like as much as possible. But according to the IMA Show, it didn’t really work well with the keypress. So I might improve it in the future.
Webpage layout and music
Originally, I had an image of the Disney castle as a background image for the background. But before the IMA Show, I think it doesn’t really match with the filter and art esthetic. So I then switched the background into all white. I like it more this way, fewer distractions.
For the background music, I added a piano version of “When You Wish Upon a Star” by Jon Sarta. I think the light and calming music matches the general vibe of the project.
 Future improvements
- Multiple users are able to be detected and added features in the same shot.
- Auto-switch between character.
- Adding more characters.
- Hopefully adjusting the detection to be more stabilized.
- Making the glowing particles follow Tinker Bell’s wings.
- Perfecting the animation.
Special thanks to:
- Professor Moon! Thanks to all the help Professor Moon gave me during the development of this project, for staying really late in the lab helping all of us with our work, and for the fried chicken. I’ve truly learned so much by completing this project. Thank you so much!
- All my friends and classmates who helped me train the detection of Posenet and record the video demo.
- All the user’s who tried out my project at the IMA Show and gave feedback. It truly made my day.