In this recitation, we connected the Arduino and Processing that they can react to each other’s actions. My first test was to make a “Etch a Sketch” with Processing that could draw a line according to physically turning two potentiometers with Arduino. I used the sample code Arduino to processing with one value.
First I changed the serial.List number to 2 as shown on my Arduino port, and NUM_OF_VALUES to 2 since we have two analog values coming from the two potentiometers. Then I setup the size and background. In draw, I put in an printArray and an ellipse. In the values for the ellipse, I put in sensorValues[0] and sensorValues[1] to use the array function I have created. Now the ellipse could move around on the screen according to the potentiometer on Arduino.
Here are the codes for step 1 https://gist.github.com/Chloeolhc/a97e8376dd088dfb7f4de319f027ae21
Here is a video for my first step.
Going into step 2, to make an actual Etch a Sketch, I need to change the ellipse into drawing a line. I changed the four values for the posy1 and 2 in a line into a=sensorValues[0];
b =sensorValues[1]; so the four points become line( a, b,sensorValues[0], sensorValues[1]);
a = sensorValues[0];
b =sensorValues[1];
a and b are defined.
This way, my two potentiometer could control the x-axis and y-axis on the canvas. However, as I was testing, the line often goes out of the border and it was difficult to find its position. So I edited my canvas size from 600×600 to 1024×1024. After editing the size, I could clearly see the path that my line was going as I was turning the two potentiometers.
Here is the video of the final result.
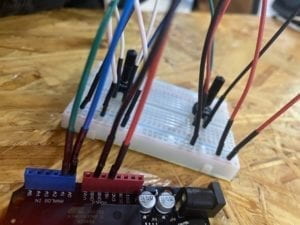
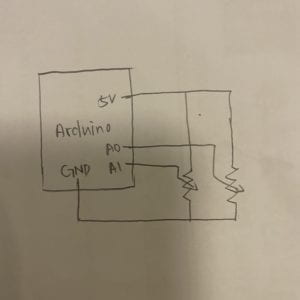
Here is the circuit and a sketch of the circuit for Arduino:
Here are the codes for the final result in the first part:
https://gist.github.com/Chloeolhc/010b0a7521164f8edbaac4e7e318ecb0
For part two of this recitation, we needed to make a musical instrument with a buzzer on Arduino that changes pitches according to the movement of the mouse on the processing canvas. I used the One Value Processing to Arduino file to create this. The idea is that the buzzer reacts to different x and y positions on the canvas. For the tone() function, it has two syntax tone(pin, frequency). I did not change the ledPin to others because there is only one buzzer involved in this project. So I had tone(ledPin,valueFromProcessing); and an if statement following this to control the reaction of the buzzer from Processing.
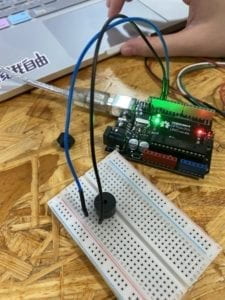
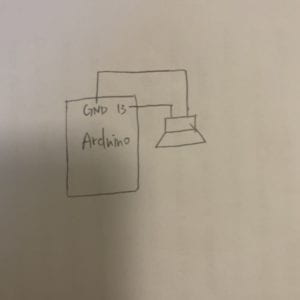
Here is my circuit.
Here is a video of the final result.
Here are my codes. https://gist.github.com/Chloeolhc/0f8b0397c28866b4f7d7ef0bc6a6424d