Recitation 8 Serial Communication (Xinran Fan)

This recitation’s aim is to learn to connect the Arduino and the processing, which can let us interact with animation. From this class , we can primarily control the image in the computer  by  the outside circuit.

Step 1 Make an ellipse with potentiometers:

Actually the beginning of the story is full of the problems. I thought the first step is just what we down at the class at the first glance.’It just a piece of cake!’ I tacked to myself. But the truth is, I only finished the first step at the end of the recitation. But this is not because of the code, it just takes me a little time to use the sensor value[0] and sensorvalue[1] to take the place of the x  and y of the ellipse();in the model code A to P.Then I was stuck by the range of the potentiometers. No matter how hard I tried, my circle ⭕️ only move in a very narrow place. I taken the advice from the assistants to test it, and figure out the range of my potentiometers only from 465 to 654. I change the potentiometers but it makes no difference. Once the professor pressed hard, its range fixed for a seconds. I was so exciting, considered we solve the problem, but soon the range change again. After test it on the recitation and after the class, I finally make sure that the problem is on the Arduino. Everything goes well after that.

Step 2 Make a line etch-a-sketch:

special code:
processing
float px=0;
float py=0;
float x=0;
float y=0;
 
……
 
 x=map(sensorValues[0],0,1023,0,500);
   y=map(sensorValues[1],0,1023,0,500);
 
  stroke(x,225,y);
strokeWeight(12);
  line(px,py,x,y);
  px=x;
  py=y;
Then come to the next class, at first I totally can not understand the logic of this code”How to make the new X=previous X?’I even try to use array functions. But another the help of my classmate, I figure out the secret of it is the order. This practice really inspire me a lot.

Make an instrument:

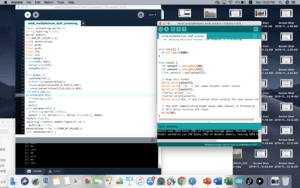
add code
Processing:
if (values[1] == 1) {
float x = map(values[0], 0, 500, 31, 4978);
  //float y = map(values[1], 0, 500, 31, 4978);
  tone(9, x);
    } else {
      noTone(9);
    }
 
Arduino:
 values[0]=mouseX;
  if (mousePressed) {
    values[1]=1;
  } else {
    values[1]=0;
  }
To the last one, I know it is time to change the model code to P to A, but I really cannot understand of that code. Even now, though I ask many assistants for this, I still confused about the complex part of that code. At the first I used the mouseY to control the duration, but when I try to see the mousePressed, I find the y is useless, so I cancel it. Then how to use the mouse in the processing to control the action in the Arduino which really trapped me, I was surprised by the idea that set a values[1], and realize that the values[1]==1 need to equal.

Leave a Reply