My project concept went through a few changes, so first a short introduction to the most recent concept: I was inspired by the artist Heather Hanson and her series of performance art pieces where she uses her body to create giant symmetrical charcoal drawings:

I like the concept of capturing body movements in an artwork, and wanted to see if I could use Posenet to create a tool to help me create interesting pieces, like a new medium of art.
Methodology
Code: https://drive.google.com/open?id=1gQd5Y2zuFOc1hy0bvWIUCVA3vMfjIuMy
I used the week03-5-PosenetExamples-1 code as a base to build on top of. I then searched in ml5.min.js to see the possible body parts to use, and integrated the nose, eyes, ears, shoulders, elbows, wrists, hips, knees and ankles. I actually forgot to include the elbows at the beginning of my experimentation, but added them in later. I also alternated between using and not using the nose and ears while experimenting with different aesthetics.
The next step was figuring out an interface that would be the most conducive in easily creating a work that could be recorded in a visually appealing way. I first created a green ellipse that serves as a “start” button when the user hovers their mouse over it. It also serves as a restart button so that if you would like to start over, you simply hover your mouse elsewhere and then hover back over the green ellipse to start the drawing process again.
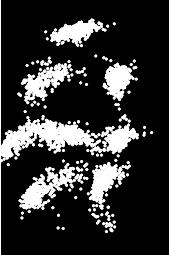
When the user first sees the screen, the web camera is on so they can see themselves. I decided to have this kind of interface because it is important to first see your body’s placement on the screen so you understand where exactly your different parts are before you start creating the artwork. When they hover their mouse over the green ellipse, however, the screen turns black and the drawing starts so that the user can no longer see themselves, but the art they are creating instead. This way, they have a clear view of what the piece looks like. One of my friends who user-tested backed this up, saying she liked being able to see the art forming as she moved around. I found that this way is also fun if you screen-record the process, so that you have what looks like an animation as an end result rather than just a final still image piece. This was my friend’s user-test/piece which she calls the “interpretive mountain dance.”:
Her piece had a cool result because it almost looks like a human figure with mountains in the background, hence the name.
Experiments
Most of the experimenting came from tweaking different components to see what was the most visually appealing. As mentioned earlier, for example, I played around with different combinations of keypoints.
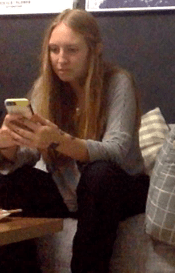
Playing around with different movements was interesting to experiment with. Some were still, some were fast and some were slow. Here’s a rather still movement of my friend sitting on the couch, for example:
Here’s another example of a movement experimentation, which turned out to be a bit of an abs workout:
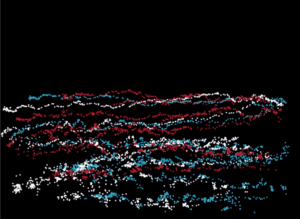
I still wasn’t super satisfied with the visuals until I experimented with the color. I found that a combination of different colors, along with a combination of still and slow movements, seemed to produce the most interesting visual effects. Here are some of my favorite pieces produced (recommended to watch at a faster playback speed)…the title of the videos describe the kind of movement that was used:
I thought it was interesting how, even if I wasn’t trying to make anything in particular and was only testing out different movements, my brain would try and find patterns or different images in each piece. These all sort of look like abstract aliens or robots to me, which is kind of ironic considering AI is very “futuristic” in the eyes of the media, as are aliens or robots.