Context and Significance
My previous research that inspires my understanding of interaction is the Firewall project created by interactive media artists Mike Allison and Aaron Sherwood at NYU Abu Dabi. This project features a membrane interface consisting of a sheet of spandex. It is sensitive to the depth the user pushes and produces fire-like visual effects and various music piece. The visual effect and the frequency as well as melody of music depend on the depth of the user’s push. The sensitiveness of the machine to the user’s input and the various output (effect) the machine produces play a key role in shaping my definition of interaction. In contrast, another project I researched— the “interactive wall” in which each button on the installation can be pushed and generates a certain color effect, features a one-to-one interaction that only has one input and one output. From what I have read in articles like The Art of Interactive Design, interaction is about a “conversation” rather than “reaction.” The contrast between two research projects deepens my understanding of interaction of a continuous conversation that involve actors who are responsive to each other. Each actor in the conversation expects something different from the other actor and therefore makes the interaction back and forth. An excellent interaction, I think, could unite both actors together in such a way that the interactive machine become an extension of human body.
We base our project on such concept of interaction as a continuous conversation involving responsive actors. This also lays foundation for the uniqueness of our project. We place significant attention to the variety of output as well as the sensitiveness of the installation’s response to the input in the hope of engaging the user and enhancing the interaction. Our idea originates from the launch pad which can generate corresponding visual and sound effects based on the keys the user presses. However, according to my definition of interaction, while the criteria of variety in output is satisfied, the level of input (press the button) is a little bit simple (like the interactive wall) and therefore limits the way of interaction. For me, I would think of how the digital input could be improved to analog input, like the one in the Firewall projects does (strength and speed of pushing something). Our project is a small musical instrument aiming at enhancing user’s experience of playing music and can be applicable to anyone who love music.
Concept and Design
In order to make the interaction a “continuous conversation,” we decide to make the input an analog one and vary the output by creating various visual and sound effect. Our initial idea was an interactive musical instrument that resembles a launch pad but with more sensitiveness to the user’s input. We did some research and found something useful on the slides of Class 06 named “Physical Interaction, Sensors and Actuators” which listed a number of sensors to choose from.
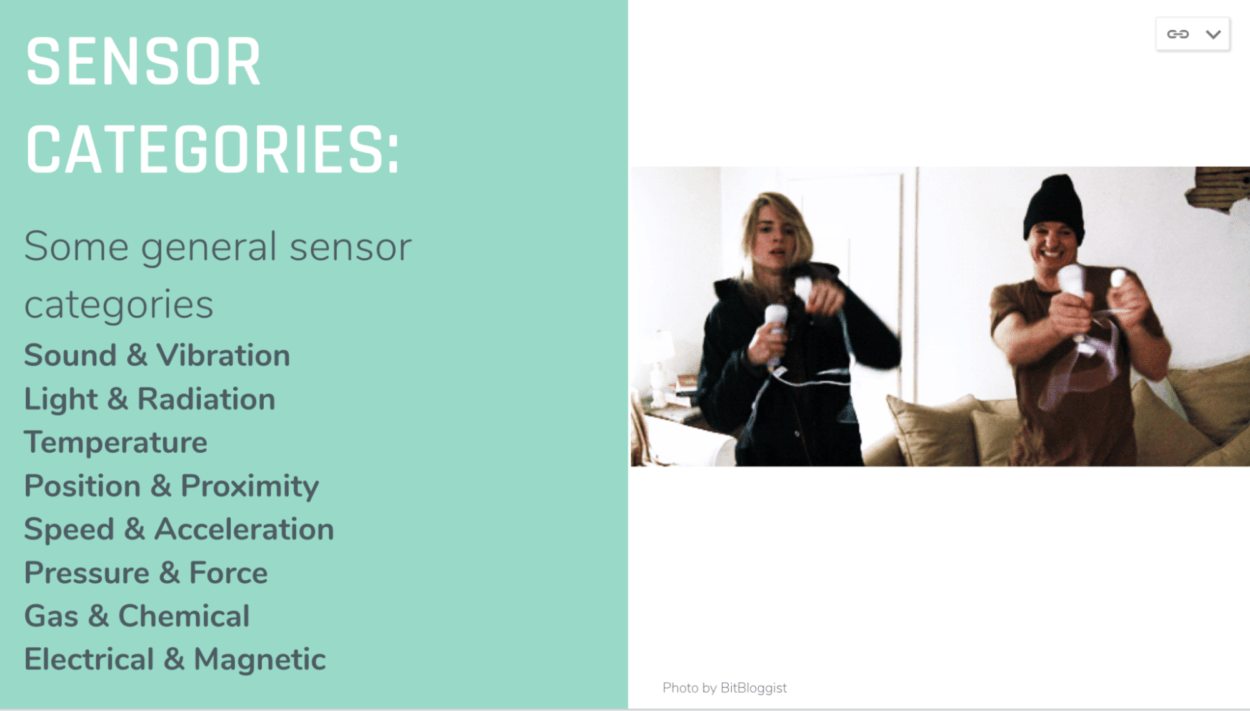
For sensors that can detect the variation of sound, light or temperature, we rejected them because we found it hard to distinguish user’s input from the surroundings. And since our output is LED light and sound, it’s hard to invest any meaning if we choose the input to be also light or sound. Some sensors may suit our purpose, like pressure, speed and position sensor. Inspired by launch pad and the Firewall installation, we finally chose the pressure sensor. Our tentative blueprint was to adjust the frequency of the music according to how hard the user pressed.
Fabrication and Production
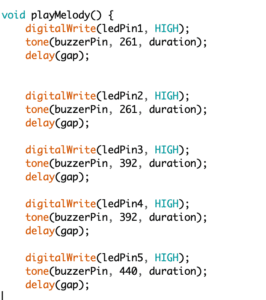
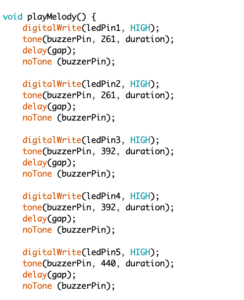
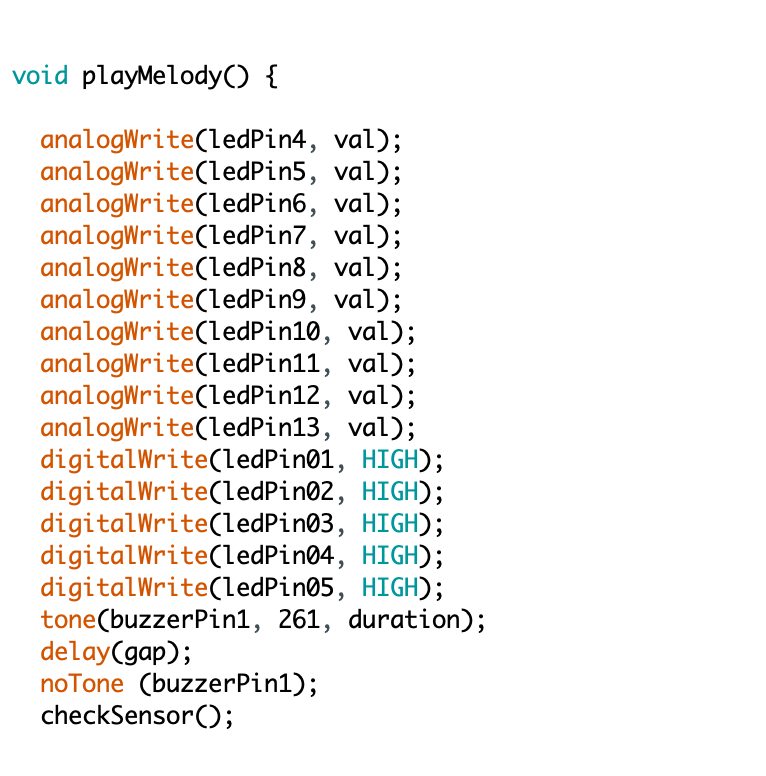
Our first attempt to build an interactive musical instrument whose output (frequency of music and light) was sensitive to the user’s input encountered technical problem. The first problem we met was the sequential light. We designed the self-defined function “playMelody()”and wrote code according to the logic: when the function was called, lit up the first LED and at the same time played the first note; delay for a “gap” (a self-defined time variable) and then lit up the second LED while playing the second note…the following has the same logic. However, when we run the code, it turned out that all lights were lit up at the same time. We sought help from Professor Lee and Professor Marcela. After some debugging and experimenting, they helped me figure out the right way to achieve desired effect— that is, to add a “noTone(buzzerPin)” after each block of code, as shown below. It’s hard to know what’s exactly wrong since the logic is fine. We finally attributed that to the underlying contradiction between duration and gap and additional pause function was needed. This made me realize that computers didn’t understand human logic all the time and there was a lot to explore in computer language.

To link the input (press) and the frequency of the music, we created two variables called gap and duration, which respectively corresponded to the interval between two notes and how long one note lasted. We changed the frequency of the melody by changing the values of the two variables. As shown above, we expected the value of gap and duration to change immediately as a result of change in how much the user pressed. However it didn’t work that way. Instead, it recorded the value of the user’s input once a time and run the whole playMelody() function with the certain value before replacing it with the new value. Below is one quick version of the melody, corresponding to a relatively large input.
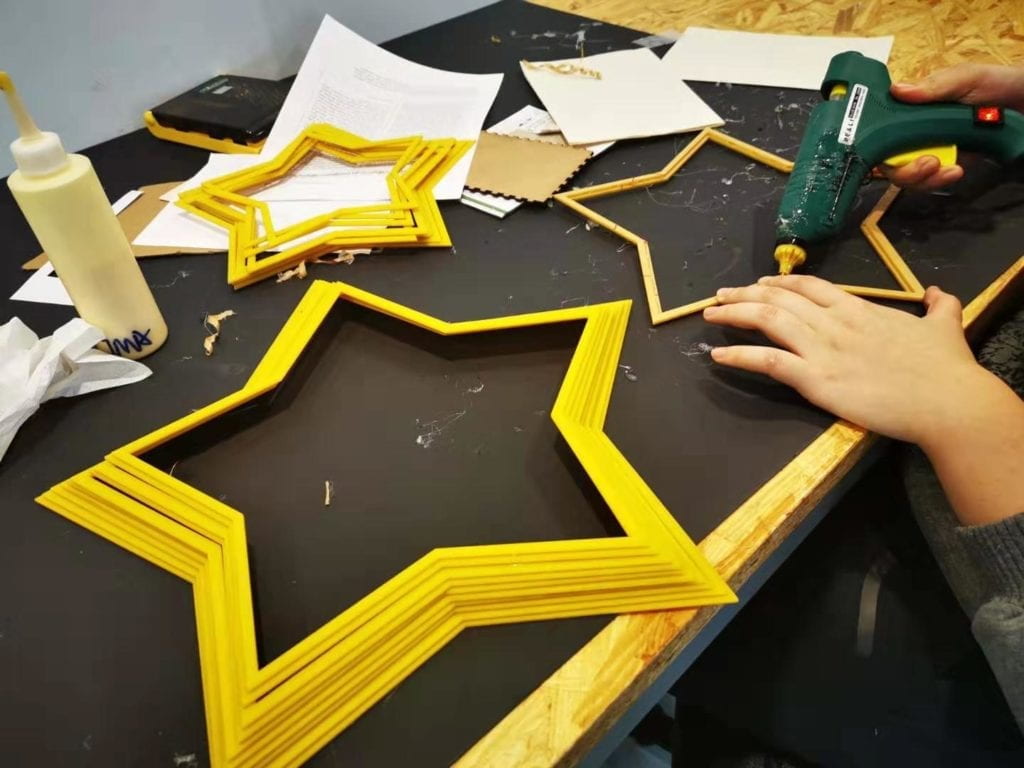
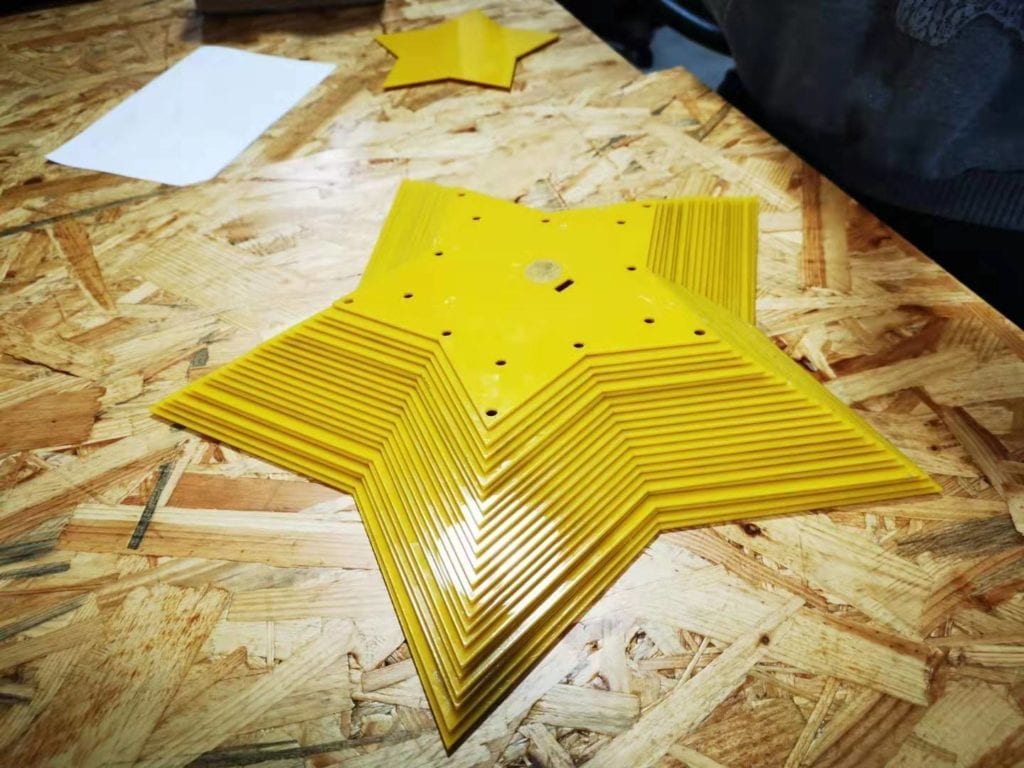
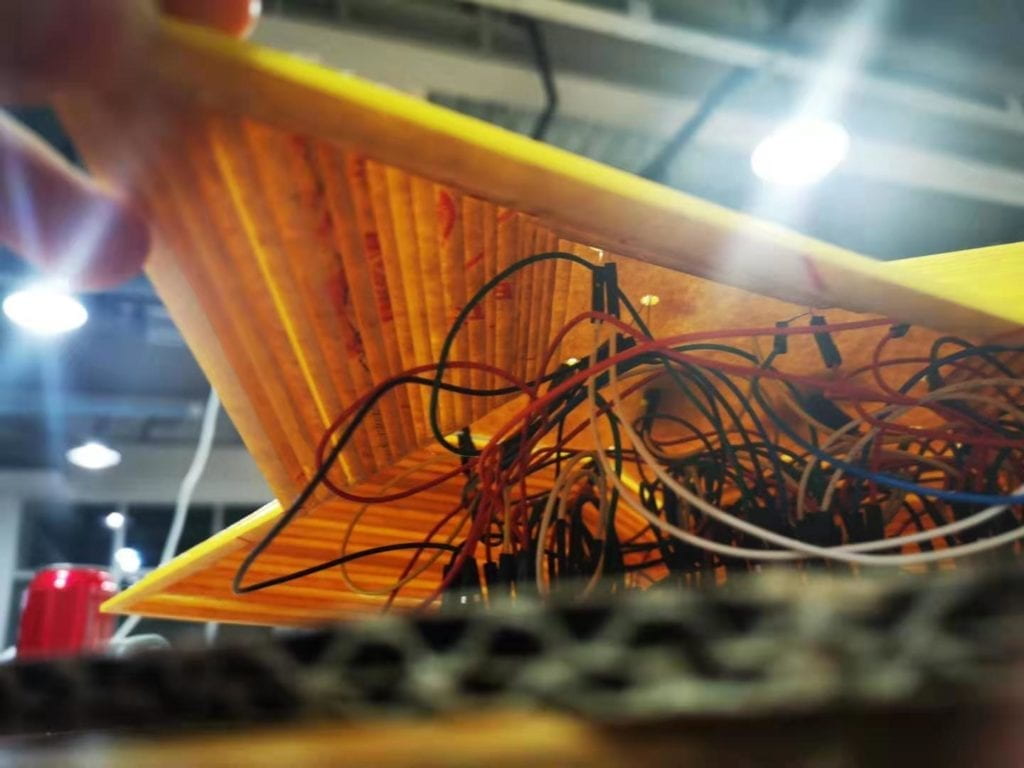
In terms of the physical part, we thought about a star picture because it matched our melody most. We imagined the user interface to be a star with various LEDs occupying the edges. We had 15 notes in the melody (including the pause) and after drafting we found that the 15 LEDs could be fit into a symmetric shape that looks like one star being wrapped inside another one. Since we also need to put the circuits underneath, we first thought of a cylinder one, but this may look ugly. Inspired by an upperclassman called Sheldon and with the help of many ima fellow like Cindy and Andy, we decided to create 22 (the number is determined by exact measurements of the height and width of our circuits) hollow stars with decreasing size using laser cut and piled them up using glue. I took several photos and videos of the process and results.

During the user test session, several peers came to interact with our project (incomplete but the basic interaction can be achieved). One common feedback we got from them was the confusing way to interact as well as the lack of immediate feedback of their input. The pressure sensor was a flat circle without indicator of interaction and the lack of immediate feedback (change in frequency) made it harder to tell the function of the pressure sensor. In addition, the pressure sensor we borrowed from equipment room was not stable and therefore negatively influenced the interaction. Here’s one clip from the user test session. The user in the video was confused about whether to remain pressing or not.
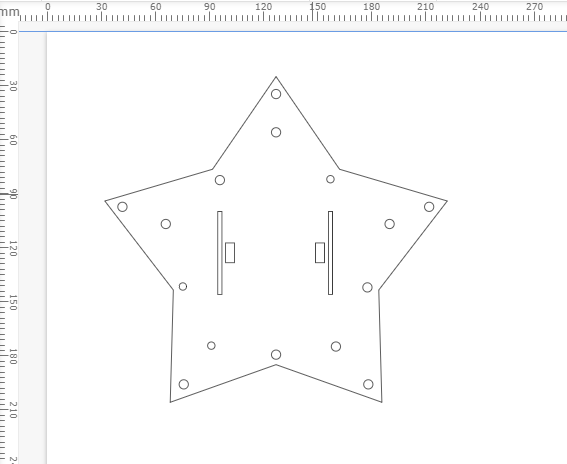
Based on the feedback, we decided to change the sensor and the way of interaction as well. After brainstorming and research, we found one useful YouTube video called ” Musical instrument with Arduino and two SNS-US020 distance sensors” created by Tsvetan Usunov. Usunov used two ultrasonic sensors that can measure distance and varied the pitch and speed of the melody based on the detected distance. I quite appreciated the way he changed the pitch and frequency of the one single note to allow more possibility in creating melody. Based on what we have done and inspiration from the video, we came up with the idea of changing frequency as well as creating drumbeats to make the project more like a “star remix.” However, later we found that the buzzer had only one kind of sound and could not produce a drumbeat-like sound that could accompany the star melody. After brainstorming we decided to create two kinds of interaction— one varying the frequency and one varying the degree of shade. We borrowed two ultrasonic sensors and placed them on either side of the user interface (the top star panel), as shown below.
In terms of the coding, we struggled a lot about the immediate change of output in response to a changing input. In other words, we wanted the interactive device to be more sensitive to user’s input so as to make it more interactive. The first technical problem we encountered was to make the frequency of the melody sensitive to the user’s input. Moon helped us solve the problem by creating a new function called “checkSensor().” This function told the computer to measure distance every time a note had been played and therefore allowed the frequency (or more specifically, gap and duration) of the next note to change. In this way our desired effect can be achieved. Another sensor followed the same logic but had different function. We applied the map () function to transform the distance to the brightness of the lights. To enhance the sensitiveness, we established a mathematical relationship between distance and brightness as well as gap and duration.
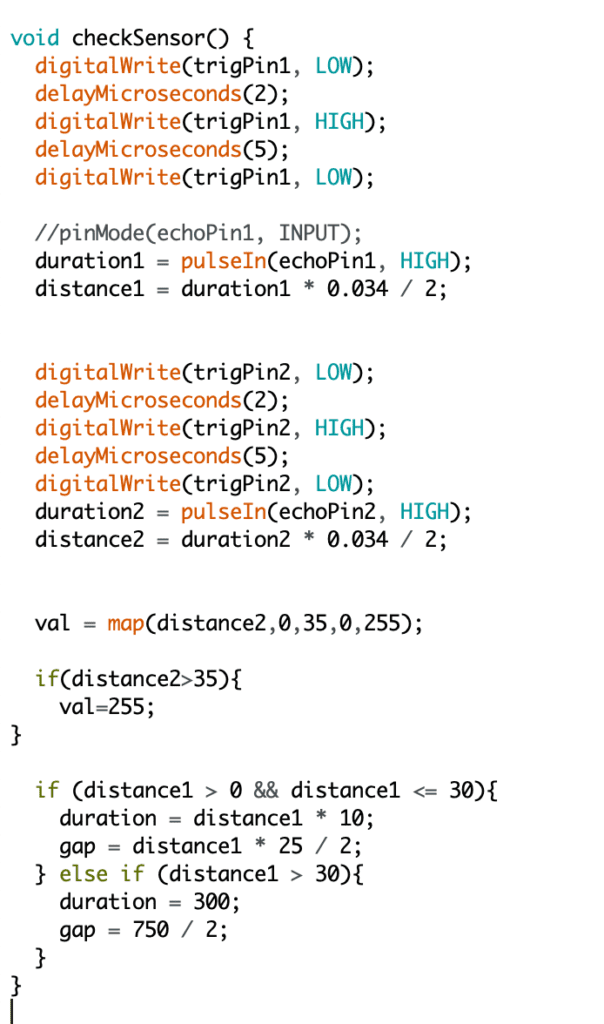
Due to technical limitation, we also changed our initial idea of sequential LED lights. Specifically, each note was assigned a specific value of frequency (gap and duration) and brightness before the “checkSensor()” function which reassigned the value to the next note. Such function limited the capacity to simultaneously change the brightness of all lights. Therefore, in need of consistency, we abandoned the initial idea of sequential lights and instead applied the same brightness to all LEDs at the same time. However, after we run the code we found that part of the lights worked and part of them didn’t. With the help of fellow Tristan, we found out that the Arduino Mega had limitations on the number of analog pins. Only 0-13 excluding 1 pins could be used to realize analog input while we had 15 lights on hand. Then I suddenly came up with the idea of combining analog input with digital to make more variation. My partner agreed and we changed the five lights in the inner circle to be digital output by creating blinking effects. In this way the visual effects were more varied and I think it enhanced the visual effects as well as interaction because the blinking frequency was the same as that of tone melody. That reminded me of an old Chinese saying, “there is a way out.” Sometimes through innovation the bad could be turned into something even better. Here’s part of the code and our final project!
Conclusion
The midterm project is a meaningful practical application of the idea of interaction I come up with after all the learning through articles, research and my own experience. This is a demanding task yet also a rewarding one, after overcoming all the difficulties with my partner and also with the help of others like professors and fellows. I want to express heartfelt gratitude to all the people who have been assisting us in doing the project. I particularly want to thank my partner Sonny who has always been creative, supportive and persistent during our collaboration. I really enjoy the process of combining our ideas together to advance the project as well as constantly designing new ways to approach a problem, whether theoretically or practically. Such a challenging experience not only develops my problem-solving skills, but also enhances my creativity. Most importantly, however, the experience strengthens my willpower and boosts my confidence in resolving tricky problems. In terms of the course itself, I think such intense practice greatly contributes to my understanding of interaction as well as the balance between creative ideas and technical plausibility. I think the result is satisfactory as it to a large extent meets my definition of interaction (also Sonny’s). The key part of a good interaction I define— sensitiveness as well as variation, are both met. There are tons of possible results of the output and user can create variation based on their input (how far the hands are away from the music box), thus enabling a “continuous conversation.” However, I think one thing can be improved about our project is that it only has one kind of melody. Due to time limitation, we fail to think of a way to enable the user play with different melodies to create their own songs like that of launchpad. This is also difficult because the harmony between various melodies is hard to achieve. Such improvement will require deeper understanding of not only interaction but also music as well. Also I think the user context can be considered more carefully to invest more useful meanings into the project.
Reference
- Firewall installation. http://aaron-sherwood.com/works/firewall/
- Click Canvas, interactive wall. https://create.arduino.cc/projecthub/natthakit-kim-kang/click-canvas-an-interactive-wall-04332c?ref=tag&ref_id=interactive&offset=0
- The Art of Interactive Design. http://s3-ap-southeast-1.amazonaws.com/ima-wp/wp-content/uploads/sites/3/2017/08/05164121/The-Art-of-Interactive-Design-brief.pdf
- Class 06 – Physical Interaction, Sensors and Actuators. https://docs.google.com/presentation/d/1yjxn3s6a9HH3oNuHiq1GGzD27czUAztx2VuvvwRpGAI/edit#slide=id.g3ffe0327f8_0_22
- Musical instrument with Arduino and two SNS-US020 distance sensors. https://www.youtube.com/channel/UCBLijWZ1jr_6VrIlhp3fFtw