Snow Controller
For this assignment, I created a screen-based interactive sketch that utilizes poseNet under the object-oriented programming concept.
- Inspiration
As I was reviewing my last assignment, I came up with the idea of creating a scene of the winter snow. Inspired by the example in p5js.org, I want to create a scene where the position of the hand can be a representative and simulation of the wind. (like the gif showed below⬇️)
- Coding
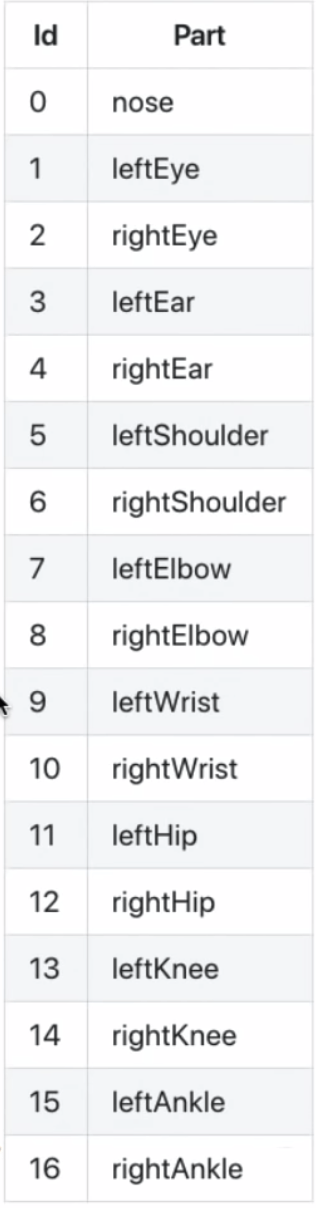
By first using the poseNet I input the position of the rightwrist: keypoints[10] and the leftwrist: keypoints[9] by referencing the keypoints list below.
 To track the position of each new position, I recorded the x and y position for both the elements:
newrwX = poses[0].pose.keypoints[10].position.x;
newrwY = poses[0].pose.keypoints[10].position.y;
newlwX = poses[0].pose.keypoints[9].position.x;
newlwY = poses[0].pose.keypoints[9].position.y;
In order to reduce the noise and smooth the value of the changing value in the position, I used the function called
lerp(x, y, amt) // class for snowFlakes
class snowFlakes {
constructor(sx, sy) {
let x = sx || random(width);
let y = sy || random(-100, -10);
this.pos = createVector(x, y); //position
this.vel = createVector(0,0); //velocity
this.acc = createVector(); //acceleration
this.r = getRandomSize();
this.R = random(255);
this.G = random(255);
this.B = random(255);
this.isDone = false;
}
//add force to the acc
//make the bigger one fall more faster than smaller one
Force(force) {
let f = force.copy();
f.mult(this.r);
this.acc.add(f);
}
update() {
this.vel.add(this.acc);
this.vel.limit(this.r * 0.07);//limit the size associat with speed
this.pos.add(this.vel);
this.acc.mult(0);
if (this.pos.y > height + this.r) {
this.randomize();
}
}
//when they get to the bottom, use your rightwrist to add them into the canvas
randomize() {
let x = random(width);
let y = random(-100, -10);
this.pos = createVector(x, y);
this.vel = createVector(0, 0); //velocity
this.acc = createVector(); //acceleration
this.r = getRandomSize(); //size of the snow
}
display() {
stroke('#a3c5ff');
strokeWeight(this.r);
point(this.pos.x, this.pos.y);
}
}
wind and using the map() function to input the detected position of the wrist and using it to control the snow in the x-axis. //the snow will move following the rightwrist positionlet windX = map(rightwristX, 0, width, -0.7, 0.7);let wind = createVector(windX, 0);- Conclusion
To sum up, I would say there is still a lot of function that can be associated with poseNet model and there must be more interaction that can be embedded. The assignment helped me to understand better how poseNet worked and again reinforced my ability coding using class/functions/for loops/if statements.