Overview
During this week I got to know Arduino and made my first attempt to connect Arduino to the computer and the breadboard. Practices in recitation increased my familiarity with Arduino as well as understanding the Arduino as a bridge between physical circuits and coding on computer.
Materials
From Arduino Kit:
1 * Arduino Uno
1 * USB A to B cable
1 * breadboard
1 * buzzer
2 * LEDs
2 * 220 ohm resistors
2 * 10K ohm resistors
2 * pushbuttons
A handful of jumper cables
From cart:
2 * arcade buttons
1 * Multimeter (optional)
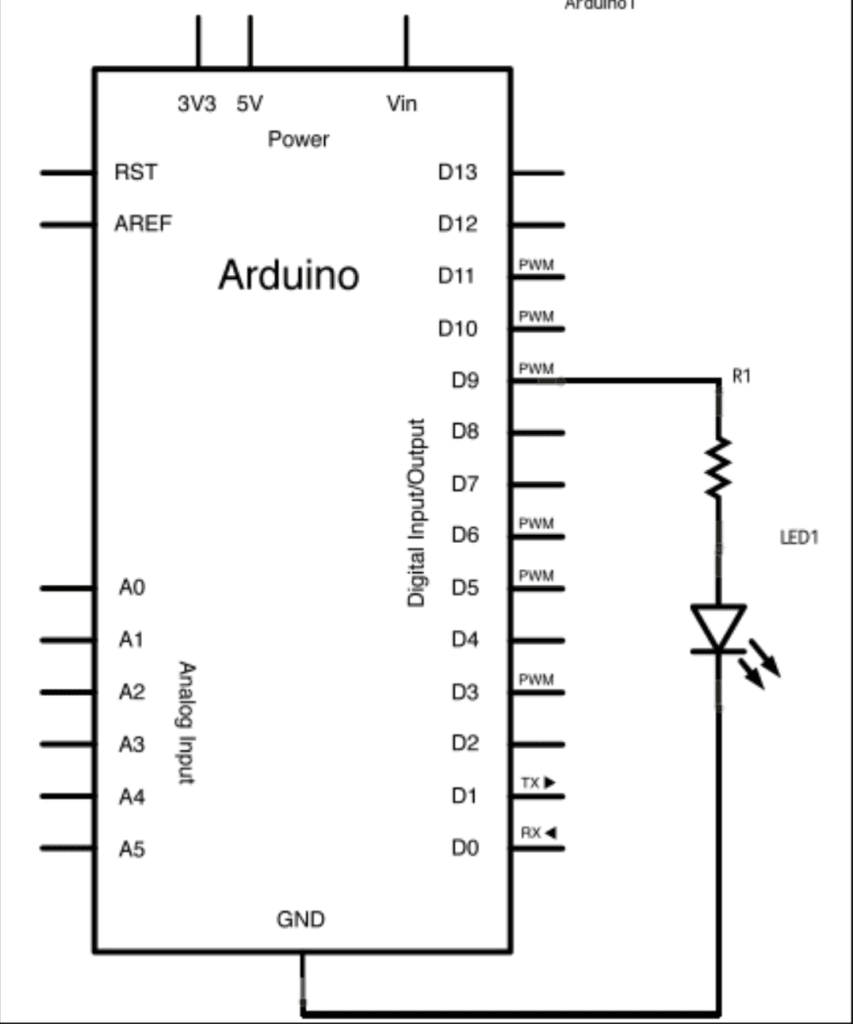
Circuit 1: Fading Light
Materials
- Arduino board
- LED
- 220 ohm resistor
- hook-up wires
- breadboard
Schematic
Process
We started by connecting the Arduino to the breadboard such as connecting the voltage 5V to the positive side on breadboard. Then we connected resistor, LED and finally linked the LED to the ground on Arduino. The process is straightforward and simple so it didn’t take us much time. The coding part is interesting. From the example code I got to know more about the function of integer, loop, if statement and so on.
After plugging it to the computer, it works!
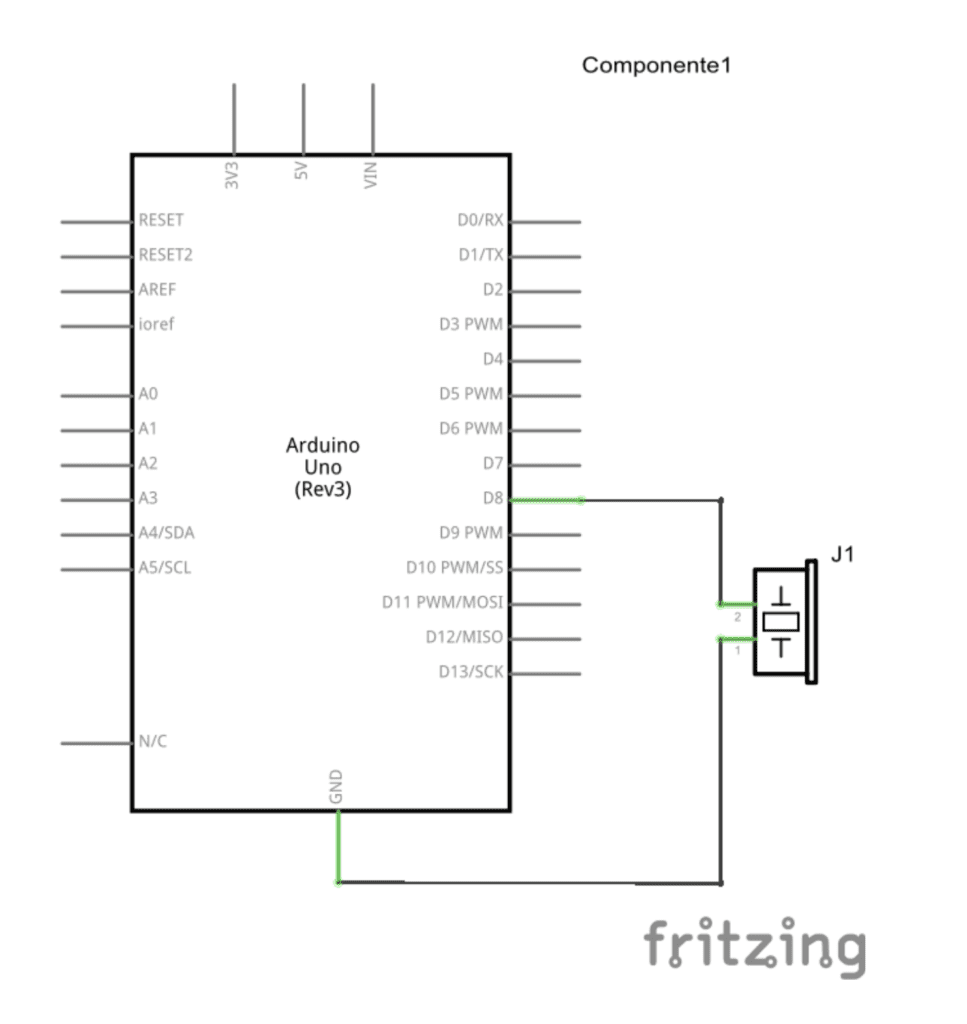
Circuit 2: toneMelody
Materials
- Arduino or Genuino board
- piezo buzzer or a speaker
- hook-up wires
Schematic
Process
The circuit is quite simple so we spent little time finishing that. The interesting part is the coding. It’s a little bit hard to understand, but the use of a series integrals in a category and the iteration for loop are interesting new concepts to learn. I also tried to move the code inside the void setup to void loop to see what would happen. The buzzer kept buzzing at regular intervals, which was interesting.
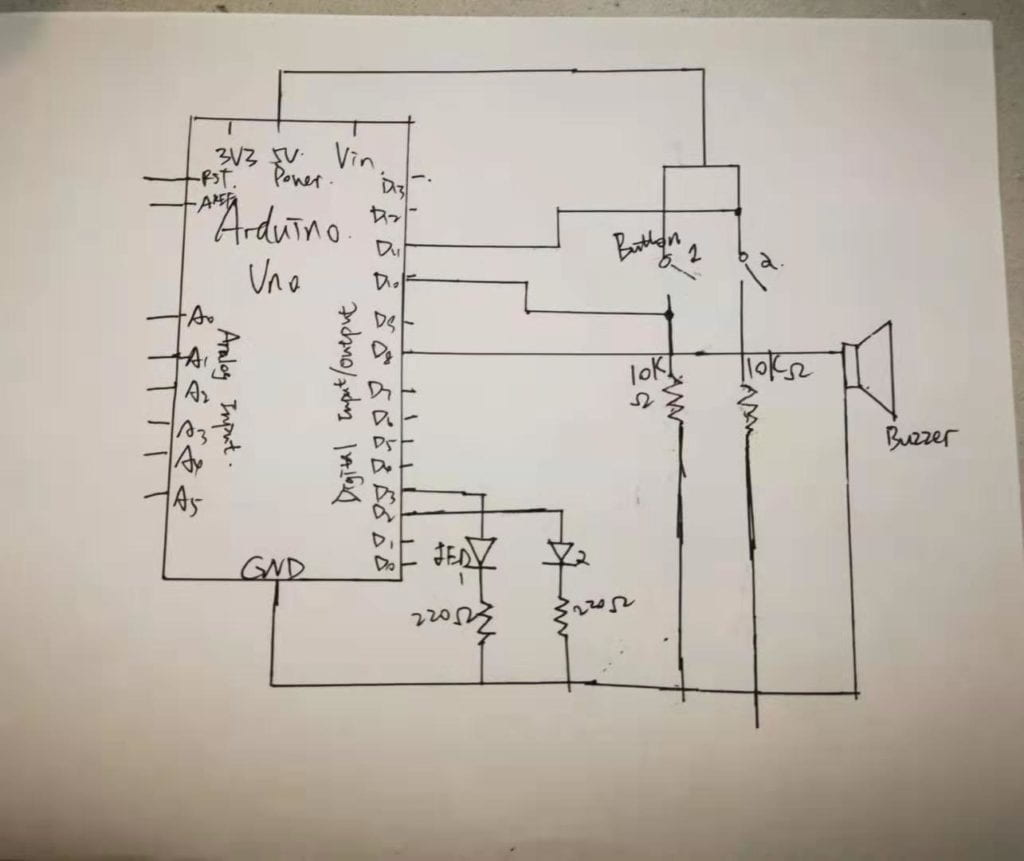
Circuit 3: Speed Game
Materials
- Arduino board
- 2 LEDs
- two 220 ohm and two 10K resistors
- hook-up wires
- breadboard
- two pushbuttons
- buzzer
Schematic
Process
This one is more challenging and also more exciting. Since it’s an symmetric circuit, we divided the task of building circuits into two identical parts, with my group-mate Ruben and me respectively building half of the circuits.
Though the schematics seem complicated, it actually can be broken down into several modules. One closed circuit is one module. I started by building one button on the side. The push button was first connected to the voltage power, then with a resistor that could control the flow of current and finally connected to the ground. Then I attached the digital pin to the button for the computer to recognize.
One important thing I learned in building the circuit was that the pin could also provide power to the LED or buzzer. Before I thought that every electronic component need to be linked to the anode to be powered.
The game is fun!
Responses to Questions:
- Reflect how you use technology in your daily life and on the circuits you just built. Use the text Physical Computing and your own observations to define interaction.
From the text Physical Computing and based on my observations, interaction is a cyclic process of input, processing and output between two or more actors. Specifically, when interaction happens, there should be one actor who starts to give input. Then another actor would start processing the input and generating the corresponding output to the starting actor. Interaction can go on and on depending on the actors’ behavior. For example, when you go through an automatic door, the door sensor senses your behavior of entering, which is input, and the underlying programming, which does the processing part, will produce output that is to open the door for you. And when you pass the door the programming receives your message of leaving and then does processing to close the door, which is another kind of output. The process go on and on whenever there is someone passing through the door.
2. Why did we use the 10K resistor with the push button?
Limit the voltage power to protect the circuit.
3. If you have 100,000 LEDs of any brightness and color at your disposal, what would you make and where would you put it?