Partner: Gloria (Yixuan Liu)
Date: 15th February
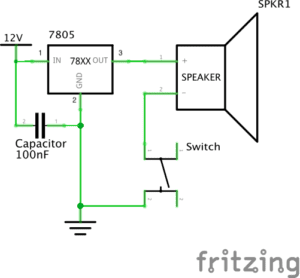
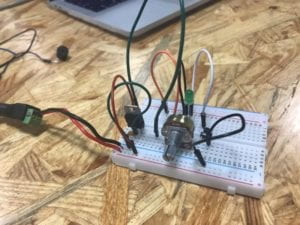
Circuit 1: Door Bell
Components:
Breadboard: Providing a platform to connect all the components
12 volt power supply: Providing electrical power for the components
Buzzer: Buzzing when the circuit is connected correctly and the switch is pressed
Push-Button Switch: Cutting or maintaining the current flow in the circuit
100 nF (0.1uF) Capacitor: Storing and releasing electrical energy and stabilizing the current flow
LM7805 Voltage Regulator: Maintaining a constant voltage level in the circuit

Process:
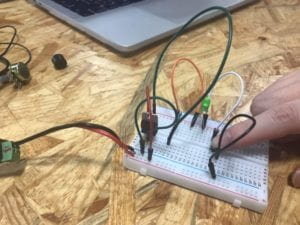
Although it was the first time I used the breadboard, we managed to figure out how it worked using the knowledge mentioned in the lecture. However, we could not use the voltage regulator correctly and we consulted the instructor, who taught us how to identify its three feet. Also, we learned a simpler way to connect the capacitor in the circuit with fewer wires. Besides, we were not sure how the switch was connected inside itself, and the instructor showed us how to find this out using the multimeter.
After solving all these problems, the circuit worked.
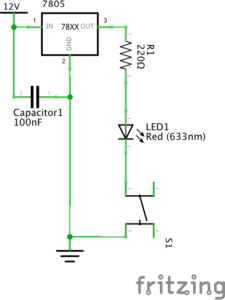
Circuit 2: Lamp
Components:
Breadboard: Providing a platform to connect all the components
12 volt power supply: Providing electrical power for the components
LED: Emitting light when the circuit is connected correctly and the switch is pressed
220 Ω Resistor: Resisting and controlling the flow of electricity
Push-Button Switch: Cutting or maintaining the current flow in the circuit
100 nF (0.1uF) Capacitor: Storing and releasing electrical energy and stabilizing the current flow
LM7805 Voltage Regulator: Maintaining a constant voltage level in the circuit
Process:
Applying what we learned just now, we finished this one quickly without much trouble. The only problem was that we did not realize its similarity to the previous circuit and just connected every component for the very beginning.
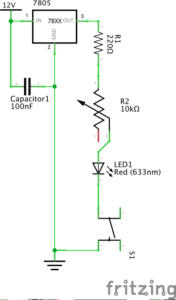
Circuit 3: Dimmable Lamp
Components:
Breadboard: Providing a platform to connect all the components
12 volt power supply: Providing electrical power for the components
LED: Emitting light when the circuit is connected correctly and the switch is pressed
220 Ω Resistor: Resisting and controlling the flow of electricity
10 KΩ Variable Resistor: Changing the amount of resistance of electricity in the circuit
Push-Button Switch: Cutting or maintaining the current flow in the circuit
100 nF (0.1uF) Capacitor: Storing and releasing electrical energy and stabilizing the current flow
LM7805 Voltage Regulator: Maintaining a constant voltage level in the circuit
Process:
This time we thought it would be easier to make, for we only needed to add a variable resistor. However, just like the problem we encountered in the first circuit, we finally turned to an instructor for help to connect the three feet of the variable resistor into the circuit. This reminds us of the importance of learning about the details of components in advance. It took much longer time than we expected but we stayed after class and finally had a thorough understanding of this circuit.
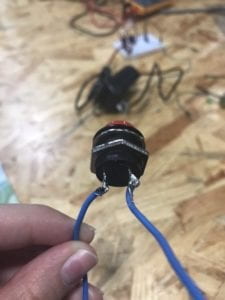
Soldering: Switch the Switches
Process:
We had some difficulty using the equipment to hold the button and the wires in place and asked for help. Apart from this, everything went on smoothly. However, we were not sure what to do when going to soldering stations and were in a hurry finishing the circuits. Next time we will be more careful when reading the recitation instructions.
Question 1:
After reading The Art of Interactive Design, in what way do you think that the circuits you built today include interactivity? Please explain your answer.
According to Crawford, interaction is a cyclic process that involves two actors. From my point of view, in the recitation, the two actors are the circuit and the person who uses it. When the person presses the button, it is a kind of input and the circuit gives feedback by buzzing or emitting light. The outcome of interacting with the button then is received by the person who may take more action based on the feedback.
Question 2:
How can Interaction Design and Physical Computing be used to create Interactive Art? You can reference Zack Lieberman’s video or any other artist that you know.
What is interesting in Interactive Art is how it surprises common by using sensors and other components. When Interaction Design and Physical Computing are used in art, they should be inspiring and creative, making people aware of their potential in art when they do simple things like drawing and moving the body. These technologies can be used to discover how amazing the human body is, and our every move may bring about unexpected amazing outcome in Interactive Art.