Ingredients
- 1 * Breadboard: Basic device to connect all components
- 1 * LM7805 Voltage Regulator: To regulate how much electricity is being used
- 1 * Buzzer:Device that makes the sound
- 1 * Push-Button Switch: Stops or activates the flow of electricity
- 1 * Arcade Button: controller of electricity
- 1 * 220 ohm Resistor: reduces the voltage
- 1 * LED: The light
- 1 * 100 nF (0.1uF) Capacitor: energy storage
- 1 * 10K ohm Variable Resistor (Potentiometer): voltage divider
- 1 * 12 volt power supply:Where the power comes from
- 1 * Barrel Jack: The plug
- 1 * Multimeter: measures the voltage
- Several Jumper Cables (Hook-up Wires): main source of transportation for electricity (they connect to the breadboard and other components to carry the energy)
Partner: Andres Malaga
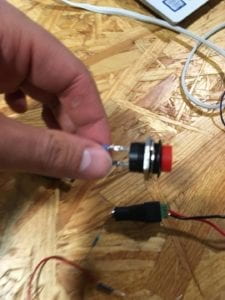
Before starting to assemble the circuits we had to attend a soldering workshop. In that workshop we learned how to melt metal for the purpose of sticking things together. For example, we had to stick some cables to a button that would then serve as a switch for circuit 2
Circuit 1) The Door Bell
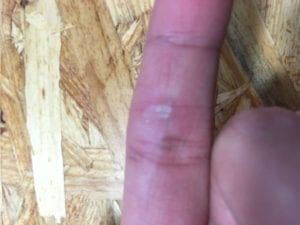
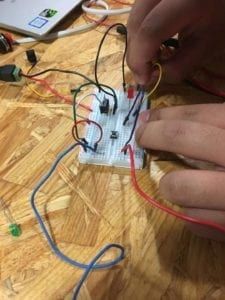
The first circuit was the most complicated to assemble, since we had to experiment and understand all the parts that the diagram illustrated. The purpose of this circuit is to create a sound through a small bell when pushing the switch. Although the diagram and the instructions are clear, it was difficult for us to understand how the electricity flows inside the breadboard. The second problem was that I accidentally touched the LM7805 Voltage Regulator and burned my finger. What I did not know is that this regulator reduces the electricity from 12v to 5v and when doing that, it overheats a lot.
Circuit 2) The lamp
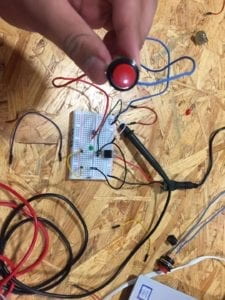
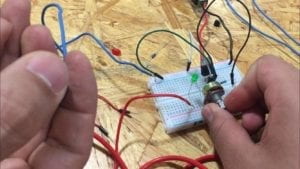
Assembling this circuit was much easier and safer. After learning how each component works we where able to assemble this circuit much faster. The only thing we found challenging was that sometimes we connected to many cables in only one line of the motherboard so we often got confused. During this circuit we used the arcade button that we assemble during the first workshop to activate the LED.
Circuit 3) Dimmable Lamp
The process to assemble this circuit was similar to that of the second circuit. Although I almost forgot to put a resistor because I thought the LM7805 Voltage Regulator was gonna reduce the voltage but luckily someone helped us before the LED was gonna burn. The other thing I learned is that we still had to push the arcade bottom to turn on the LED as I thought that the potentiometer had this purpose.
Question 1)
First I would like to address the formal definition of interaction given by the author of The Art of Interactive Design, “Interaction: a cyclic process in which two actors alternately listen, think, and speak”. Although the authors uses this definition more as a metaphor, for this circuit the interaction we encounter among the components was a more responsive reaction to how each ingredient is dependent on the other. For instance, how pushing the switch will ultimately end up on emitting a sound through the buzzer. Although in the case of the circuit all of this is possible through and only through the use of electricity. Therefore, I believe that in order for us to conceive interaction there must be a key factor that all the components share, so in the case of all this circuit the main factor was electricity. Same with humans, there must be a key factor sending signals in order for us to speak, listen and hear.
Question 2)
From my perspective I had never appreciated how Interaction Design and Physical Computing had the ability to create Interactive Art. Before I only saw both for the purpose of developing technology. But now that I think about it, the school last semester took us to Shenzhen for a technology convention, were I had the opportunity to admire this type of art (without knowing where and how it came from). For example: there was a box where if you came closer it showed you different type of images (this was possible through detectors that where activated though movement). I just find it extremely cool that art can also be responsive to interaction. Not only it is fun and stunning but it also connects the audience closer to art.