Exercise 1:
Components: Arduino UNO, breadboard, 2 potentiometer, jumping cables
Steps: To complete this exercise, I first broke it into several steps: 1. Connect the circuit; 2. Open codes for Arduino and test; 3. If step 2 succeeds, modify the codes for Processing and test.
Process: for communication between Arduino and Processing, I refer to the in-class exercise on multiple values. After using map() function to change the value of potentiometer to the height and width of the canvas in Processing, I successfully drew an ellipse the position of which was controlled by the potentiometers. But when I asked Young to check it, it turned out that what the instruction would like us to do was to make the ellipse seem like a brush and could draw lines. The trouble was that in the result I got, each ellipse seemed like a single ellipse. So I add noStroke() function so that with all frames existing at the same time on the canvas, it would seem like drawing a line.
Diagram:
Picture: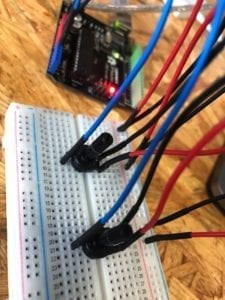
Video:
(First Try)
(Final Result)
Codes: <script src=”https://gist.github.com/Ellie-1809/2c964a65def9ed49d306da3360251dac.js”></script>
Exercise 2:
Components: Arduino UNO, breadboard, 1 buzzer, jumping cables
Steps: similar to exercise 1: 1. Connect the circuit; 2. Open codes for Arduino and test; 3. If step 2 succeeds, modify the codes for Processing and test.
Process: Things went pretty well. I chose mouseX() and mouseY to send the value and also involve if(){} and mousePressed() function to make sure the buzzer will only give sound when mouse is pressed. At last, I draw an ellipse which would follow the move of the mouse cursor so that the position of it could be seen more clearly.
Diagram: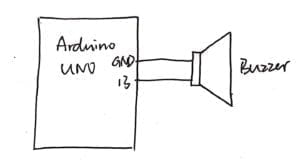
Picture: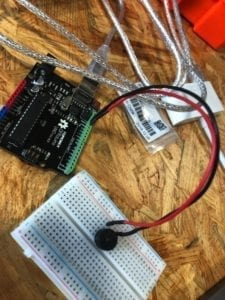
Video:
Code: <script src=”https://gist.github.com/Ellie-1809/538f0d50385aa4169159bb477e9afa8f.js”></script>