Context and Significance
In this midterm project, my group (Jonathan Lin, Jennifer Cheung and me) created a Shake to Quake competitive game. My previous group project taught me what kind of thing is interactive. First, it must have an input which receives the outer world’s information and an output which respond back. Second, it must form a loop. While the input determines the output, output also changes users’ decision thus changes future input. Last, the time interval between input and output is usually small. We agreed that making a multi-user game is the best way because games perfectly match my interpretation of interaction and competitive games are entertaining. A competitive game is never a new idea, but we innovated to combine the earthquake with a competitive game. We expected users to shake our 3D-printed cities. And the faster will be the winner of the game. Apart from a game, our project is intended to kids. This game can teach them the different levels earthquake has, as well as the destructive nature of the earthquake.
Conception and Design
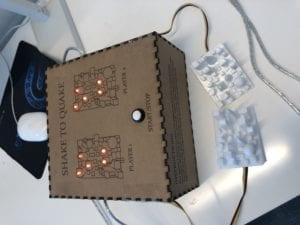
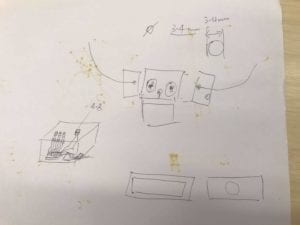
The sensors we chose to measure shaking motion was acceleration sensors, which is widely used nowadays. We want to install the sensors on two 3D-printed city model. And the users will shake the model to play the game. For the output, we initially decided to install several red LEDs on the 3D-printed city model as indicators. The goal of our game is to destroy the city as fast as possible. We use LEDs to represent buildings. The LED turns on when the corresponding building is down. We initially wanted to install LEDs on the 3D-printed buildings. Unfortunately, we quickly found that the city models are too small to contain that many LEDs. We considered using one RGB LED to replace several red LEDs, and we can use different colors to show different levels of earthquake. However, we realized that this indication might not be straightforward enough and might confuse our users. I suggested making a box and putting all the red LEDs in the box. Jennifer added that we can print a 2D Birdseye representation of the city on it. Eventually, we decided to make a box and use 5 red LEDs for each player.

Fabrication and Production
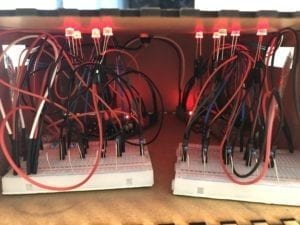
I was in charge of the coding part. And the biggest challenge I met was how to communicate between two Arduino. Our acceleration sensors connect to Arduino via I2C bus. And I knew that I2C bus protocol supports connecting more than one salve devices on one master device. However, the address of all the slave device must be different. Both our sensor has the same address. I searched online but still couldn’t change the address. I even asked Jonathan to borrow one Arduino MEGA2560 but still cannot solve this problem. My final idea is that I connect one sensor to one Arduino and combine two Arduino together. And here came my second challenge, which was how to communicate between two Arduino. Since the I2C bus was occupied by the sensor, I chose to use the serial I/O. But occupying the physical serial port will cause a lot of trouble in the debugging process. Fortunately, Arduino has one library named SoftwareSerial which can simulate serial port on almost all digital pins. And its interfaces are exactly the same as Serials. This helped me a lot. I quickly expanded the sensor code and created a simple communication protocol. It’s tricky that two Arduino don’t necessarily run synchronously. In the logic of sending a message to the other Arduino, I put some while loop to cope with the possible time mismatch. My first version program quantifies the shaking motion and lights up more LEDs when the user shakes harder. However, if the user shakes too hard, many LEDs will light up altogether in a sudden. Later we made a change: LEDs light up according to the accumulative amount of shaking motion. This change made the response much user-friendly. In the user test session, we found that everyone enjoyed the game, but they could hardly figure out when the game starts. One suggestion was to change the LEDs from respectively turning on to turning off. Jenifer said it’s like buildings losing their power. Another problem was that the button sometimes needs to be long pressed to take effects. After the session, I adjusted the code to fix these issues and add some start-up animations.
Conclusions
Our goal is to build an entertaining multiplayer game to tell which player’s earthquake is stronger. This project is interactive because the LEDs will turn off as a response to users, and users are also encouraged to continue shaking as the LEDs turn off. Our project is successful, as people were happy to play with it and we cooperated quite well. However, there is something we can do better. We can design more indication in the game. For instance, when the game starts, four LEDs may light up while one LED blinks. It may help users better understand that their goal is to turn off all the LEDs. Additionally, our project can be more educational. We can put digit dioxides on the box to display the level of the mini earthquake so that kids can have a clear understanding of the earthquake measurement. Throughout the whole process, I’ve learned a lot. I not only learned about advanced Arduino programming skills but also realized the importance of user tests.