Context and Significance
In our midterm project, Lana and I wanted to create a project that could be useful and serve a purpose. Taking what we had learned about the concept of interaction from the group project as our starting point, we were able to start brainstorming ideas for our midterm project. Having understood interaction as “being at least two actors expressing variable outputs that engage with one another and those outputs are interdependent on each other” we wanted to make sure our project had multiple actors interacting with one another. Initially, we wanted to create a lamp that turned on when someone clapped, but we realized it was too simple and a product like that already exists. Working from there, we ended up settling on creating a device that would detect a level of noise and react by turning red and start buzzing when the sound level gets too loud and remain green when the noise level is quiet. We envisioned our project to be in an area where it is normally quiet and should remain quiet; places like libraries and common areas. That way when the noise level gets too loud the device will turn red and make a sound. Our project is unique because it is something that is simple, yet can be very useful. It is of special value because it is a device that can be utilized in varying situations.
Conception and Design
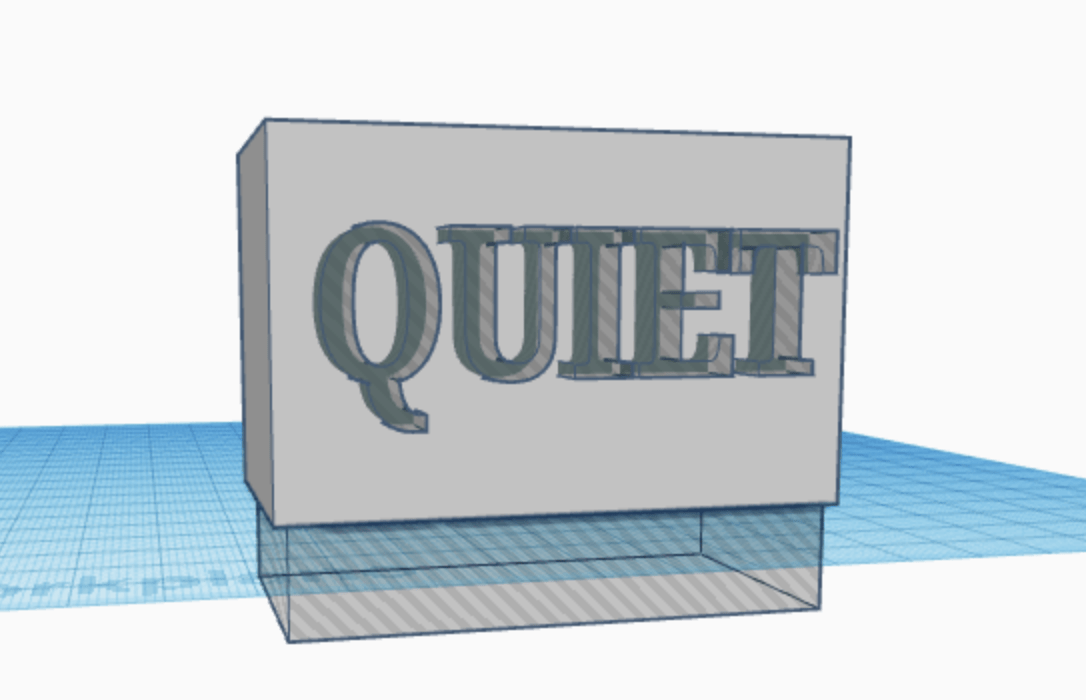

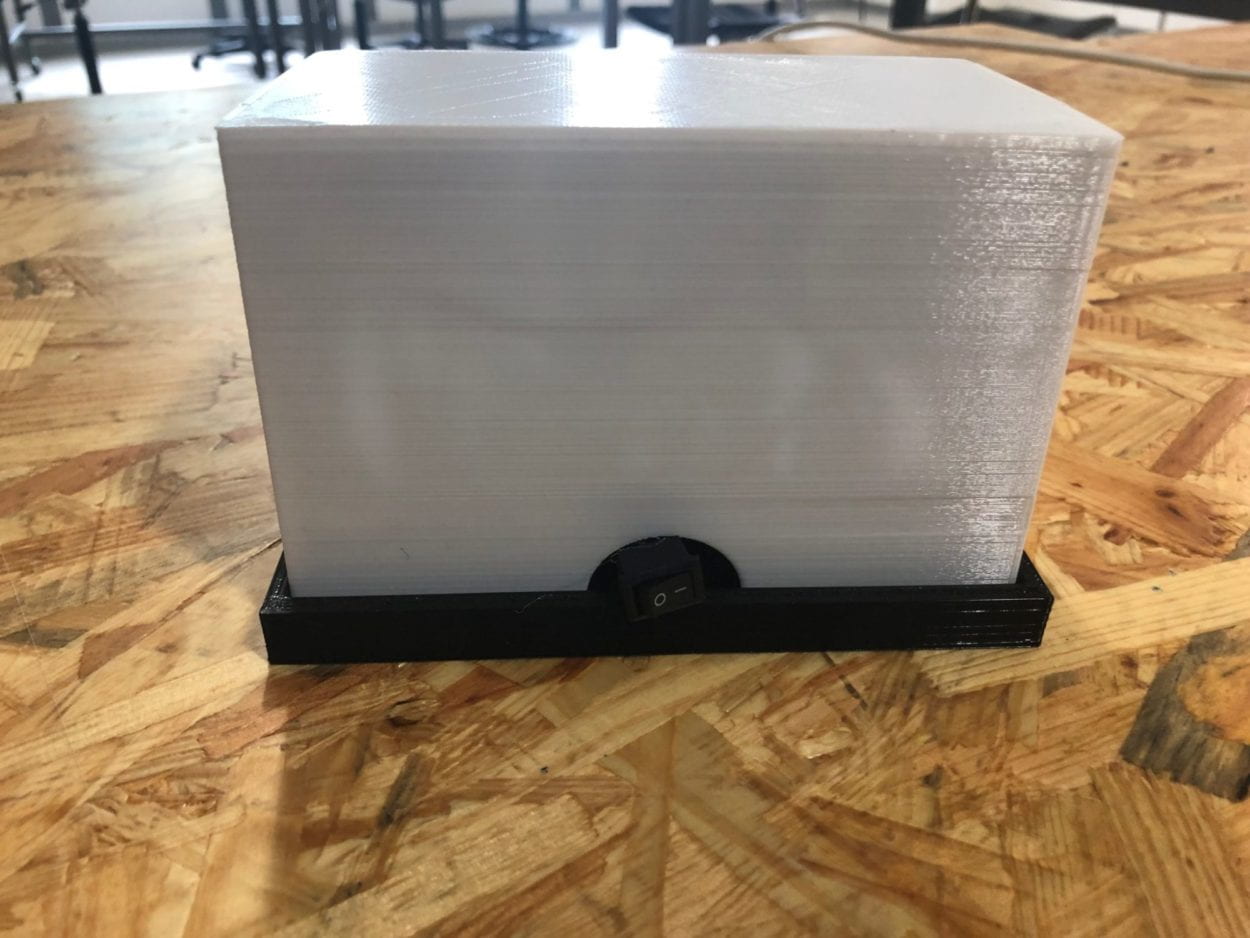
In the process of designing our project, we knew that we wanted to make the design simplistic and easy to use for its users. In designing the box that enclosed our circuit, we kept in mind that we wanted the user to understand its purpose when using it. We knew we wanted to 3D print our box because we wanted the light to shine through the box. We also added a hole in the back of the box so that we could power the device without having the Arduino outside the box. A base was also 3D printed because we wanted to ensure that all the wires and breadboard would fit inside the box. Prior to making our box, we were advised to laser cut our box because 3D printing would take too long. However, we were adamant in 3D printing it because we knew that with the design of our device, 3D printing would yield the best results and was better suited for our project goals. The LED would not have looked as nice through wood or clear plastic from laser cutting. In the design of the box, we cut out the word “Quiet” so that users would know to be quiet. We didn’t feel a need to add any other words because we all associate the color green with being good and red with being bad. We intended the LED to in essence do the “talking” for us.
Fabrication and Production
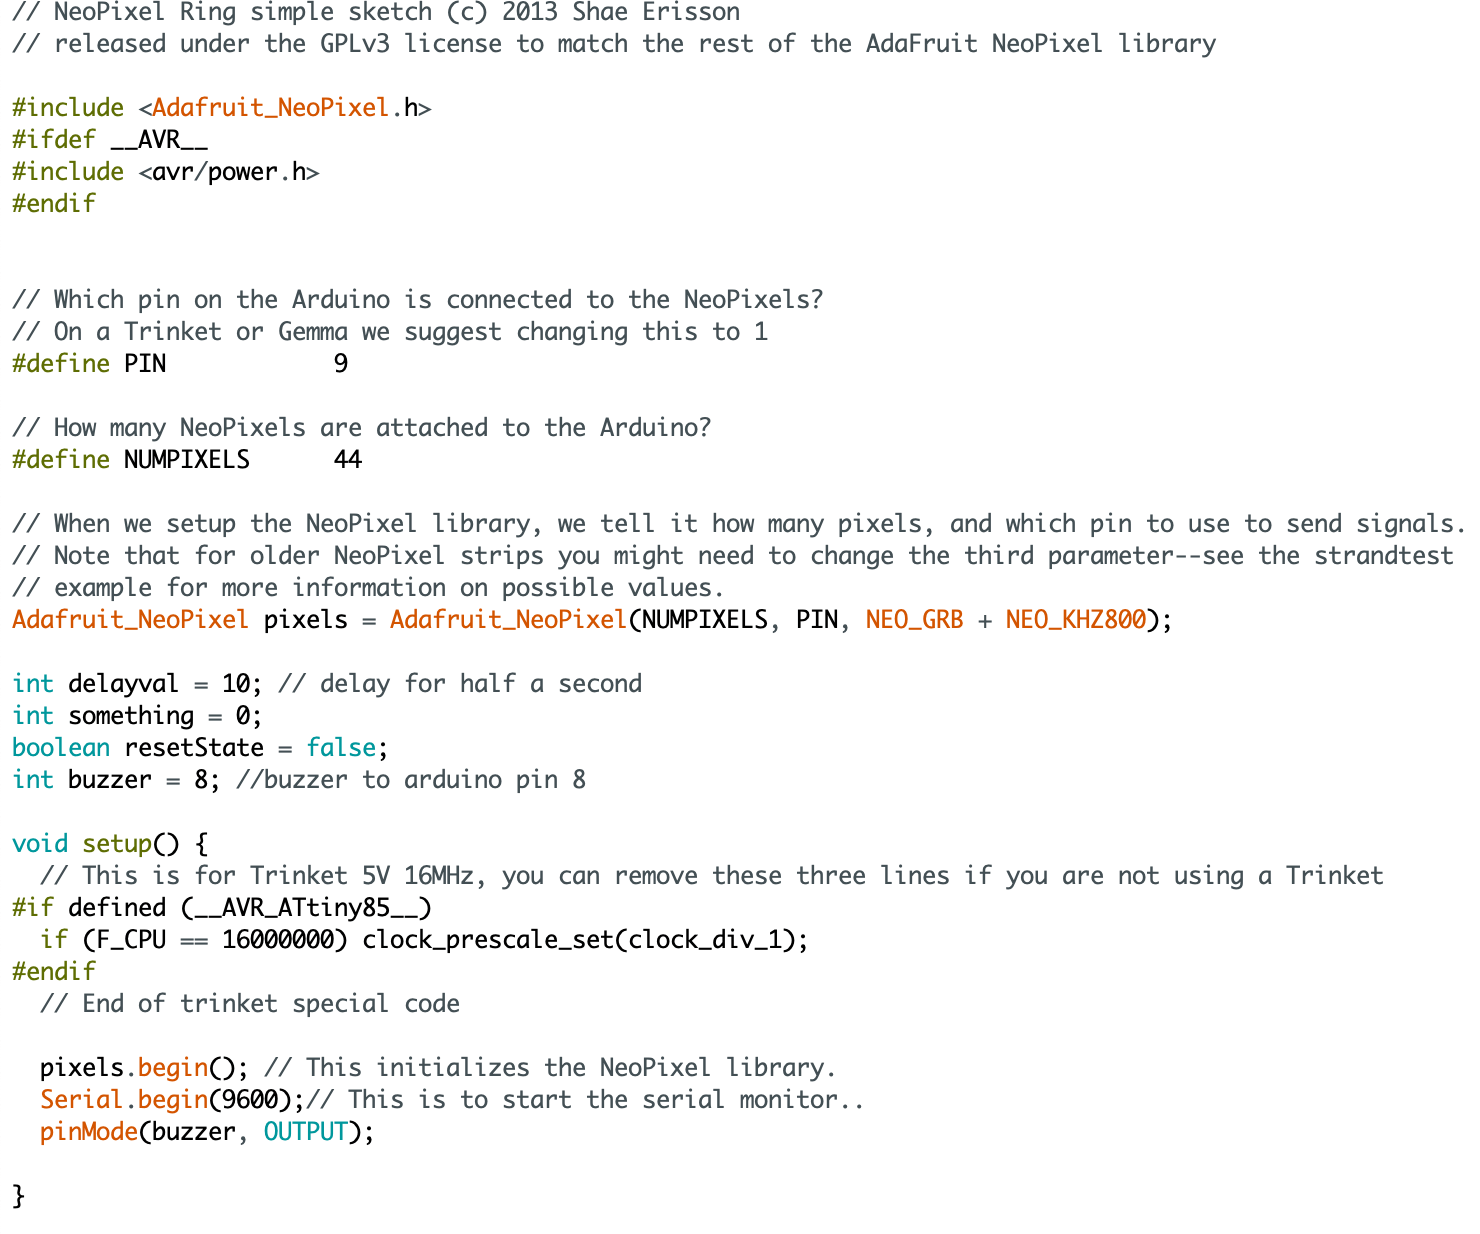
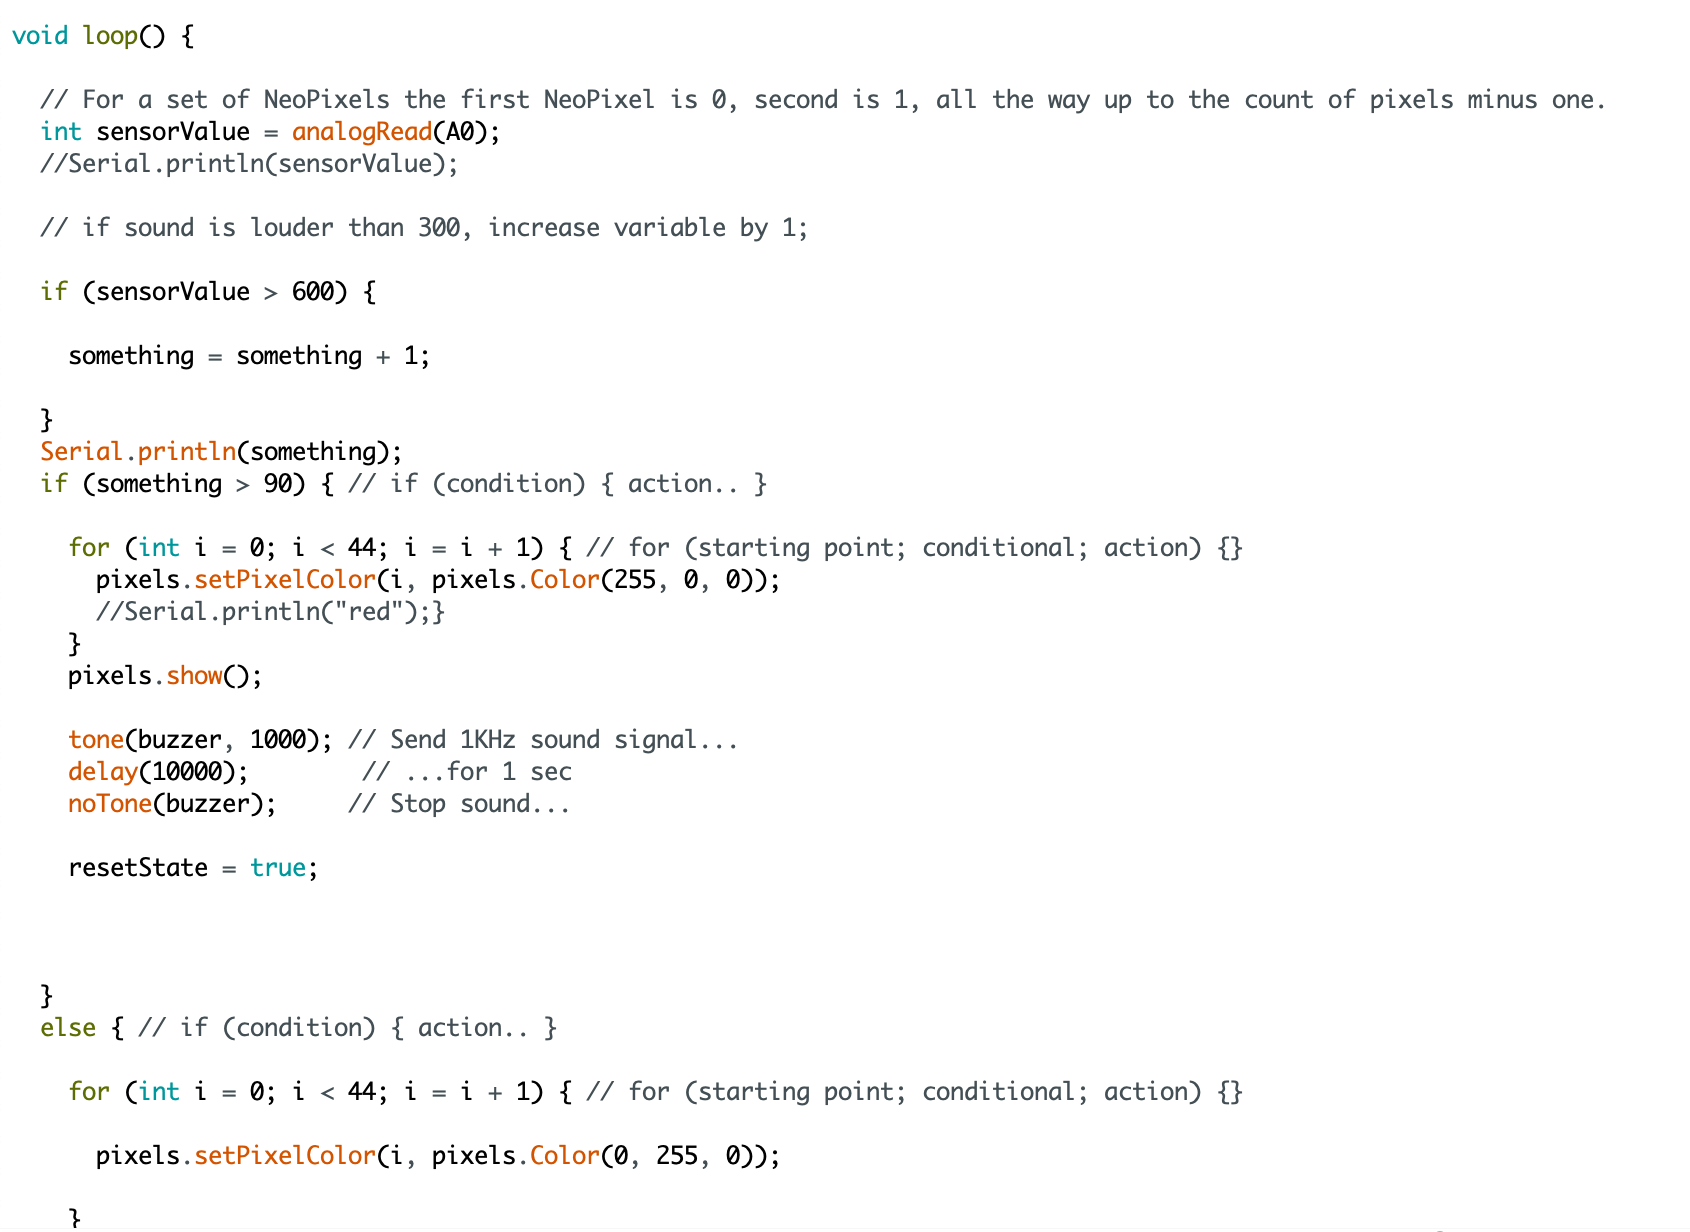
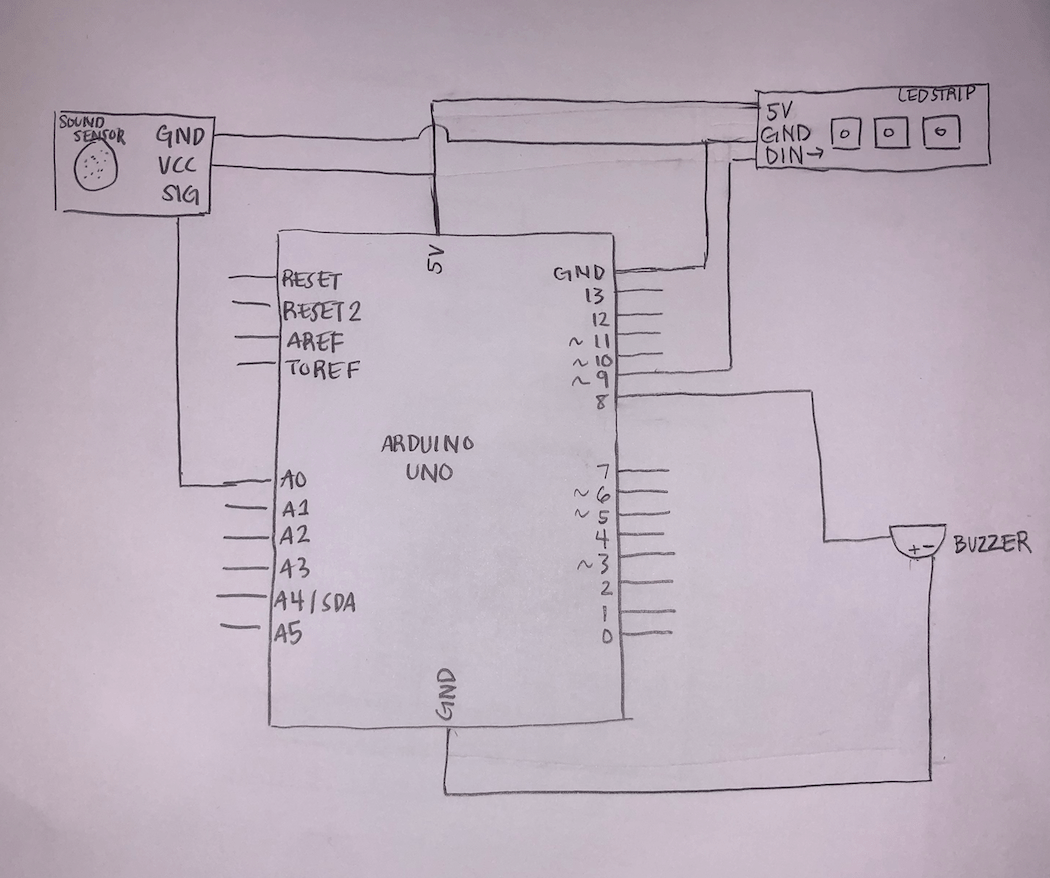
In the production of our project, we ran into a lot of problems and as a result, our project went through a lot of changes. Initially, we wanted a gradient of colors for different meanings of noise level: green- good, yellow- a little too loud, red- too loud. We then realized adding yellow would be unnecessary for the goal of our device so we simplified it to only have red and green. We were also not sure as to where our source of light was going to come from. We started with individual LED lights and then decided a LED strip was better suited for us. The hardest part for us was coding. We were unsure as to how to code our program so that the LED light would turn red once a certain level of noise was detected. Throughout our coding process, we got a lot of guidance and help from teaching fellow, Leon. He helped us set our “if…then” statement and also how to make our program turn green when the level of noise is okay and turn red when the level of noise was too loud. We were advised in making our program reset itself every round. Making the program reset itself allowed us to successfully complete our project goal.
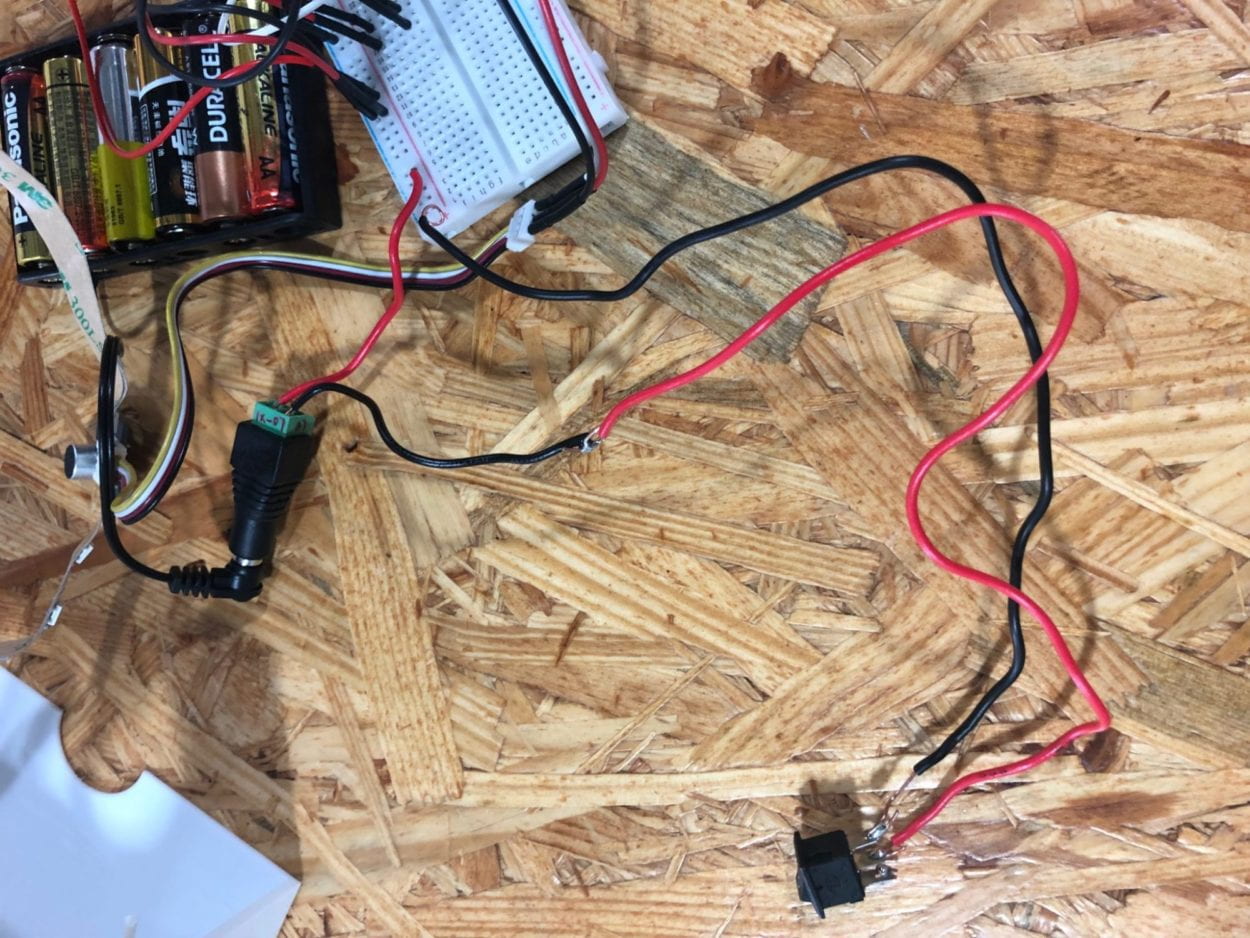
During user testing, we got some suggestions in which we adopted into our final design. There were people who told us our project needed no altering. There were a few people who told us we should add a potentiometer so that the threshold of sound could be changed depending on the setting. We decided in the end not to follow through with that advice because we thought that since our device is meant for places where it is supposed to be quiet, by adding a potentiometer there would be no purpose. The advice that a lot of people told us to add which was included in our final project was adding a switch so that the power source would be included inside the device. That way the device would seem more compact and easier to use for the user.
Conclusion
The goal of our project was to create a device that would be useful in a setting like a college, where individuals value quiet spaces. We also wanted to ensure that the concept of interaction was incorporated into our project. In my perspective, our project fits my definition of an interactive project. There is consistent communication between the user and the device. Each actor gives a response to another actor and the process is cyclic. Once the audience understood our project, they were able to successfully interact with our project which went against my expectations. I expected users to understand what the device’s purpose was by simply looking at it, which wasn’t the case. Although our project was simple, our intended use for the device was achieved. I am now able to understand that in designing you have to focus a lot on user experience and the little details. In our case, an example is the sensitivity of the sound sensor. In the future, I would definitely consider how to better design our project so that it communicates better and efficiently with its user. I think also being open in taking advice from people and deciding what to carry over into the final is important. From our accomplishments, I am now able to understand the whole design process and the amount of time and effort it entails.