Final Project Documentation

A. Corgi Ball Catching Game – Hongxi(Shane) Zheng – Professor Andy

B. CONCEPTION AND DESIGN:
This project is designed to be running on Arduino and Processing, obviously, and it could read off the value from the flex sensor in order to trigger the image on processing. On processing, there is an image of corgi running, and once processing receivee any significant output to the serial port, then it would trigger the ball to be bounced out. The ball’s movement is randomized, and the dog will bring back the ball once it reaches the ball, then waiting for input again.
The user testing session definately gives me much insight on how the project should go in the end, but before that, it was Andy’s idea to bring vector into the code, so it would perform much better on visual.
Although it was something we have never learned in class, and it does give me a pain in the back, in the end the result does come out really nice, even though in comparsion with others in class it was something not outstanding, but I was satisified.
Then the user testing gives me the idea of we should not just put the flex sensor on the table but at least let it hand. We did have the idea of placing it on the wood stick to let it look like a seasaw, or have some other ways of triggering it, but in the end we have not had a great idea on how to achive it, so it looks a little shabby still.

C. FABRICATION AND PRODUCTION:
We had the idea of digital pet at first, much like the old, classic digital pet on the watch or something in the eariler days of technology, but we gave up on this idea, because there were so much needed to be achomplished, and having them chaging the function displayed accordingly is likely going to be a pain, so we goes with the most imporant part of the digital pet design, and that is to play with it.
The project was never intended to be this hard at coding first. We had the code of a ball bouncing according to mouse grab/arduino input much earily before the user testing session. This is probably the most success I have found during that process, because I found my code working just fine and capable to adjust the ball speed accordingly.
However, as we decided to go with using vector in the code, we had much trouble, and I spend a long time learning how it should work, and how I should code this to work around my projcct.
Now, those were just a bit of complain of what I had went through, but I don’t regret doing so, and I considered it to be a big success because the end movemnt of both the dog and the ball looks nice.
I also forgot to mentioned, we originally don’t have the drawing of the corgi, and we wrote our code using two balls chasing each other, then we go from using image of a corgi, but with some white background, to me drawing a corgi and have the background to be transparent for better look in the end.

D. CONCLUSIONS:
Now as we think back to this project’s original idea of digital pet, I would not call this project perfect, because it is far from it, but I would also call it successful, because learning while working is also fun. The project does achive the goal of entertaining, and it is simple but also interactive.

E. APPENDIX
Here are the archive file of my code.
https://drive.google.com/file/d/1rjX3VW2hZ26iNJ-4jYV2W1WKlnVRibXo/view?usp=sharing
Midterm Project Report

And there it is, finally went by the midterm.
The midterm project’s title is the Weight scale, and my team’s instructor is Andy Garcia.
We originally had two different ideas for how this midterm should go and what we wish to create, for me, I wish to create a music player that could play the sound of the Chinese traditional note of Gong Shang Jue Zhi Yu, but in the end, we figured that this may not be as interesting and interactive as enough. so we give up on this idea. Then it is my partner Dino’s idea to create a weight scale. He is recently cutting weight, so he is on a diet, and for me, I’m overweight, so the project kinda fits with us. However, having just a scale is boring, what is important is the interaction. What we can make out of a scale? How to make this interactive? This became our next problem.
In the later discussion with professor Andy, we began to think about two approaches, one focusing on the feedback, and one focusing on the display, for the feedback we have been learning many of the materials we used in class. We think of using the buzzer and led as user feedback, by inserting a number into the program, each input in number will result in a reaction from a buzzer and led, letting the user feel that there is an interaction. However, we think this is very odd in terms of a project since there is not much to be built. We, later on, decide to focus on the display, which is to create more like a more realistic scale.
We break this building portion down into several parts, the weighting function portion, the display function portion, and the outlook portion. Since when prototyping we think of using cardboard which was given to us and many of our fellow classmates are using them as well, we decided to do the same thing. Additionally, we borrowed a weight sensor from the equipment room for the weighting, thus we begin with the building.
It comes us with many problems when doing so. I have never used a weight sensor, and the ones we borrowed are also not in a good shape, the wire is constantly being pulled out since the thin wires inside are too fragile. The coding is confusing, and we also found out that, using cardboard to adjust the weight sensor is a no-go since cardboard is too weak for object holding and also for screwing the sensor. It could not provide a solid standing.
Thus I have to go online and find merchants who cut the acrylic boards to make the platform for me, and in the end, it comes out very nice. Also, the merchant, after understanding what I want to design, suggested I purchase an LCD screen and told me that it would be better for the visual representation, which is also a problem we think to overcome when prototyping. Having the user looking constantly at the data displayed on the laptop screen does not seem to work well during the user testing session. So I asked the merchant to cut additional holes on the acrylic board for the spot to screw in the screen.
In the end, after we have overcome many of the problems we faced during coding and building, the result looks pretty nice. Our project had the instruction displayed on the lcd screen each run we start the Arduino, and the button reaction from the IR remote control, although is not very sensitive and requires time between each button press to react and decode, the process was interesting. I think what we achieved is pretty much aligned with what we envisioned back in the beginning from the idea generating.

https://drive.google.com/drive/folders/1zbZL2q2ldcwbvU5CJftV5gE6Ge2N7Fvk?usp=sharing

Group Research Project Report

This group project is probably the one that I feel most comfortable doing. Usually the group project that I have done are much different than what I would have envision if doing an individual project. Yet for this time, I think the main difference is that I was lucky enough to be randomly placed into a group of cooperatived members, who are willing to all put efforts to get this thing settled with.
First, the idea is from the apocalypse story that was from the readings in previous weeks. We quickly decided this to be our background because, well, it is very easy and at the same time very inclusive to all different type of themes and ideas. We think of different kind of items that should be prototyped, and for example a watch that monitored people’s status, a sensor that attached to the brain, and some others, in the end we realized that many of our ideas connected with mental control and status monitoring, and thus we combined some of our ideas together, and created out a helmet that could do mental control, block certain part of one’s feeling in order for one to make diffcuit decisions. This also fits with the theme of zombie apocalypse, like in the story of Walking Dead there are many times when the team needs to kill some one of their team because he/she was infected by zombie virus.
During this process, each individual of us have a role in this performance. I am the script writer of this drama, the full script is attached here:

https://docs.google.com/document/d/1wng6TmDsXArGsIHGceWDLhUC3F4wQzK5Lgo3arzO2B0/edit?usp=sharing

While writing the script, all of us in the group were giving insights on how this should play, and how the helmet should look. In the end of this post I will share a folder which contains all the image of us working and performing. I was focusing on the script, and the others where working on the helmet, since we come up with the idea that both Angel and Riley would have to wear this helmet, we also have to adjust the helmet size to fit both peoples’ head.
When someone was tired, then he/she would come to the google doc and fix/write the script with me, all of us change ideas, fixes the lines in the script so it could fit each individual’s tone.

Other team’s performance:
I think the team that perform the dream recorder is rather interesting. This is a machine that could be weared during the day when one has a dream in previous night, and he/she could recall what was in the dream, be emerged in the same feeling like he experience the same dream. This is somehow relatevent to the interactive freature in the fictional novel, like the room that could mimic the environment in the novel. Personally, I would wish things like this to be true. There are many times I feel in real life that there is a deja vu feeling, and I felt that I have seen this in my dream.

https://drive.google.com/drive/folders/1USmdHCVNbd4yVUCQmVVKyewjdDcdKl-q?usp=sharing

Project B: Documentation

Due to the fact that I have returned the aruduino parts of my project, I am afraid that I couldn’t provide the final video of the project in work, but only the short video that I took for consult ing purposes.
The project’s name is Azuki the cat.
The figure of the cat is from a Japnese artist named Nobeko, who shares a lot her story with the cat Azuki using cartoon images. I have been using a lot of this cat’s meme on the social media, which pushes me to create this project.

The project consists of two parts, the html, and the physical cat figure.
The user should pick his/her decision on the designated console, and according to the decision he/she made, the cat will react accordingly using movements with the eye and the blink of the LED.
Here is the video of the project.

Although this project is simple, and in comparison with all my classmates it is pretty much awful to the defination, but personally, I feel great for what I have achomplished through this process.
I have never learned Arduino, so pretty much everything during this project is new for me. I have also challenged myself creating the html and code with it instead of using P5.
This process of learning is great, and in the end, even the project isn’t great, but I feel great for what I have learned.
Additionally, I should thank professor Gohai for helping me all along since the beginning of this semester. I have encountered some personally problems which have impacted my acedemic performance greatly, but he shows understanding and offer me helps to complete the project, thank you again for what you have done, and thank you dearly for this semester.

Exhibition Review “The Pieces I Am”

Telegarden, a program started by Ars Electronia from June of 1995, was an invention to create interactions for users on the web to the real world garden moved by a robot arm.
The project now could be 3D printed using 3D printer, using this 3D printed material and the online interaction tools, users could view and interact with the garden remotely, and anyone could view, monitor, and even water the plants since its been seeded via the industrial robot arm, and more importantly, the seeding selection is also in the hands of the users.

The Telegarden creates a physical garden in reallife and move the process of taking care of the plants to the virtual space, in the Ars Electronia center, anyone can view the garden as a guest, and the right to plant the seed is granted for those who shared their email address with the cooperative, and the activity log will be saved in the center for care purposes.
I choose this project because…Professor Gohai hand this to me, but of course, I also think this project is interestin in this own way. Anyone with interest is allowed to participate in this event of cultivate their own garden, and more importantly, it also does this in the style that fits in this digital era, which makes me wonder, if garden like this could be virtually controled, are there more programs such as Telefarm, Telepan, Telebow, etc.

Project A Documentation

Moving Eye

This is a project using 3D printed and laser cutting materials to complete. The idea is to have an eye moving within the frame constrained by the pad to mimic the eye movement that is horizontal. By clicking on the screen on P5 website, the user could move the eye into three different poisiton, the is from left, mid, to right.

I got this eye out of a sudden. Originally I was still thinking of the idea of this project, but I couldn’t come up with one, yet when I am playing a videogame that has a scene when a monster perform a jumpscare and rush up to the screen at an almost jumping out of the screen distance, I could see the monster’s eyes are moving in order to furthur enhence the scary feeling, that is where I came up of this project idea. 

However, even though I had helps from many people, and I have created a somewhat close product of what I aimed to achomplish, the project didn’t make it to the end. The eye component was cracked in an accident, and by the time when I come to the class the eye was already almost cracked apart, and when I got to the dorm, it is already completely cracked, so I couldn’t provide a moving in action video.

Within this page I have attached three of the autodesk model that I have used to create this project, which I have separeted the models into three parts, the eye, the pad, and the lever.


As a reflection, there are many things I have learned throughout this process, the usage of 3D printing and laser cutting are both things I have heard and see but never got a hand on before, I am very excited that I have learned the basics of using them. The usage of arduino is very new to me, since I didn’t choose interaction lab, learning how to use it is intersting. The lastly, when working in autodesk, don’t get too excited and put in numbers in the scale slot just by feeling, the object looks fairly small in the autodesk, but when it came out of the laser cutting/3D printing machine, its scale may be very wrong.

Challenge 1 Blogs Week 4

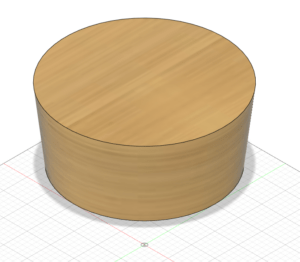
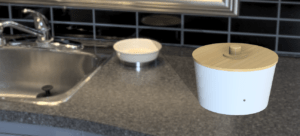
I used the Rilsan invent Natural PA-11 for the apprence of the container, and the cap I have used the bamboo wood.
Wood as cap has the advantage of leakproofness, and it can effectively prevent dust go inside of the container, which is a key health concern of the product.

The polyamide material as container is great for cooling.

As for the scene, I have used a scene from Maxime Roz, the kitchen set looks very natural and fits average people’s day to day lives.

Challenge 1 Blogs Week 3

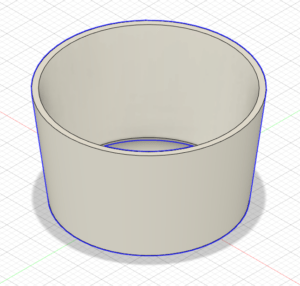
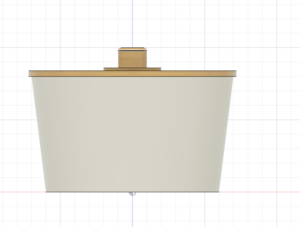
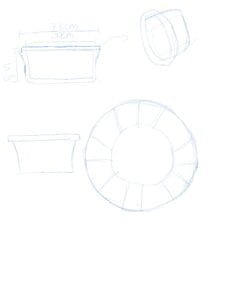
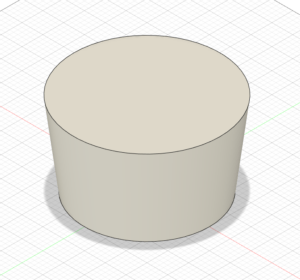
First, I draw a circle on the Y Plane. Then, I offset the Y plane, leaving space between the Y and Y’ plane, draw another, bigger circle, then loft between the two circle.

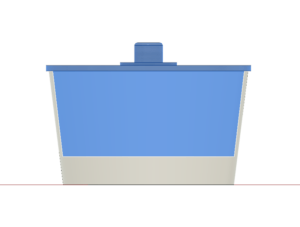
Second, to leave enough space for the container, then use shell.

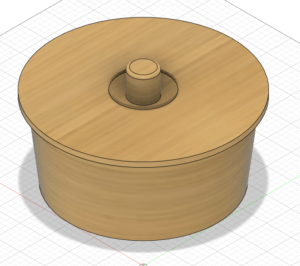
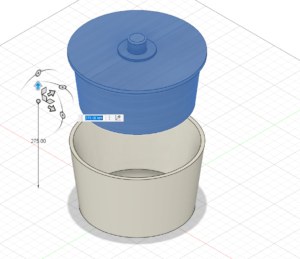
After the containing part is done, moving on to the cap. Drawn two circles on different planes, and loft between them. This will be the fillet object that be used to give the shape of the bow.

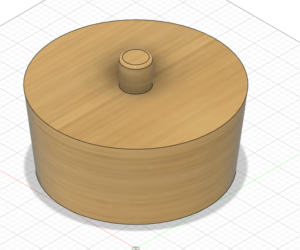
In the center of the circular space, draw another, smaller circle, extrude it and also fillet it, this will be the hand-holding part of the cap.

Finally moving to the cap itself.

The product looks like this in the end.

Challenge 1 Blogs Week 1

Problem:
1. Oil stains in the food containers are hard to wash
2. Summer days are still not over
3. Too lazy to wash dishes

During a phone call with my friend who is currently living alone for work, he has mentioned about how different it is to live alone, and how much more work he has to do daily. One of those works being watching dishes. He has told me that he has changed from making his own dinner at night to instant foods/uber eats delivery, because he really does not want to come back from a long day of work, making a few plates of meals, and then spent a long time watching them afterwards.

“It’s not like I don’t like cooking or something, im just too tired to wash all the dishes and the cooker”, what is what he told me originally.

Then I began to think, what if YOU DON’T have to wash them?

If there is a type of dish which one does not need to watch on their own, or a type of dish one could just throw away after using, wouldn’t that be nice?

I know clearly that plastic plate does the same thing, so this is definally a silly/useless design.

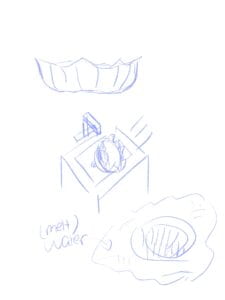
I think of using ice as a dish/plate/bow. Before cooking one would just have to prepare one inside of a container, and then use the ice bow to hold foods/meals. After using, one could just throw the ice bow into the sink, let it melt on its own and it will just go down to the pipe without a problem.


Reading Assignment Blog Post – Week 4

James Dyson is definitely a man with many great ideas, and also a man who will put on efforts to work the ideas out, and most importantly, a man who comes out with a profound product in hand in the end. However, there is also a problem which I think is important about his product, and that is the pricing of his product.

My knowledge of the vacuum cleaner stays on the perspective of simple, durable, and eazy to use. It is just a tool with the bare minimum function of sucking up visible junks on the ground, and that is it. Problems such as navigation and memorzing where is clean, where has been cleaned are problems of my own. Dyson cleaner is out of this scale.
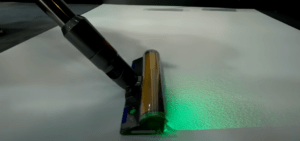
If one wonders the region has been vacuumed, or is the region clean enough, when using regular vacuum cleaner these are problems that rely on memories/experiences, but for the cleaner with laser decter on it, it is just a problem of switching on the laser mode and see what is on the ground.
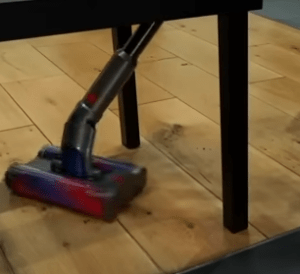
Also, majority of the vacuum cleaners facing the problem of navigating. the angle of rotation for the head of the cleaner are often limited to a small degree, causing the users have to move around and find a better angle using the cleaner. From the video, Dyson is standing still infront of the small desk, and yet the cleaner has the capability of sucking up all the spaces underneth without a problem. This is also a very valuable trait.

But there is also the problem of the pricing. The vacuum cleaner comes with the price starting from $700, although I know that there is high value technology inside of this machine, the price is looking like a outlier in the market. The product could be beneficial when doing houseworks, and probably worth the price, but instead of paying 700 or even close to 1000 dollars on a cleaner, I think majority of the people would still perfer a $100 cleaner.