II. FABRICATION AND PRODUCTION:
Vickie and I collaborated very well, working together on the project from May 5th (last recitation session) to May 12th (IMA Show). We meticulously worked on coding and circuiting tasks throughout the fabrication and production processes. We both displayed high dedication to the project, striving to build and refine it to the best of our abilities. While we aimed for perfection, it’s important to acknowledge that minor defects may still exist. Nonetheless, we are immensely proud of our joint efforts and progress within the given timeframe.
Steam sensor
We began our development process by focusing on the Arduino sensor. Initially I was planning on using humidity sensor, while Professor Gottfried Haider generously lent me a steam sensor. I spent time on understanding its functionality and the basic circuitry and coding involved in Arduino projects. Also, I explored the communication between Arduino and Processing. In our last recitation session, I constructed a simple prototype that allows the vertical movement of a video background to be controlled by the user’s breathing. Below are the lines of code used in this implementation:
import processing.serial.*;
Serial serialPort;
int NUM_OF_VALUES_FROM_ARDUINO = 1;
int arduino_values[] = new int[NUM_OF_VALUES_FROM_ARDUINO];

import processing.video.*;
Movie myMovie;
void setup() {
  size(1024, 576);
  myMovie = new Movie(this, "background.mp4");
  myMovie.loop();

  printArray(Serial.list());
  serialPort = new Serial(this, "/dev/cu.usbmodem101", 9600);
}

void draw() {
  background(255);
  getSerialData();
  float hy = map(arduino_values[0], 0, 700, -height/3, height/3);

// if (mousePressed == true){
  if (myMovie.available()) {
    myMovie.read();
  }

image (myMovie, 0, hy);
  rectMode(CENTER);
  rect(width/2, height/2, hx, 200);
}

void getSerialData() {
...
Arduino:
//S-Analog pin 0
void setup()
{
 Serial.begin(9600);
}

void loop()
{
 int sensorValue;
 sensorValue = analogRead(0);   //connect Steam sensors to Analog 0
 Serial.println(sensorValue); //print the value to serial
 //delay(200);
}
During the recitation, when experimenting with the steam sensor, I observed that its sensitivity to breathing was not optimal, and there was a significant delay in its response. Additionally, I realized that the mapping of the video positioning required more precise adjustments for a smoother user experience. These findings highlighted the need for improvements in both the sensor sensitivity and the mapping calculation to ensure more responsive interaction with the video background.
In the meanwhile, Vickie worked on modifying the example code of Flappy Bird into a “Swimming Diver” game by adjusting the game mechanisms and replacing the background and other visual elements. Example code was found on Processing Forum.
Helmet
Moving on to the next week, our primary focus during the initial half was on fabricating the helmet.
Over the weekend, we purchased all the necessary materials for our project, including fabrics of various colors and textures, the required hose, straws, and a paper model of a helmet. With these materials in hand, we brainstormed and formulated three potential plans for constructing the helmet. After seeking guidance from our Professor, we ultimately settled on Plan 3 for several reasons: 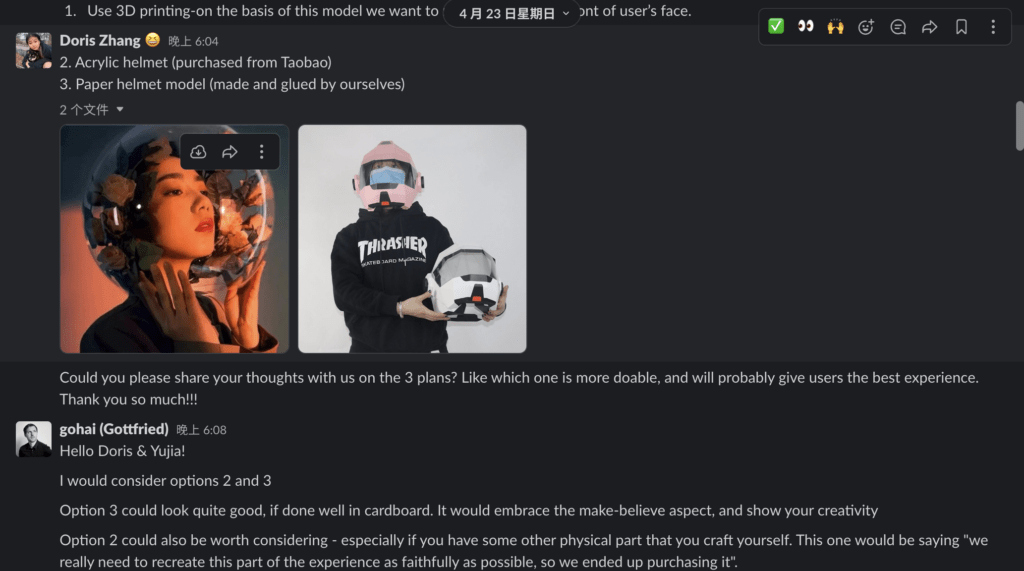 1. Using cardboard in its construction allows for an enhanced sense of make-believe (and immersion);
2. Plan 3 offers visual appeal, capturing the attention of users.
3. This plan provides flexibility for future adjustments, such as adding components like earphones and sensors.
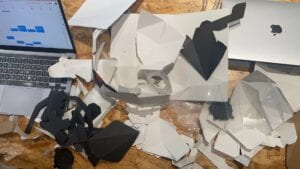
Cardboard fabrication: We folded, cut, and glued the model together and built a brought prototype paper helmet first. There were so many fine parts that required us to be patient and careful for the glue to dry and fix.
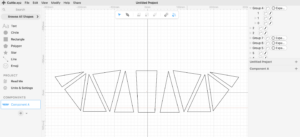
Mask: To ensure precise measurements, I measured the dimensions of each folded surface of the face mask. Using these measurements, at night, I replicated each triangle (and quadrangle) on paper, accurately capturing their proportions. Next, I drafted a design using Cuttle.xyz, inputting the hand-calculated numbers to generate a digital representation.
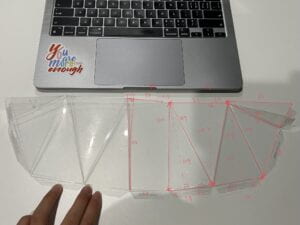
As Cuttle doesn’t support drawing non-isosceles triangle shapes with specific side lengths, I divided each triangle into two right-angle triangles and combined them accordingly. Vickie performed the laser cutting after I sent her the SVG. file. By collaborating closely and leveraging our respective skills, we successfully transformed the design from a concept to a tangible reality.
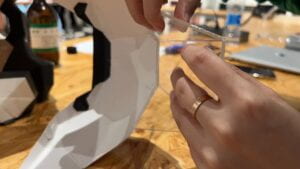
Combine them together: We were quite struggling when attaching the cut acrylic boards. The connections between the boards were not flat but asked for specific angles for proper assembly. The pieces kept falling apart, causing some frustration. However, we overcame this issue by reinforcing the connections with a small amount of hot glue, effectively strengthening the bond. Still, the mask was the most fragile component in our project and kept annoying us in user testing and the final presentation.
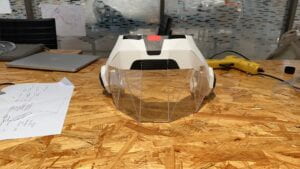
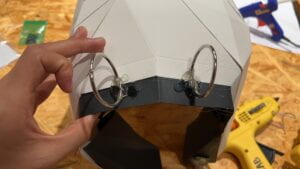
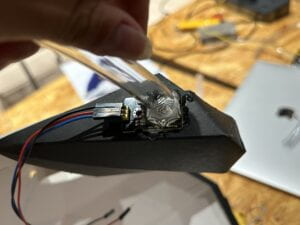
Additionally, we reused the iron rings previously purchased for our midterm project. These rings were to secure the hose around the neck of the helmet, providing a stable attachment. At the other end of the hose, we connected the steam sensor. Furthermore, we integrated a wired headphone into the helmet, enhancing the user experience. With these additions and modifications, we successfully completed the basic structure of the helmet, achieving a milestone in the fabrication process.
Ultrasonic Sensor
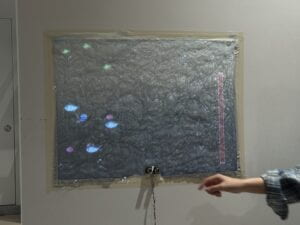
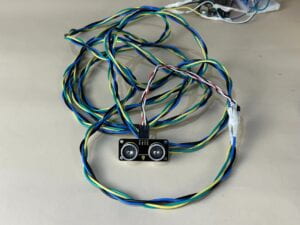
As previously mentioned, we incorporated an ultrasonic sensor to detect the distance to participants as they simulated swimming motions. This detection then triggered the character in the game to “dive upwards.” First, we faced challenges in determining the optimal placement (height and angle) of the ultrasonic sensor on the projected wall. We experimented many times to find the ideal position. Additionally, we encountered difficulties in calibrating the sensor’s values to establish an appropriate threshold that ensured smooth gameplay.
After several attempts, we ultimately affixed the sensor at the bottom of the projected display. We used bunches of paper tape and hot glue to fill the gaps between the wall, the fabrics, and the sensor. With these adjustments, we achieved a more consistent sensor response.
Regarding the code, we made final modifications to our IMA presentation setting. This included adjusting the threshold value to 90 and appropriately changing the sign of the speedY to align with the gameplay mechanics. These refinements ensured a smoother and more enjoyable gaming experience for our users:
// Add condition to check armMov and call jump function
   float armMov = arduino_values[1];   print(armMov);
   if (armMov < 90) {
     b.jump();
   }
Failures (with Processing)
To our surprise, unlike what we faced during our Midterm Project, the majority of our struggles (about 70% of our time commitment) revolved around the Processing codes. Starting with the foundation of the Flappy Bird scratch, the final version of our game differed significantly from the original, to the point where it felt like building an entirely new game.
Lagging code: One of the major issues we encountered was severe code lag, which significantly impacted our in-class presentation and could be considered a “failure” in that regard. However, it turned out that the solution to this problem was much simpler than expected. The cause of the lag was traced back to a single line of code that we mistakenly added: “frameRate(80);.” Deleting this line of code resolved the issue entirely. It was puzzling for us to have faced this problem, as the code had been running smoothly since I tested with the steam sensor alone at the first place and performed decently in user testing as well. This confusion bothered us for two days as we attempted to debug the code ourselves. Eventually, we sought assistance from Gohai. He promptly identified the problem: the experimental addition of the line “frameRate(80);” that we had forgotten to remove.
The game ran smoothly once this oversight was rectified, allowing us to move forward in our presentation and subsequent iterations confidently. This experience taught us the importance of thoroughly reviewing and refining our code to ensure its optimal performance.
State transition: One significant challenge we encountered was the need for Vickie and me to assist each user with putting on the helmet and mask and explaining the game instructions. To overcome this hurdle, we implemented step-by-step instructions that required users to click through the instructions themselves. This approach freed us from explaining the game rules each time and, more importantly, improved the overall user experience. I took the initiative to hand-draw the visual settings for the home page and subsequent instruction pages. Furthermore, I was proud to incorporate the concepts learned from Lecture 06.1 on state transition to improve code organization and functionality.
However, this solution presented a new challenge. Initially, we used the “if (mousePressed())” condition in specific areas of the instruction pages. Unfortunately, this approach did not work as intended, as the pages transitioned too quickly when the mouse was pressed, and participants did not have enough time to read and understand the content thoroughly. Based on our knowledge and guessing, this might be because 1. the mousePressed() function works globally OR 2. when the state transits to the next, it was so fast that the mouse was still “pressed,” so it would just automatically pass to the next state, repeatedly.
 if (mousePressed) {
       state = 2;
     }
   } else {
     state = 1;
   }
   println(state)
; }
To solve it, we also tried multiple methods. For example, we replaced all the “mousePressed( )” with “mouseClick( )”, but it did not work. We also introduced delay() within each state to provide Processing with sufficient time to respond to the release of the mouse click. Unfortunately, this approach proved unsuccessful as well. Finally, an idea struck me to add a delay() function in the code responsible for transitioning between states. Fortunately, this approach proved effective, as a slight delay greatly enhanced the overall user experience and eliminated the issue.
By incorporating this adjustment, we successfully improved the usability and readability of the instruction pages, ensuring that users had ample time to comprehend the information before transitioning to the next state:
//State setting, four states in total
   if (state == 1) {
     state1();
     delay(100);
   } else if (state == 2) {
     state2();
     delay(100);
   } else if (state == 3) {
     state3();
     delay(100);
   } else if (state == 4) {
     state4();
     delay(100);
   } else if (state == 5) {
     state5();
     delay(100);
   } else if (state == 6) {
     state6();
     delay(100);
   } else if (state == 7) {
     state7();
     delay(100);
   } else if (state == 8) {
     state8();
     delay(100);
   } else if (state == 9) {
     state9();
     delay(100);
   }
 }
Sensitivity of Ultrasonic Sensor: Another problem we failed to resolve fully, as previously pointed out, was with the Ultrasonic Sensor. We had to adjust the value and map( ) scale so many times. The Ultrasonic Sensor operates by emitting soundwaves and receiving the corresponding signals bounced back to calculate the distance to an object. Consequently, the accuracy range of the sensor is quite limited, requiring participants to perform arm movements directly in front of the sensor to achieve optimal performance.
What’s more, the reaction time of the Ultrasonic sensor is further reduced by minimizing the print delay from Arduino communication at an optimal frequency. While we could not resolve these issues fully, we continuously worked to find the optimal balance in adjusting the sensor’s values and communication settings. Despite the limitations, our system functioned reasonably well, providing an engaging and enjoyable user experience overall.
others
Braid the wirings: Inspired by another project during the User Testing session, we braided all of our wirings to make them look tidier (and more visually appealing too).
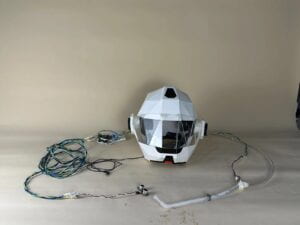
Projector: Furthermore, we were influenced by Maggie and Gloria’s project, which demonstrated the benefits of using a projected display to create a more immersive environment for users. We recognized that projecting our game onto a fabric background with gradual colors would reduce distractions from computer screens and keyboards. To achieve this, we borrowed a small portable projector from the Equipment Room, enhancing the overall visual experience for our participants.
