III. Fabrication and Production
Failures and corrections
1. Keyboard circuit
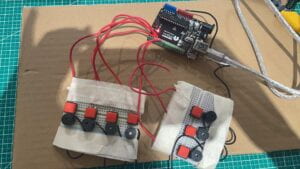
We started with the keyboards. The very first draft of the circuit and codes was a total mess. We went straight to the circuit building without much careful consideration, which was really big trouble. Because after spending hours on the circuits and wirings, we found out it could not work at all! At least we should not connect buttons and buzzers in tandem and taped them – they should be inserted in separate circuits to the pins of the Arduino. We were too careless and “confident.” So we tore down the circuits and started over.
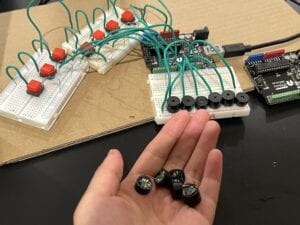
Honestly, we were quite discouraged by the mistakes. Still, by the end of the day, we rebuilt the circuit which seemed to look nice.
Another crucial problem we encountered after revising the circuit was, we could not make all buzzers make tones. And that was because most of the buzzers we borrowed from the Equipment Room were active buzzers (taller), meaning that they make only sound in one fixed tone, compared to passive buzzers (lower) that can produce different tones based on the codes. We very much appreciated Professor Haider for pointing this out and generously borrowing us the passive buzzers. We replaced the wrong ones with the correct ones the next day, and all the code worked (for single button push).
2. Keyboard coding
We wrote the codes with relevant tones for each button push with reference to the library embedded in the built-in example “toneMelody.” The first draft of the code I wrote was like this:
long startTime = 0;

void setup() {
pinMode(2, OUTPUT);
pinMode(3, OUTPUT);
pinMode(4, OUTPUT);
pinMode(5, OUTPUT);
pinMode(6, OUTPUT);
pinMode(7, OUTPUT);
}

void loop() {
if (digitalRead(2) == HIGH) {
tone(8, 262); //C
}
else if (digitalRead(3) == HIGH) {
tone(9, 294); //D
}
else if (digitalRead(4) == HIGH) {
tone(10, 330); //E
}
else if (digitalRead(5) == HIGH) {
tone(11, 349); //F
}
else if (digitalRead(6) == HIGH) {
tone(12, 392); //G
}
else if (digitalRead(7) == HIGH) {
tone(13, 440); //A
}
else {
noTone(8);
noTone(9);
noTone(10);
noTone(11);
noTone(12);
noTone(13);
noTone(14);
}
}
From the code, we could see that each buzzer was “controlled” by a separate button as the input and thus make sounds. However, there were two problems with this version of code: 1. only the first four buzzers could make sounds (because the “tone ( ) ” function has a number limit on the buzzers, which we did not find out until later) 2. the “tone ( )” function does not allow multiple buzzers to make sounds at the same time either, but we expected our piano to be able to play chords.
We updated our code the second time by introducing the “notePlayer” function (credit to Professor Haider for introducing this new function to us). See the code below:
#include <Tone.h>

long startTime = 0;
Tone notePlayer[6];

void setup() {
notePlayer[0].begin(8);
notePlayer[1].begin(9);
notePlayer[2].begin(10);
notePlayer[3].begin(11);
notePlayer[4].begin(12);
notePlayer[5].begin(13);
}

void loop() {
if (digitalRead(2) == HIGH) {
notePlayer[0].play(262);
} else {
notePlayer[0].stop();
}

...//codes are deleted here to save space
}
Our third (also the last) version of the code was to enable multiple (up to three) keys to make sounds at the same time. We decreased the total number of buzzers to only three, and each is responsible for monophthong, diphthong, and tritone. See below for the added part:
// we're not, see if there is a free slot
for (int i=0; i < 3; i++) {
if (freqs[i] == 0) {
// found an empty slot
freqs[i] = freq;
tones[i].play(freq);
return;
}
}
}

void stopTone(int freq) {
// check if we are playing it
for (int i=0; i < 3; i++) {
if (freqs[i] == freq) {
// found it, stop playing it
freqs[i] = 0;
tones[i].stop();
return;
}
}
}
3. Guitar sensor
We used the SharpIR distance sensor for the guitar. The first obstacle we faced was the low quality of the sensors we borrowed from the Equipment Room and from the Interaction Lab. We tried several and finally, we found one that could work properly with ideal range, prompt feedback, and good sensitivity.
We found the online open source and downloaded the SharpIR sensor library:
/*SHARP GP2Y0A21YK0F IR distance sensor with Arduino and SharpIR library example code.
//This was adapted from a the tutorial found here:
//https://www.makerguides.com/sharp-gp2y0a21yk0f-ir-distance-sensor-arduino-tutorial/

// Include the library:
#include <SharpIR.h>

// Define model and input pin:
#define IRPin A0
#define model 1080
Then I wrote the code accordingly to “translate” the input of the distance into different tones. During this process, I found that the number printed out in the serial monitor was not the actual physical distance the sensor detected, however, the correspondence was clear and certain. So I assigned the value of the “distance” by several trials and figured out a system that worked well with the electronic and cardboard parts.
4. How to “fold” the guitar
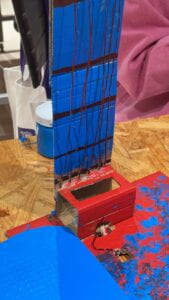
As I worked more on the code and decoration, Vicky was the one who was in charge of crafting. Different from a “flat” keyboard, to play it, a guitar has its neck and needed to be put up vertically. At the same time, we wanted our whole project to be foldable and portable. So we had to design a flexible structure enabling the guitar neck to switch between the two states of “standing up” and “getting down.”
Genius Vicky came up with the idea of using copper wire as a buckle or a latch so that users could fix the guitar neck to stand by just bending the wire, which worked like a string (very similar to our way of making our “carnival mirror” stand).
5. Painting with “brushes”
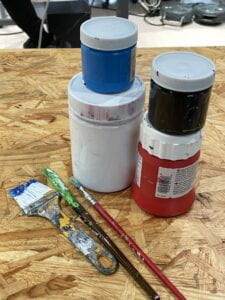

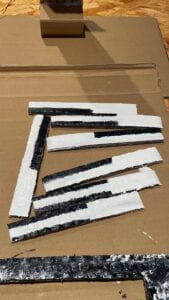
A fun and creative method we applied, to paint our covers and pages, was using tissues as the brushes for the acrylic paint – because all the paint brushes we could get from the Equipment Room were covered with dried paint and worked very badly. After trying using our fingers and palms, we adopted this “tissue painting” and had much fun with the decoration process.
6. Loose/Broken buttons and connections
This was a problem we faced throughout the whole process we developed our project. Since there were so many buttons and components as well as wiring and wire-less signal inputs, we consistently experienced sudden disconnections or “inexplicable failures” for various reasons:
1. Buttons: broken leg(s), and poor contact (when you pushed). Solved by carefully checking every button and connection, then replacing the ones which did not work.
2. Wirings: broken wires (which were hard to check because they were hidden in the holes of Arduinos or breadboards). Also, we needed to manually peel off the insulation skin of the wires because we wanted the proper lengths. Solved by careful checking too.
3. Arduino: the USB – Type-C adapter always went wrong, and codes were sometimes uploaded unsuccessfully. Solved by patience and constant attempts.
User Testing and adaptations
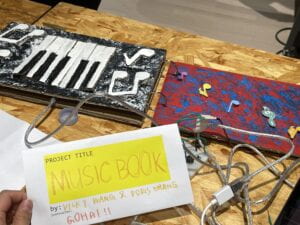
During User Testing Session, we received so much valuable and thoughtful feedback (both suggestions and praises) on various aspects. We took all of them into consideration very seriously and made the following major changes and improvements.
Audio Output Replacement
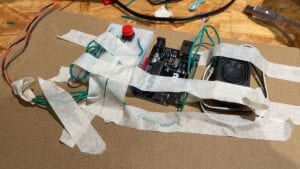
First, more than half of our visitors provided feedback that the sound of the piano was too low that they barely heard it. Even for those who did not report so, we observed that they actually had to hold their ears close to the buzzers in order to hear the sound. We completely overlooked this issue because all of our tests before were carried out in a rather quiet environment in the studio where there was not as much noise as in the User Testing Session. Another reason for this was, we hid the buzzers between the cardboard for aesthetic purposes. Thus, the sound quality and volume of the piano decreased significantly. The guitar buzzer somehow made louder sounds though the tone was not very pleasant either.
Professor Haider suggested that we use speakers instead of buzzers to improve the audio outputs. We struggled to adopt this suggestion at first. Because we had glued all our wirings and inner structures – that would be a lot of extra work to do. We were also afraid we would not have enough time to adjust the codes. The concerns were then dispelled by the professor after we learned the codes could remain all the same with the “tone( )” function. So we went to the Equipment Room and replaced all the buzzers with Stereo Enclosed Speakers. Both the tone quality and volume were improved so drastically!
One Book? Two Books?
Another minor adaptation we made to the form of our project was introducing one more operation step for users to freely choose whether to connect the two instruments as a whole piece or play with them separately.
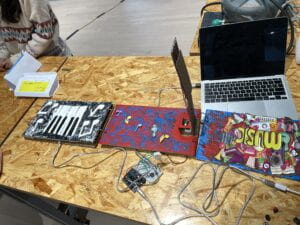
During the User Testing, Professor Parren and Professor Minsky acknowledged and praise our design idea of a “book.” Specifically, Professor Minsky said it would be better if the users could actually have the experience of opening the cover and flipping pages before engaging with the instruments. Therefore, we set the “default” display of our MusicBook to be:
1. separated into two instrument books, but with two iron rings placed in the middle so users can also choose to connect them into one piece.
2. each book is folded (with a new theme cover for piano added), so users can engage with the book – interactivity increased!
Button Switch for the Guitar
Our final obstacle overcome, as mentioned before, was embedding a button in the guitar Arduino circuit to switch the “on” and “off” of the speaker, so that the speaker won’t start making sounds immediately as it was powered (which was very annoying!).
We experimented with a lot of approaches and spent days on the code.
First attempt:
#include <SharpIR.h>

#define IRPin A0
#define model 1080

int distance_cm;
SharpIR mySensor = SharpIR(IRPin, model);
int prevButtonStatus = LOW;
int buttonStatus = LOW;
bool buzzerStatus = false;

void setup() {
Serial.begin(9600);
pinMode(2, INPUT);
pinMode(8, OUTPUT);
}

void loop() {
buttonStatus = digitalRead(2);
distance_cm = mySensor.distance();

if (prevButtonStatus == LOW && buttonStatus == HIGH) {
buzzerStatus = !buzzerStatus;
}

... //codes deleted to save space

prevButtonStatus = buttonStatus;
delay(10);
}
I wrote this by myself with reference to the Recitation 03 slides. And it did not work.
Then, with hints from Kevin and Tracy, we then took a step back and wrote a version requiring you to hold the button to turn on the guitar (but it worked!) See codes excerpts below:
#include <SharpIR.h>

#define IRPin A0
#define model 1080
const int buttonInputPin = 3;


int distance_cm;
SharpIR mySensor = SharpIR(IRPin, model);

void setup() {
Serial.begin(9600);
pinMode(buttonInputPin, INPUT);
}

void loop() {
distance_cm = mySensor.distance();
int buttonTog = digitalRead(buttonInputPin);
Serial.print("Distance: ");
Serial.print(distance_cm);
Serial.println(" cm");
//Serial.println(digitalRead(buttonInputPin));

...//codes deleted to save space

// The button has been pressed, so turn on the buzzer

//
}
However, what we really wanted was to allow users to just press the button once, and the guitar system was to be turned “on” or “off.” What we had in our minds was the concept of “transitioning” (-1/1) from what we learned in the lectures. The real implementation was much harder we sought help from Professor Haider, who generously helped us figure out the final version of the code for the guitar. See the snippet below:
#include <SharpIR.h>

#define IRPin A0
#define model 1080

int buttonInputPin = 3;
int buttonVal;           // latest button value
int pButtonVal;          // previous button value
bool makeSound = false;  // whether the sound is on

SharpIR mySensor = SharpIR(IRPin, model);
int distance_cm;

void setup() {
  Serial.begin(9600);
  pinMode(buttonInputPin, INPUT);
}

void loop() {
  distance_cm = mySensor.distance();
  Serial.print("Distance: ");
  Serial.print(distance_cm);
  Serial.println(" cm");

  buttonVal = digitalRead(buttonInputPin);
  if (pButtonVal == LOW && buttonVal == HIGH) {
    // user just pressed the button, turn sound on or off
    if (makeSound == true) {
      makeSound = false;
    } else {
      makeSound = true;
    }
    // for "debouncing"
    delay(20);
  }
  pButtonVal = buttonVal;

  if (makeSound == true) {
   ...//codes deleted to save space here
}
Another lesson learned
Different from most other groups, we used two Arduinos in our project because we had two separate systems. Therefore, because we would only have one member attending each recitation session, an issue came up in our preparation for the User Testing Session: could we connect two Arduino Unos to the same laptop and run them at the same time? We tried several times ourselves, and we failed. We reached out to Silvia, Tracy, and Zhiyang. Zhiyang shared his experience with us that: we should plug one Arduino first, then upload the code to it. Next, plug the other Arduino, find its port, and upload the code again. After that, the laptop will only function as the power source for the Arduinos, as long as we don’t use the serial monitor for the output receiver.
This was just one of the many little details in our long process of developing the whole project. But there were so many moments like this when we encountered an obstacle, we tried to figure it out ourselves, we reached out for external support, we solved it, and finally, we deepened our understanding of Arduino, the electronic system, and even interaction arts.