First Recitation – 9/16 – Electronics and Soldering
Task 1
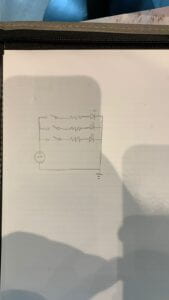
For our first circuit of the day, Freddy, my lab partner, and I had to make a simple buzzer activated with a button. We had a hard time beginning as we did not understand how to use the breadboard. After a little guidance from a teaching assistant, we got our circuit working!
Our next circuit required us to add an LED, with an appropriate resistor, to the existing circuit. Since we now understood how to use the breadboard, it was quite simple to add another component. Our circuit would now emit noise and light whenever we pressed the button.
Our final circuit required us to add an LED controlled by a knob, a potentiometer. We spent some time figuring out how to connect the knob so that our existing circuit corresponds to the different prongs of the component. We needed to make sure this addition was not in any way interfered with by the button.
After successfully doing so, we had a circuit with a buzzer and light activated by a button and a light that could both dim and brighten!
Task 2
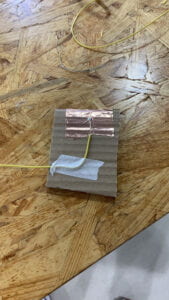
Now it was time to make our very own DIY switch. We used copper tape, tape, wires, cardboard, and our newly acquired soldering skills to do so. After taping together two halves, one I made and the other Freddy made, we had our very own switch! It felt quite exciting to learn how to create something with your own hands that could function in a multitude of ways!

We will use this switch in Task 3
Task 3
We replaced our button switch with our DIY cardboard switch, allowing us to interact directly with our circuit. We took turns playing around with our creation, and seeing something we created work and allowing us to interact with our circuit was exciting and thrilling! We could now communicate in morse code with this handy little button!
Additional Questions
Q1 – LEDs need resistors to limit the current that passes through them, so they do not get damaged.
Q2 – 
Q3 – I think that the circuit we built today, the last one that is, is quite interactive as it creates a conversation between two entities. Like Crawford illustrated, the circuit is “listening” to the input we provide, “thinking” about the appropriate response, and “talking” or providing us with output, a sound, and light in this instance. I would say that this circuit has a moderate level of interaction since the flexibility within the “conversation” allows for different outcomes and can serve different purposes, say communicating a message with morse code.
Q4 – Interaction Design can be used to create Interactive Art by allowing human behavior and interaction to give meaning to or shape the meaning of the Interactive Art in question. While simple, I believe Andrea Bravo’s “No Territorio” exemplifies how human interaction with art can give and shape the meaning of the very art. Physical computing can be used to create Interactive Art through the usage of systems that can respond to input from the analog world. Physical Computing is essentially the “listening” part of Interaction Design that Crawford illustrates in “The Art of Interactive Design.”
